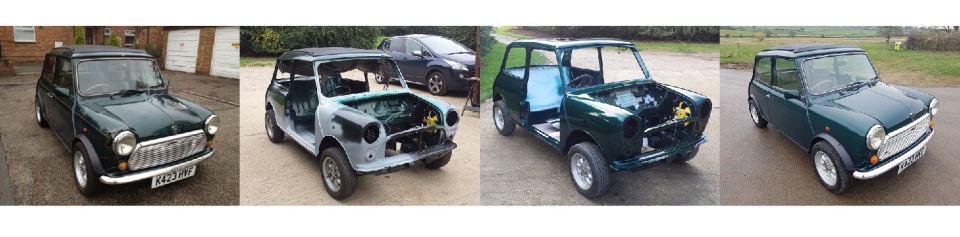
Timeline 5 July to 16 August
This is a continuation of the work done to Sasha.
Sunday, 5 July 2015
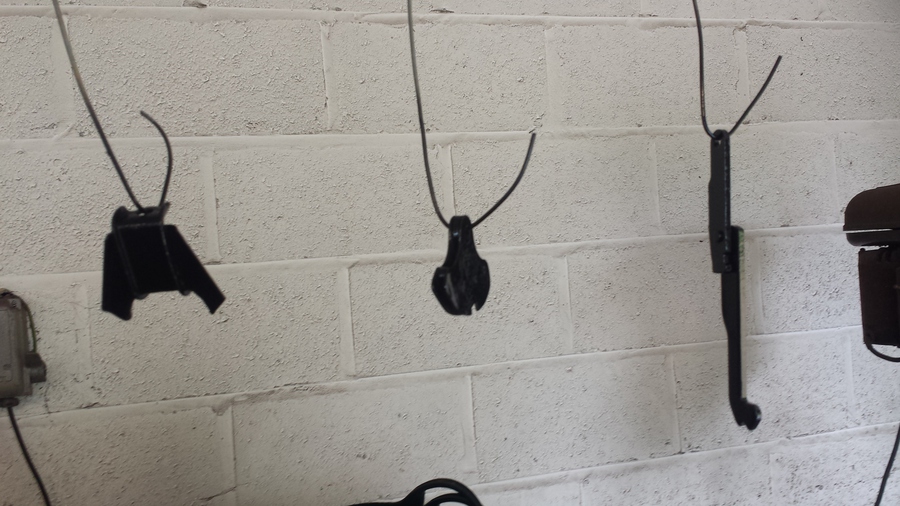
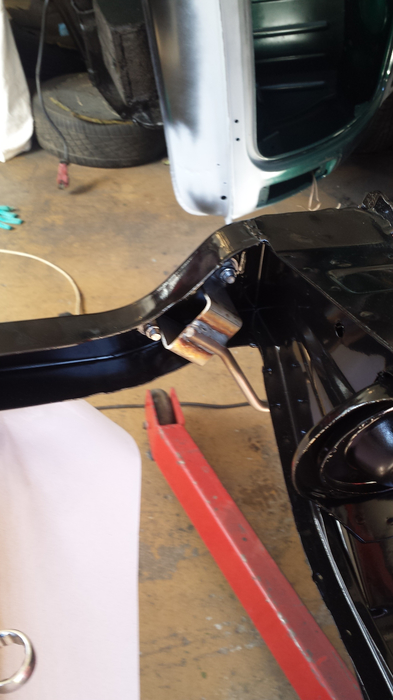
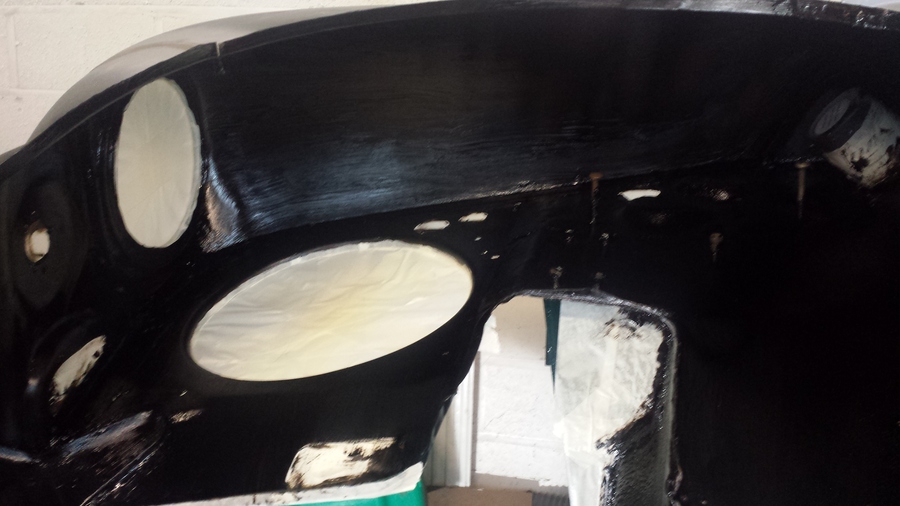
In this picture you can see the fixing brackets for the rear sub frame and the brackets that hold the handbrake cable they have all been painted with satin black.
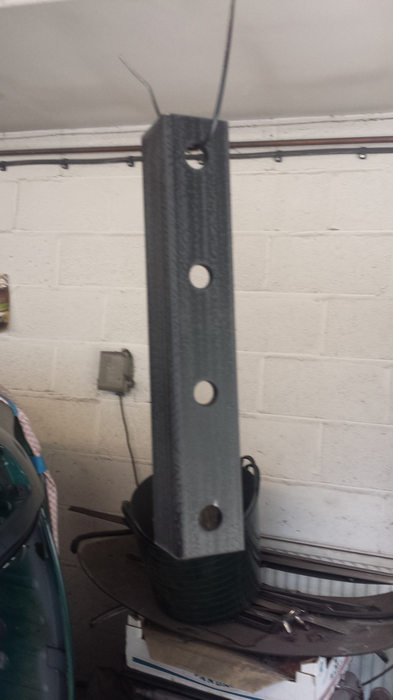
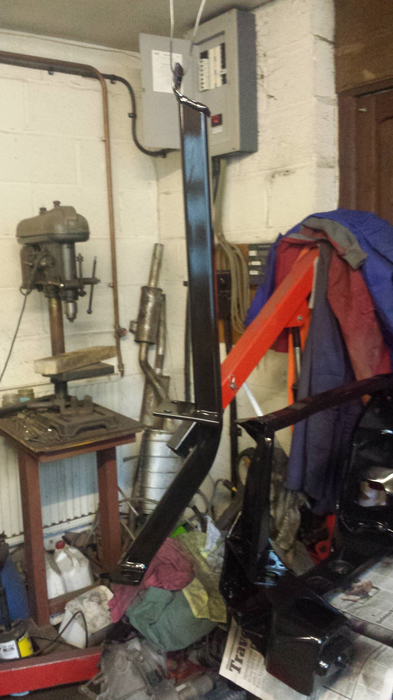
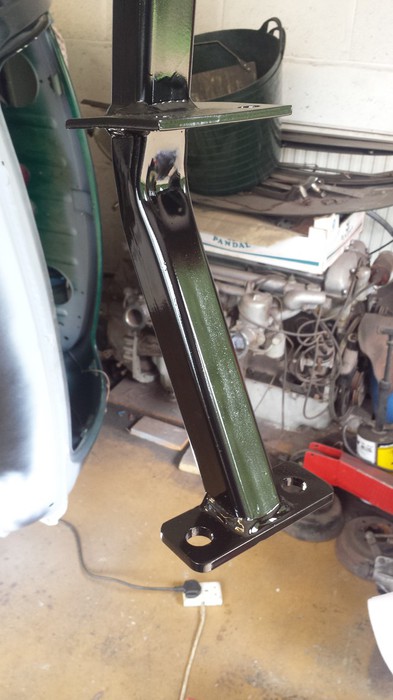
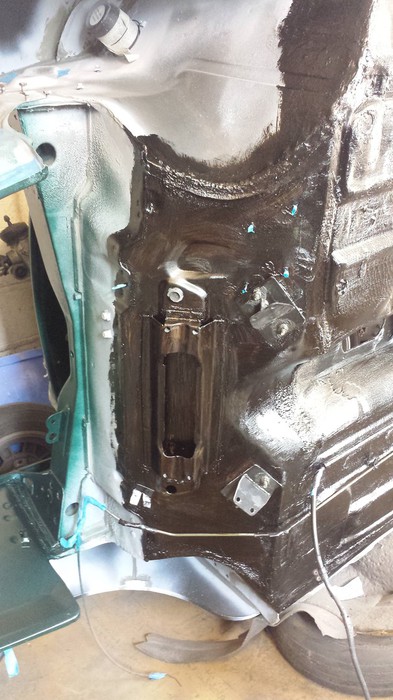
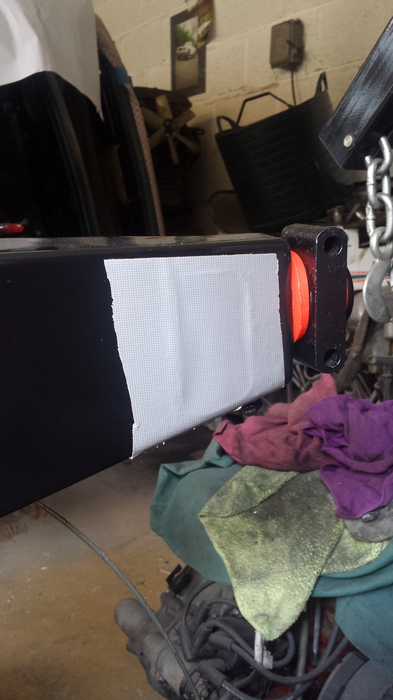
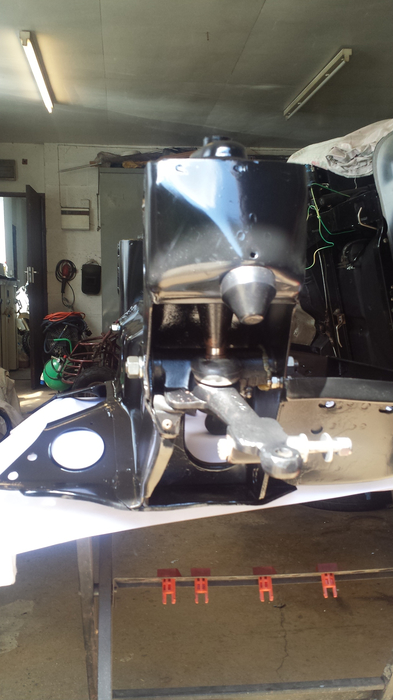
This is the strengthening bracket for the tow bar, I have flatted it down and removed some burrs, it’s now ready to be painted, I am going to paint it with Hammerite smooth black the same as the sub frame.
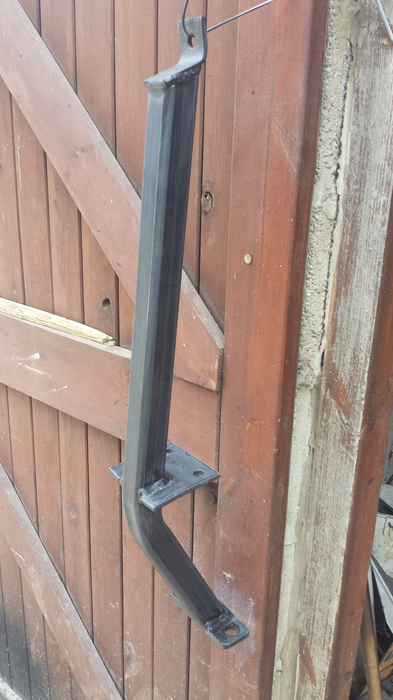
In this picture you can see the tow bar, I ordered this from Mini Sport although the finish on it was quite good I have flatted it off, removed some weld splats and burrs and re-painted it with Hammerite smooth black to match the rear sub frame.
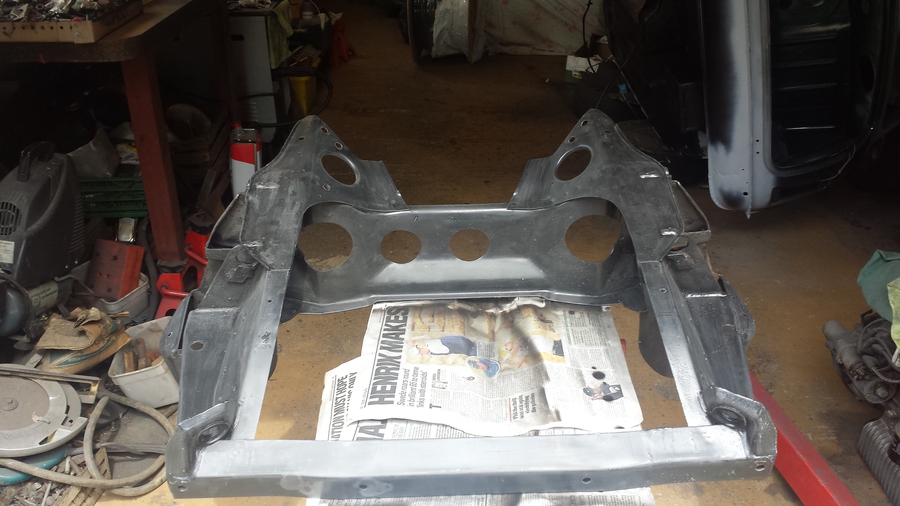
The front sub frame has been flatted down again ready to be repainted, I spilt some petrol on it last weekend and it messed the paint up, the paint Abi and I had used it must have been acrylic as this is affected by the benzene in petrol. I will repaint the front sub frame with Hammerite smooth black as I know this is a lot tougher and should last longer, I should have used a better paint in the first place.
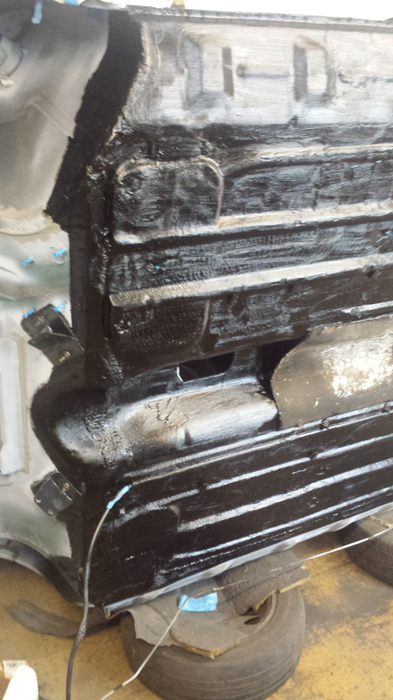
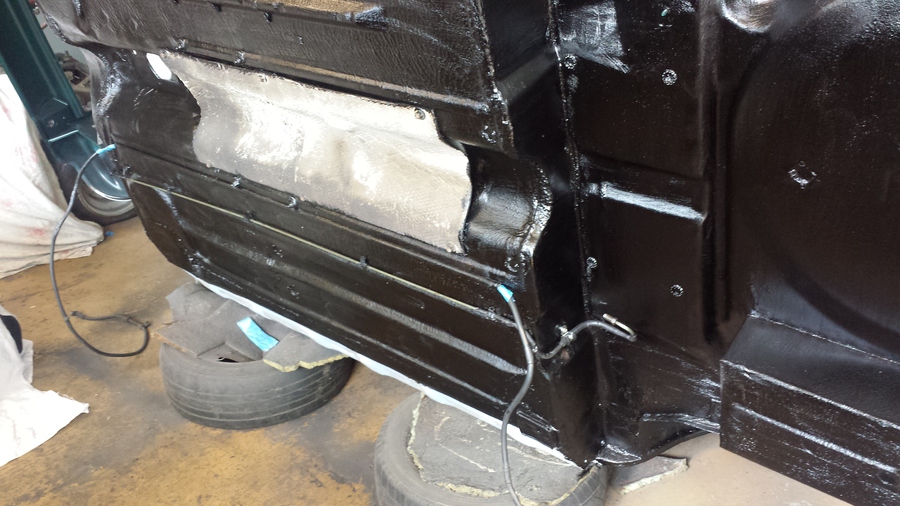
In this picture you can see the front half of the floor pan, it has had a second coat of under seal, the type I am using has wax and a rust preventative in it.
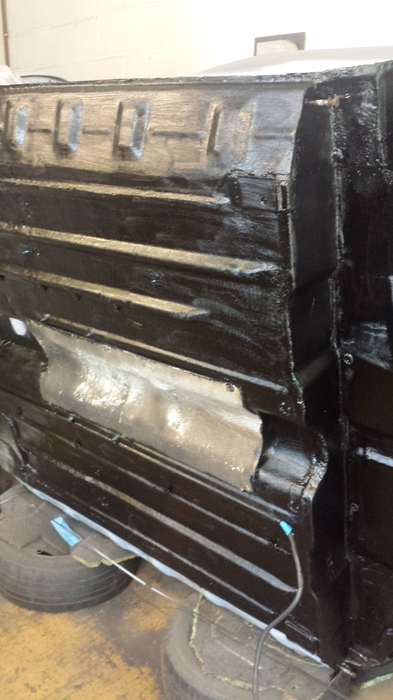
Here you can see the rear section of the floor pan, the only things I left attached are the heat shields and the battery cable.

I have also applied a second coat of under seal to the underside of the boot floor.
Abi has now turned up for the afternoon to help out and do some jobs, Abi is working on the engine bay while I have been cleaning up the rear hubs, I have also given them a coat of the Hammerite smooth black, they are going to need a second coat before they can be fitted.
The tow bar has now had two coats of Hammerite smooth black and is ready to be fitted when I get the sub frame back in.
The front sub frame has now had a couple of good coats of Hammerite smoot black, I can say it does look much better now and with a good coat of better paint it should keep the rust at bay.
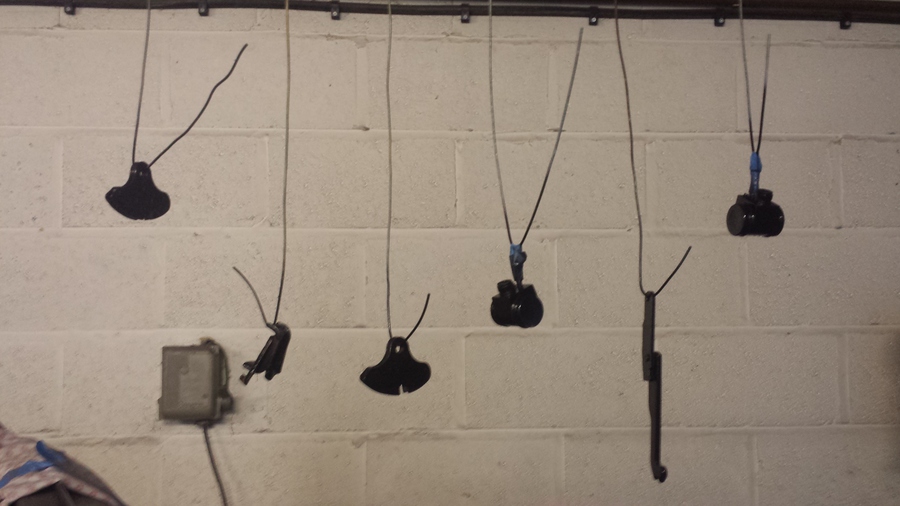
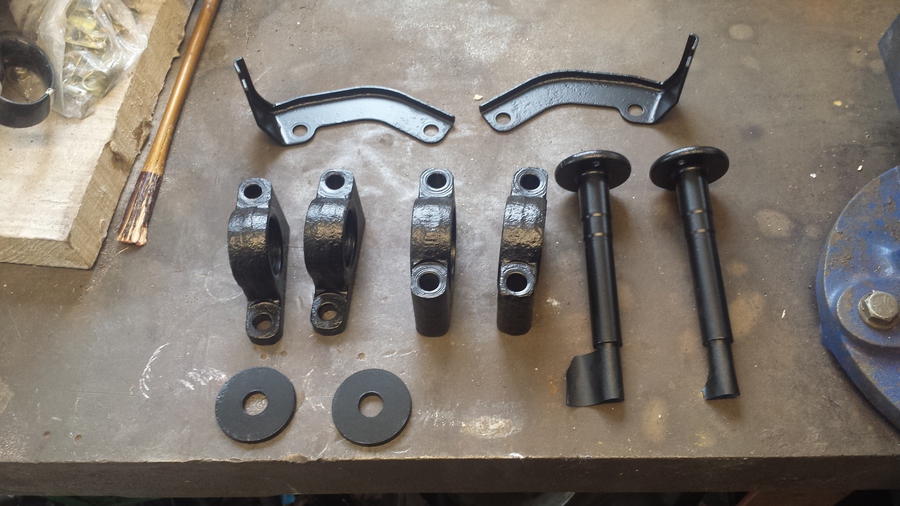
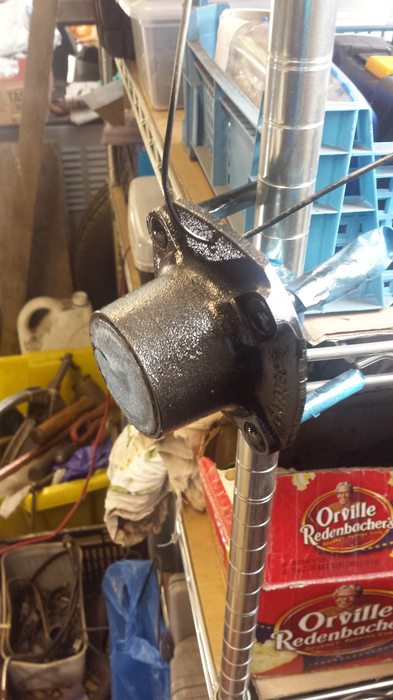
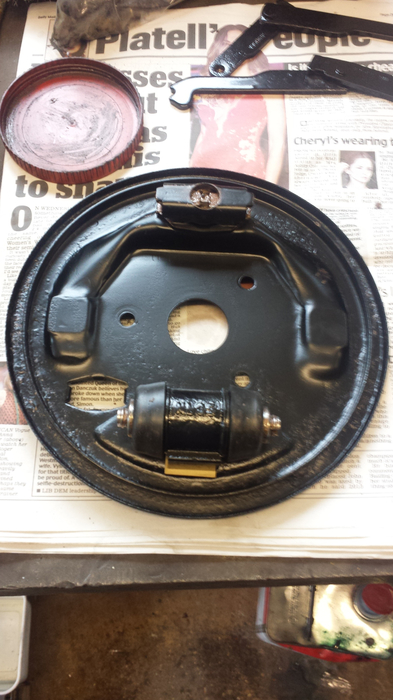
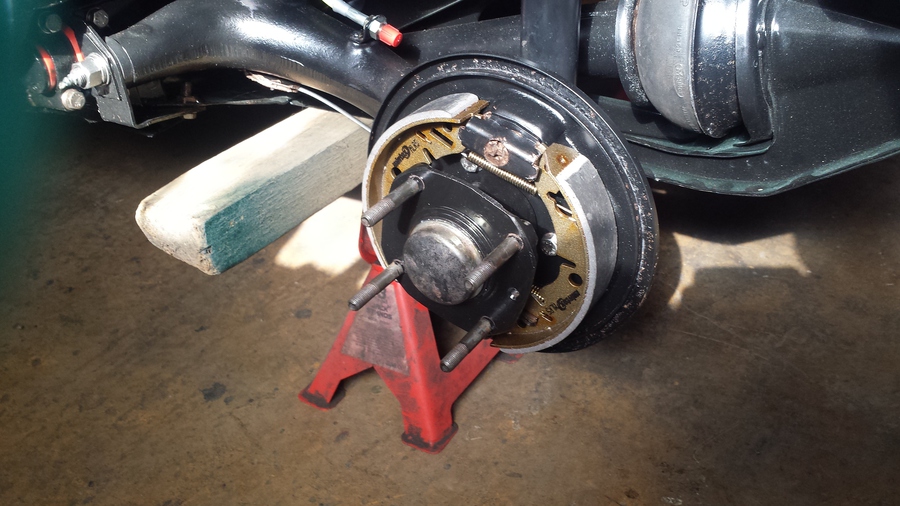
Abi and I have been cleaning up some more parts from the rear sub frame, we have cleaned up and painted the hand brake cable quadrants that mount on the radius arms, the bracket that goes between the two parts of the hand brake cable, the levers that operate the brake shoes for the hand brake. I have also degreased and painted the two new rear brake slave cylinders, hopefully it will give them some additional protection so I don’t have to change them so frequently.
It’s getting late now it’s time to get clean up, lock up and make our way back home.
Sunday, 12 July 2015
I started off today by painting a bit of the tow bar I missed last week, while that was left hanging to dry I put another coat of uder seal on the drivers’ side rear wheel arch.
Then I put the rear brake slave cylinders bback together now the paint has had a week to go nice and hard, I didn’t take any pictures of these but I used copper grease on the bleed screws and I put copper grease on the back part of the pistons between the seals and the dust seals I also put some copper grease on the outside of the pistons where the brake shoes go, this is to try and prevent some rust.
I put another coat of paint on the brake parts as last weel I had only put one coat on them and the paint looked a bit thin.
The rear hubs have also been treated to another coat of black Hammerite smooth.
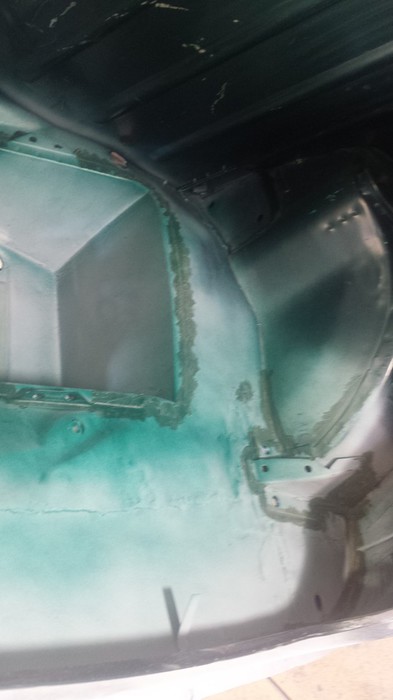
I have extended the under seal a bit further up the front bulkhead up as far as the seam between the bulkhead and the floor pan, the rest I will do after the engine bay has been painted.
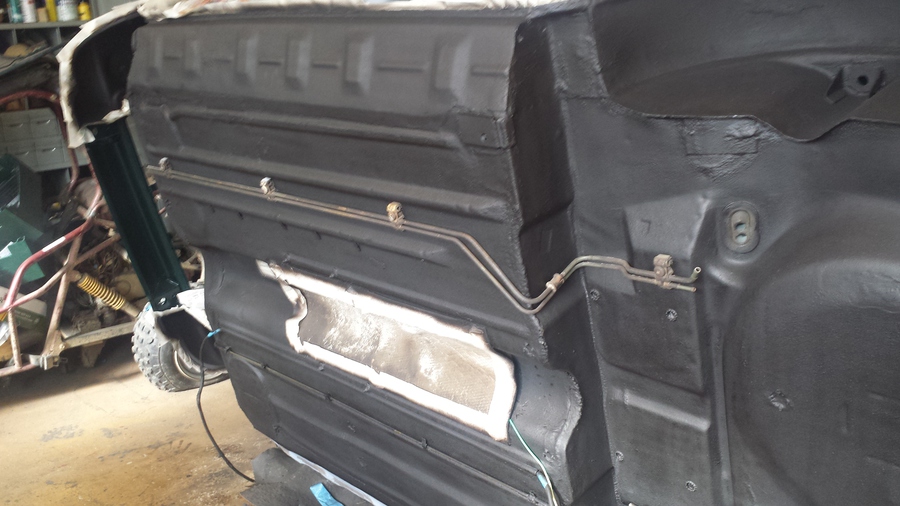
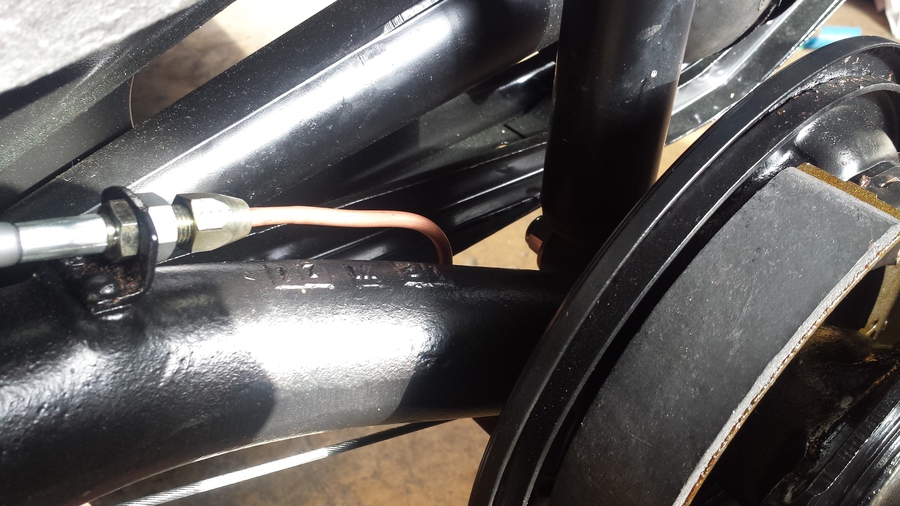
I have partly re-fitted the brake line and fitted a new P clip to hold the brake line to the heal board where the old metal clip had rusted away. Before refitting I cleaned the brake line with a little petrol and greased it. Where the metal brackets hold the brake line in place under the car I was going to use some heat shrink to protect the pipe but the heat shrink I have won’t go small enough to fit right on the brake line as it needs to be large enough to go over the brake pipe fittings. I did leave the heat shrink I tried to fit where the brake line goes under the rear sub frame, it should give it a little extra protection.
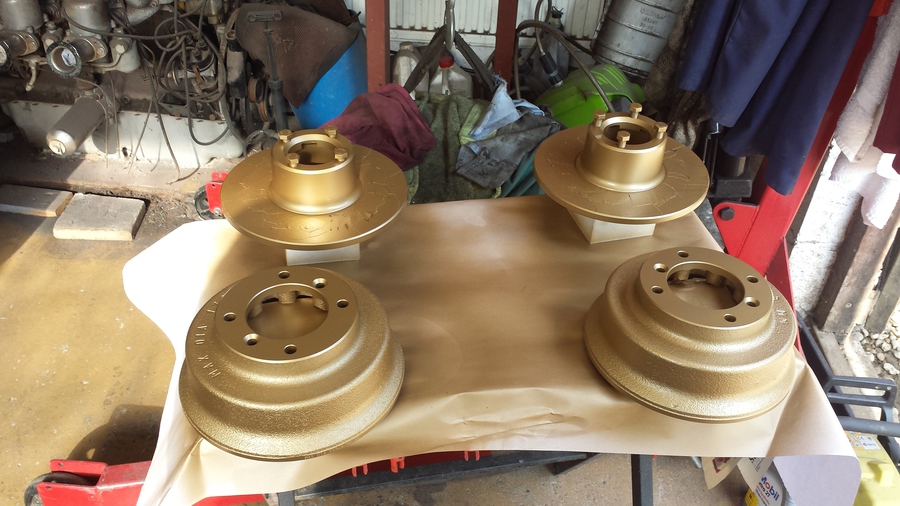
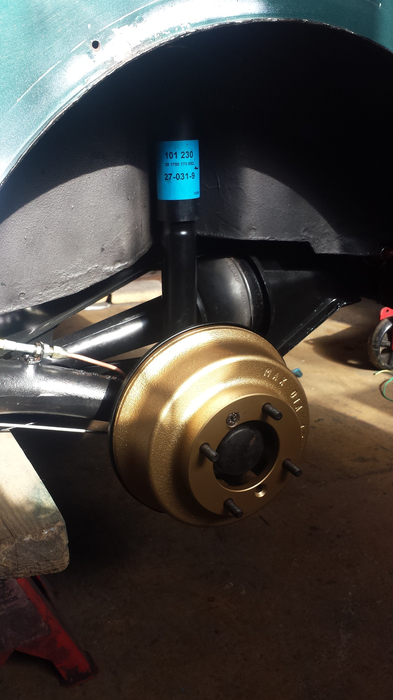
I have de-greased the new brake discs and drums used masking tape to mask off the brake surfaces and painted them inside and out with gold VHT. Abi and I had discussed this and decided on the gold as the British Open Classic decals are gold on British Racing green we thought it would look quite good.
Anyway I have run out of time today, I put all the tools away, clean up the workshop and make my way home.
Sunday, 19 July 2015
We start today by mixing some HNA British Racing Green and Abi starts spraying the engine bay, while that is drying she flats down the primer inside the boot.
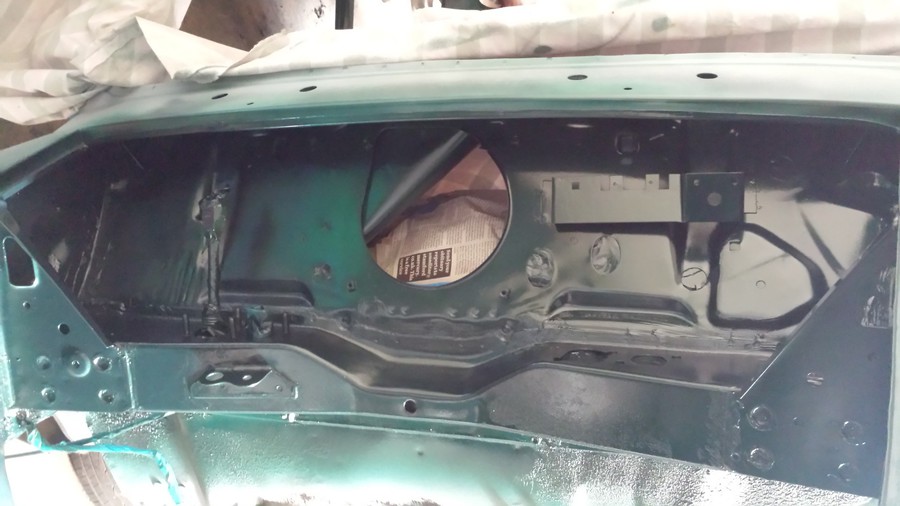
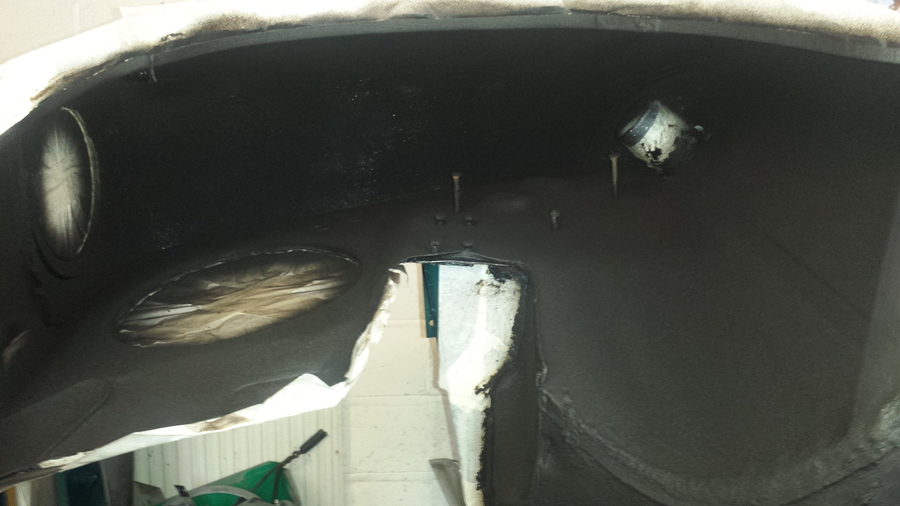
You can see in this picture where Abi has painted the inside of the front panel and the underside of the bonnet slam panel.
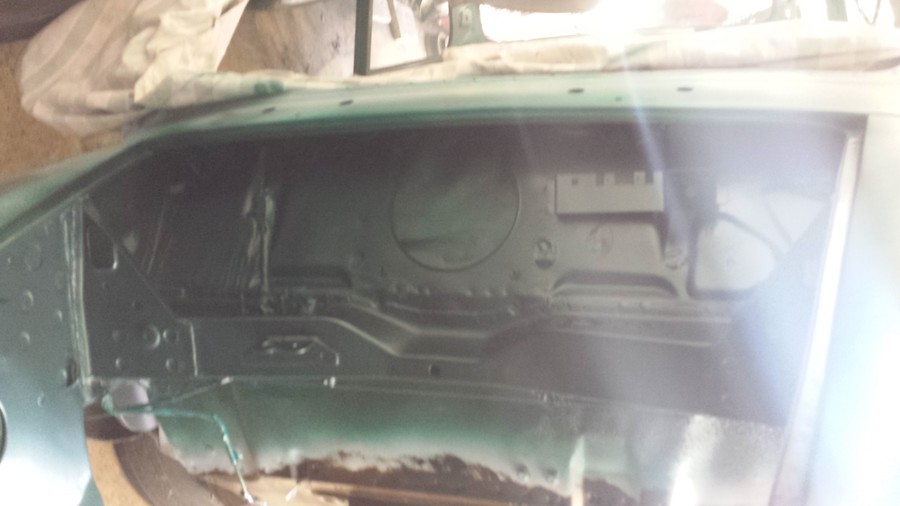
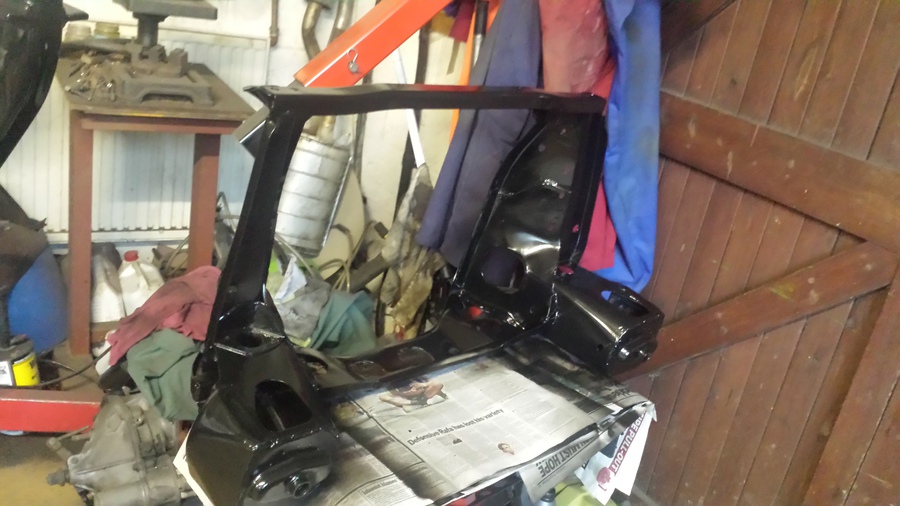
Here you can see the bulkhead has been painted.
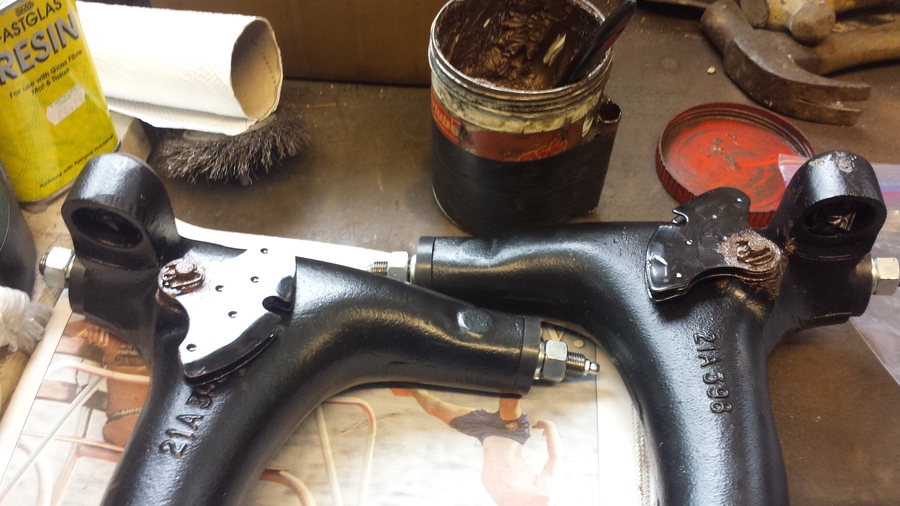
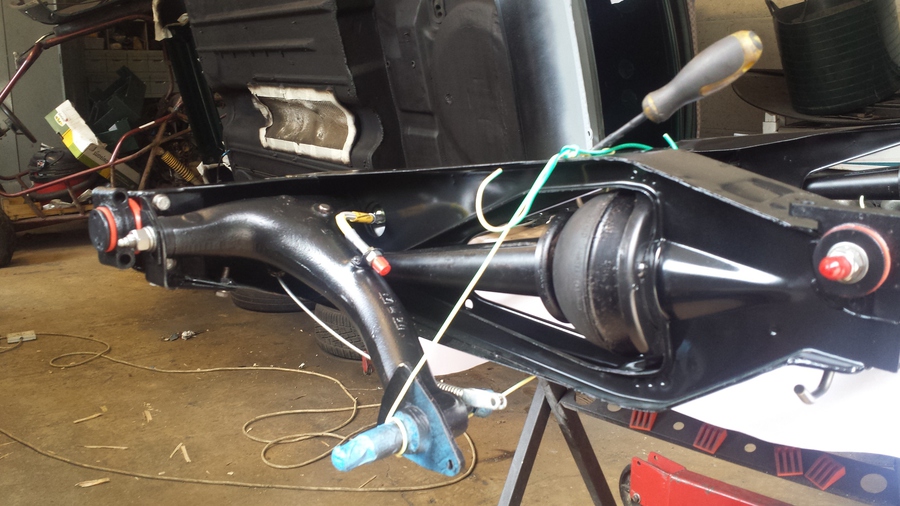
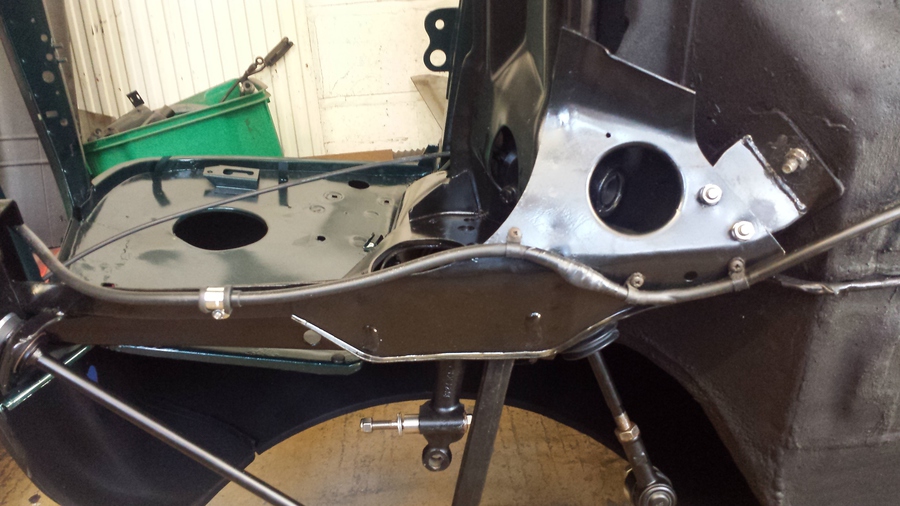
While Abi has been painting I have started to bolt a few items back onto the rear sub frame, this is the rear exhaust hanger, we have had to use these because when I ordered the new rear sub frame from Mini Sport they didn’t have any for the correct year i.e. 92 on, so we are using the earlier sub frame.
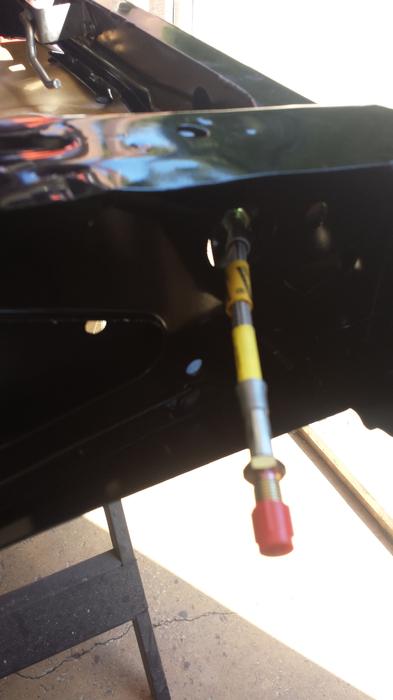
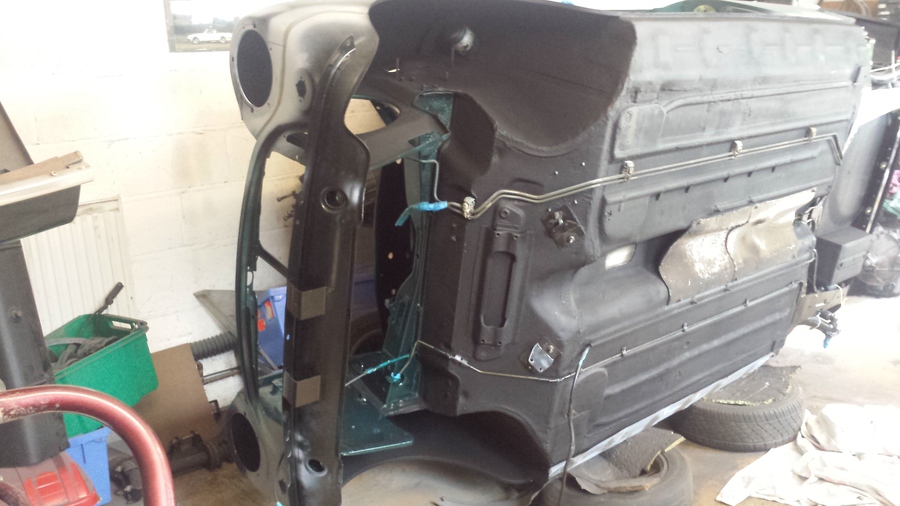
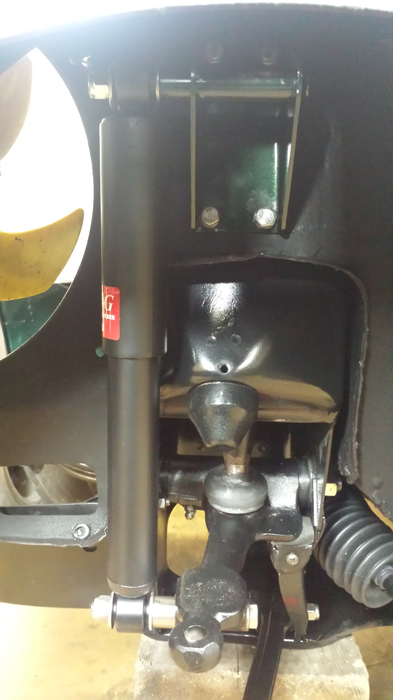
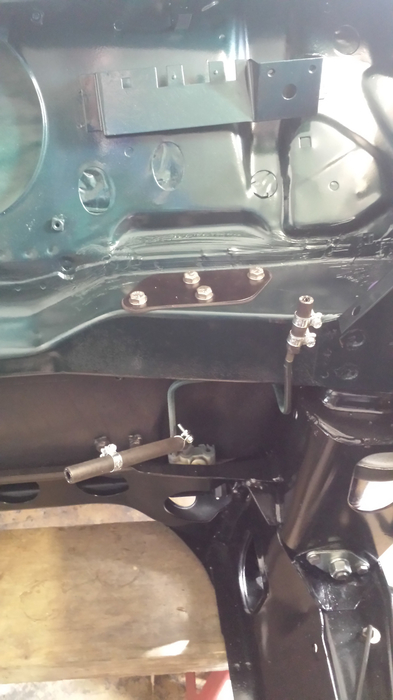
In this picture you can see the new rear flexible brake pipe, we have decided to go with stainless steel braided rather than the rubber, these should last longer and give a firmer brake pedal.
I have fitted poly bushes to the rear mount on the rear sub frame.
I have also fitted poly bushes to the front mounts of the rear sub frame.
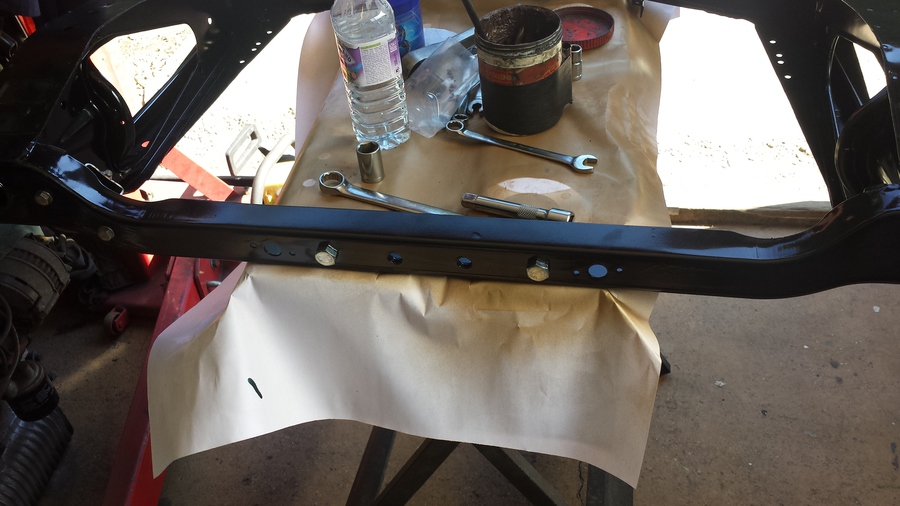
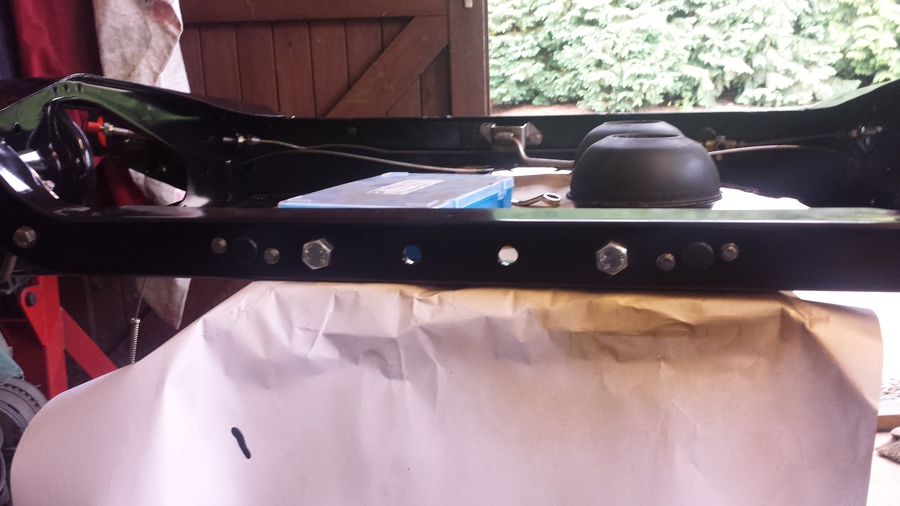
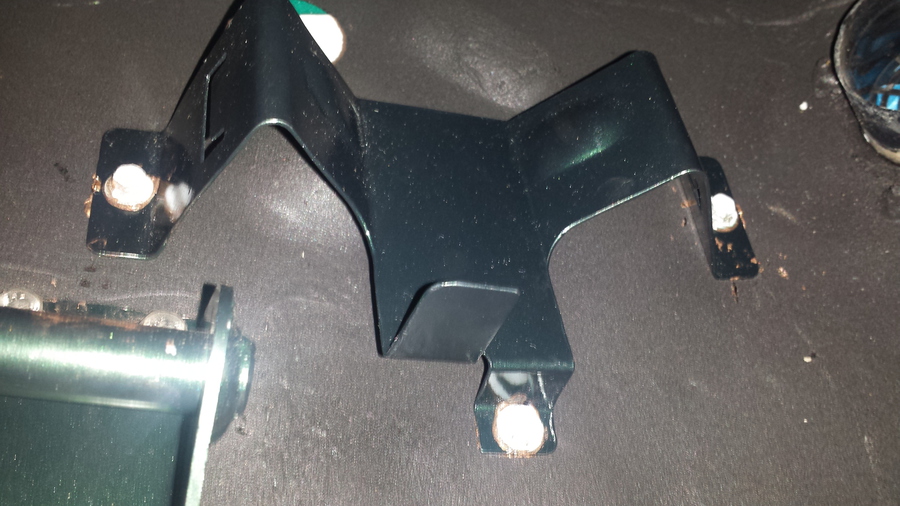
In this picture you can see some additional bolts on the rear sub frame these hold the strengthening bracket for the tow bar.
You can see in this picture Abi has finished painting inside the boot, she has also put on about three coats of clear.
While Abi is finishing off the clear coat I have put a coat of spray on under seal on the underside of the boot floor, Abi likes this finish better than the brush finish.
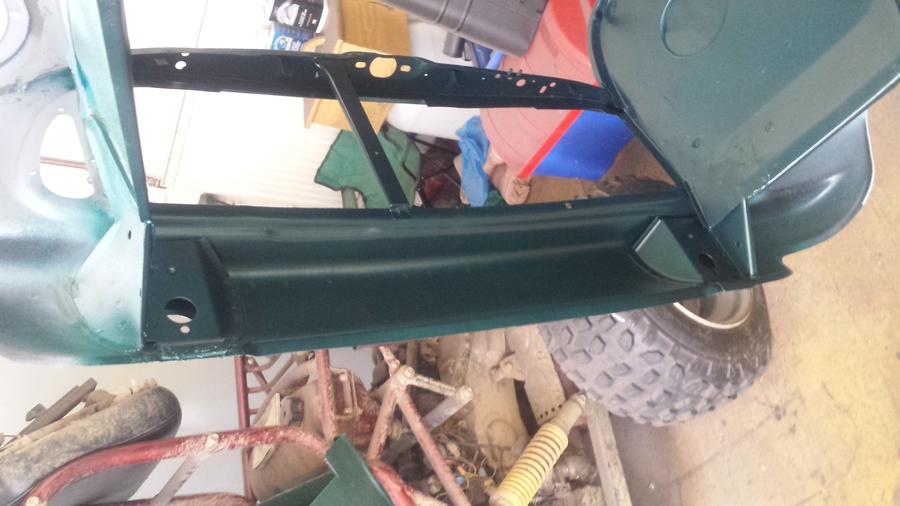
With all the clear coating done, you can see the completed bulkhead in this picture, all the engine bay has been done ready to start putting everything back together.
That’s it for today we have run out of time, let’s get off home and get something for tea.

Sunday, 26 July 2015
Another Sunday I make my way over to the workshop, I start today by masking the paint off on the bulkhead that was done last week so I can underseal up to the cross member. The reason for the masking is I am going to use a spray on underseal when I have got two coats brushed on.
In this picture you can see I have removed all the masking that we put on when Abi sprayed the engine bay, I have re masked the other side and applied a coat of underseal making sure to get it in every nook and cranny.
Here you can see the masking tape used on the other inner wing, ready now for me to start putting some underseal on the underside of the wing and inner wing. I have also masked of the fresh air vent, the hole where the heater air inlet comes through and the hole where the steering column joins the steering rack.
While the underseal in drying on the front end I apply the spray on underseal to both rear wheel arches. This created a nice spray matte finish rather than the glossy finish with visible brush strokes left from applying the underseal with a brush.

I have also masked the holes in the floor where the gear lever comes through and the holes that mount the remote selector assembly. In this picture you can see that I have applied a coat of the spray on underseal to the entire floor pan.
It’s a bit early to go home yet so I decide to make a start on putting the rear brakes together, I liberally coat the adjusters with copper grease and screw them back into the back plates. I screw them all the way through then from the other side of the back plate I apply more copper grease, this is to lubricate the adjusters and to stop it from rusting. I coat the other components of the adjusters with copper grease and install them.
Next I install the slave cylinders, to do the I remove the bleed screws, put a little copper grease on the back of the slave cylinders and fit the supplied gaskets between the slave cylinder and the back plate, then secure the slave cylinders with the circlips, these are a bit of a pain to get on but with a little patience I get them on. I apply some copper grease to the bleed screws and re-install them.
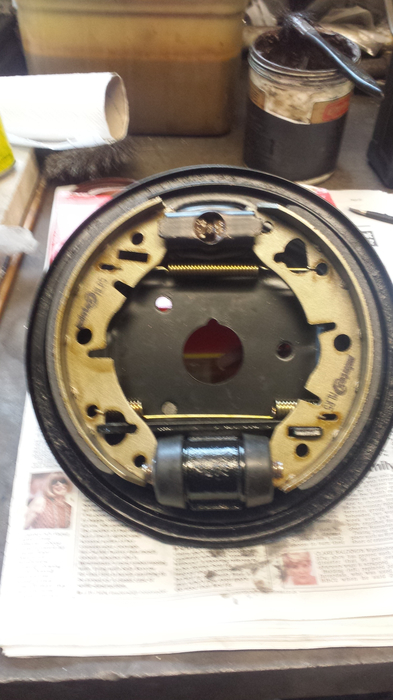
Lastly I install the lever inside the back plate for the handbrake and the rubber seal on the outside of the back plate, next I install the new shoes along with new springs. The old springs were ok I just thought that now was a good opportunity to replace them as I have everything in pieces.
Well that’s it for today, time to get off home.

Monday, 27 July 2015
I know I don’t usually work on Sasha during the week but for a few days this week I am helping out with something at Sweethedges, whilst waiting for a job to be completed at Sweethedges I have a chance to do a little more work on Sasha. I apply another brushed on coat of underseal to the underside of both wings, inner wings and the back of the front panel, this is now ready to put on a spray coat of underseal.

In this picture you can see I have applied a spray coat of underseal to the bulkhead up to the cross member.
I only have time today to do a little more before I have to get home, so I install the handbrake quadrants back on to the radius arms. I use copper grease to lubricate the pins that go through the radius arms then put on the wavy spacer washer with more copper grease, then the quadrant is next trying to make sure they go back on the correct side this takes a quick look in the Haynes manual, then a stainless steel flat washer then securing them to the pin with new stainless steel split pins.
That’s it for today, time to get off home, I will try and do a bit more tomorrow if I get chance.
Wednesday, 29 July 2105
I have managed to get a little work done on Sasha today, I start by spraying a coat of underseal on the underside of both wings, inner wings and the inside of the front panel, applying a reasonably thick coat.
Next I cover the two holes in the back of the rear sub frame where the mount trunnion goes through with gaffer tape, this sounds strange but there is tape over these from the factory, so I am just putting it back to how it was from the factory.
You can also see in this picture that I have installed the handbrake cable that goes from side to side of the rear sub frame, it's easier to install it now before I install the rear radius arms.
The next thing I decide to do is fill some of the excess holes in the rear sub frame, sometime ago I bought a box with various sizes of grommet, so where I can I use these to fill the holes, hopefully this will keep some of the water out of the voids in the sub frame and prevent some rust. There is four little holes in the rear sub frame which is a hangover from the hydro-elastic version, I don’t have any grommets small enough to go in these so I install some small stainless steel bolts in these holes.
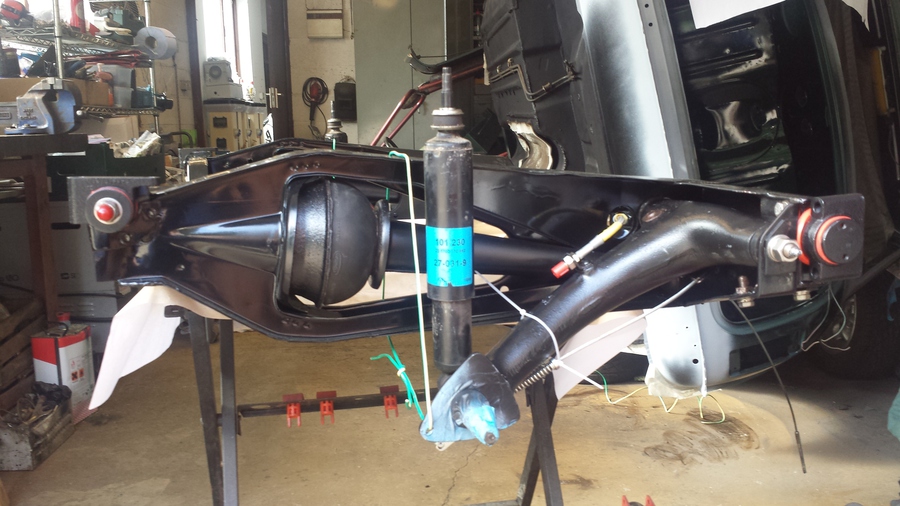
Next I install the rear radius arms, this is quite a time consuming job as there are a number of parts that have to be installed at the same time and it is fiddley, I make a start by using some copper grease in the hole in the radius arm that holds the nylon cup for the knuckle joint, then push the knuckle joint into place. Then coat the shaft of the knuckle joint with copper grease and install the suspension trumpets, these go together quite easily as I have previously restored all these parts. Next I use more copper grease on the end of the trumpets where they go into the doughnuts I also put copper grease on both ends of the doughnuts. The next step is to remove the nuts and washers from the radius arm shafts, I use copper grease on these as well, I manipulate the radius arm with trumpet attached into place to hold it I put the washer over the shaft and put the nut on a few threads. Then I start to install the radius arm brackets, the bottom bolt under the radius arm is the worst one to get in so I get that one in loosely first, then get the others in loosely as well. Now I fit the washers and nuts on the other side of the radius arm shafts, I tighten the radius arm bracket bolts a bit more taking care not to crush the edge of the mounting bush from the sub frame mount, I then torque the radius arm nuts, then finish tightening the radius arm bracket bolts.
I fit the handbrake cable into the quadrants under the radius arms applying copper grease and crimping the edges of the quadrants together to hold the cable in place. Then I use copper grease on the shafts that hold the shock absorbers to the radius arms a washer goes on first then the shock absorber, followed by another washer and lastly the nyloc.
While I am still working on the rear sub frame I fit the front half of the handbrake cable.
Last job before I make my way home is to re-install the fuel lines, on Sasha that is quite easy as there are studs welded to the floor and the fuel line fixings just screw on.
With that done it’s time to go home.
Thursday, 30 July 2015
Well a major step forward today, I have managed to get the rear sub frame back in, this was a fairly time consuming exercise. To start I placed some blocks of wood on the floor at a similar level to the bolt holes in the heal board, I adjust the sub frame into the correct position and with a little help from Brian to hold the sub frame up I place a trolley jack under the radius arm to slightly lift the sub frame into position. I then manage to get one bolt into the front mount into the heal board, then pushing the bottom of the sub frame back into position I get the other bolt into that mount, by slightly moving the other side of the sub frame I get the other two bolts into the heal board. Leaving all these bolt loose for the moment so there is some movement in the sub frame I start to get the bolts into the rear mounts, on the top side the bolts go straight in, on the bottom side one bolt goes in but the other is about 6 or 7 mm out of alignment. Using a short extension bar from my socket set and the trolley jack I am able to left that edge of the mount up into the right place and get the bolt in. Then lastly I finish tightening all the bolt holding the sub frame. With the sub frame now in place I re-fit the battery cable, re-connect the brake line and re-install the other part of the hand brake cable.
The next task I complete is to remove all the masking from all over the car.
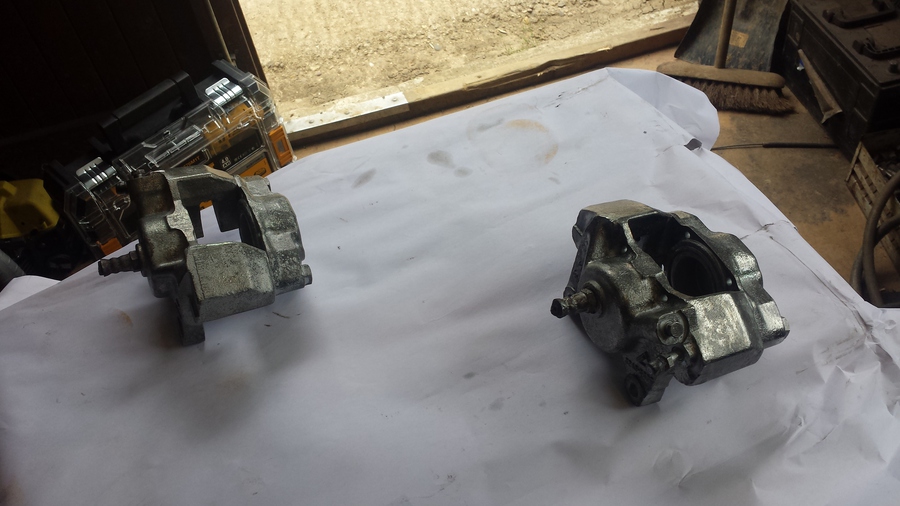
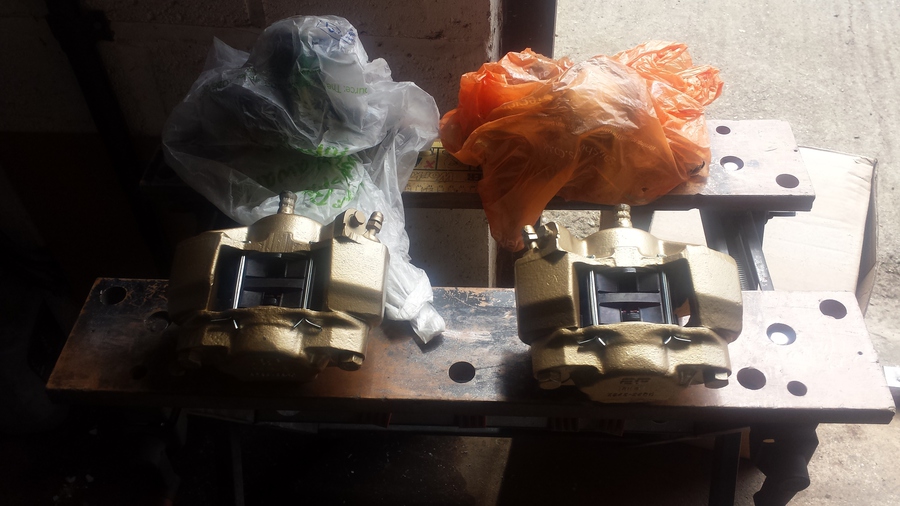
I degrease and remove some of the paint I had previously applied to the front brake calipers ready to re-paint them gold to match the rear brake drums and discs.
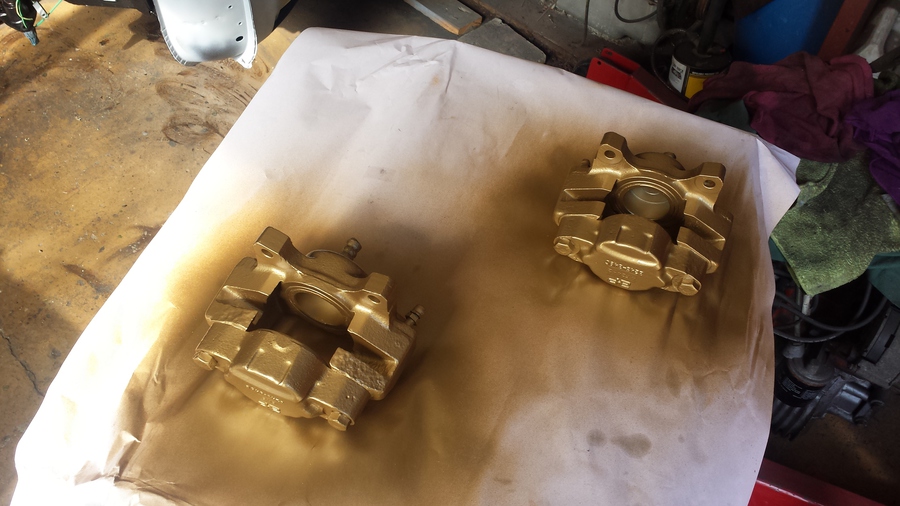
In this picture you can see I have finished painting the front brake calipers gold, in-between applying coats I have done some cleanup work inside Sasha using the shop vac to get all the dirt and dust out of the way.
Well I have run out of time again, it’s time to get off home.
Friday, 31 July 2015
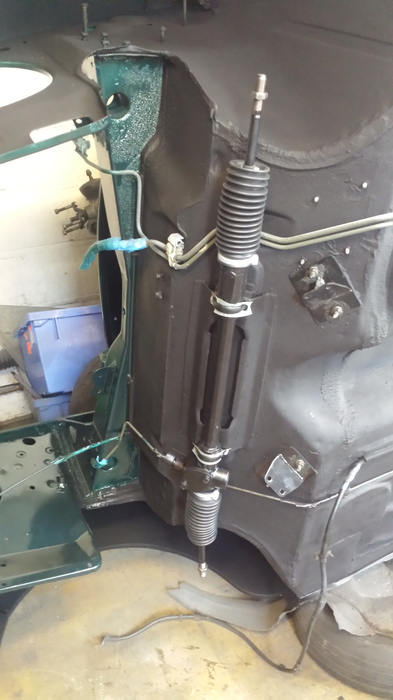
I started today by installing the steering rack, the rack is quite easy to install when the car is like Sash, on it’s side with no front sub frame in. I get all the parts ready, including the strip of plastic that goes between the ubolt and the rack, I use some copper grease on the threads of the ubolts then start the installation process. The drivers’ side of the rack has a locating rib so I fit the ubolt there first, then put the rack in place and push the ubolt through the holes in the body, then the same with the other one, these fit quite tightly so they hold the rack in place even though there are no nut on them. I put the nuts on but do not tighten them, this is to allow me to adjust the position of the rack, I grab hold of the rack and pull it up and down to make sure it’s located in the right place, next I re-install the steering column to make sure the rack is rotated correctly, with the steering column in place with it’s mounting bolts in I finish torqueing the rack bolts up. Then I remove the steering column again, I have work to do on the interior and it will be in the way, the column will get installed another time.
I start working on the front sub frame, first job I install the bump stops, these are easy and just bolt straight in, I do use copper grease on the threads it should help keep rust at bay. Next I install the rebound rubbers, these also install quite easily, they locate on a small raised tag in the sub frame then are held in place with a screw.
I then install the new bearings into the top suspension arms, I do this by using the new shaft and nuts to wind the new bearing in, when they are pulled in as far as they will go I tap them in just a little more using a socket the right size and a hammer, with the bearings in I grease the new bearings well ready to install them.
With that done I am now able to install them, firstly I use copper grease around the edges of the rubber doughnuts where they mount into the sub frame and where the trumpet mounts into it, then using the special tool I compress the doughnut. I grease the socket in the suspension arm and install the new knuckle joints, then install the trumpet onto the knuckle joint. I remove the shaft and the thrust washer that goes into the large hole in the sub frame, one of the thrust washers is thicker than the other, this one goes that side. I maneuver the suspension arm into place and fit the trumpet into the doughnut, this takes a bit of messing about, then slide in the shaft and the thrust washer, then the spring washer and nut on the other side, now the retaining plate can be installed and then the other spring washer and nut. Lastly torque up the two nuts.

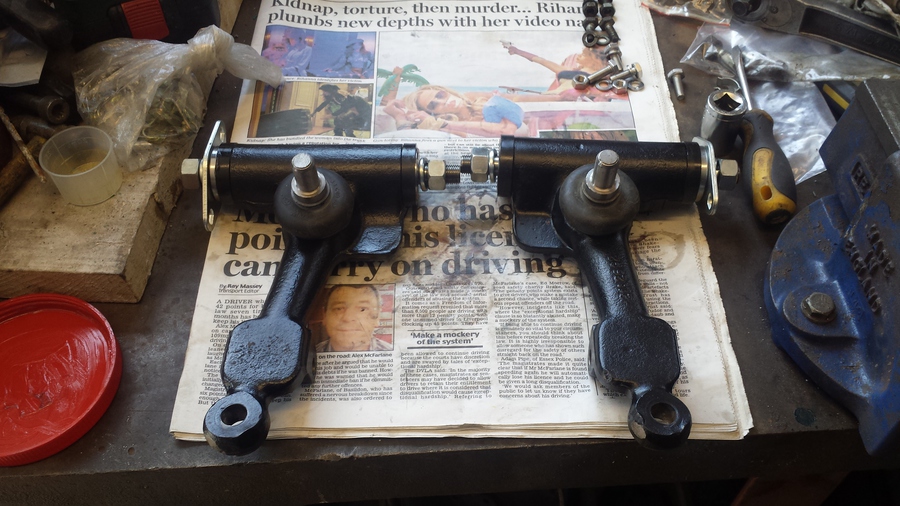
Next I install the bottom arms and the tie bars, the new rubber bushes are installed into the bottom arms then the shaft is inserted into the sub frame and through the bushes aligning the flat part on the end of the shaft with locating piece in the sub frame, I put on the spring washer and torque up the nut. The tie bars are very easy to install, a tie bar rubber bush goes on the end of the shaft then through the sub frame another rubber bush them large washer and nut, tighten until it stops. The other end of the tie bar is secured to the bottom arm with a nut and bolt.
My last job today is the install the new shock absorber mounts onto the inner wings, I use new stainless steel bolts and washers.
That’s it for today time to clean up as Frances is joining me for dinner at Sweethedges.

Sunday, 2 August 2015
Abi and I are both working on Sasha today, Abi is doing a little painting and seam sealing on the inside under the top dash rail. While she is doing that I install the fuel line shield.
Next we get the front sub frame in, with Sasha still on her side I balance the bottom suspension arm on the cup of the trolley jack and lift the sub frame into position, with a bit of a wriggle I manage to seat it in about the right place. I make sure the tower mount rubbers are in the right place then get the tower bolts started a few threads. Next I fit the bolts in the tail mounts this takes a bit of effort some prying and use of a podger, but we get them in and tight. Next we get the bolts through the teardrop mount on the front, the bottom one goes straight in but the top one is out of alignment, we find that the bottom of the inner wing is caught on the sub frame once that is aligned properly the bolt goes straight through the other teardrop mount. Lastly on the front sub frame I finish tightening up the tower bolts.
I install the P clips to hold the battery cable to the front sub frame, I re-use three of them and install one new one.

Next I re-install the electric cooling fan into the inner wing, I replace all the original bolts with some new stainless steel ones and bolt it into place.
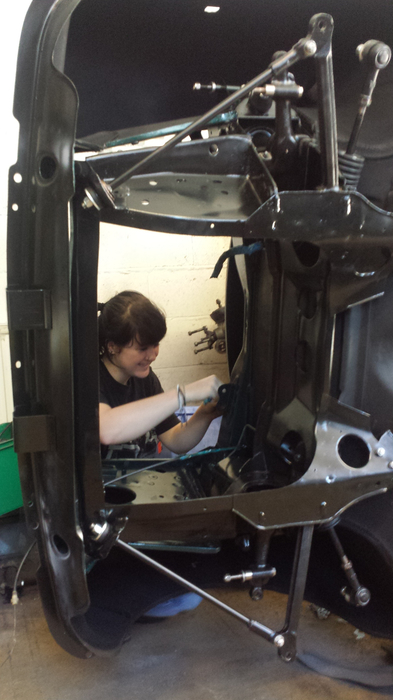
Abi and I put Sasha back the right way up she has been on her side far too long, we move her into a better position in the workshop then get her back on axle stands ready to continue working.
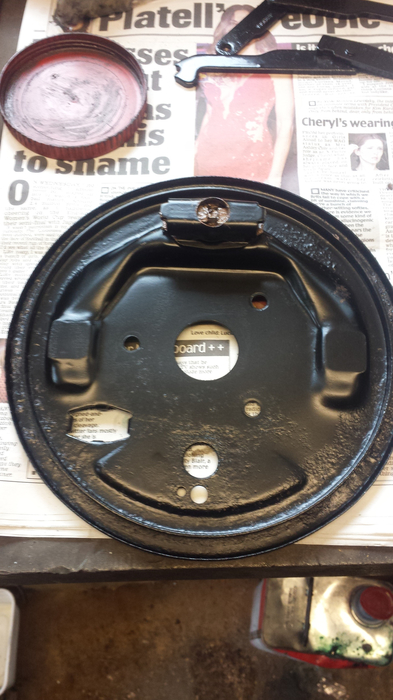
I continue with refitting the rear brakes, I already have the back plates made up so I just bolt them back into place with new stainless steel fittings not forgetting to refit the hand brake cable bracket that mounts with the same bolts. I also fit a new pin and split pin to secure the hand brake cable to the lever that comes out of the back of the brake back plate. I also re-fit the hubs after adding some fresh grease to the bearings, I torque the castle nuts to the correct setting and put in new split pins, then lastly re-fit the dust caps.
I fit the copper brake lines that I made up a few weeks ago that go between the flexible brake hose and the slave cylinders.
Last job for today I re-fit the brake drums and after a coating of copper grease I secure the drums with the securing screws.
Abi has cleaned all the dirt and dust of Sasha today so before we make our way home she covers he up to keep some of the dirt off.
Anyway that’s it time to go.
Sunday, 9 August 2015
I start today doing a little bit of tidying up round the workshop and rounding up some of my tools that had been left all over the place by other people using the workshop while I wasn’t there, I suppose that is the joy of using someone else’s workshop.
Well back to my jobs, I managed to find the bracket for the emission control system’s charcoal canister in Abi’s bedroom so I brought that with me this morning and I have now installed it, I had to use the original bolts as I don’t have any stainless replacement ones, for some reason the threads on these are metric not imperial like every other nut and bolt on a Mini, I use copper grease on the captive nuts in the body and on the bolts.
The new front shock absorbers have been installed using new stainless steel nuts, bolts, spacers and washers at the bottom and new stainless steel nuts and washers at the top.
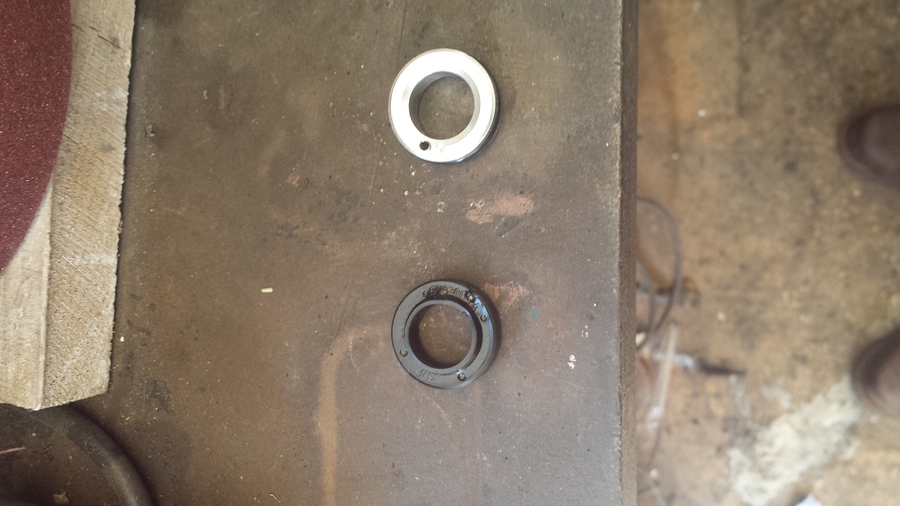
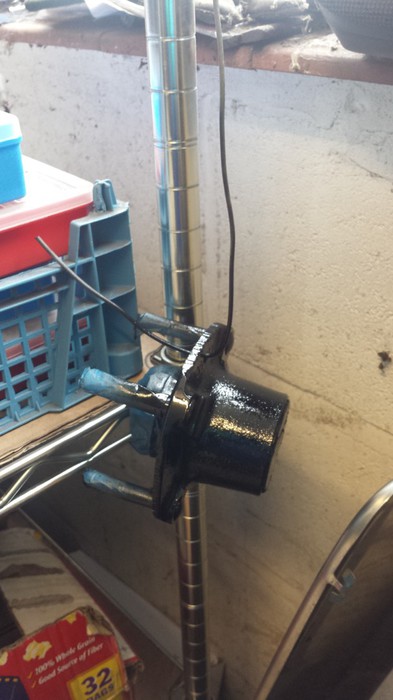
The two items in this picture are the aluminium bush and the oil seal from the gear selector shaft, this has been leaking along with the sump plug, so today it’s time to replace them. The sump plug is just replaced with a new one that was ordered some time ago along with a new copper washer. The two components from the gearbox are a little more difficult, the oil seal comes out using a small flat blade screwdriver to pries it out, the aluminium bush I drill a small hole in and screw in a small but long self-tapping screw, I use the screw to pull out the aluminium bush. You can see the hole in the picture, actually both attempts, the first one was a little bit too close to the selector shaft.
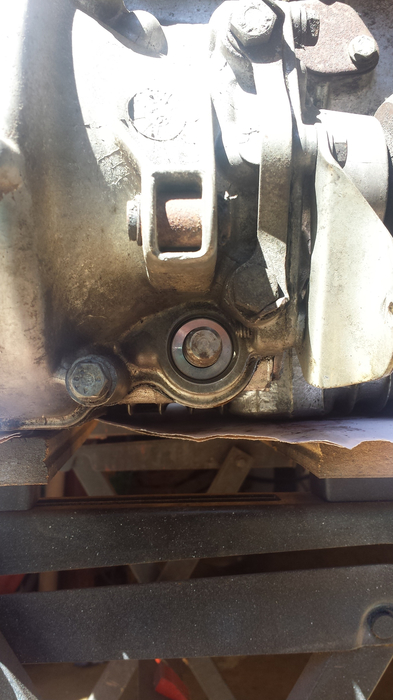
I this picture you can see I have installed the new aluminium bush with it’s new o-ring, this jus pushes into place and I make sure it’s located right back by tapping it into place with a drift.
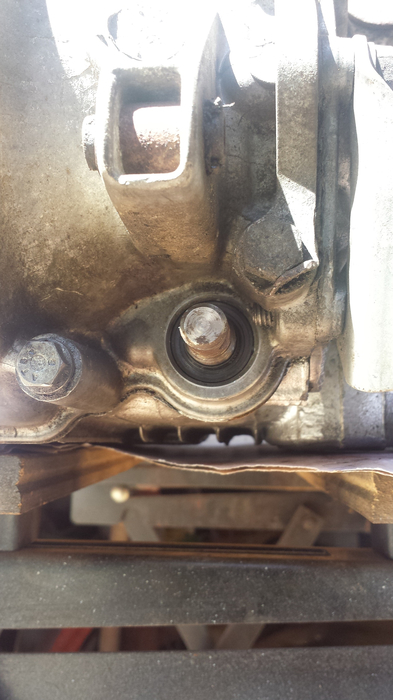
Now the aluminium bush is in I install the new oil seal, this just pushes into place, I use a deep 16mm socket to push it all the way in, then give it a few taps with a drift to make sure it is located.
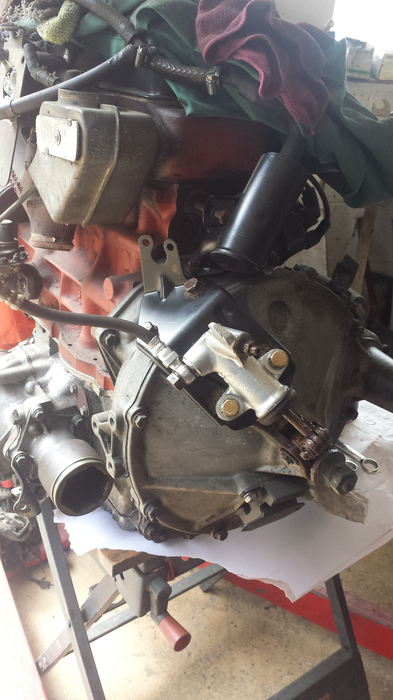
Next I install the clutch slave cylinder bracket, I have to re-use the original bolts as the two larger ones are UNC thread and all my new stainless steel nuts and bolts are UNC and the smaller one although UNF I don’t have one long enough, I use plenty of copper grease. Then I install the clutch slave cylinder for this I have some new bolts, although I have previously used these ones when I painted the new brake discs so the heads are gold, never mind. Then I install the flexible hose, I think it will be easier to do it now rather than when the engine is back in Sasha.

Next I install the clutch slave cylinder bracket, I have to re-use the original bolts as the two larger ones are UNC thread and all my new stainless steel nuts and bolts are UNF and the smaller one although UNF I don’t have one long enough, I use plenty of copper grease. Then I install the clutch slave cylinder for this I have some new bolts, although I have previously used these ones when I painted the new brake discs so the heads are gold, never mind. Then I install the flexible hose, I think it will be easier to do it now rather than when the engine is back in Sasha.
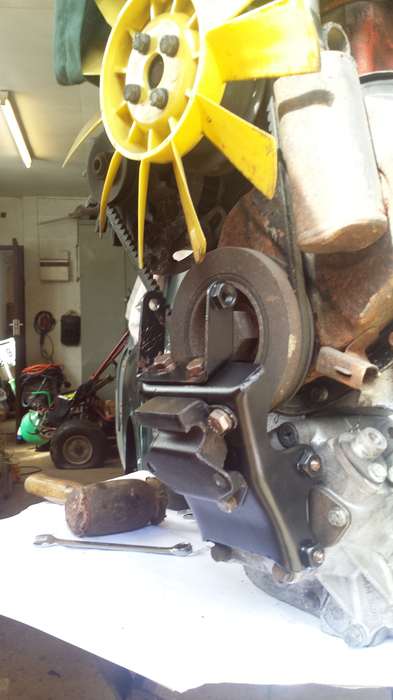
I install the engine mount and bracket on the near side, the engine mount bracket has long bolts so I use copper grease on them and put them back in, but I don’t tighten them up as when I re-install the engine I might need to take one of them out to get the engine mount bolts through the sub frame. I also put the radiator mounting bracket back on using the original bolts with copper grease on them.
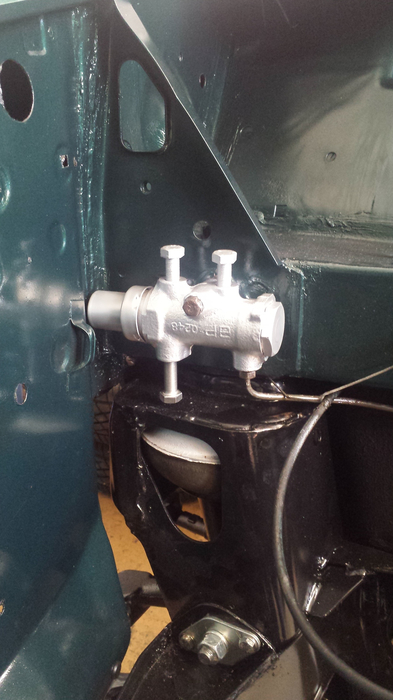
Next I re-install the brake limiter valve onto the cross member in the engine bay, this is just bolted back into position, I also re-connect the brake pipe that goes to the rear of the car.
The last few tasks today I install a new piece of fuel line that goes onto the steel fuel line under the car, I also install some smaller pipe onto the breather pipe that goes back to the tank.
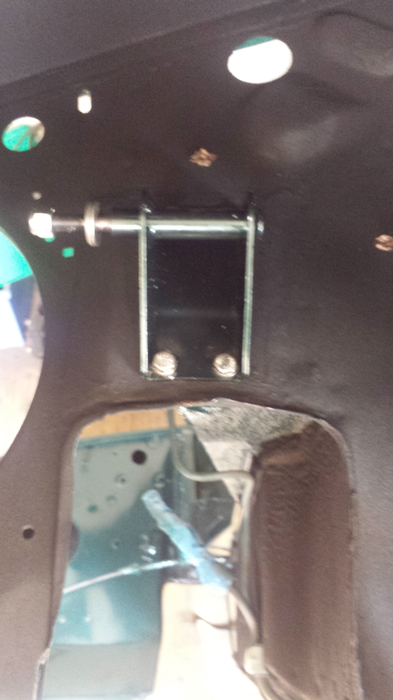
Lastly I re-install the blanking plate that covers the hole in the bulkhead cross member for left hand drive, I bought a new foam gasket ready and I fit it in place with new nuts, bolts and washers.
That’s it for today time to clean up and get off home.
Sunday, 16 August 2015
I start working on Sasha today by finishing the oil change, I install the new sump plug and copper washer, the old copper washer seemed to be the source of the oil leak, the old copper washer had some damage on it that looks to have been caused by a piece of the threads from the aluminum sump getting stuck under the washer. I fill the new filter with new oil and smear some oil on the rubber seal then crew in the filter, then pour in the fresh oil, with the engine being cold the oil doesn’t drain into the sump very quickly so I have to stop when the rocker cover is nearly full. I continue pouring in fresh oil letting it stand then checking the dip stick over the next couple of hours until the oil level is at the max indicator on the dip stick
Next I refit the rear wheels then adjust the rear brakes. Then I find a piece of wood out in the barn that just fits under the sub frame, then jack up the back of the car so than I can remove the axle stands.
I install the new brake pads into the front calipers ready to be fitted back on Sasha.
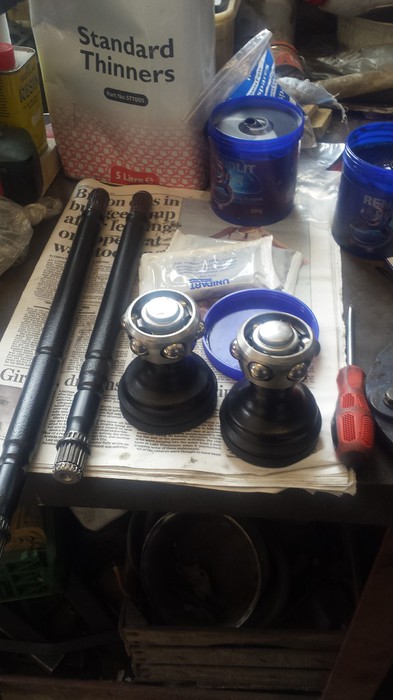
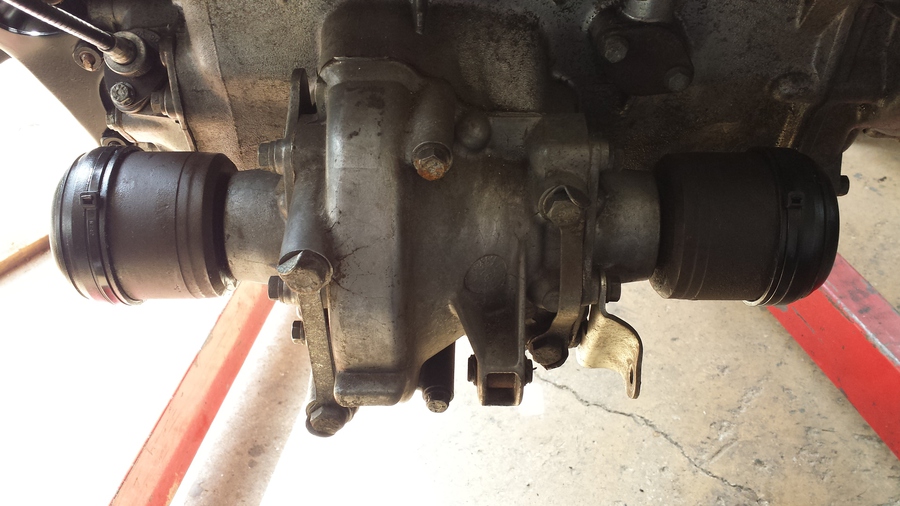
I strip the inner CV joints and clean them in petrol to remove all the old grease, as both of the old inner CV joint boots were split the grease was contaminated and needed to be removed. The other half of the CV joints still attached to the gear box are also cleaned out. Then the new inner CV boots are installed, the CV boots are turned inside out to make it easy to fit the cable tie and trim off the end.
I empty the packs of Molly CV grease that came with the new inner CV boots into the part of the CV joint that is attached to the gearbox, I then pack the inner part of the CV joint with new Molly grease that I bought a while ago. Once that is done I insert the inner part of the CV joint into the other half then I turn the CV boots the right way round again and secure them in the correct position with cable ties.
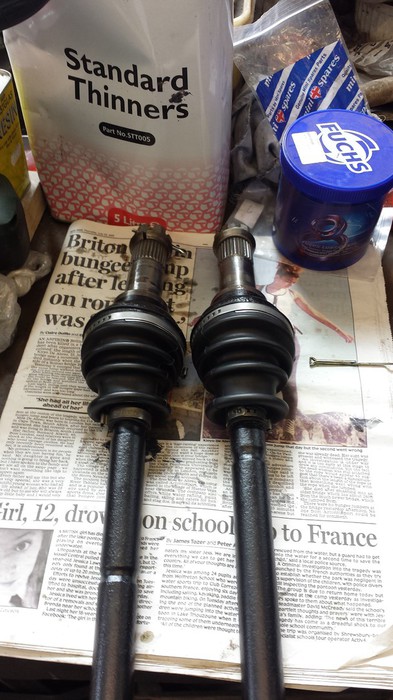
Next I slide the new outer CV boots over the drive shafts, then I pack the outer CV joint with the Molly CV grease that came with the new CV boots. I insert the drive shafts into the CV joints then I move the CV joint through it’s range of movement to make sure the CV joints are packed properly with Molly grease, I top up the CV joints with Molly grease from the pot then pull down the CV boots into the correct position and secure them with the CV joint clips that came with the new boots.
We are located at:
Market Harborough
Leicestershire
Contact us
If you would like to contact us:
rod@howitt.org.uk
abi@howitt.org.uk
sasha@howitt.org.uk
Or use the contact form.