Timeline 22 November to 31 January
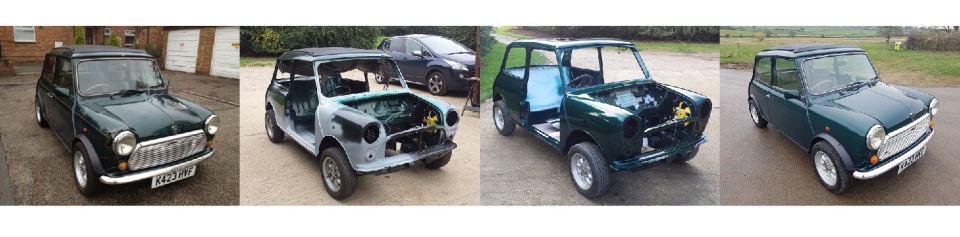
This is a continuation of the work done to Sasha.
Sunday, 22 November 2015
After a break while I went on holiday I’m back all rested and ready to get to work on Sasha again.
Today I make a start removing the masking tape from the front of Sasha left behind from the paint job.
The next task is to start removing the masking tape from the inside of Sasha and from the parcel shelf. I have left the back seat still masked up, as at the moment, the boot lid is laying inside of the car to keep it safe.
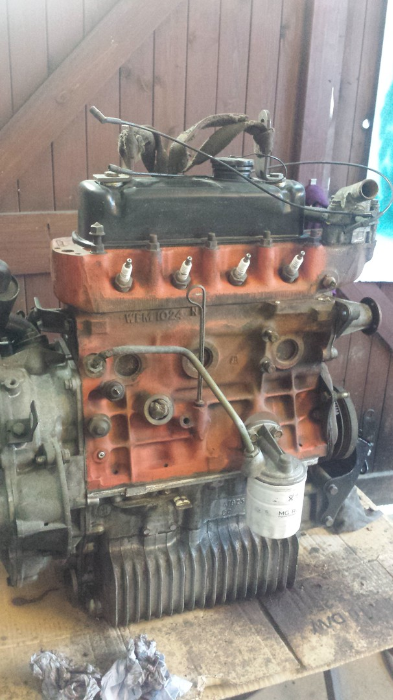
A number of people have been badgering me to paint the engine. This wasn’t something I was going to do, but now the outside of Sasha looks so good it would be a shame for the engine to let the project down so I have relented.
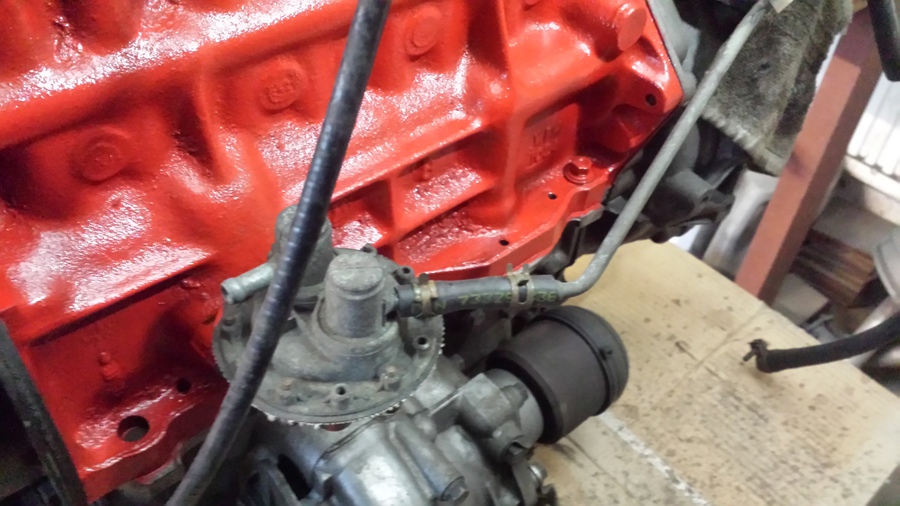
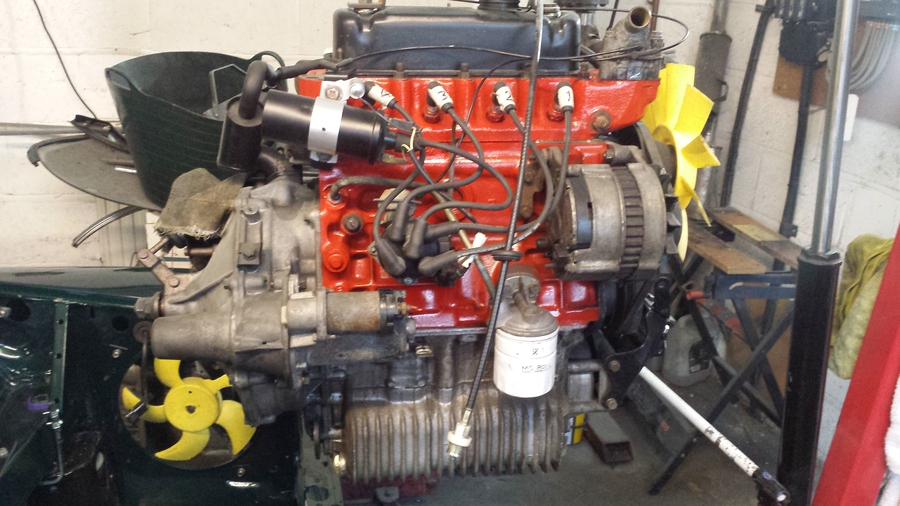
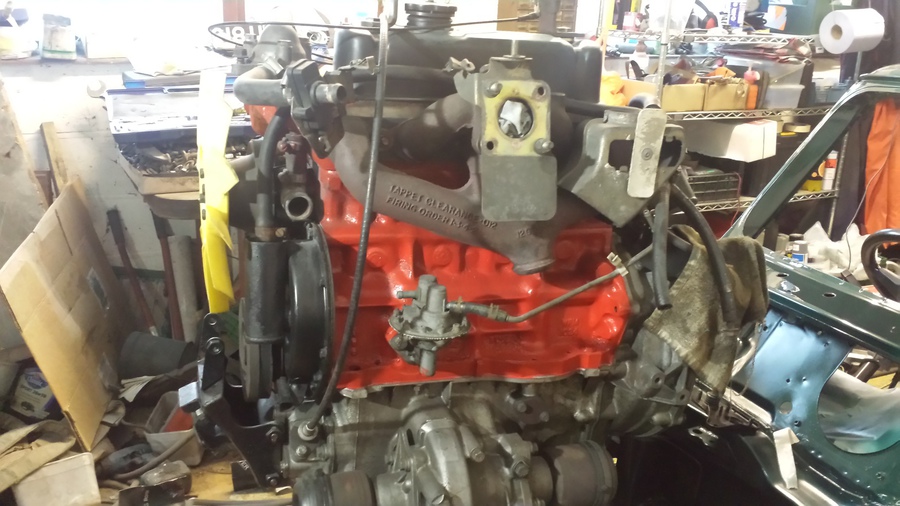
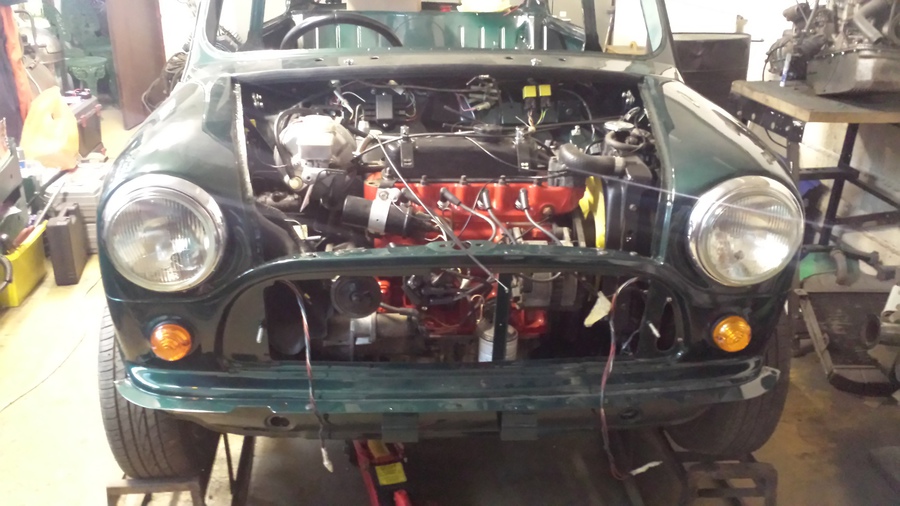
The engine has previously been de-greased and pressure washed but that was some time ago. So, I remove the alternator, starter motor, coil and distributor from the front of the engine and the manifold from the back of the engine, then blow any loose off with the air line. Then I wash the head and block with thinners to remove the last 22 years of dirt and grime, and blow dry it with the air line.
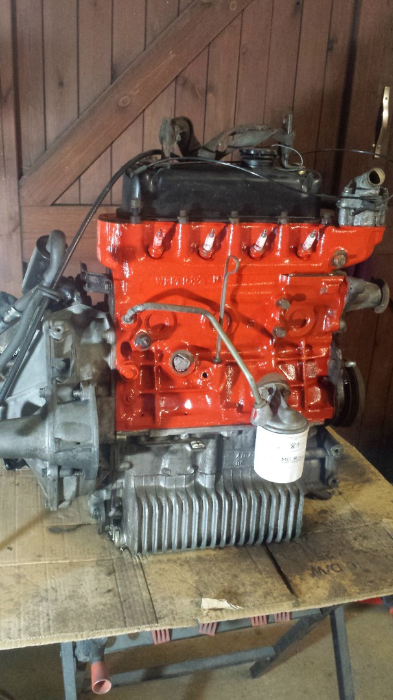
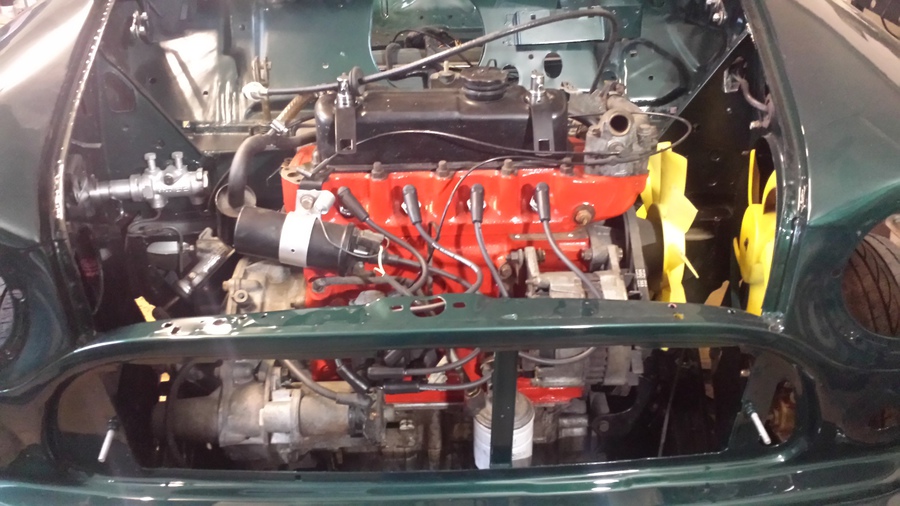
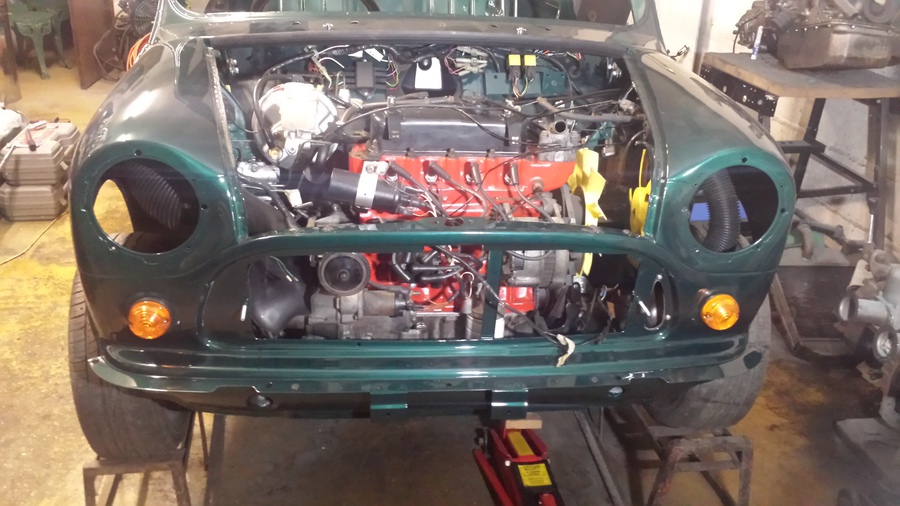
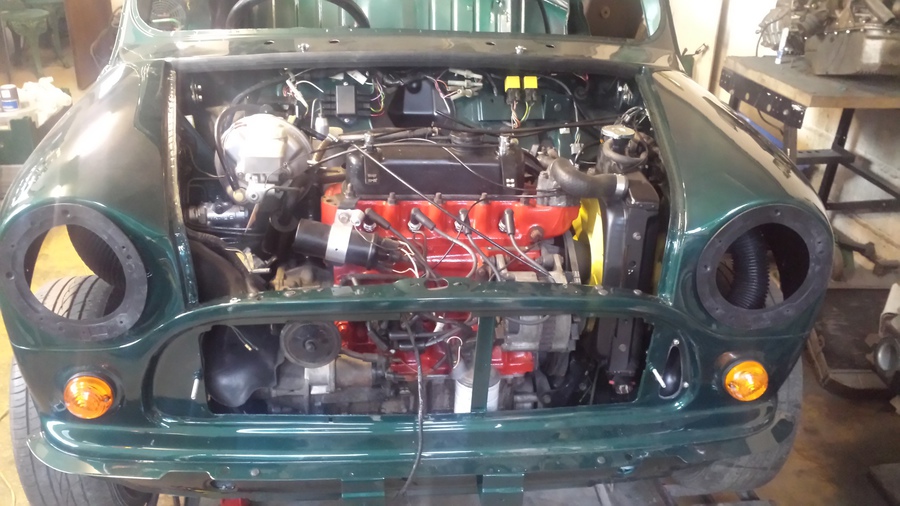
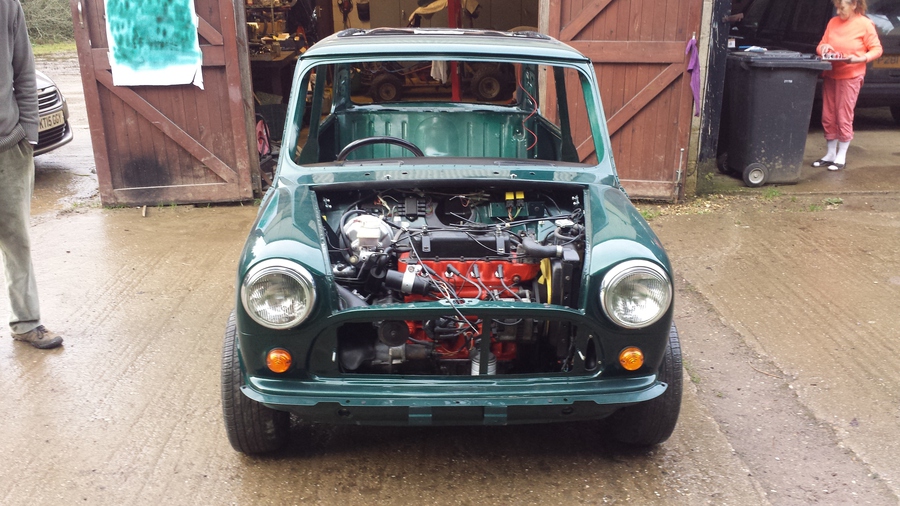
Next I paint all the non-machined surfaces of the head and block with red engine paint.
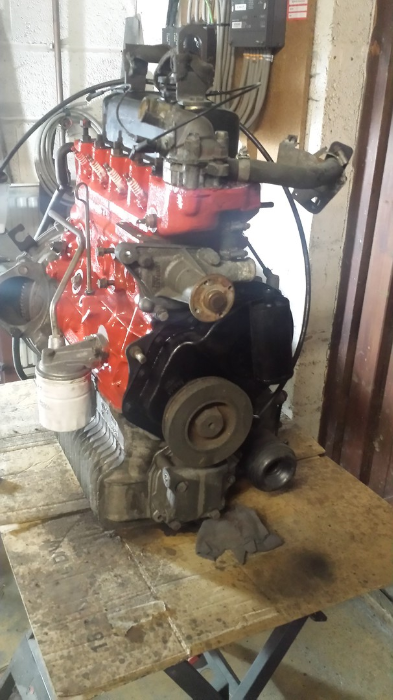
The timing chain cover is looking a little bit sad now compared to the rest of the engine so I quickly mask it off and give it a quick spray over with satin black. With that done and a little time for the satin black to be touch dry I remove the masking tape and snap some pictures.
I don’t have time for anything else today so I cleanup and make my way home.
Sunday, 29 November 2015
I picked up some smaller bore fuel line yesterday, so I start today by changing the small piece of pipe between the fuel pump and the metal pipe that will run up to the carburetor.
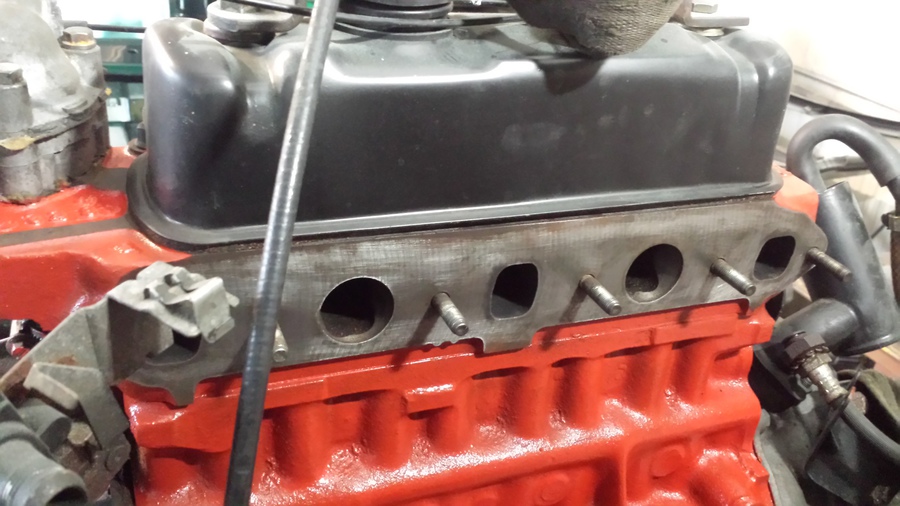
Next I clean up the gasket surface for the manifold gasket and the other machined surfaces where I got a bit of the red engine paint on them.
I re-fit the starter motor after giving it a bit of a clean. I also clean the alternator and distributor before re-fitting them. I also put the coil back on.
I put the new manifold gasket in place and fit the manifold.
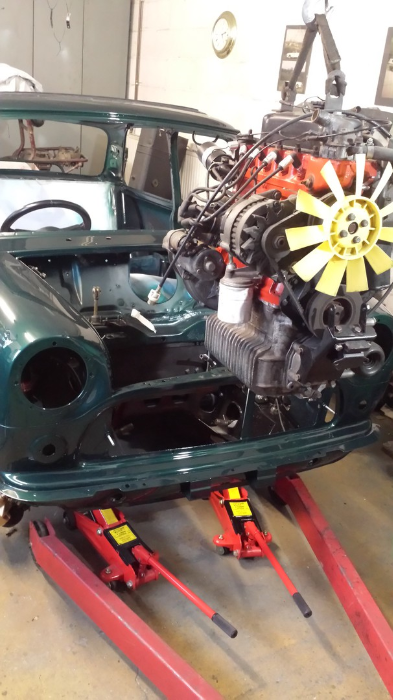
Next I get Sasha ready to put her engine back in. I put my two small trolley jacks under the front sub frame so I can remove the front wheels and undo the top ball joints and track rod ends. This will allow the drive shafts to move far enough out of the way to get the engine in.
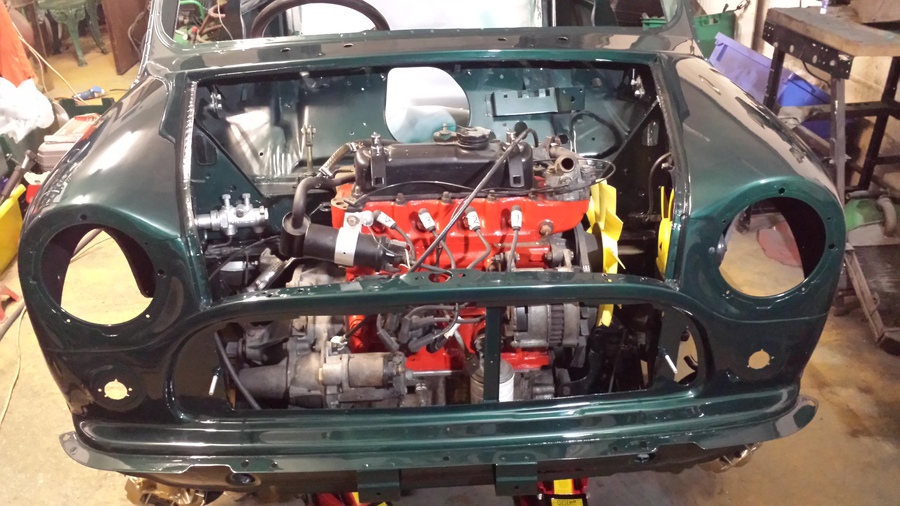
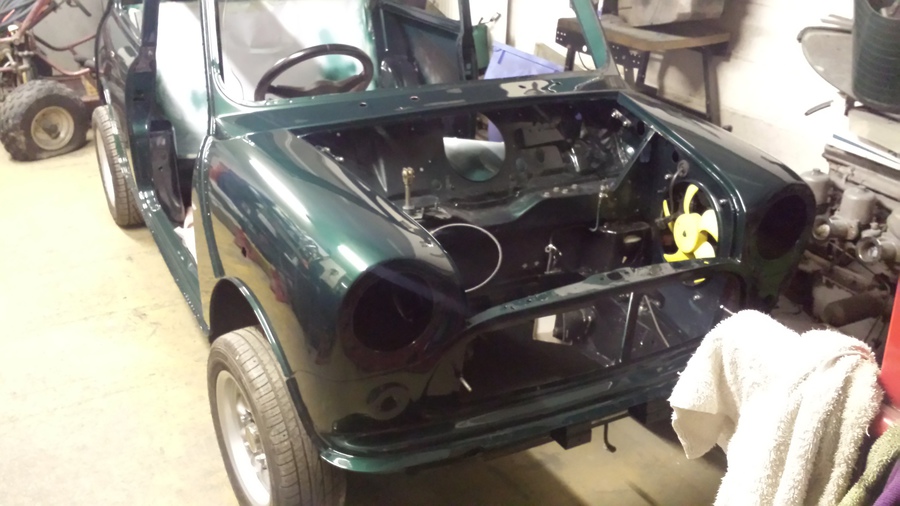
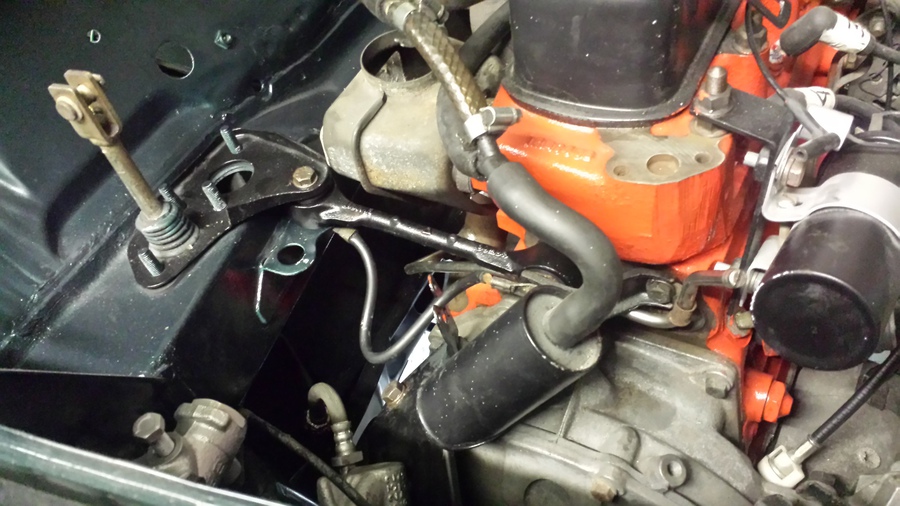
I then lower the engine into place and make a start getting the bolt through the engine front hole in the engine mount. With the engine still hanging from the hoist I get the first bolt in fairly quickly and put the washer and nut on loosely. I have a problem getting the back bolt in place as I can’t get my hand down because the clutch slave cylinder is in the way. After removing the clutch slave cylinder I am eventually able to get the bolt in and get the washer and nut on the other side. I tighten both bolts up and make a start on getting the bolts in the other side. To get the bolts in on the passenger side I remove the top bolt from the radiator mount bracket, this lets the engine mount move in a little more making it a bit easier to get the bolts in, it takes me a fair amount of time to get the bolts in and the washers and nuts on the back, I then tighten them up. To get the bolt back in the radiator mounting bracket I lift the engine up a bit with the hoist so I can get the bolt back in the top hole. This takes a little while and I end up picking up the whole front of the car before I am able to get the bolt in and properly tighten the top and bottom bolts. The engine is now technically in. I refit the clutch slave cylinder. I remove the lifting brackets from the rocker cover bolts and fit the new T-bars and the weather shield brackets.
Last job today is to fit the drive shafts into the inner CV joints. To do this I loosen the hub nut to allow the outer CV joint to move so I can get the drive shaft to lock into the inner CV. With this done I put the top ball joints back through the top suspension arms and torque the nuts up correctly on the top and bottom ball joints. Next I adjust the track rod end on the drivers’ side, I noticed when I was taking the pictures when Sasha came back from paint that it didn’t look right. Then I torque up the track rod ends on both sides and make sure the lock nuts are tight.
I put the wheels back on, clean up the workshop and make my way home.
Sunday, 6 December 2015
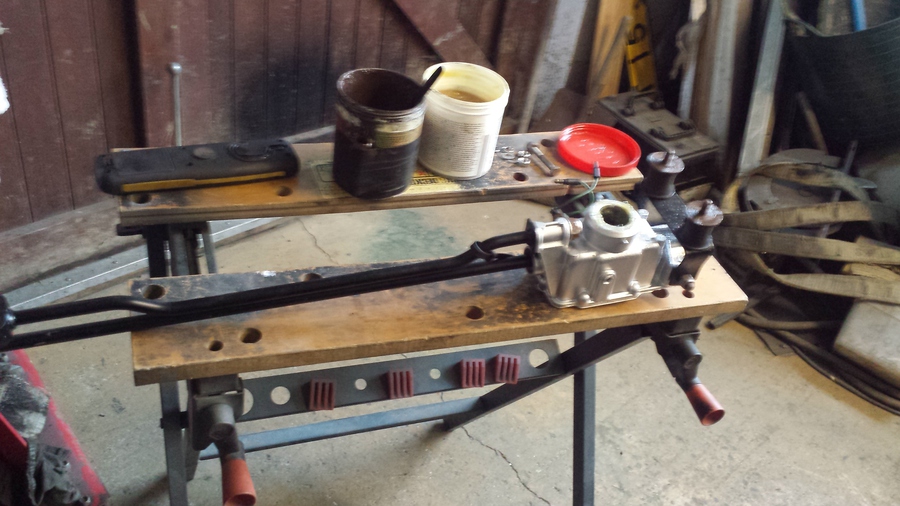
I start by getting the remote gear change mechanism ready to fit. When I cleaned it up and painted it some months ago, I didn’t re-grease the inside so I do that now. I remove the roll pin that I had left in the end as I will hammer it in from the other side when I install the gear change mechanism. I jack the front of Sasha up and put ramps under the wheels to give me a bit more room. I get all the tools I need ready along with all the nuts and bolts I’ll need and place then under Sasha ready. I setup my workshop light so I can see what I am doing underneath. First I put the bolt, that holds the rod to the back of the diff casing, about half way in. Then I hook the slotted side of the rod over it, then push the bolt the rest of the way, loosely putting on the washer and nut to stop it falling out. I make sure the little gaiter is in place over the selector shaft, which keeps the dirt off the selector shaft to make the oil seal last longer. I prop the back of the remote gear change mechanism in the right place, with the workshop light, then from inside Sasha I put the washers and nuts on the bolts on the rubber mounts that hold the remote in position. I then got back underneath and put the roll pin in.
Next I get the exhaust ready to install, to make it a bit easier and to give me more room underneath I use the two small trolley jacks to lift the back of Sasha. I start to get the down pipe into place but the engine is moving a bit too much so I fix this by fitting the top and bottom engine stabilizer bars. I make sure I don’t forget the earth strap.
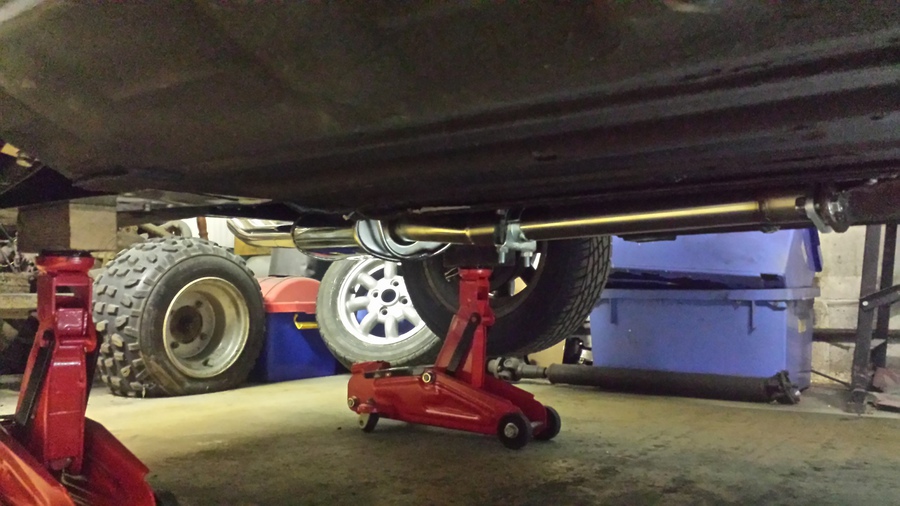
I eventually get the front part of the exhaust on including the CAT. Then the centre section that bolts up to the CAT, then the back part of the exhaust system.
Next I try to get the tail pipes level before fitting the U clamp.

I’ve had enough of groveling about on the floor, so next I decide to remove the last of the masking tape round the dash and pedals.
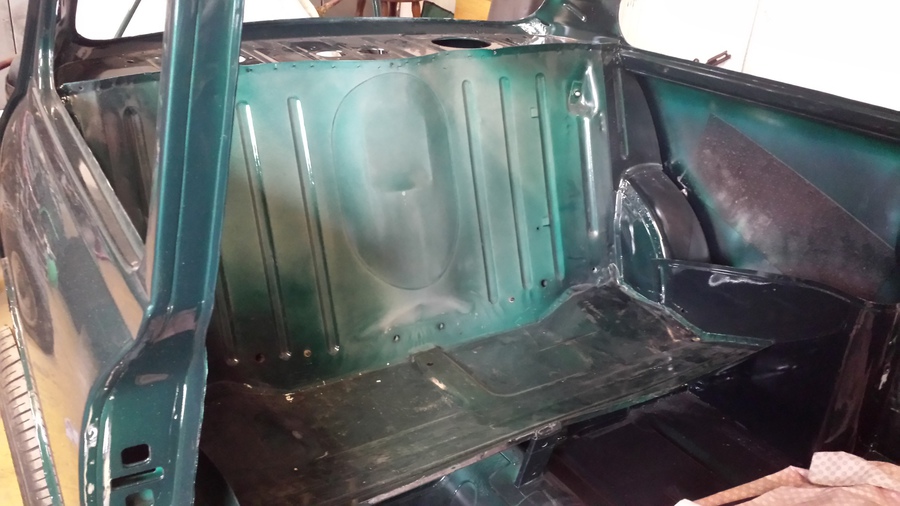
I also remove the masking from the back seat.
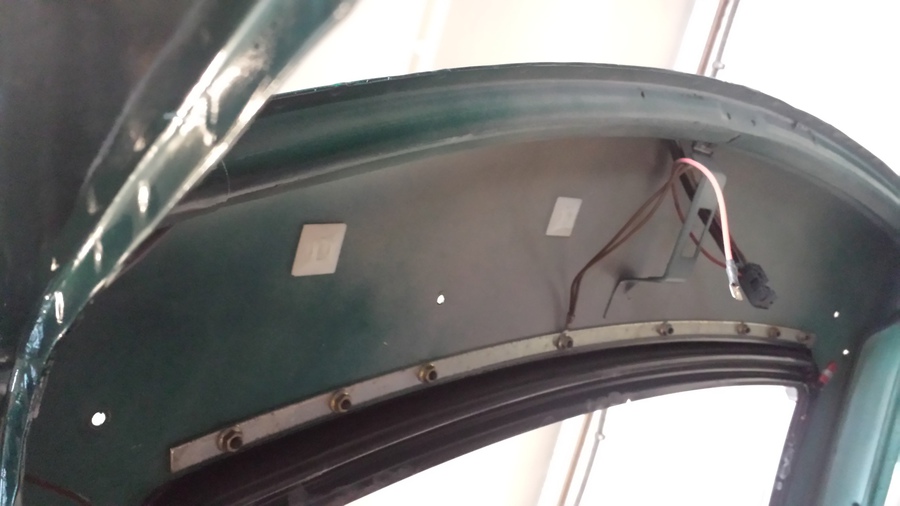
I remove the residue from inside the roof where the pads are stuck on, that hold the wires and the foam blocks that protect the headliner from the nuts and bolts that hold the wind deflector on. I then fit new tie wrap pads that hold the wiring for the power roof.
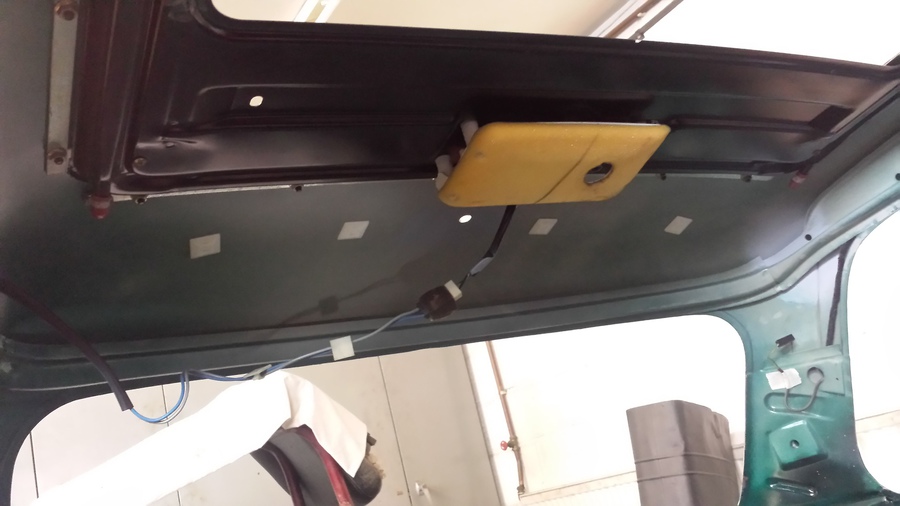
I remove the old wiring pads from the roof at the rear of Sasha where the power roof motor sits. Then I use some panel wipe to clean the residue off. Next I fit new wiring pads for the power roof motor wiring and the aerial wires.
I put all my tools away and clean up the workshop before making my way home.
Sunday, 13 December 2015
I make a start today by installing the new distributor cap, plugs and plug leads. I didn’t change the rotor arm as this is in good condition. I had a bit of a problem with one of the screws holding the distributor cap on since a previous owner had stripped the threads out of the hole in the distributor, so I have to put a cable tie on it to hold it in position.
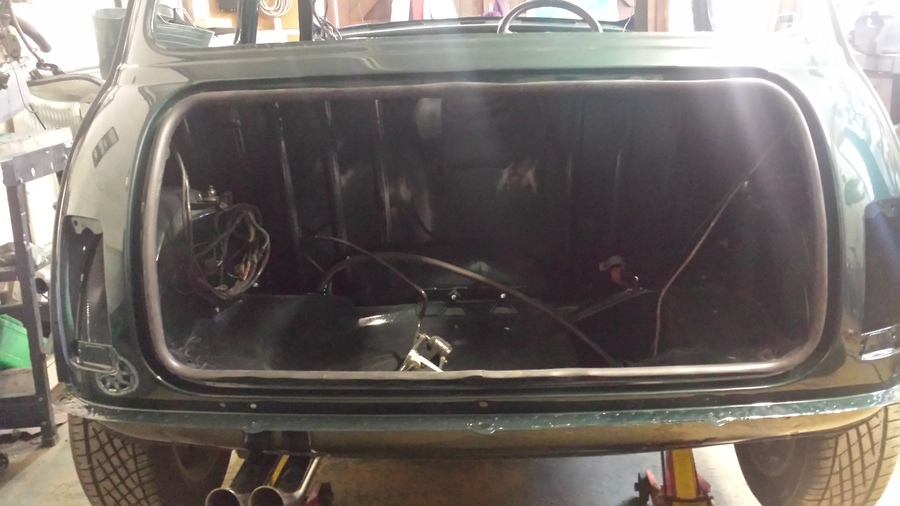
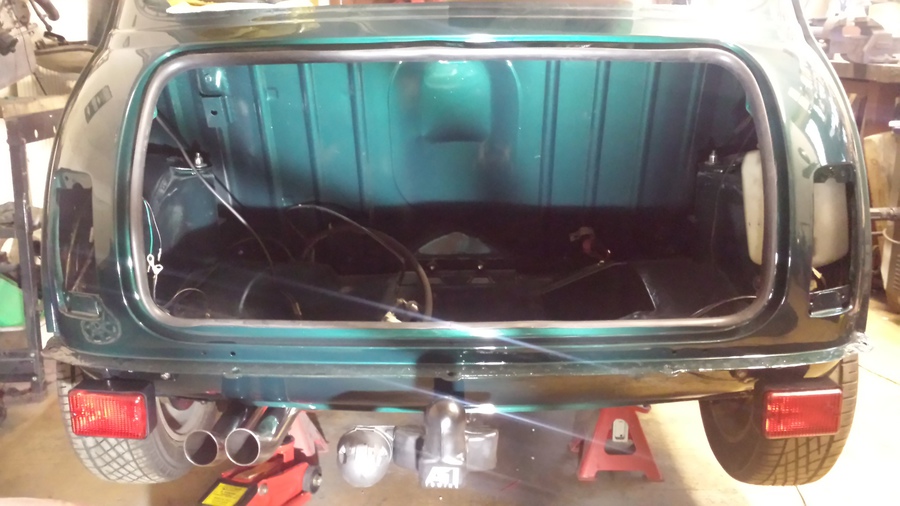
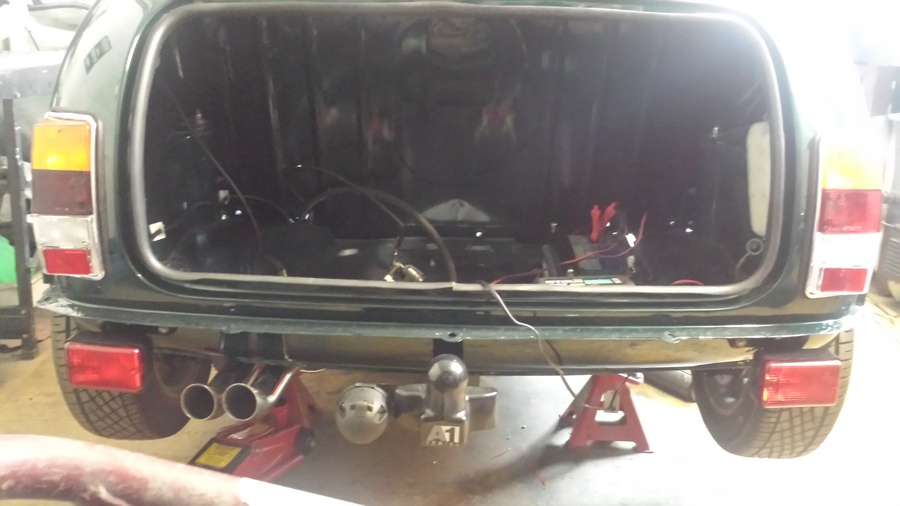
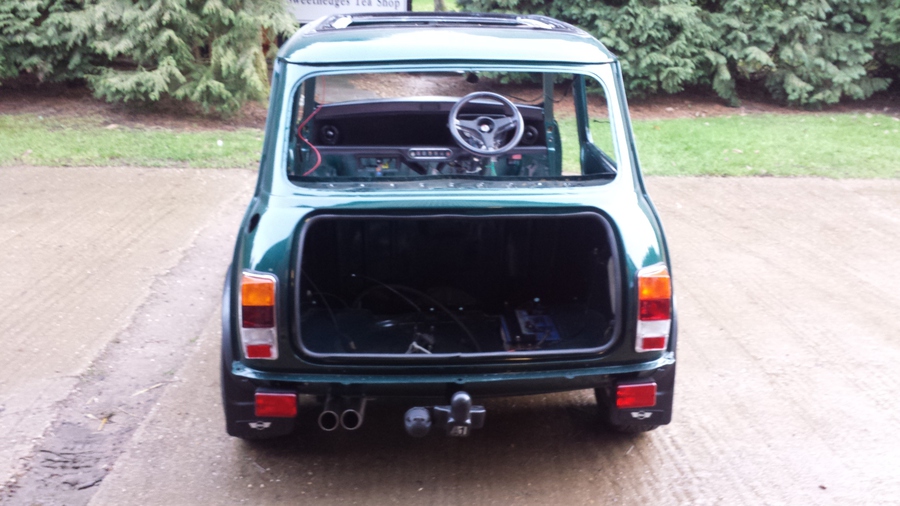
Next job is to install the new boot seal. I bought nearly all the new seals from Phoenix Seals. I start at the bottom and work my way round installing the boot seal. When I get back round to the bottom I trim off the excess using a hacksaw.
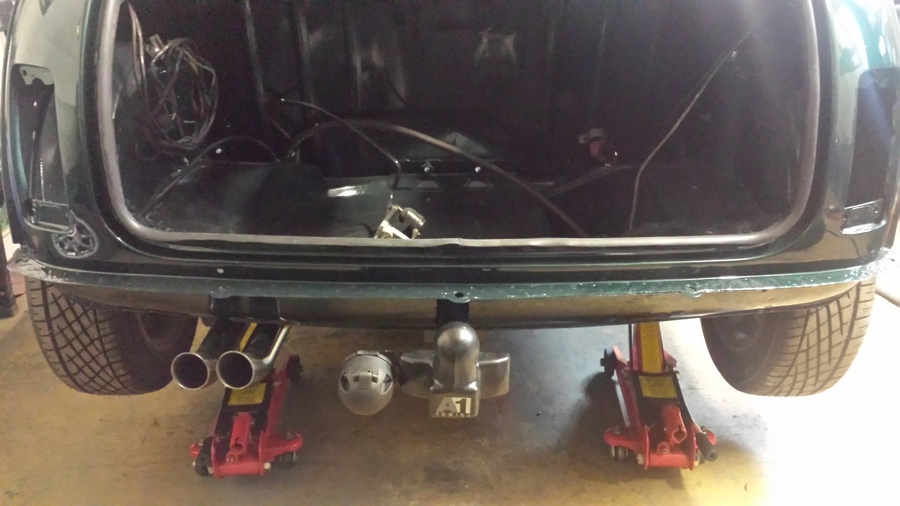
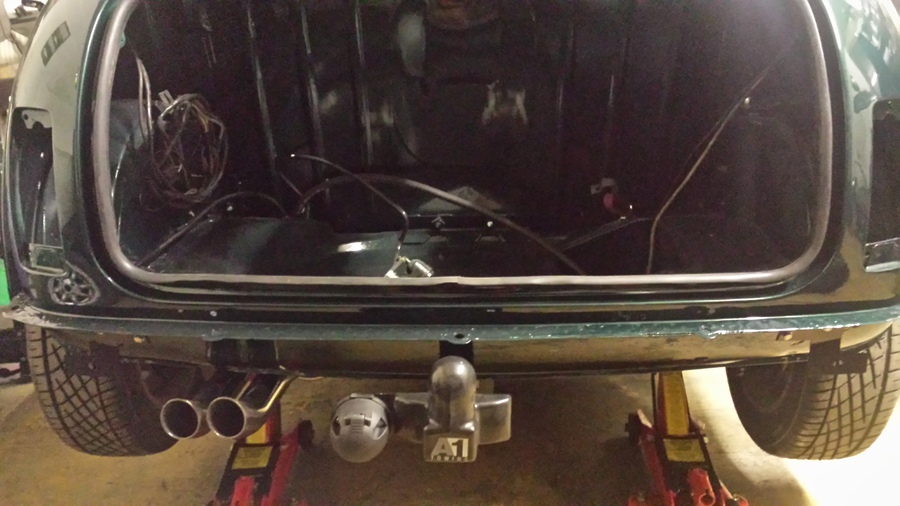
Next I install the tow bar. Installation is easy, it just bolts on. Everything was previously mocked up so it went together nice and easy. The only difficulty was tightening the bolt that goes under the back seat as I had no one to help me. I wedged the spanner against the back seat, with a rag round it so I don’t damage the paint, then go back underneath with a ratchet and socket and tighten it up.
Then I bolt on the plate with the electrics and the actual tow ball. The wire for the electrics is cable tied to the tow bar all the way along and the cable goes through the boot floor through the seal along with the fuel lines.
I will connect it all up at a later stage.

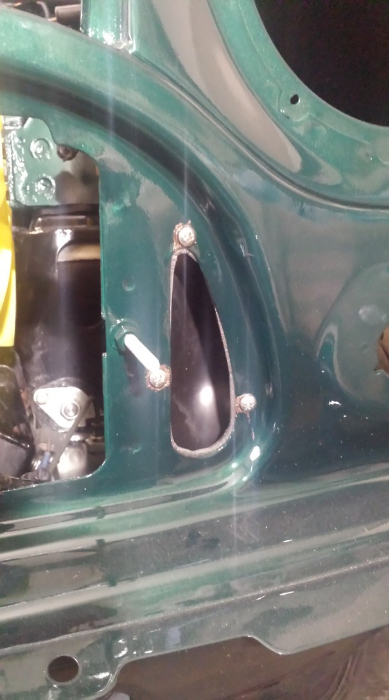
When I did the repairs to the inner wing, the hole where the drivers’ side face vent goes was very badly rusted and had to be completely replaced. Getting the face vent off destroyed the seal so I need to make a new one. I make a pattern using masking tape on the face vent marking it up then cutting round it. I then transfer this to the material I am going to use to make the new seal. The material I am using is a dense foam rubber used for draught excluder, which doesn’t allow water to soak into it so it should be quite good. Once I have the seal cut out I stick it to the face vent, the material is sticky one side. I then bolt the face vent into place.
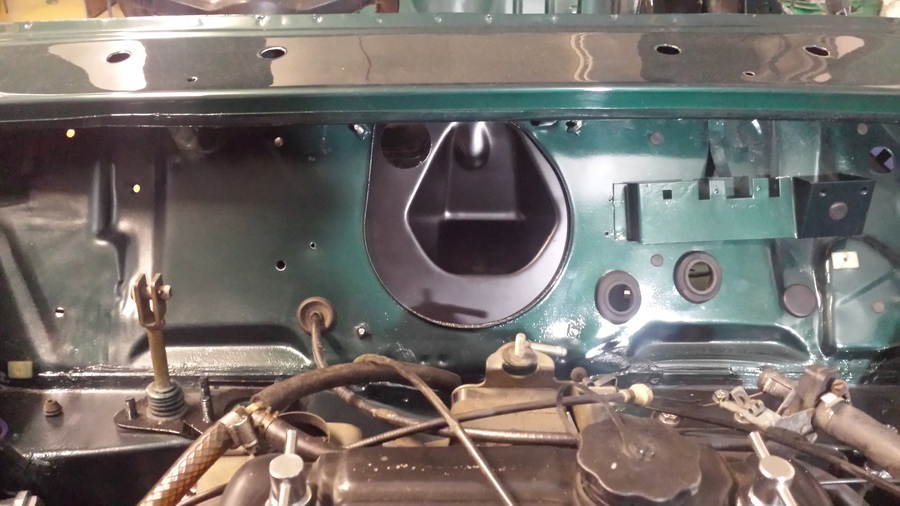
I refit the plate in the front baulk head that the wiring loom goes through. This was originally sealed with a kind of putty but I don’t have any, so using the same method as the face vent, I make a seal out of the draught excluder. I have made a bit of a mistake, unlike the face vent, the plate seal is not reversible. I don’t want to waste the material so instead of sticking the seal to the plate I stick the seal on the inside of the baulk head then bolt the plate in place, this works just fine.
Next job is to fit the rear fog light brackets. I have decided to fit the left hand drive fog light as well, I think it looks better. I know Abi doesn’t like it but she hasn’t been helping with Sasha recently so tough luck, it will be how I want it. Normally the brackets are just screwed on to the captive nuts in the rear valance, but I have used some more of the draught excluder to create a gasket to protect the paint on the rear valance.
I have done some other jobs today, I have refitted the choke and heater cables through the front baulk head and refitted their grommets and some of the other grommets in the front baulk head. I have also filled most of the holes in the bonnet slam panel with grommets, refitted the dim dip resistor, re-threaded the wiring back in on the passenger side and added the new power wire and aerial wire for the new roof aerial.
Now it's time to clean up and get off home.
Sunday, 20 December 2015
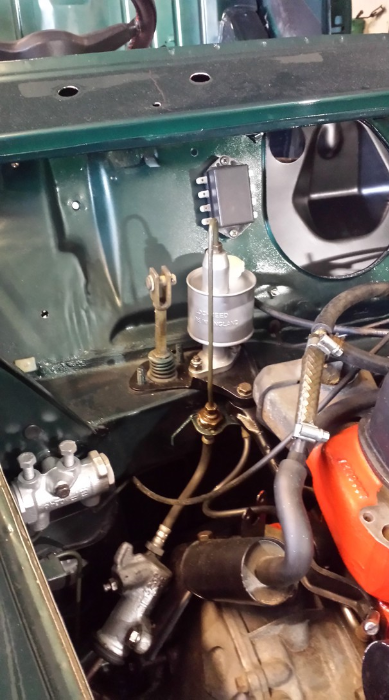
Well I have had some help today, Darren has come down to give me a hand for the day. While I am busy fitting the clutch master cylinder Darren is getting the Waxoyl sprayer ready. I have to make a new gasket for the clutch master cylinder. To do this I stick masking tape to the mounting surface then cut round it with a sharp craft knife and cut the mounting holes out as well. When complete, I peel off the masking tape template, place it on some cardboard from the back of an A4 pad, mark round it and cut it out. I use some copper grease on both sides of the gasket and place it on the mounting surface of the clutch master cylinder, being careful getting it over the rubber cap on the clutch master cylinder. Next I line up the arm with the top over the top of the clutch pedal then put new stainless steel washers and nyloc nuts on the mounting bolts and tighten them up. Darren takes a break from trying to get the Waxoyl sprayer working to put the pin and R clip in to join the clutch master cylinder to the pedal. I get the metal pipe from the master cylinder to the flexi pipe installed, then Darren helps me bleed the system. Sasha now has a working clutch. I top up the master cylinder with fluid and screw the cap back on.
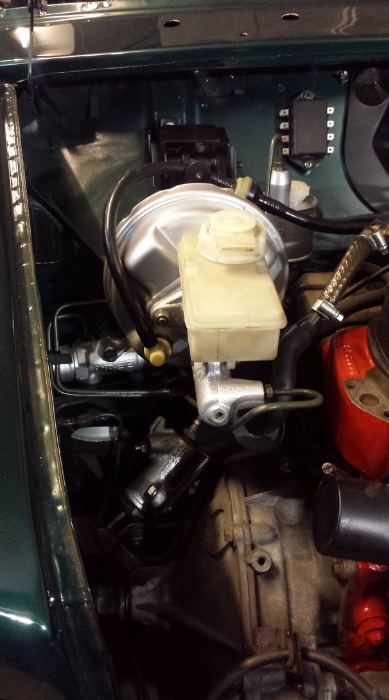
While Darren continues to get the Waxoyl sprayer to work I re-fit the bracket for the brake servo. This just bolts into place and I use new stainless steel washers and Nyloc nuts on the bottom fixings and a new bolt with washer and shake proof washer. I re-install the pin and r-clip then start re-installing the servo and master cylinder, this is just four nuts and another pin and r-clip. Next Darren and I re-fit the metal brake pipes from the master cylinder to the brake bias valve. Next time I will get the brakes bled and Sasha will be another step closer to being mobile again.
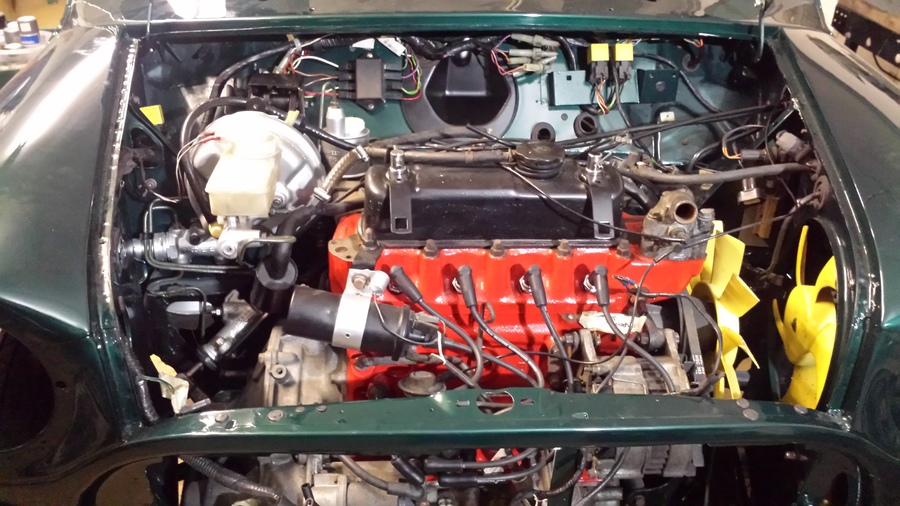
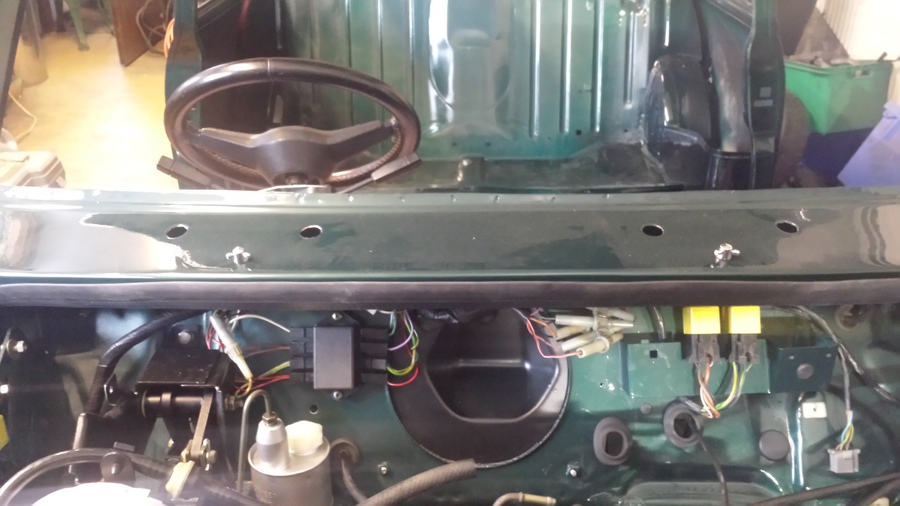
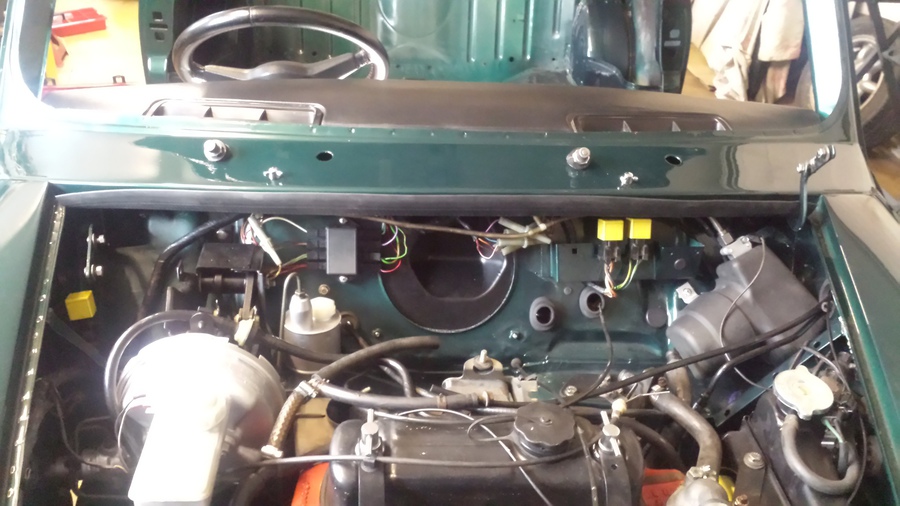
Darren gets the Waxoyl sprayer working and the Waxoyl melted enough and sprays Waxoyl into the cavities in the ends of the scuttle panel, the A posts, the A pillars and the sills. At some point I will finish the rear section of the sills, inside the rear storage bins and the cavities in the rear valance. While Darren is doing that I get the water expansion tank re-installed under the passenger side wing and the emission control system charcoal filter. With these bits done Darren and I feed the wiring loom back through the baulk head and start connecting everything up. Darren connects the wires that go to the back of Sasha, as I am red green colour blind it would take me three times as long. With some of the other things re-connected we re-fit the power wire for the electric roof.
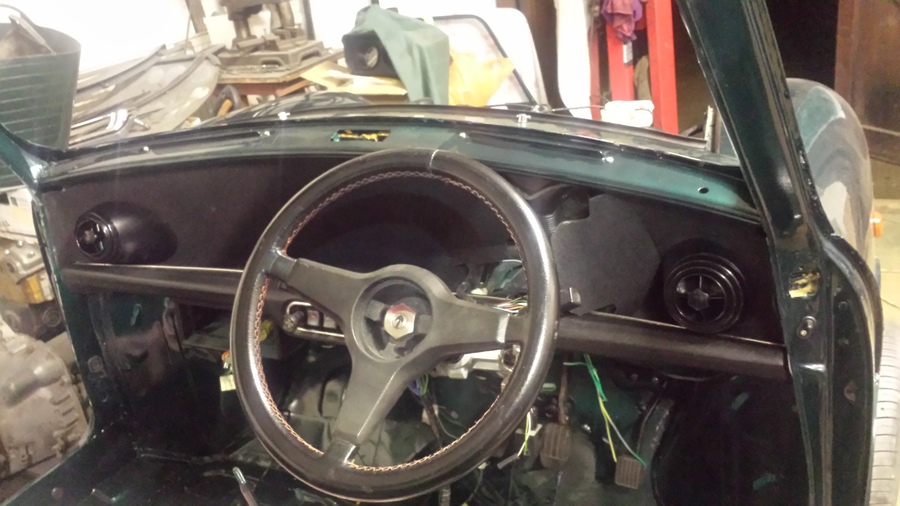
The inside of Sasha looks a lot better with all those wires put back to where they should be.
Thanks to Darren we have got quite a lot done today.
That’s it for today, Darren and I tidy up the workshop and make our way home for pizza.
Sunday, 27 December 2015
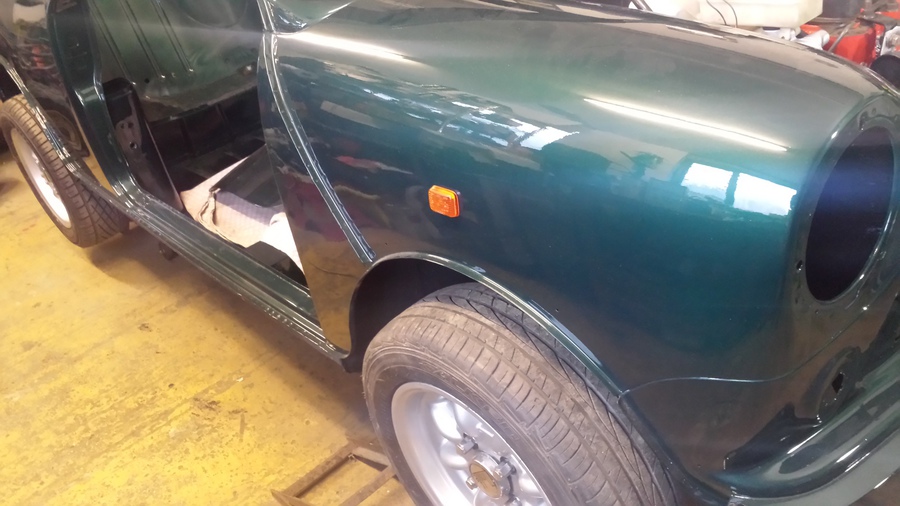
With Christmas out of the way I make a start today by changing the lenses to the side repeaters, the original lenses have gone cloudy, but I have a pair in my shed.
Next job is to fit the new screen washer jets. Rather than the standard plastic single jets I have fitted chrome ones with twin jets. These just go through the holes in the scuttle panel and are secured with a nut on the underside. I have swapped the nuts that came with them for stainless steel ones.
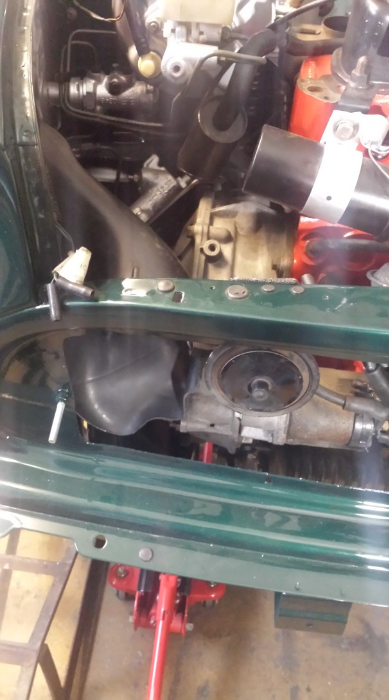
I re-install the plastic inlet for the heating and ventilation system on the drivers’ side. I make a new gasket for it from some draught excluder. I also refit the splitter box that goes under the wing, connects to the face vent and through the flitch panel to supply air to the heater. Next I re-install the large pipe that connects the inlet to the splitter box. There is a metal bracket that supports the large pipe and I bolt this back into place. I made this bracket last summer as the original had almost completely rusted away. It isn’t working quite the way I want it to, so I add some cable ties to help support the large ventilation pipe. I also bolt the horn back into place and connect its wire.
Then I start on the other side. Originally there was no gasket between the plastic inlet and the body, so to stop it rubbing any of the paint off I make a gasket for it using some more of the draught excluder. I secure it in the correct position using some new stainless steel self tapping screws. I then re-install the ventilation pipe that goes over the water expansion bottle round the emission control filter and connects on to the back of the passenger side face vent, then connect the other end on to the inlet.
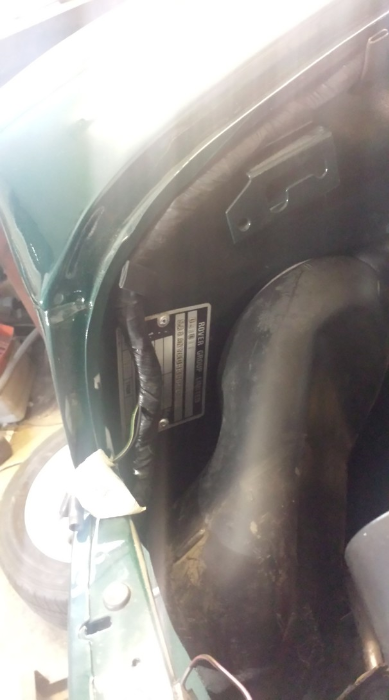
Next I pop-rivet the VIN plate back on to the inner wing.
I start to re-install the front indicators. I bought some new J clips to secure the indicators from Halfords, unfortunately they are a little different to the ones that were originally there. I have to elongate the slots in the front panel so I can push them all the way on and I can get the indicators to fit properly. I then secure them in place with new stainless steel self tapping screws. I will connect the wires at a later stage.
I have been warming the Waxoyl all morning so that it is thin enough to spray and fill the sprayer can from a new 5 litre can. I boil the kettle a few times to fill a bucket so I can put the sprayer can in it to keep the Waxoyl liquid so it will spray. I have already removed the plugs from the sills inside the rear storage pockets. I liberally spay Waxoyl into the cavities and into the bottom of the storage packets, also in all the nooks and crannies to prevent any more rust getting in. I also spray some Waxoyl down the windscreen pillars so that hopefully it will protect where I have put the new scuttle panel in. The next bit to Waxoyl is the cavity between the rear valance and the closing panels. I spray Waxoyl through the hole where the fog light wiring goes through the valance and through the hole in the boot floor where the wiring comes back out. Next I go round mopping up all the spillage and excess. Then I go round putting all the plugs and grommets back in to fill all the holes up.
Last job for today is to fill the brake fluid reservoir and to bleed the fluid through to the rear brakes. I need to make sure plenty of fluid runs though the system to flush out any of the old fluid as I am upgrading to silicone fluid because it is not hydroscopic and I should never need to change it again. I need to pick up some more silicone brake fluid before I can do the front brakes.
So, time to clean up the workshop and make my way home.

Tuesday, 29 December 2015
Well with it being Christmas I am able to put in a few more days on Sasha. Today I start by bleeding the front brakes. Yesterday I had to go into Leicester to Graham Goode Racing to pick up some more silicone brake fluid. I top up the fluid level and Matthew gives me a hand to bleed the front brakes. The pedal is now good and firm - all sorted.
Next I use some draught excluder to make some gaskets to go between the seat mount brackets and the cross member, then using new stainless steel bolts and washers I bolt the seat mount brackets into place.
Next job is to re-install the radiator. Abi refurbished this some time ago so it is ready just to re-install. I put a cloth over the wing and down the inner wing to protect the paint and refit the bottom hose to the radiator, then drop the radiator down between the inner wing and the fan. I put the bolt through the bracket under the radiator, then put new stainless steel bolts through the mount bracket in the top of the radiator, then a new stainless steel nut on the bolt on the thermostat housing. I refit the bottom hose to the water pump and tighten the hose clip. I reinstall the top hose and tighten the hose clips. Lastly I refit the pipe to the expansion tank.
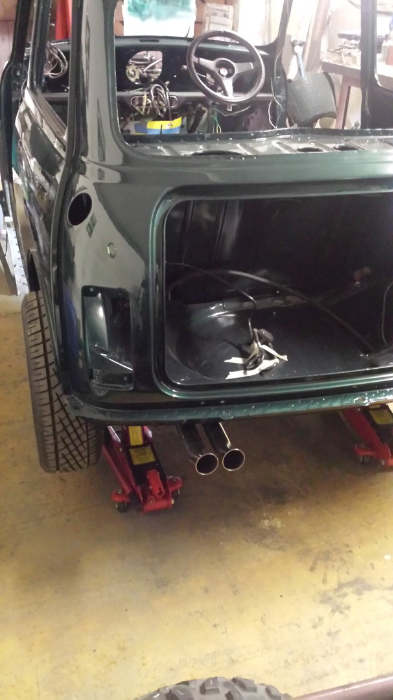
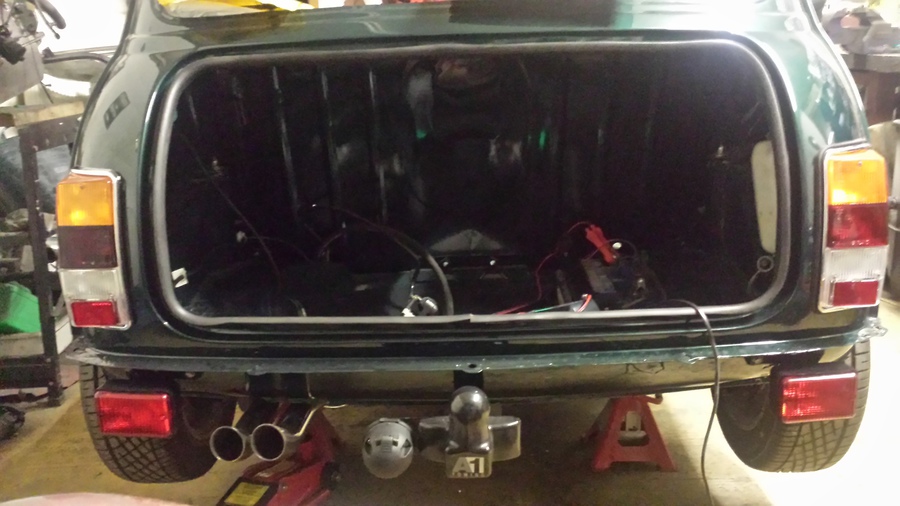
I decide to refit the rear lights next. I pull the new passenger side rear light out of the box and go to install it, only to find that the rubber seal that goes between the light and the body is the wrong one, it’s the seal for the drivers’ side. So I go and fit the drivers’ side rear light, at least this one has the correct seal. But things don’t go well, I don’t have the correct nuts to secure the rear light to the body. Oh well, that seem to be just how my day is going. I go to fit the rear fog lights next, only to find I don’t have the correct nuts for those either.
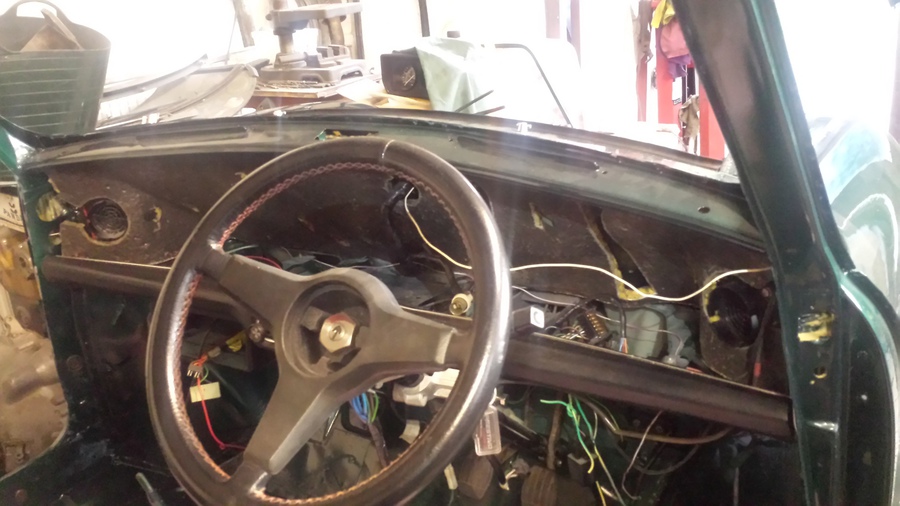
So, with a lack of the correct parts for the rear lights, I decide to re-install the sound deadening pad to the front baulk head. This would have been much easier if I had remembered to install it before re-fitting the wiring loom. I end up installing the pad from the passenger side, folding the drivers’ side of it in half and threading it behind the wiring loom. I put the tags through to hold it in place. That job is now done.
Then I re-install the windscreen vent pipes. These just use screws to hold them in place. Next I refit the board base for the front parcel shelf both sides, re-install the dash material and the face vents. I also install the new switches into the A posts for the interior light. The new switches have different connectors than the original ones so I clip them off and fit female spade connectors, connect the new switches and secure them in place with new stainless steel screws.
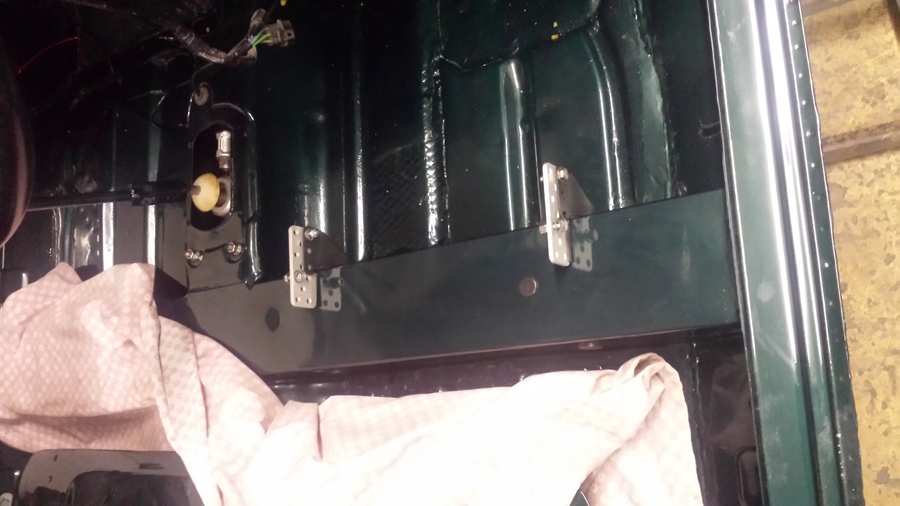
I bought seat adjuster brackets to allow me to get the drivers’ seat a bit further back. To prevent them damaging the paint on the cross member, I put a piece of rubber edge strip between the brackets and the cross member and bolt them in place.
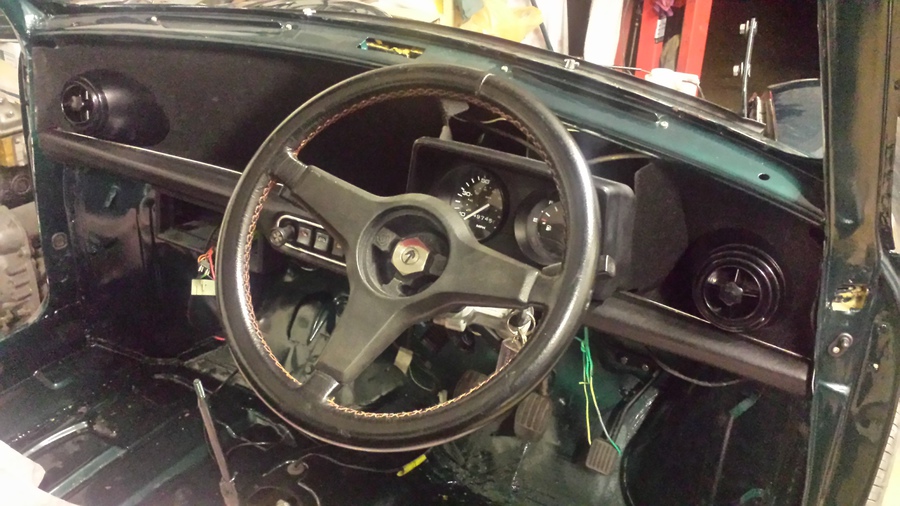
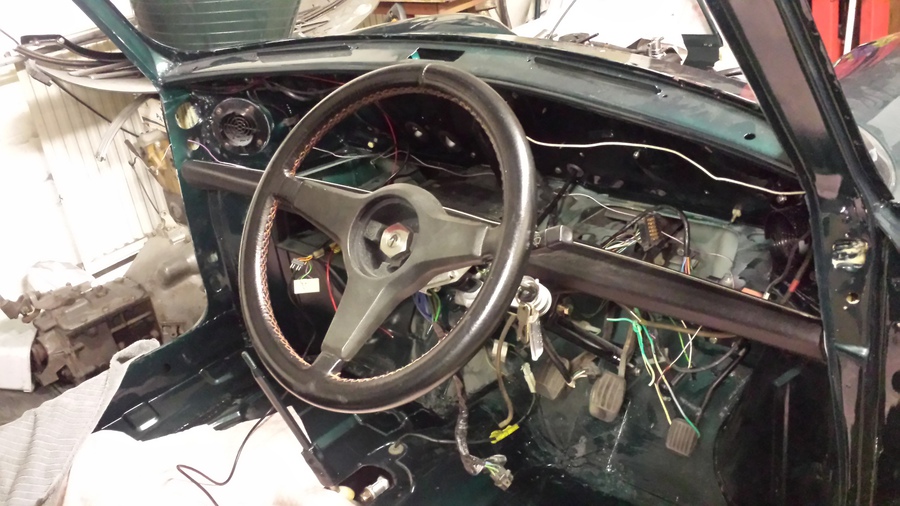
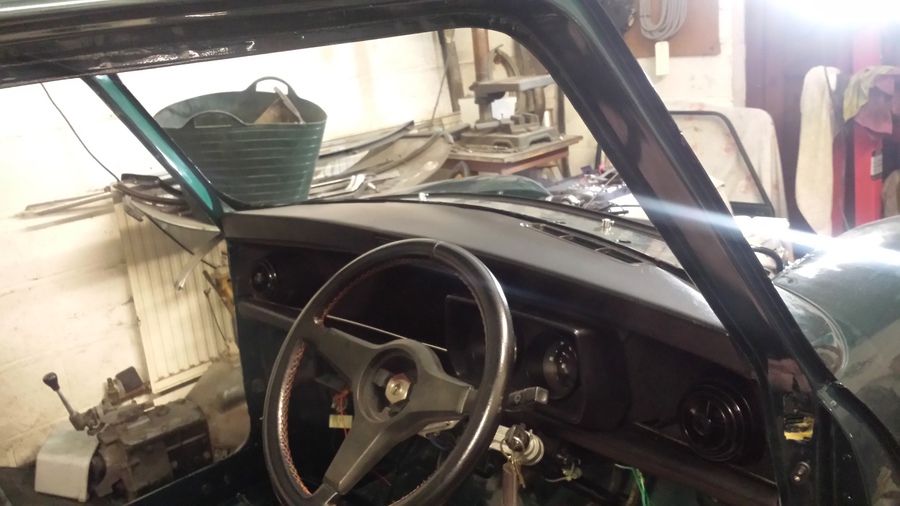
Last job today is to install the instrument cluster. This is more difficult than it looks. I get it into more or less the right position then connect the plug for the electrics, then the speedo cable. Then I get the bolts from the mounting brackets through the baulk head, which takes a bit of manipulating before they are in place. I then secure it with new stainless steel nuts and washers.
Well it’s now getting late so I clean up the workshop and make my way home.
Sunday, 03 January 2016
First job today is to call in at Halfords and pick up some small stainless steel self tapping screws to secure the chrome headlight rings, I did mean to do this when I went out the other day to pick up some more stainless steel nuts and washers in metric for the fog lights and rear lights. When I get to the workshop I make a start fitting the lead light buckets, the headlight buckets are the original ones that have been cleaned up, I have to do some repairs to them as they have been bent a bit out of shape even though they are plastic ones. To sort this issue out I warm up the plastic very carefully and bend the headlight bucket back into shape, with that task done on both buckets I start to mount them in the wings. I remove the inside piece from the headlight bucket to make it a little easier, I then use some new stainless steel bolts and washers with nylocs to secure the buckets. I then put the inside pieces back in, connect the headlights and secure them with the chrome rings and the new stainless steel self tapping screws I picked up earlier. Then I finish the headlights off by re-fitting the outer headlight rings and secure them with a little bit larger stainless self tapping screw.
Next I install the rear fog lights, the plastic sleeve over the cables has been folded in the packaging so to straighten them out I stand them in front of my fan heater for a little while to soften it up. While they warm up I prepare the new grommets, all I need to do to them is make a hole in the middle for the wiring to go through, I do this using my battery drill and drill bits. Now the plastic sleeve has warmed up I straighten them out ready to install them, I thread the wiring through the hole in the mounting bracket then thread on the grommet. I them thread the wiring through the holes in the rear valance and the boot floor, then pulling the excess wiring through into the boot, tidy the amount of wiring between the fog lamp and the body then secure them in place with stainless steel washes and nuts.
I then re-install the top dash pad, there is nothing between the mounting points on the back of the top dash pad and the top dash rail so I use a little bit more of the draught excluder to make a gasket to stop the top dash pad taking the paint off the top dash rail. Then I simply use some new stainless steel washers and nuts to secure it in place.
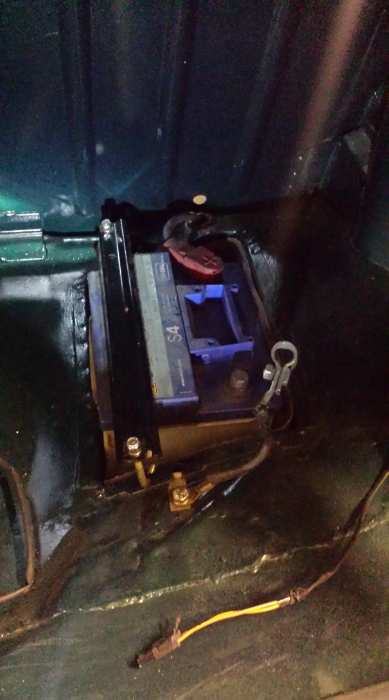
Matthew had some rubber matting kicking about in the workshop, as he isn’t going to re-use it I make a liner for the battery box, I then re-install the battery. Next I re-fit the live battery cable then the negative, but I don’t tighten the negative as I will leave it disconnected when I have finished for the day. New Sasha has some power I can do some testing of the electrical systems, I connect up the front indicators and test each direction and the hazard light switch. I have a minor problem with the near side repeater, this is fixed by cleaning the connections inside and re-fitting the bulb. Next I re-connect all the headlight wiring, I then test the side lights, dip beam and main beam as Sasha is fitted with a dim dip system I also test to make sure this is working. I turn on the side lights then turn on the ignition, the lights come on onto dip beam. While I am testing I test the rear fog lights, at first these don’t come on but I realise what I have done and that is because the rear light are not fitted the earth for the rear fog lights is not there, I temporarily connect the two earth wires and they come straight on. I then test the side light wiring, reversing light wiring and rear indicator wiring all using my multi-meter.
That’s all I have time for today, I disconnect the battery earth, clean up the workshop, empty the bin that is getting a bit full and make my way home.
Sunday, 10 January 2016
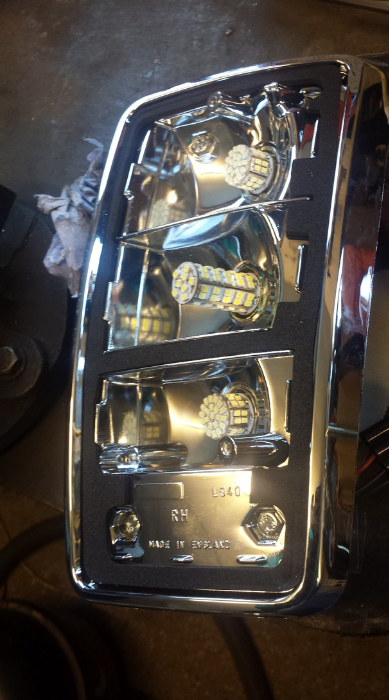
This morning I start off by preparing the rear lights for installation, some time ago I bought some LED bulbs through eBay so I remove the lenses from the rear lights, remove the original bulbs and then install the LED ones. The drivers’ side one goes back together just fine but the passenger side top lense section doesn’t seem to fit quite right, to remedy the situation I remove some of the plastic from around the screw hole to allow the top section of the lense to fit a bit tighter.
Next I install the drivers’ side rear light, this sounds really easy and it should be, but this takes me the best part of three hours. I just can’t get the rubber seal that goes between the lamp unit and the body to sit properly, when I try to pull the top section into place the bottom pulls up, if I tighten the nuts up to hold the seal in place it’s ten too tight to pull the other part into place. I have a chance of plan and up the seal in front of the fan heater to soften the rubber a little, I then carefully stretch the rubber a little then I refit the rubber to the lamp unit and hold it in the right place with some small bits of masking tape trying to only put the minimum amount of tape under the seal so I can peel it off afterwards. This seems to be going really well until I try to tighten the nut on one of the bottom bolts and the bolt just turns in the lamp unit. To fix this I have to take the lamp unit back out again in order to tighten the nuts on the back of the lamp unit. Then using the same process as before I re-install the lamp unit again, this time I am able to get it into place without the rubber moving too much, I loosely put to washers and nuts on the back, adjust the rubber seal a bit then finish off tightening up the nuts. While I am still waiting for the replacement rubber seal for the passenger side rear light I install it loosely so I can test the rear lights and connect up the tow bar wiring.

I then connect up the tow bar wiring, this is not easy for me as I am red/green colour deficient, I find it very difficult to see the difference between red, green and brown wires. I end up using my multi-meter to test out the wires to make sure I get the right ones. I follow the wiring diagram that came with the tow bar and eventually get it all connected up and tested. Next I tidy up the wiring in the back passenger side of the boot and clip the tow bar wiring to the side of the rear wheel arch using some sticky pads. I also tape the wiring loom back together where I have had to open it up to connect the tow bar wiring, the tow bar wiring also includes a buzzer to let you know that the trailer lights are working.
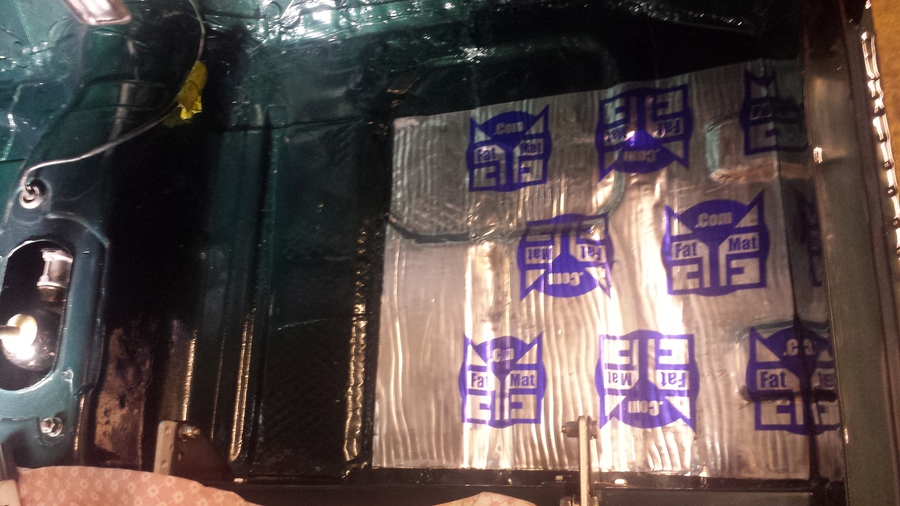
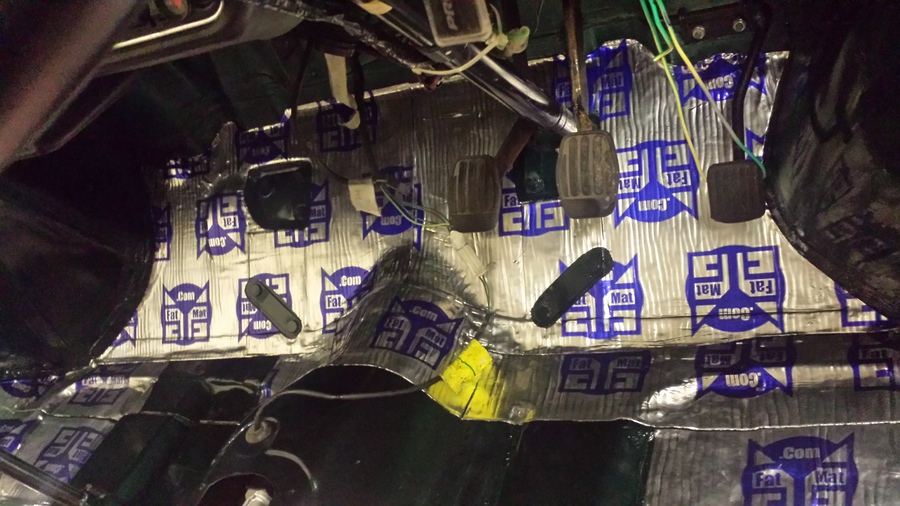
This week just gone I ordered some sound deadening material called “Fat Mat” I am going to use this to replace the sound deadening material that we had to remove during repairs the add some more in places to cut down noise inside Sasha and to help keep it warmer. Before I begin I vacuum the front section of the floor pan and degrease the whole area with some panel wipe on some blue cloth. I then start with the drivers’ side. I make up a paper template, then make adjustments to it then transfer the template to the “Fat Mat”. I cut out the “Fat Mat”, I peel off one edge of the backing of the “Fat Mat” and start to stick it down making sure not to trap too much air underneath, I use a roller that was supplied to help stick it down then I warm up bit by bit to smooth it out some more and the heat activates the glue on the back.
Last job today is to do a corresponding piece on the passenger side, I do this in exactly the same way as the other side.
With that done I clean up the workshop and make my way home.
Sunday, 17 January 2016
I start off today by fitting the near side rear light, the replacement rubber seal was delivered by Mini Sport this week. Just like the other side, the rubber seal keeps moving back when I try to install the rear light, so I remove the two lenses and the foam seal, I use some masking tape to hold the seal in the right place while I get the light unit secured into place. Once I have the nuts tightened up a little I pull the masking tape out and adjust the rubber seal, with the masking tape removed and the seal adjusted I finish tightening up the nuts making sure the wiring earths are connected to the bottom bolt closest to the boot lid. Thee I put the foam seal back in the re-install the lenses.
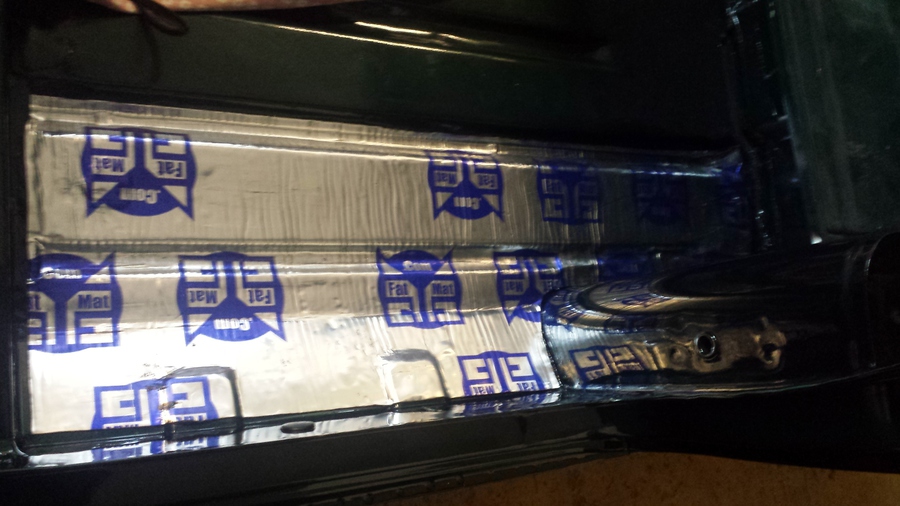
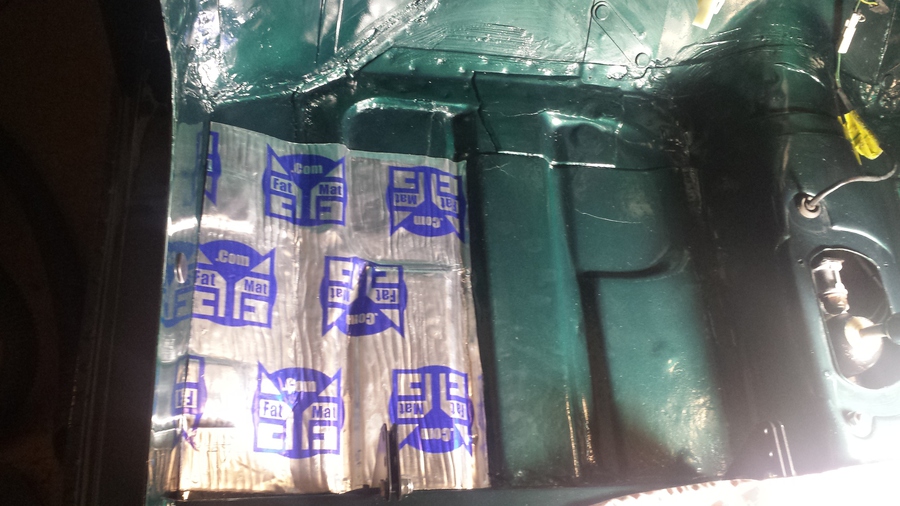
Next I install the sound deadening material on the drivers’ side rear floor, where we made repairs to the floor and put the new inner sill in we had to remove some of the original sound deadening. I make a template using some paper then transfer the template to the Fat Mat, I cut out the Fat Mat with my tin snips. With it being so cold today the Fat Mat is not very sticky so it does make it a little bit easier to install, I use the roller tool to smooth it into place and get it down into the ridges in the floor, I then use a heat gun to soften the Fat Mat for a better fit and the heat activates the glue so it adheres to the floor better.
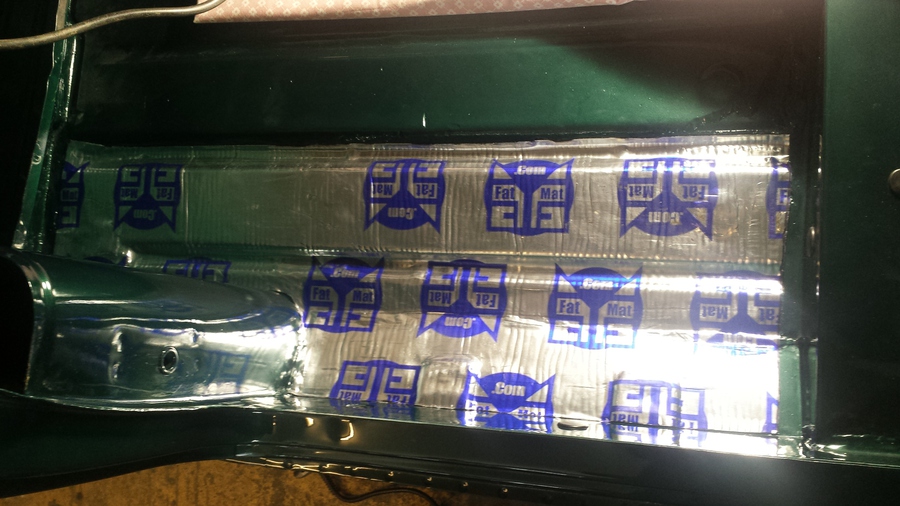
Then I repeat the process on the passenger side rear floor.
I have some work to do on another car today so that’s all I have time for.
Sunday, 24 January 2016
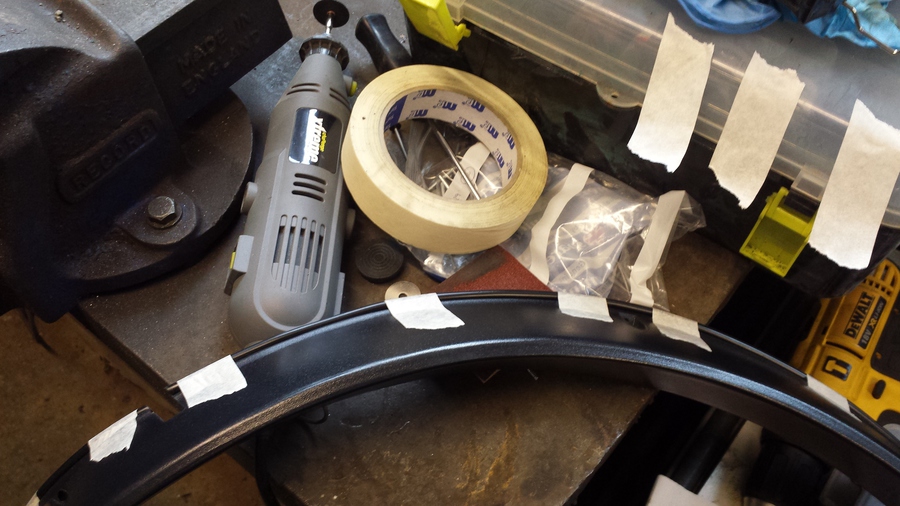
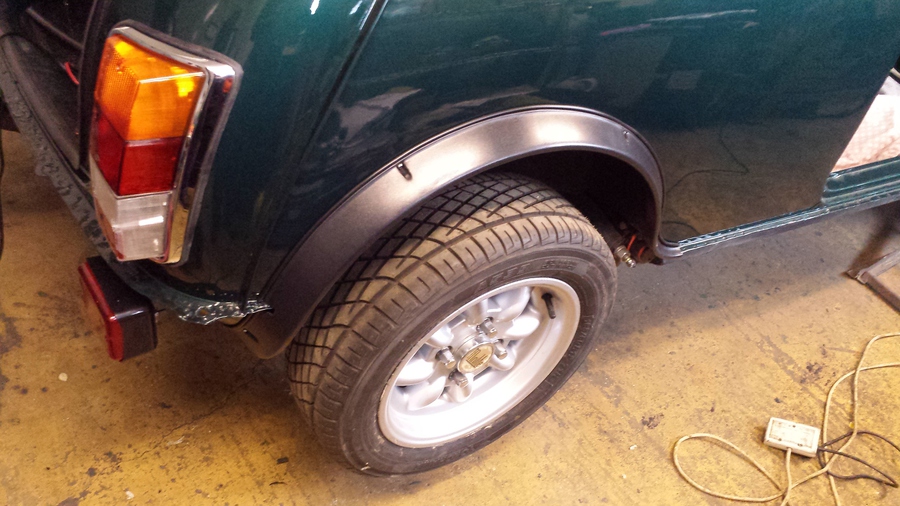
Today I make a start by getting the rear wheel arch extensions ready to install, I bought a rubber trim to go underneath the wheel arch extensions to stop the plastic rubbing the paint off. I use some masking tape to hold the rubber trim to the wheel arch extension so I can cut it to the correct length and so I can make some holes in it where the pop-rivets will go through. I use a 4mm drill bit in my battery drill to make the holes in the rubber trim. I change the masking tape so there is only a very small amount of tape under the rubber trim to make it easy to get the tape out later.
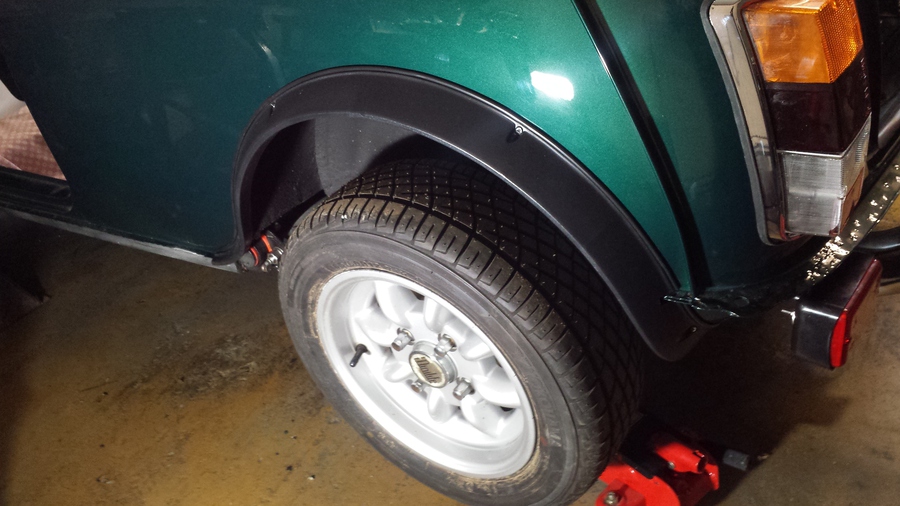
With the trim held in about the right place I put pop-rivets in all the mounting holes and through the rubber trim. I then put the wheel arch extension with rubber trim into the correct location on Sasha then using a little more masking tape to hold the whole thing in place. The pop-rivet gun doesn’t fit into the recesses in the plastic wheel arch extension so I use a slightly cut down top from a spark plug to create a spacer, I pop-rivet the top two mounting first and on these to stop the rivets from pulling the panel out I put some large flats washers over the rivets to spread the strain. Next I make sure the rubber trim is in the correct position and then pop-rivet the front and back mounts into place.
I then repeat the entire process on the other side.
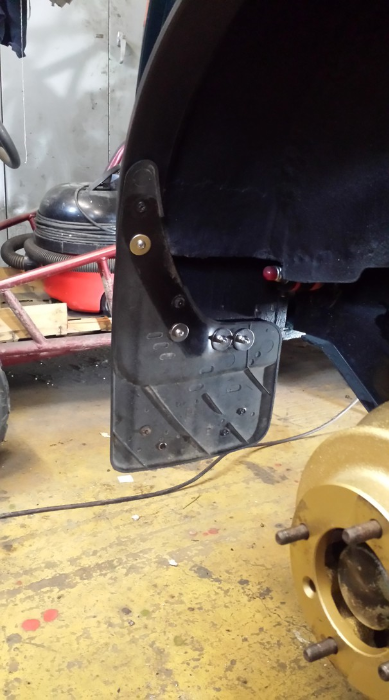
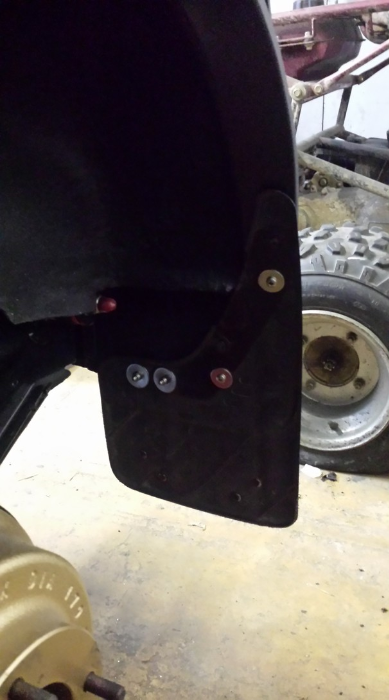
The mud flaps are the original ones that came on Sasha they have been cleaned but unfortunately while trying to get the dirt out from under the Mini badge the push-on circlips all fell apart due to rust, to hold the badges in place I put a stainless steel washer over the post where the circlips were then using a heated screwdriver I melt the plastic over the washer to hold the badge on. Using the original mounting holes I mark the rear valance where I then drill holes for the mounting bolts. I use copper grease to prevent rust in the holes I just drilled, I put the washers on the bolts and put them through the holes from the outside in. I put the mud flap into place over the bolts and put on large flat washers and then nyloc nuts. The other two mounting holes in the mud flap I use self tapping screws and large flat washers, I then go back and finish tightening the nuts and bolts at the bottom.
I repeat the process on the mud flap on the other side.
Matthew wants to clean the engine for his Alfa Romeo Guilietta spider called Bella Rosinetta which has been at the side of the workshop the whole time I have been working on Sasha, so he can do this I need to get Sasha out. So I get her off the axel stands and ramps and push her outside for the first time since before Christmas. Matthew and I get the engine for Rosinetta out of the workshop using the engine hoist.
I take the opportunity to take a few pictures of Sasha outside, the paint looks so different in natural light, it will be nice to see her in sunlight, when we eventually get some.
I have a job to do for Matthew now so I put Sasha back in the workshop and Rosinetta’s engine still on the hoist.
I do the job for Matthew then make my way home.
Saturday, 30 January 2016
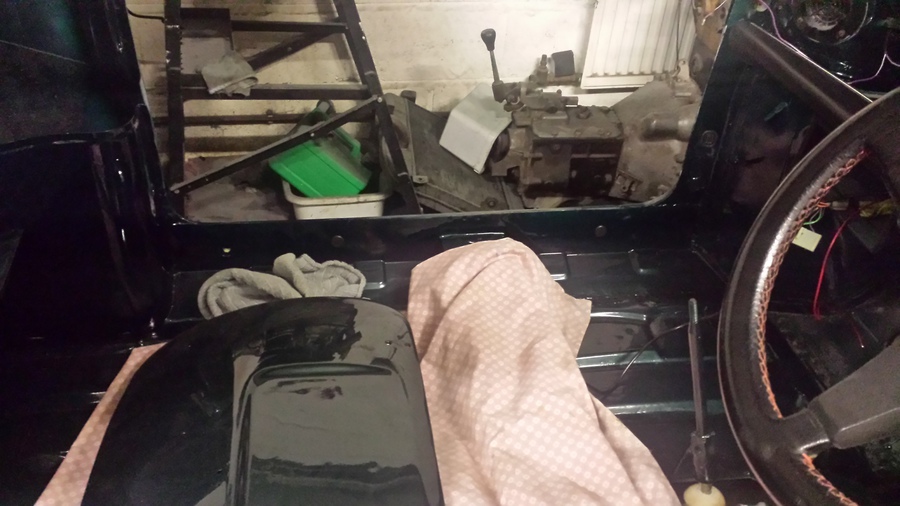
Well I’ve been putting this off long enough It’s time to start looking at the sun roof. I have bought a new headliner for Sasha which came with a new piece for the sunroof but in closer inspection I don’t have the equipment or the skills to change it, also the headliner on the sunroof is in good condition and it is all heat welded to the frame so I decide to clean it and leave it in place. I start by disconnecting the front of the headliner from the frame.
Then I disconnect the rear section of the headliner from the frame.
Next step is to remove the runner brackets from both sides of the frame.

Then I use some hand cleaner to clean the outer part of the headliner and as much of the underside as I can get to.
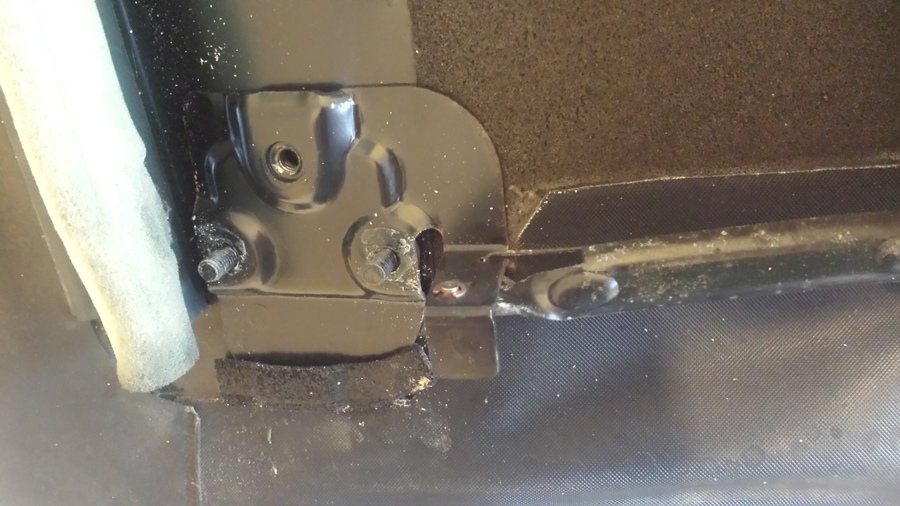
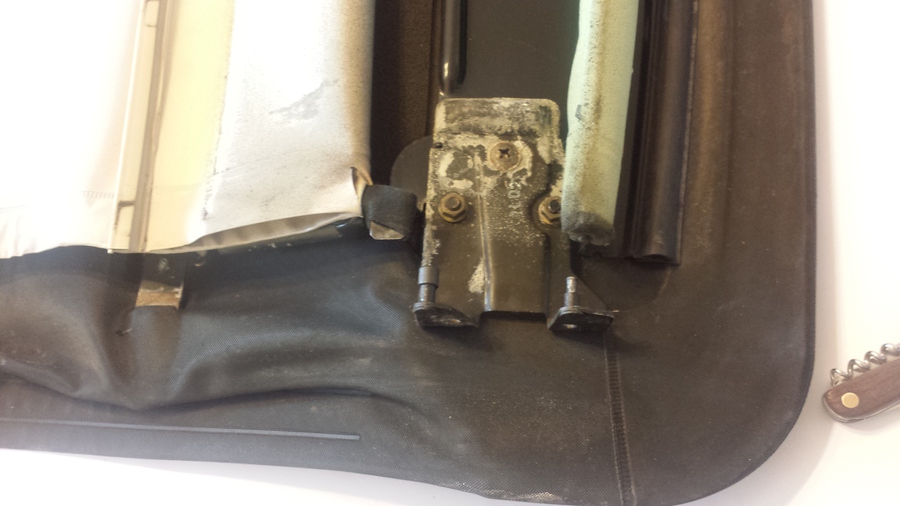
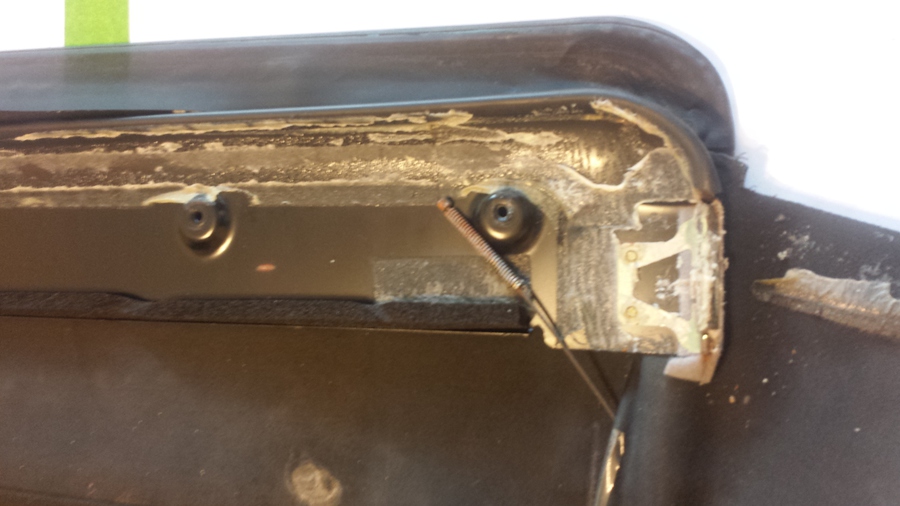
To remove the frame and headliner from the outer cover I need to remove a circlip and a spring from either side of the front section that is fixed to the outer cover.
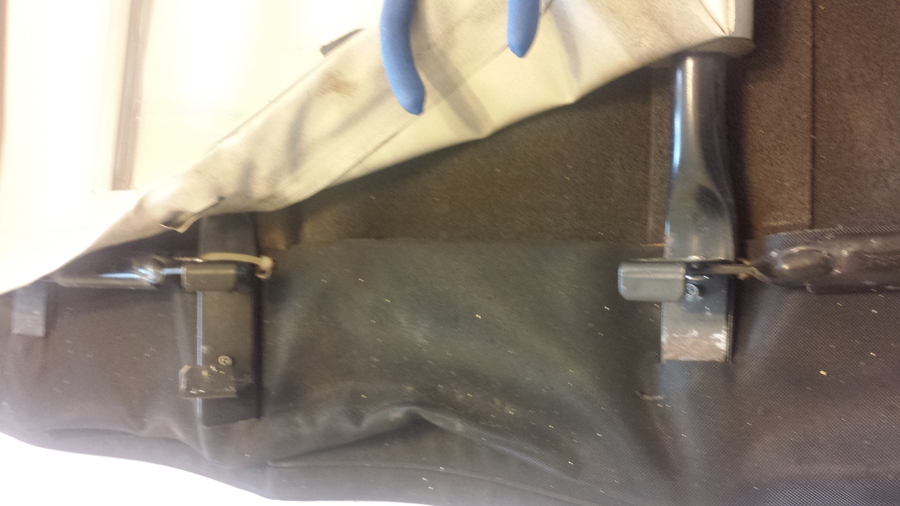
Next I cut all the cable ties that secure the outer cover to the frame on both sides.
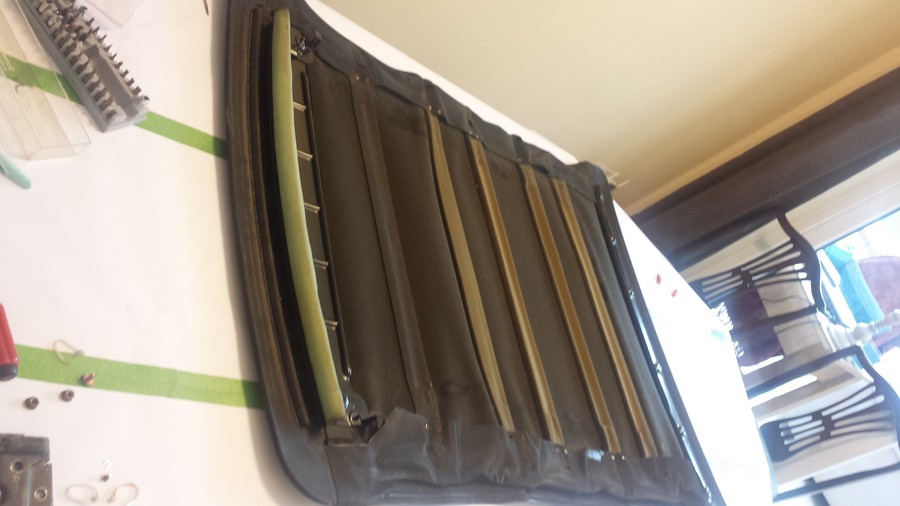
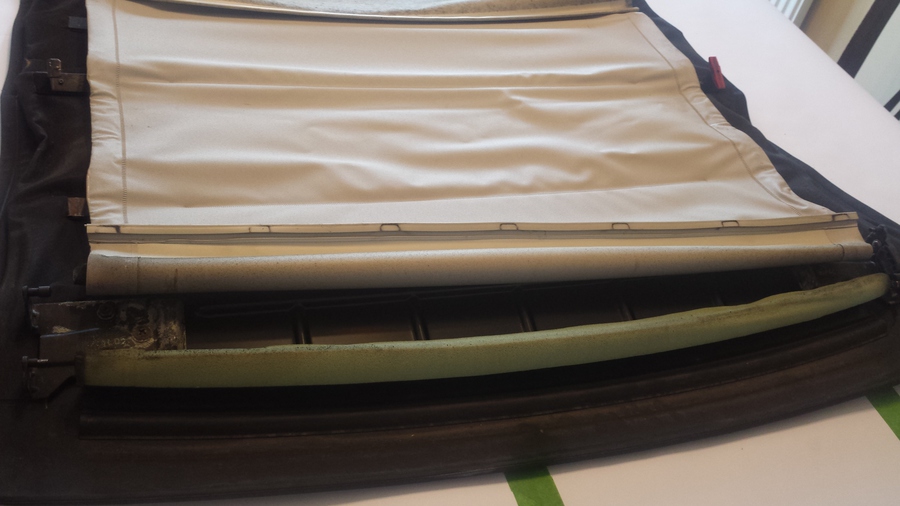
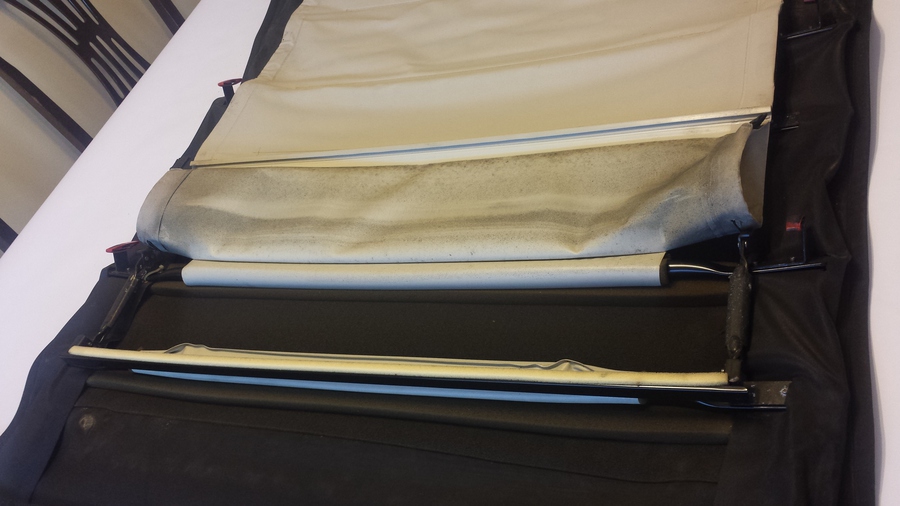
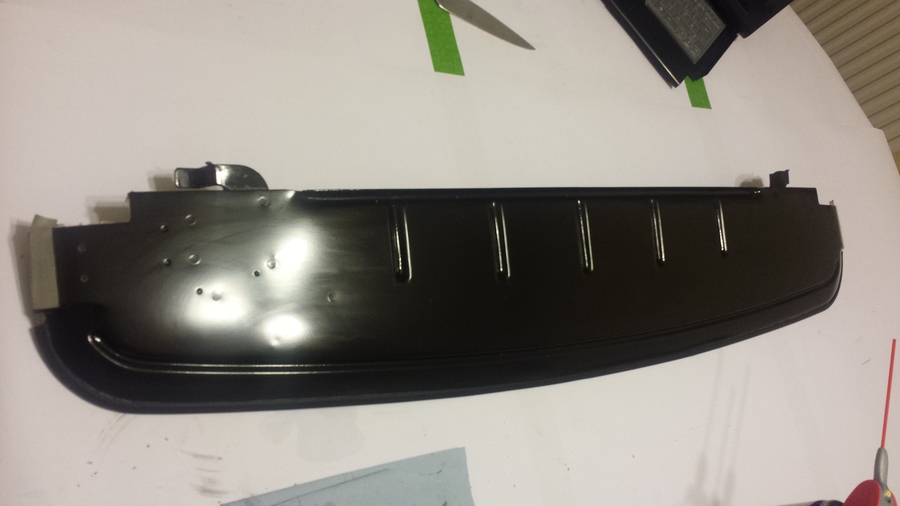
Now I am able to remove the frame complete with the headliner. I clean the underside of the headliner before putting the frame to one side ready for refitting at another time. You can see in this picture the sun roof outer cover with the foam insulation and the foam strips that protect the outer cover from the frame.
Next I pull the outer cover from the rear frame piece this takes some time as there is a fair amount of adhesive holding it in place but only on the inner surface.
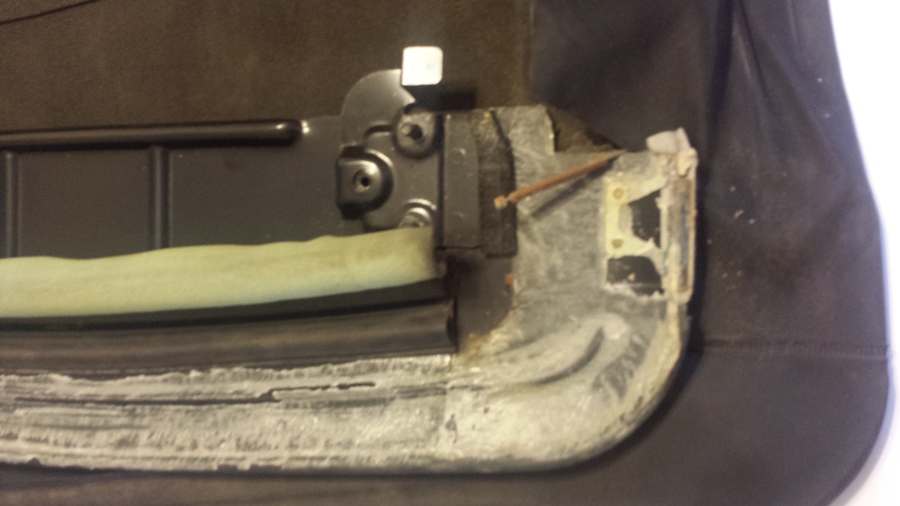
I then start to pull the outer cover from the front frame section this is more difficult from the rear section as the front section is glued on both sides, eventually I get it out.
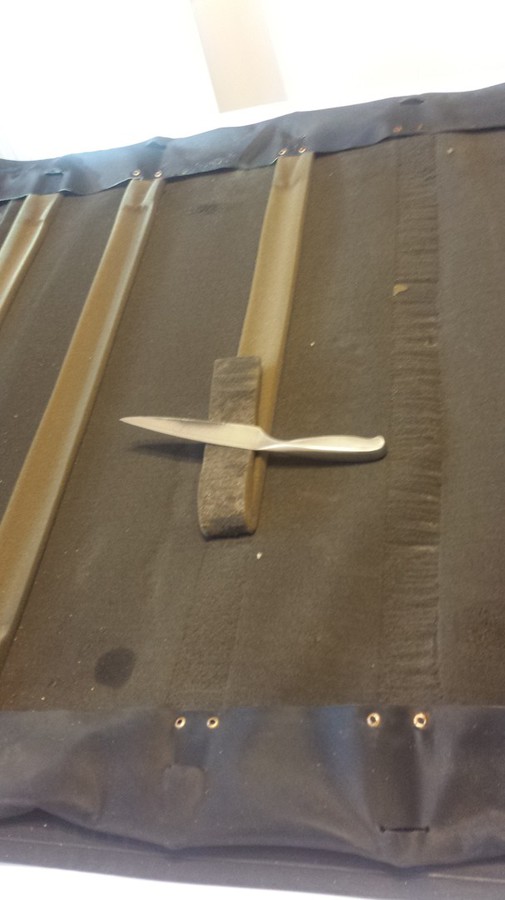
I use a sharp kitchen knife to remove the foam protection pieces from the old outer cover so that I can use them on the new outer cover.
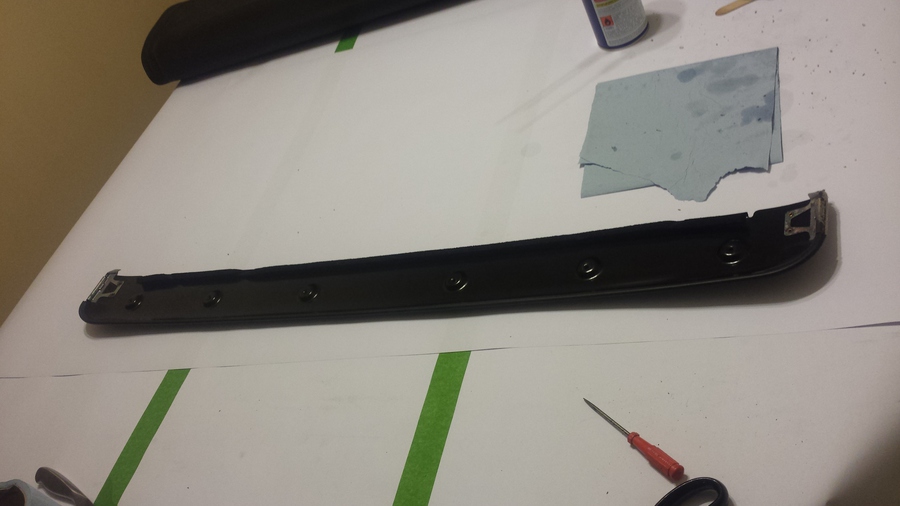
I use WD40 to break down all the glue on the rear frame section to I can scrape it off, this takes quite a lot of time as it’s not just glue it seems to be a heavy duty double sided tape.
I then use the same method to clean the inner and outer sides of the front frame section.
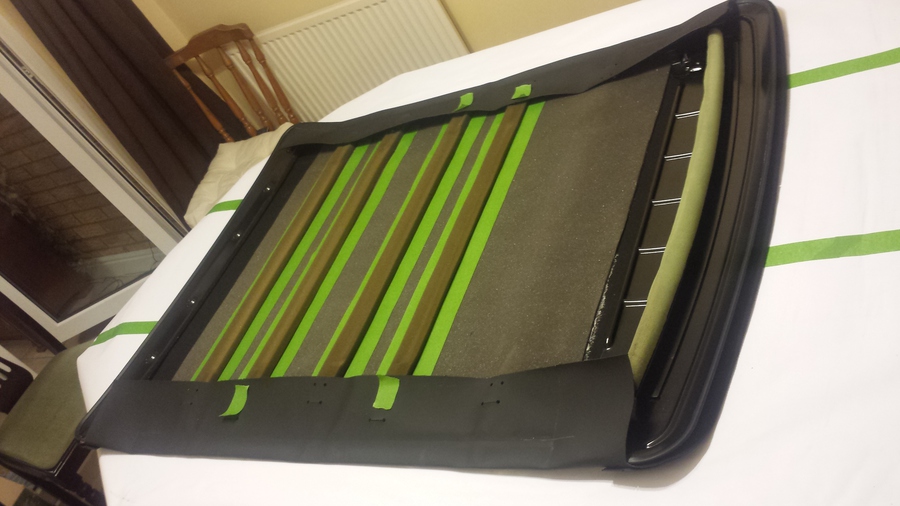
It’s now getting quite late, so last job tonight is to use some masking take to layout where the foam protection pieces will be glues to the new outer clover for the sunroof.
Sunday, 31 January 2016
I made a visit to Halfords yesterday to pick up some spray glue for the sunroof while I was there I picked up some stainless steel round head screws and nuts to replace the ordinary steel ones that hold the wind deflector on. The screws are too long so I use my rotary tool with a cutting disc to cut them down to the right size.
Next I refit the wiper mechanism, I test it first as there was some wiring issues with it when I removed it, and it looks like I still have an issue as it doesn’t work. I check out the wiring in Sasha and everything seems to be in order, I investigate further and get the motor to run but it seems to be running very slow and on the normal speed it stops halfway through the cycle. I strip the top of the mechanism and there is some old grease in there that might be causing the issue so I remove the gear from the mechanism to find the issue, the shaft the gear runs on isn’t lubricated and has some rust on it, I clean out all the old grease, rub down the shaft with some fine wet and dry paper, grease it up with some new grease and test it again. It works a bit better this time although the park switch isn’t working, this turns out to be a bad connection, I adjust the plug and it starts to work ok, I’ll have to keep an eye on this. I then put it all back together and prepare to install it back in Sasha. I maneuver the wiper motor into it’s space and align the wheel boxes into the right location, I then rotate the wheel boxes so that the arm comes through the scuttle panel, I then put the plastic piece over it and secure them with the chrome nuts. Lastly I put the rubber block under the wiper motor and secure it in place with the U bracket and new stainless steel screws, I then test before replacing the plastic cover over the wiper motor.
I them spend the next few hours continuing to install the sound deadening material onto the floor of Sasha. I tackle it in relatively small pieces making a paper template then transferring the template to the FatMat then cutting it out.
That’s all I have time for today, I clean up the workshop and make my way home.
We are located at:
Market Harborough
Leicestershire
Contact us
If you would like to contact us:
rod@howitt.org.uk
abi@howitt.org.uk
sasha@howitt.org.uk
Or use the contact form.