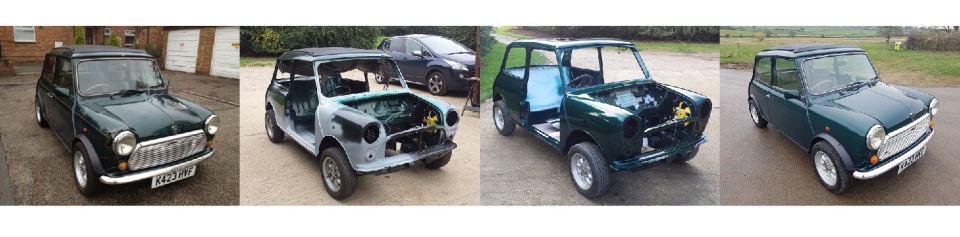
Timeline 13 April to 26 June 2014
This is a timeline of the work that has been done on Sasha
Sunday, 13 April 2014
It Begins
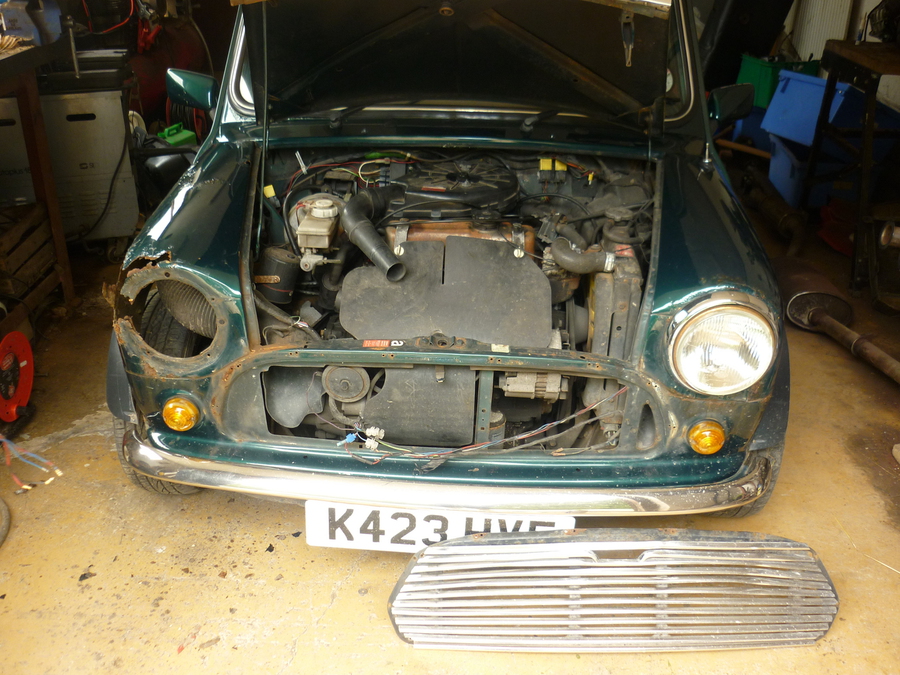
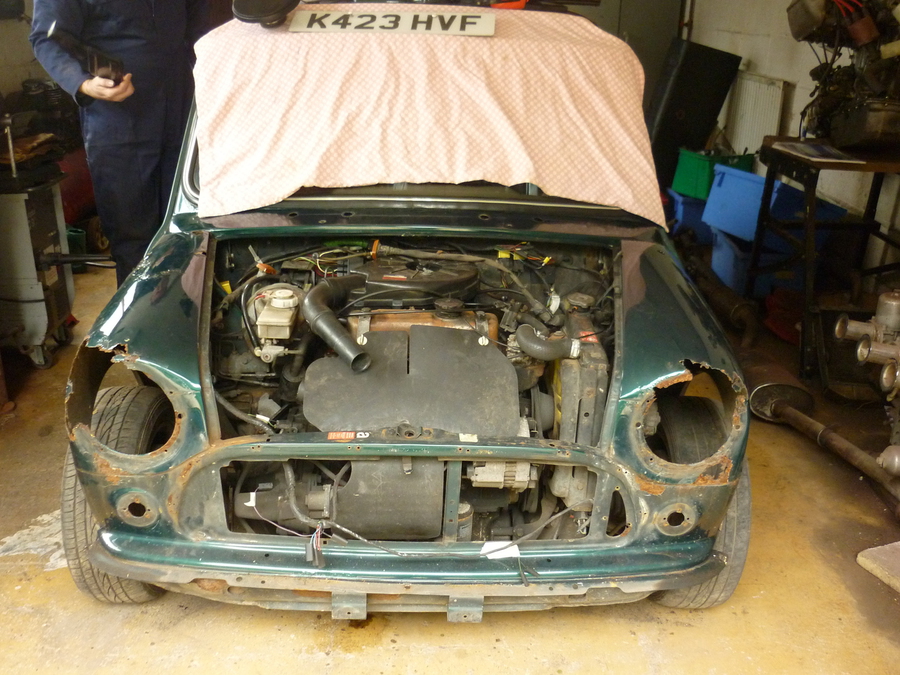
So the work begins, we get Sasha over to Sweethedges Farm and into the workshop.
Time to start some work and assess exactly what we need to do and what we can safely leave. Our intention is not to build a show car, but to build a good reliable everyday car for Abi.
Taking out a headlight is normally quite an easy job, not on Sasha. The screws were all rusted in, and the chrome pieces holding the light unit in were beyond use, rusted all the way through in places, more parts to add to the list.
The grille came off easily, some of the screws were loose and some were missing. The grille needs to be replaced as it is damaged, but luckily someone gave Abi a new grille for her birthday back in January, that leaves just the side pieces and the bit across the front of the bonnet to add to the parts list.
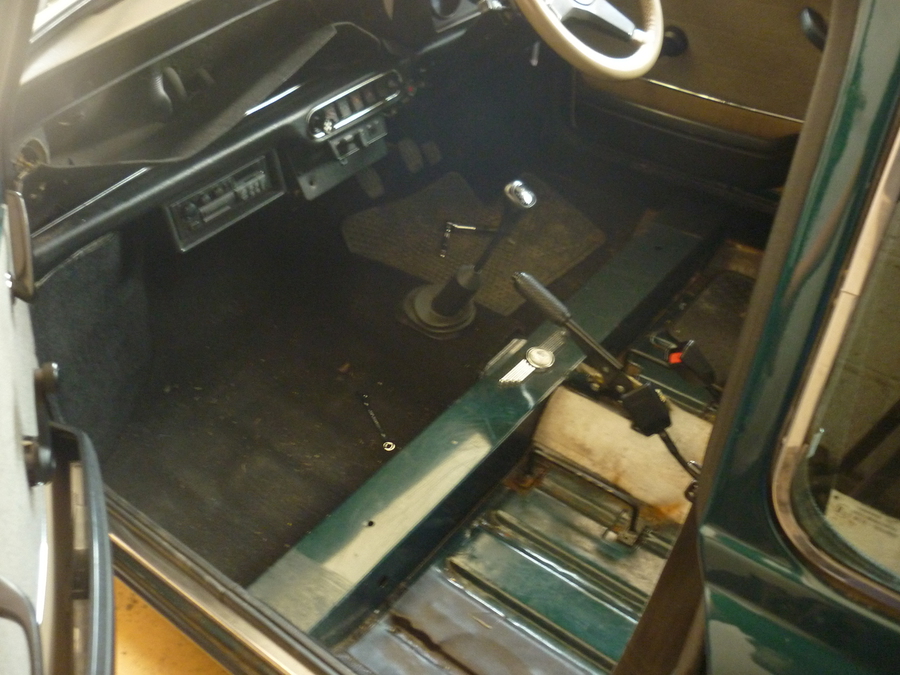
While I am taking the front of Sasha apart Abi is busy taking some photographs as a record of our progress and so we will know how to put everthing back together again.
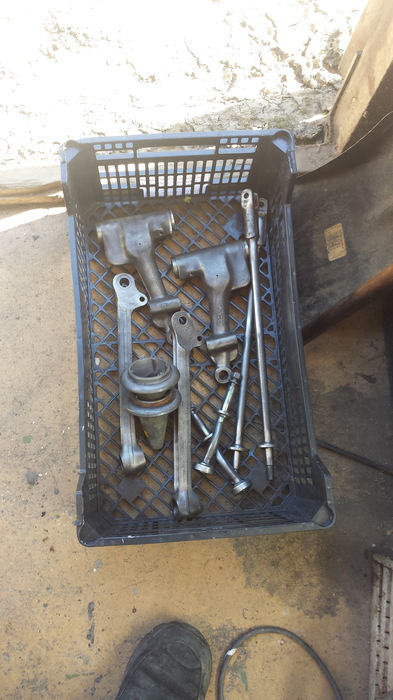
After taking pictures Abi is removing the interior.
By the time we are finished for the day, the font end of the car has had all the lights removed, the grille and number plate. Also the wheel arch extentions have been removed all round and Abi has most of the interior removed. The interior ends up in the back of my car ready to take home be cleaned and have any damaged repaired ready to be refitted.
Abi's bedroom is going to end up being additional storage space for parts of Sasha the have been taken off.
As the sun starts to fall we clean up the workshop, load up the car, close the workshop doors and head for home.
Sunday, 20 April 2014
Start the strip down process
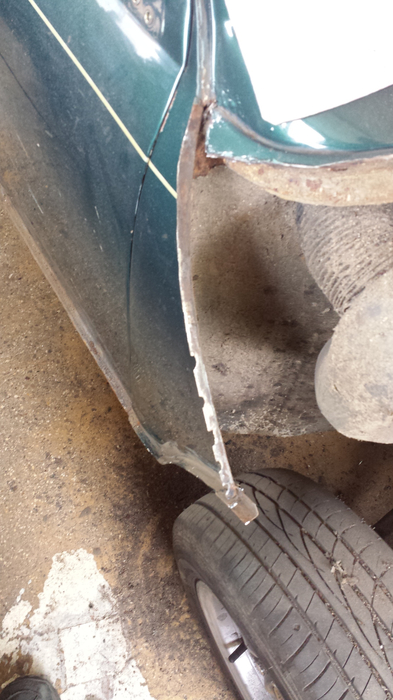
We have already removed most of the exterior trim ready to start cutting off the rusty wings. Firstly get the bonnet out of the way and try and find somewhere to keep it safe.
Removing the wings from a Classic Mini is not a difficult job, but it does depend on what you are trying to keep. At this stage we are going to replace the wings and the front panel, the front panel is not too bad and would still be serviceable, but there is a good amount of rust in it so we decide to replace it.
Firstly I remove the seam covers, being particularly careful not to damage the bodywork while prising them off the clips that hold them on. One way I found to do this is to use a piece of cardboard under the flat blade screwdriver against the body and just prise the seam cover up working from one end to the other.
Next, out with the angle grinder fitted with a metal cutting disk. As I want to preserve the A panel I cut into the wing at least 5mm away from the seam between the wing and the A panel. I don’t want to damage the inner wing so I cut along the top edge of the wing, I can always cut more off later rather than having to fix cuts in the inner wings made by careless use of the grinder. Then I cut along front of the wing between the headlight and the front panel, I know I am replacing the front panel but I would rather cut the wing off as if I was preserving the front panel as well. Lastly I make a small cut with the grinder between the cuts already made by the A panel seam and the wing to inner wing seam. Now the old wing is free and can be added to the scrap pile.
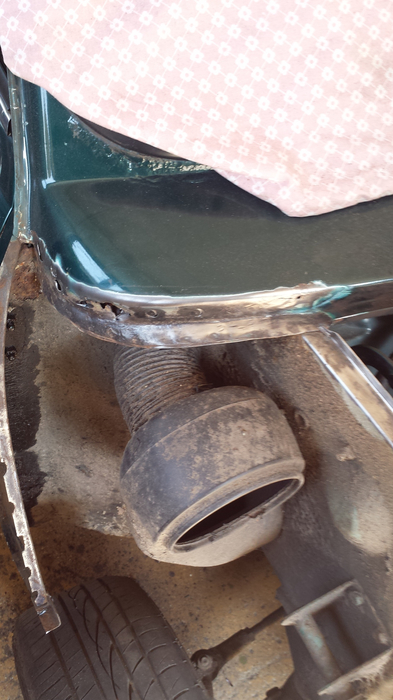
Under the wing on the drivers’ side are the large pipes for the heater and fresh air vents, I had already removed these so they didn’t get damaged. I just needed to be careful not to damage the wiring for the side repeater. The bracket that holds the ventilation pipe had already rusted away to nothing so this is going to have to be replaced later.
We repeat a similar process for the wing on the passenger side, and with a little help from Abi that wing is also added to the scrap pile.
Under the wing on the passenger side you will find the fresh air vent pipe and on the British Open Classic there is also the charcoal filter canister for the emission control system along with the electric cooling fan and side repeater. When I removed these items earlier I noticed that the vacuum pipe ends were mostly broken and the fuel system breather pipe was split, these will have to be sorted when it all goes back together.
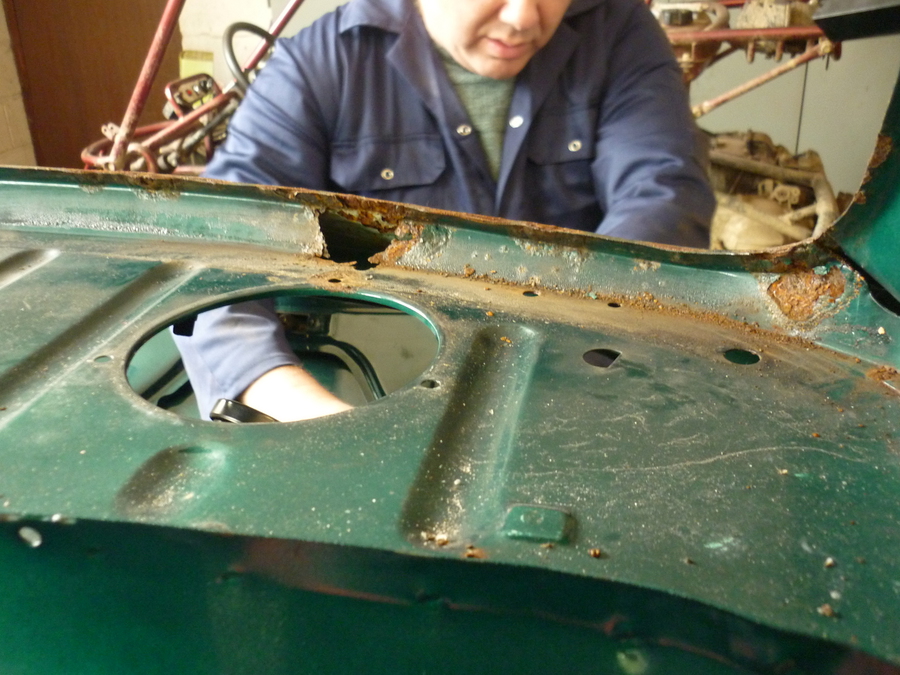
Abi and I spend the rest of the day removing the rear side windows and rubbers, the rubbers will need replacing as they have gone hard and started to shrink, we also remove the rear window and rubber, this rubber will also need replacing as it too has gone hard and shrunk, a previous owner has added a little bit of extra rubber to make up the gap. This is no doubt the reason why the rear window has been leaking. Once the speakers and parcel shelf trim were removed you can see in the picture the damage caused to the parcel shelf. This will be another job to look at later, although I have seen this damage on other Mini’s of this age I have never seen it repaired. I remember seeing another Open Classic at Stamford Hall and that had exactly the same damage in the same place and had been left as a hole and painted over.
Well that’s it for another day, Abi and I clean up the workshop, close the doors, lockup and head for home.
Sunday, 27 April 2014
When the bumpers were removed all six bolt broke off despite using lots of WD40, so the first job today is to remove all the broken bolts from the bumpers. As the bumpers are the later Rover stainless ones, these will be re-used. By some careful drilling the bolts are all out, these will be replaced with some stainless steel ones when it comes time to refit them. For now I have put some cad plated ones in there in case I need to test fit them for any reason.
Next it’s time to clean up the seam on the drivers’ side A panel. This was done by carefully grinding off the material from the old wing. As the A panel had been replaced before this seam had some runs of MIG weld along it instead of the factory spot welds. It was nice to see that the small stiffening piece between the wing and A panel had been left in place, almost every time I have done this before these have not been left in place or put back in. So I also leave it in place ready to re-use it when I put the new wing on.
Continuing on, I cut off the extra metal on the seam between the wing and inner wing, leaving just the flat piece spot welded to the inner wing. I then use a spot weld cutter on all the spot welds joining the panels together, taking great care not to go too deep, I don’t want to damage the inner wing, some damage is inevitable though. This process takes some time, when complete I then grid off what is left of the spot welds ready for fitting the new wing.
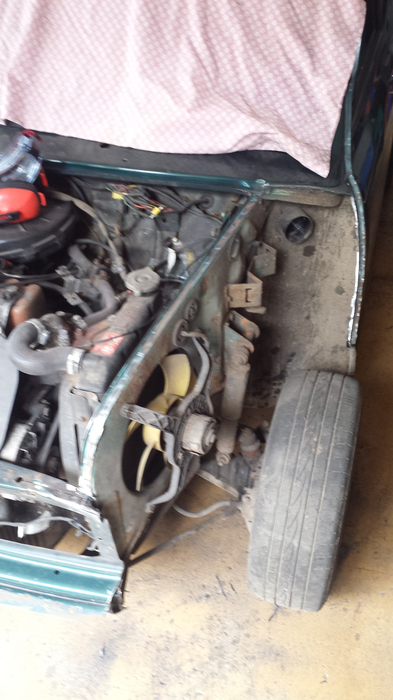
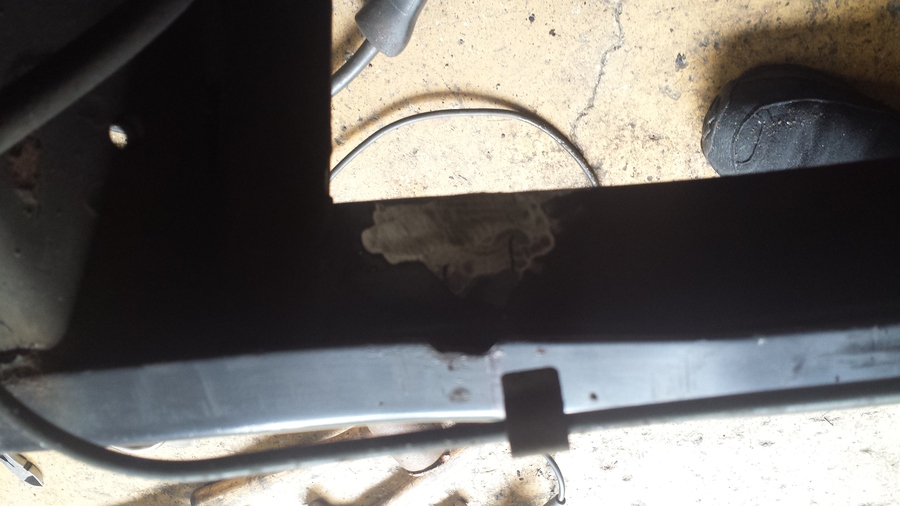
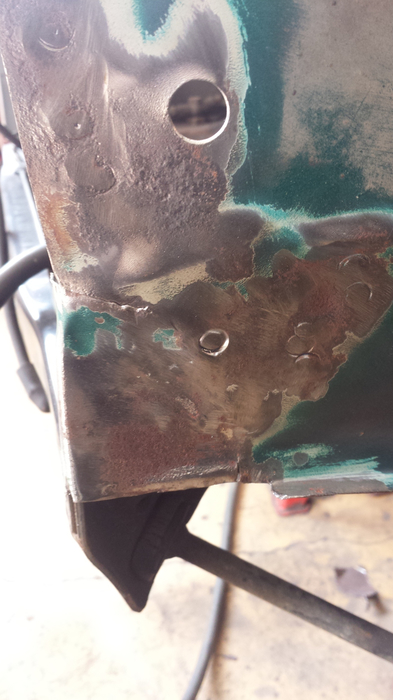
As you can see from the picture there is two stress cracks on the inner wing by the shock absorber mount. This has been caused by poor maintenance. Sasha has less than 50,000 miles, and looked like it had been well maintained judging by all the receipts for work that came with it. The front sub frame mounts are all shot, the front ones are completely separated and someone has just put big washers on them to hold them together, but they are still moving. The rear mounts are also both separated, this is allowing excessive movement in the sub frame and has caused this damage. Another thing that will need to be fixed before the new wing can be fitted.
Carrying on, I cut the ends off the front panel. Every time we walked past we kept catching ourselves on it, plus it will make it a lot easier to cut off the front panel later. I do the same to the passenger side as the drivers’ side to clean up the A panel and the inner wing ready to put the new wing on.
I have noticed on the passenger side as well that there are two stress cracks in the inner wing, on this side they are only about 20mm each. Still a product of poor maintenance, on Classic Minis’ front sub frame mounts should be checked regularly, they can be a source of noise and can cause poor handling not to mention stress cracks in the inner wings.
Last job of the day is to remove what is left of the front panel. There are four tabs on the back of the front panel, these are spot welded to the inner wings to hold the front panel in place. There are also two runs of MIG weld that are located either side of the bonnet slam panel.
I use a cutting disc in the grinder to cut off four tabs from the back of the front panel, then also using the cutting disc, cut the front panel away from the inner wings at the top. This leaves the front panel held in place only by the bolts holding the front tear drop mounts. Once these bolts are removed my suspicions are confirmed, both front mounts are dead, and by the amount of rust where there should be a rubber joint, they have been for some time. More to be added to the parts list.
Running out of time to do anymore today we clean up the workshop, close and lock the doors and head for home.
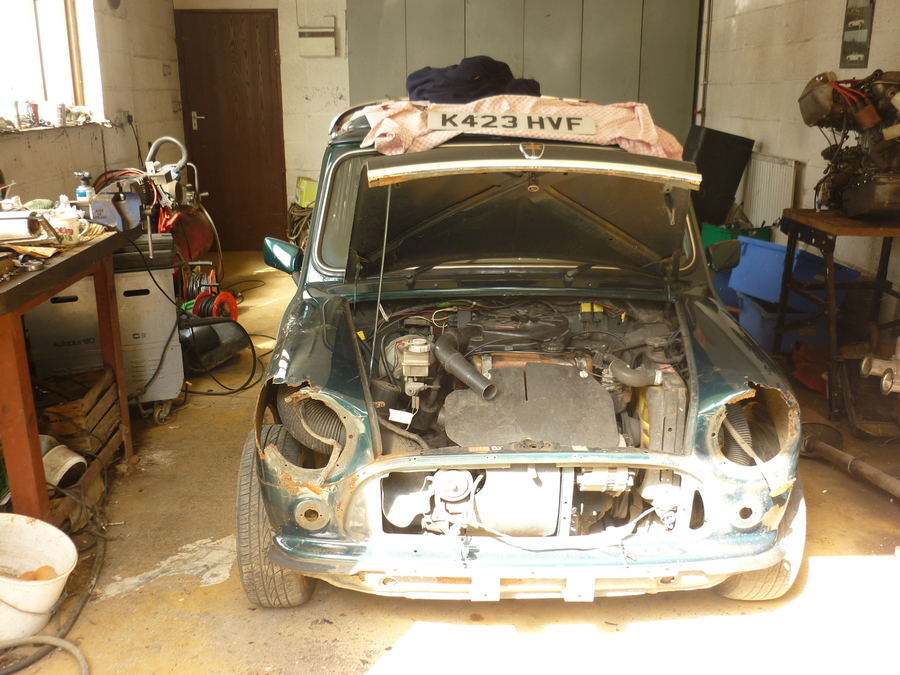
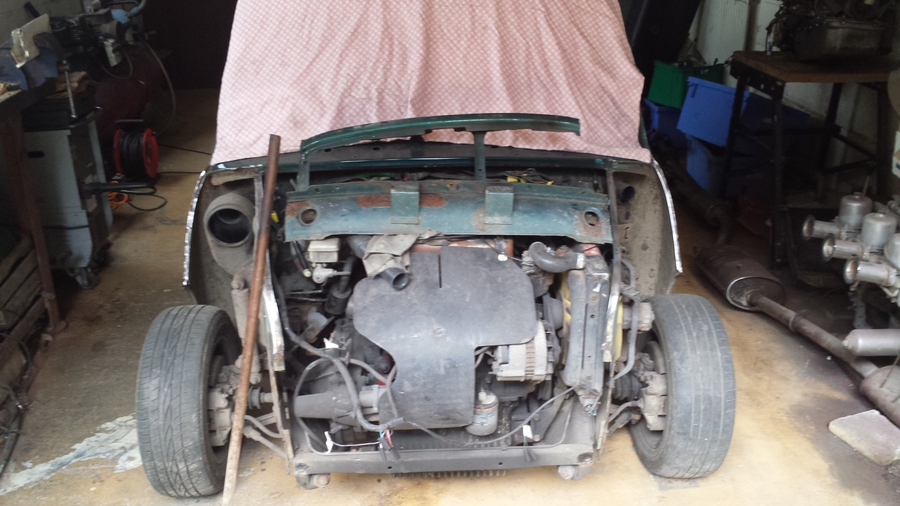
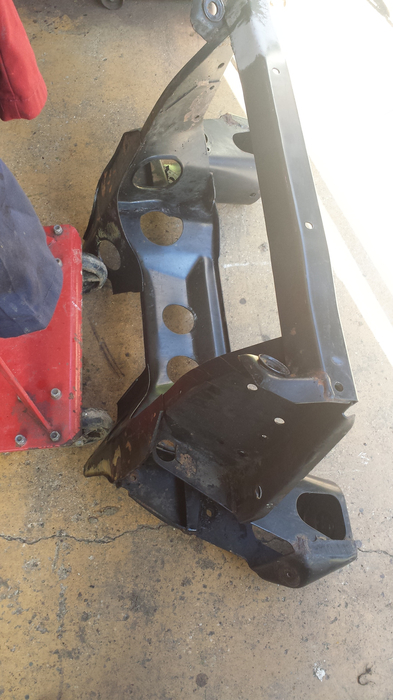
Sasha is looking very sad now with no bonnet, wings or front panel.
Sunday, 4 May 2014
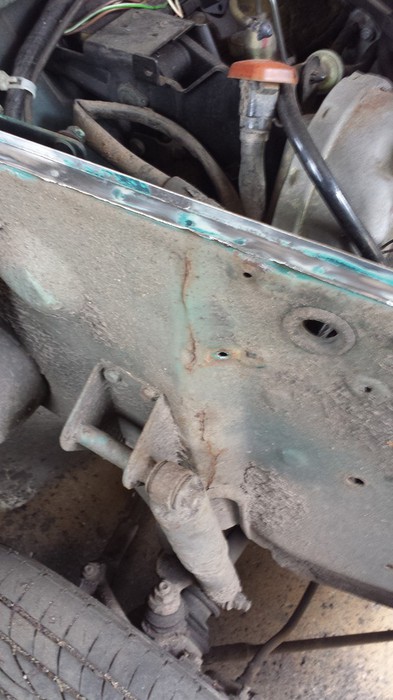
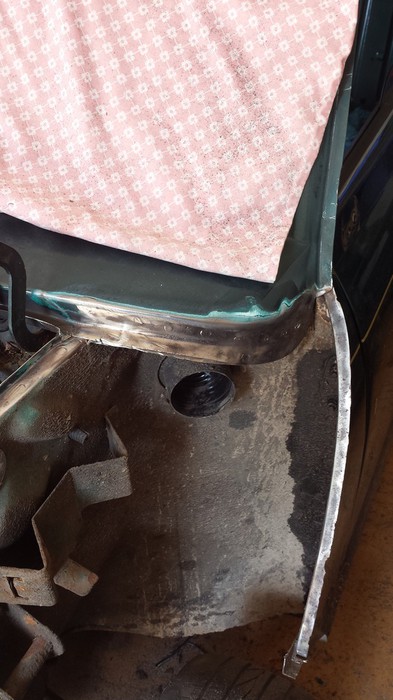
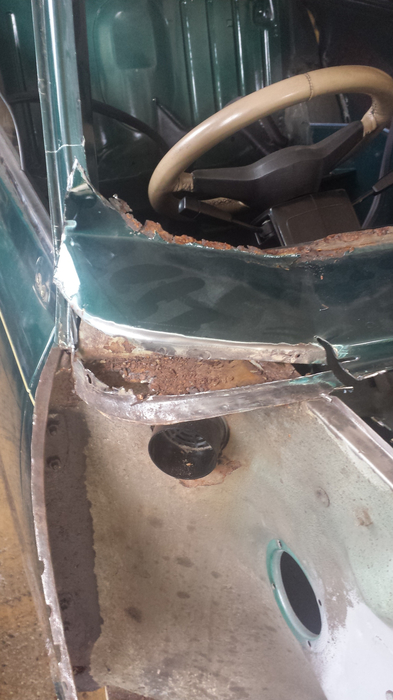
Starting the day’s tasks by dressing the seam between the wing and the scuttle panel on the drivers’ side. This was done by using the spot weld cutter to break the spot welds the clean up the corner of the scuttle panel. There is a fair amount of rust in the corner of the scuttle panel and as you can see from the picture there is some rust bubbles under the window rubber. At some point the front windscreen will have to come out to deal with the rust there.
After removing the remnants of the wing from the scuttle panel on the passenger side, the scuttle panel doesn’t look to bad this side. Maybe I’ll get away with fixing it instead of replacing it.
Using the spot weld cutter and the grinder I remove the remnants of the tabs of the front panel from the inner wing on the passenger side. In a couple of places I have gone a bit too deep with the spot weld cutter, so I will have to go over those with the MIG welder later. There is also a small split in the inner wing where the bottom tab has been flexing, this will need to be MIG welded over as well.

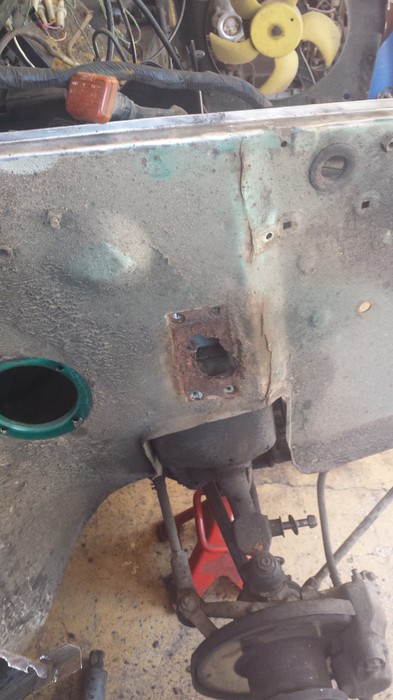
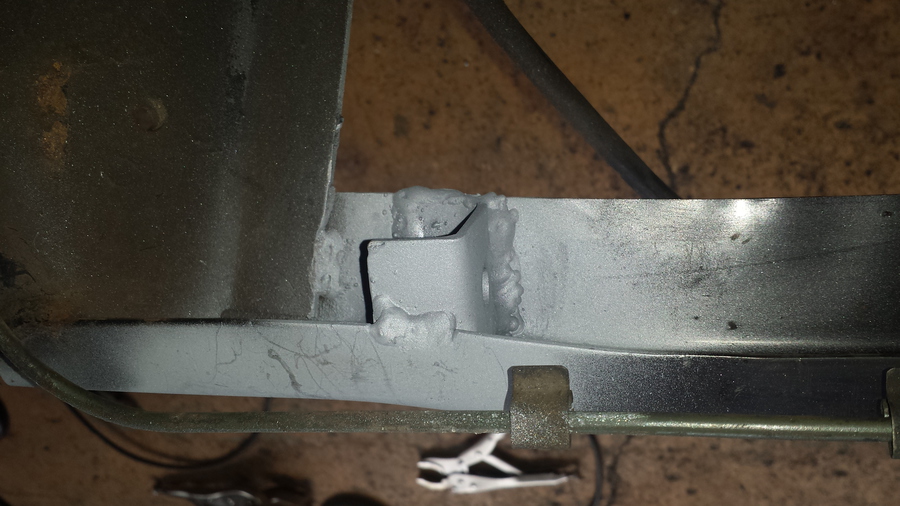
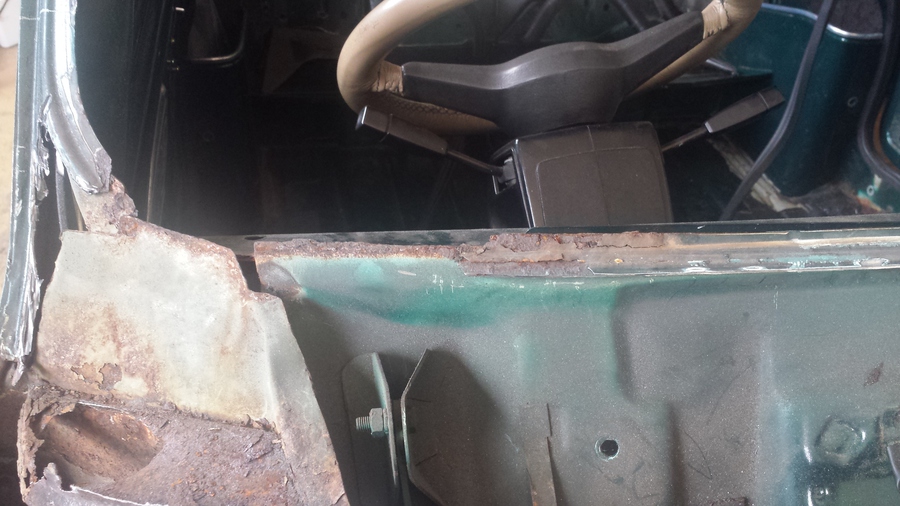
After removing the front panel tabs on the driver’s side of the inner wing I am presented with some rusty holes. These will need to be cut out and patched as this is where the new front panel will need to be welded in. This damage has been caused by water getting in the joint between the tabs on the back of the front panel and the inner wing. When I put the new front panel on I’ll have to put some seam sealer or underseal here to stop it happening again.
Well that’s enough for today, time to clean up, lock up and make our way home.

Sunday, 11 May 2014
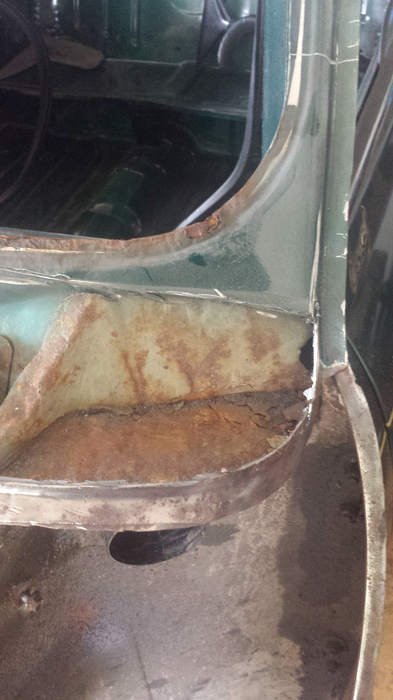
When the windscreen and its rubber were removed the damage to the scuttle panel is quite evident. There is now no chance of saving it, the scuttle panel is going to have to be replaced.
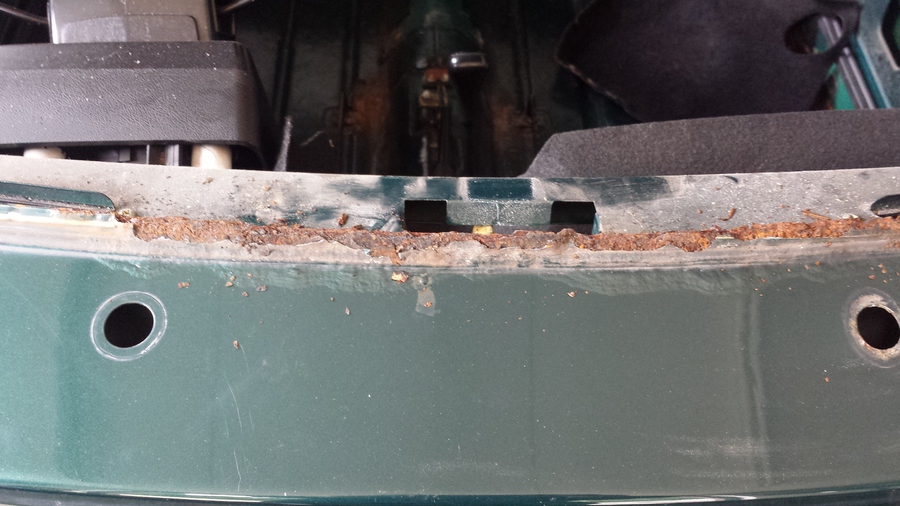
Looking further alone and at the seam between the bulkhead panel, the scuttle panel and the top dash rail, rust has eaten the metal away to the point where water has been going under the windscreen rubber and into the car. This is why, when we went to the Mini show at Stafford in the rain, water was dripping into the car from the top dash cover.
On closer inspection the damage has gone far enough that the top dash rail is going to have to be replaced as well, or there is going to be nothing to attach the replacement scuttle panel too, or hold the windscreen rubber in.
The windscreen rubber will have to be replace also as it has gone hard and started to split.
More to be added to the parts list!
To make more room around the engine bay and so as not to damage it while removing the scuttle panel, we remove the brake servo unit and master cylinder. The servo unit comes out quite easily, I undo one of the pipes that goes down to the brake limiter valve and drain the brake fluid into a pot. Then the other one. This brake fluid can’t be re-used as brake fluid is hydroscopic (it soaks up moisture), so it will be disposed of properly. Remove the split pin from the arm of the servo, remove the vacuum pipe connecting the servo to the inlet manifold, and lastly remove the four nuts holding the servo to the bracket. Now the servo can be lifted out.
Next I remove the carburettor, this is just a matter of removing the breather pipe, fuel line, throttle cable, choke cable and the four nuts that hold it to the inlet manifold. With this out of the way there is nothing we are going to damage apart from wiring, when removing the scuttle panel a bit later on, but these can be held out of the way.
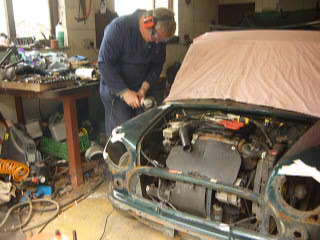
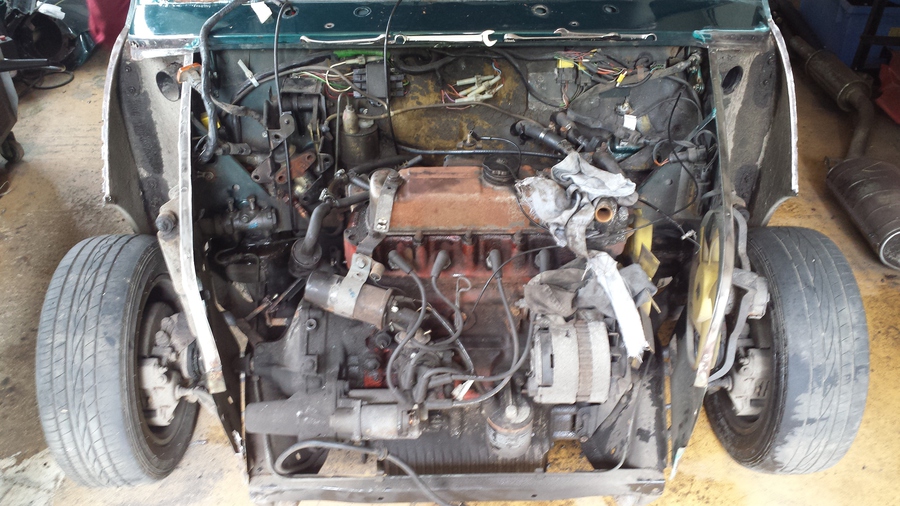
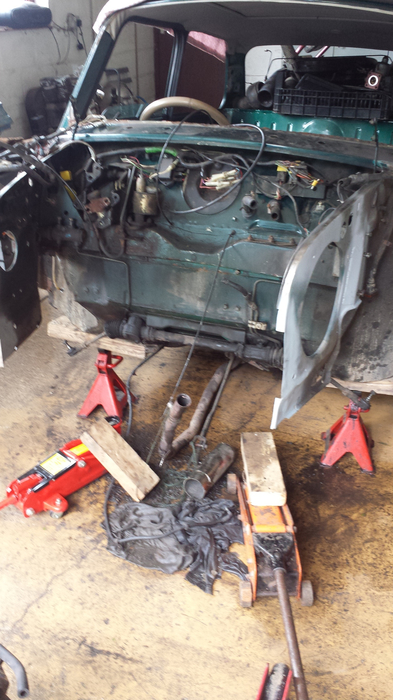
Abi decides that the engine has got to come out so it can be cleaned and so the engine bay can be cleaned.
Removing the engine from a Classic Mini is not a difficult task, just a little time consuming and usually you will lose a knuckle or two. Undo the top water hose from the thermostat housing, if the hose clip has a hex head use a socket rather than a flat blade screw driver, this will prevent the screw driver slipping off the hose clip and probably sticking in your finger, not to mention damaging the hose clip. Then undo the bottom hose from the back of the water pump. Undo the bracket that goes between the radiator housing and thermostat housing, then remove the horizontal bolt from underneath the radiator. On this model there is an electronic thermostat for the electric fan, label the wires and remove them. The radiator and housing can now be carefully lifted out, making sure not to damage the fins on the radiator or the blades of the cooling fan. Disconnect the wires to the coil and starter motor, if you haven’t done so already make sure the battery is disconnected, Sasha’s has been removed before we started any of this work on her. Disconnect the exhaust from the manifold, and undo the bolt from the bracket at the bottom of the diff housing. While still underneath the car remove the bolt from the remote gear selector and knock through the roll pin. I purchased a tool for this from a Mini show, it make the job a fair bit easier (I’ll put some details on this on another page) Undo the front and back engine tie bars, and the two bolts each side from the engine mounts. The only thing holding the engine in now is gravity and the drive shafts.
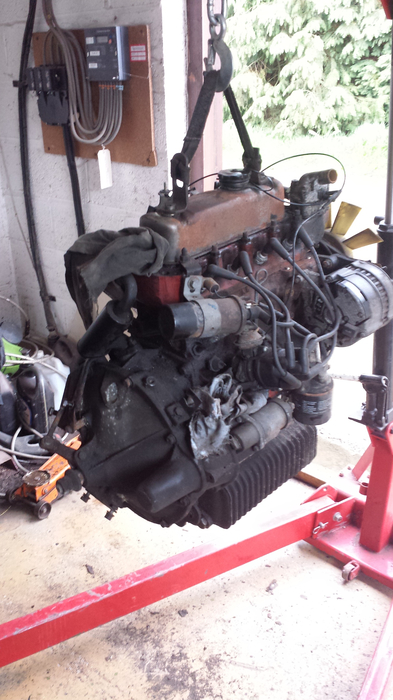
Everyone has their own way of removing the drive shafts, I like to put the front of the car on axle stands and drop the top ball joint, then remove the inner CV joint gaiter. By wriggling the engine from side to side as it is lifted by the engine hoist the engine comes out. At this point I realise I have not disconnected the fuel line from the fuel pump. I quickly do this and the engine is out. For those reading this that have done this job themselves I had already removed the clutch slave cylinder.
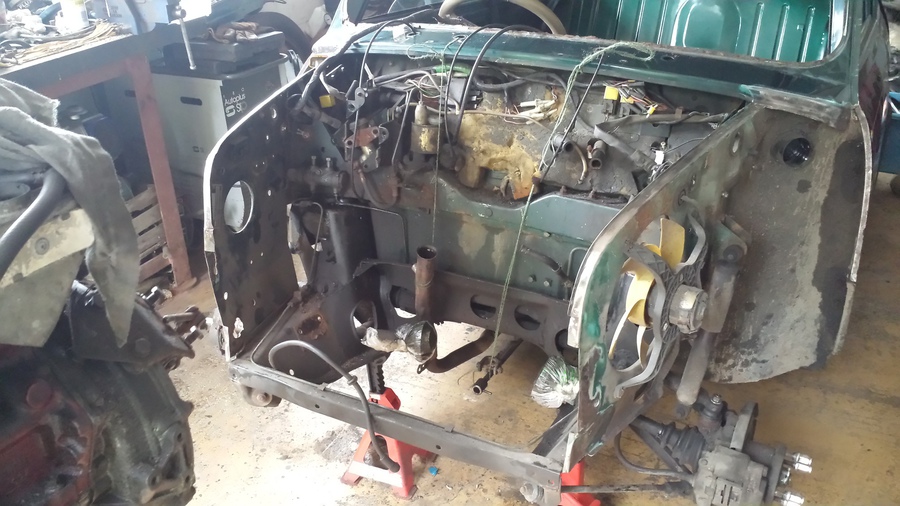
With the engine removed there is plenty to do in the engine compartment. Spilt brake fluid has lifted the paint around the clutch master cylinder and the bracket for the servo, this will have to be stripped out and cleaned up. This work will be done at a later stage. While surveying the area I notice that the steering rack gaiters are all split, these will need to be changed, more parts for the list. To remove the steering rack the front sub frame will need to come out, this will be a good time to clean up the sub frame.
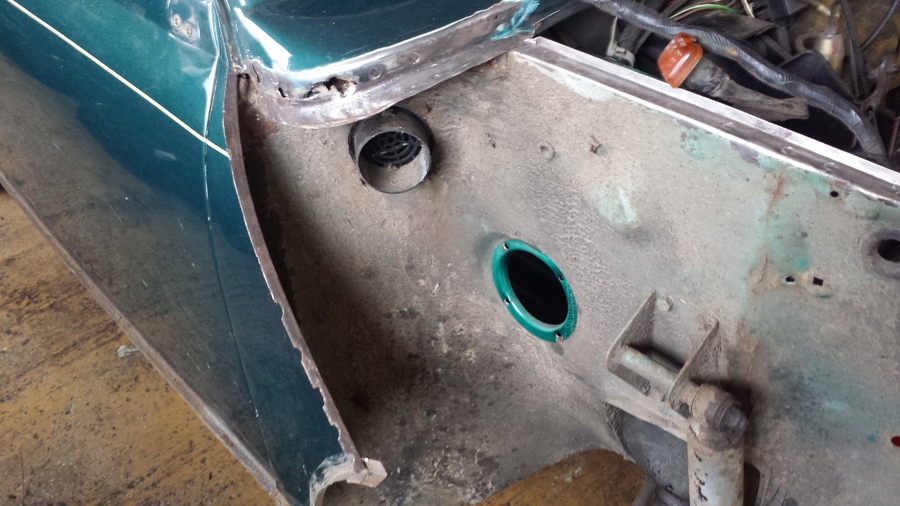
We remove the air box from the inner wing on the drivers’ side so we can get to the closing panel under the scuttle panel. There is some rust around the fresh air vent, this will need to be looked at further when the scuttle panel has been cut away.
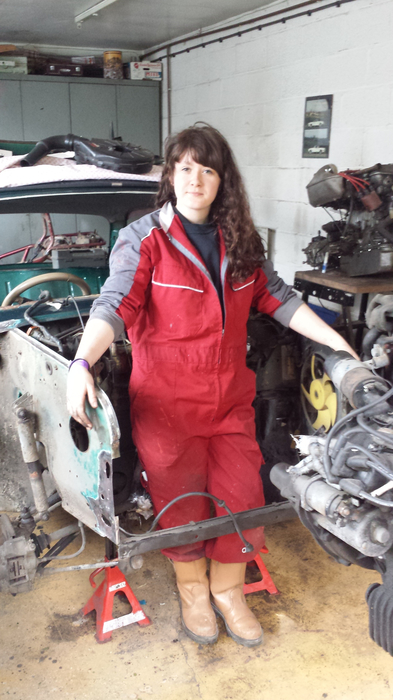
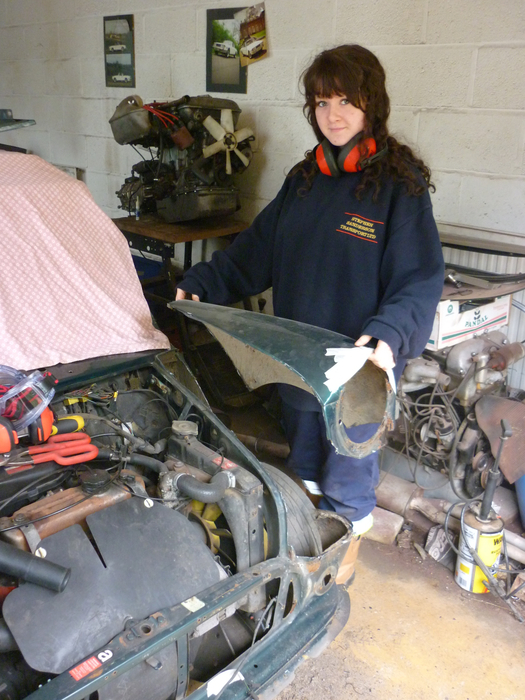
At the end of the day Abi poses for a photo, doesn’t she look great in her overalls and rigger boots, very girly!!
Time now to clean up the workshop, lockup and make our way home.
Sunday, 18 May 2014
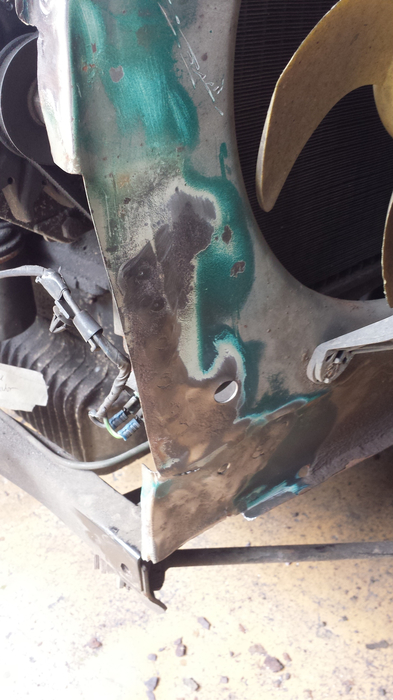
I start work on Sasha today with the intention of putting something back on rather that cutting something off. I am going to repair the two stress cracks in the drivers’ side inner wing.
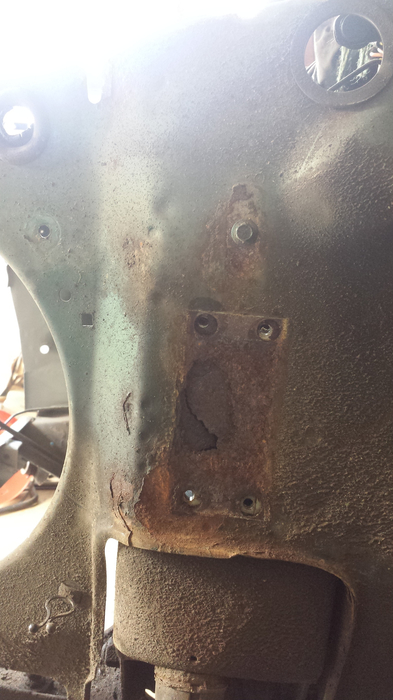
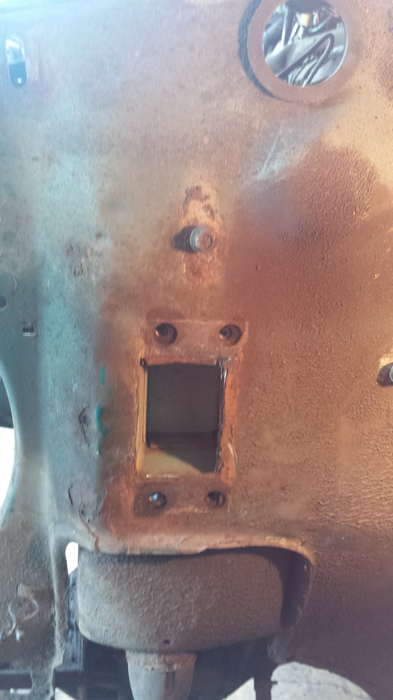
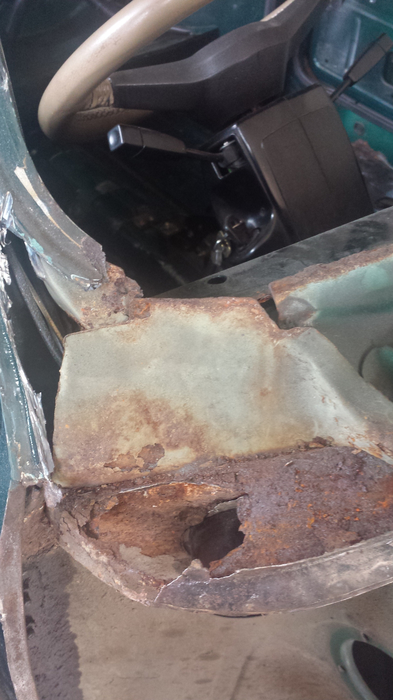
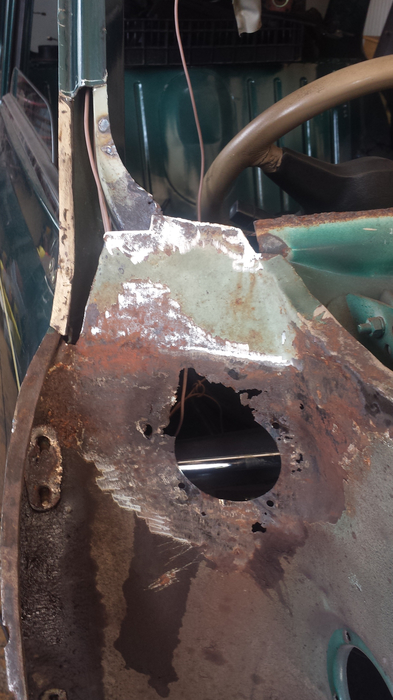
To make it easier to get the grinder in and the MIG welder I remove the shock absorber mount, there is a surprise waiting for me underneath, yes you guessed it more RUST.
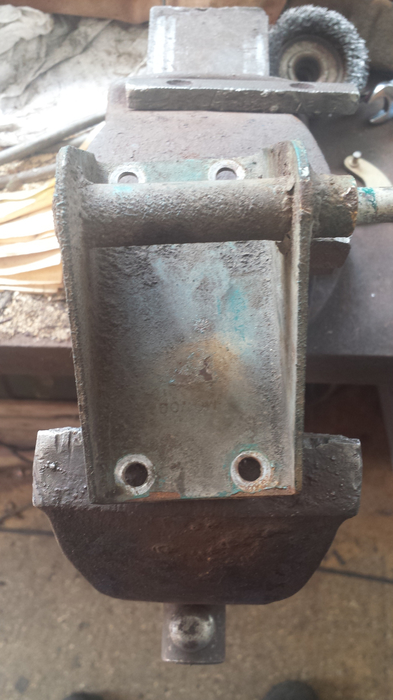
It’s difficult to see from this picture, but the shock absorber mount is actually rusted all the way through, this will have to be replaced. More to add to the parts list!
I start the repair to the inner wing by cutting out the rusty section where the shock absorber mount bolts on, I do this using a Dremmel. There is actually two layers of metal here, the inner wing and part of the bulkhead cross member. Once this is done I use my shop vac to clean out the rust that has fallen into the void in the bulkhead cross member.
I make up a patch to go in the hole in the inner wing and hold it in place ready to weld with a magnetic welding clamp.
Once it is welded into place I clean up the welds with the grinder, I want to leave this quite flat as I intend to weld another plate over the top of it after I have welded the stress cracks up.
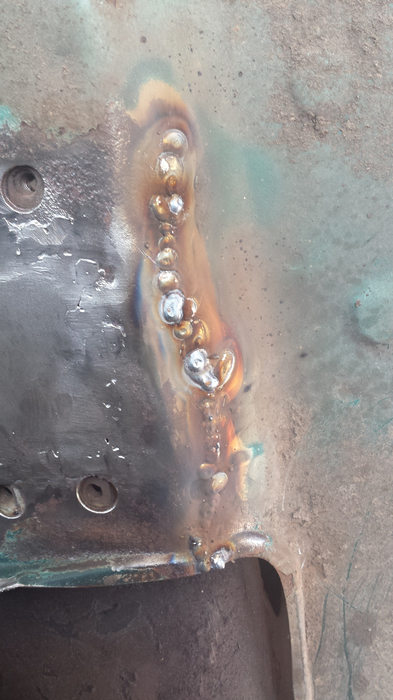
These two stress cracks have been here for some time as they are both quite rusty. I go over both of them with a wire brush in the grinder, this is very good at removing paint, sealer and surface rust. When complete I use the Dremmel again to open up the stress crack slightly then MIG weld over the stress cracks. Grind everything flat ready to plate over the top.
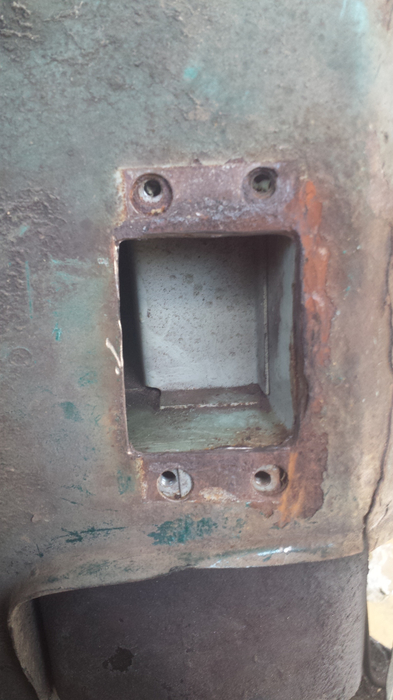
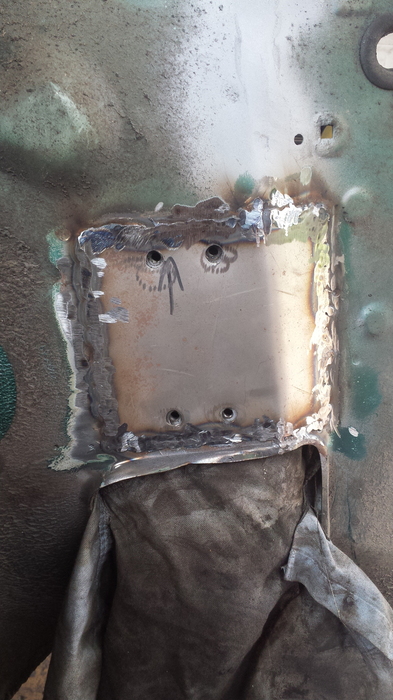
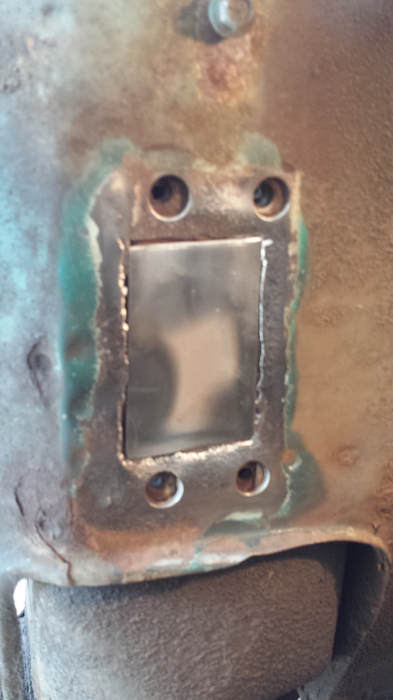
Next job is to start on the rusty holes left by removing the tabs from the front panel. I make up a plate the right shape, place it over the hole and mark round it. I then cut the piece out of the inner wing using the Dremmel, De-burr both sides ready to weld the plate in.
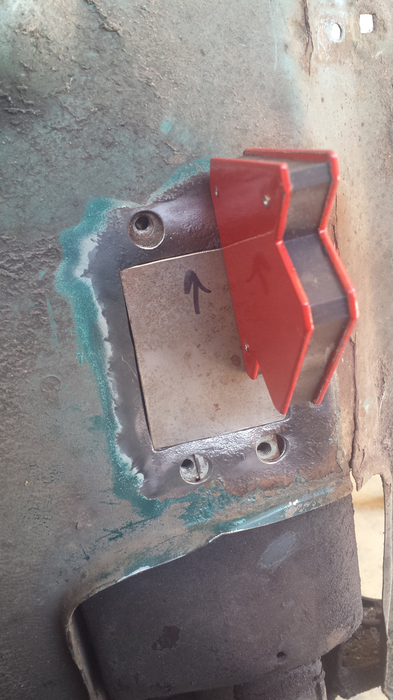
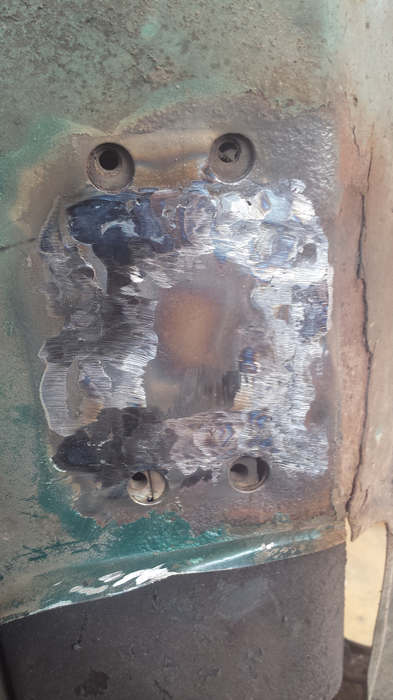
With the plate held in place by a magnetic welding clamp and a pair of flat vice grips, I weld in the repair patch. When the welding is done I clean up the welds with the grinder, this needs to be quite flat as the front panel fixing tabs will welded back on here.
Saturday, 24 May 2014
Decided to get an extra day in this week.
Fist job today is to fix the bottom of the inner wing on the drivers’ side. Before cutting the piece out I make up a patch to go in, as this piece is not flat it needs to be bent to the right shape. Once I am happy with the fit of the patch I place the patch over the existing hole and mark round it, then I cut the piece out. I fit the replacement piece in and hold it with a magnetic welding clamp and a forked vice grip. I get some tacks round the patch moving the clamps as required, when it is tacked most of the way round I weld between the tacks. Finishing by grinding back the rough welds leaving a relatively smooth panel. Clean up with a wire brush in the grinder and apply some primer.
Another good reason for removing the engine was to give some more room to fix the bottom engine stabiliser mount on the front of the front sub frame. This is quite common with Classic Minis and is down to poor maintenance, the rubber bushes in the top and bottom engine tie bars need to be checked and changed regularly. There are some alternatives, harder rubber can be fitted also nylon ones can be fitted. On high performance Minis an additional right hand engine stabiliser can be fitted, we are not going to do this as we are trying to keep it mostly standard, what I will do is add nylon bushes to the parts list, these are a bit noisier but last a lot longer.
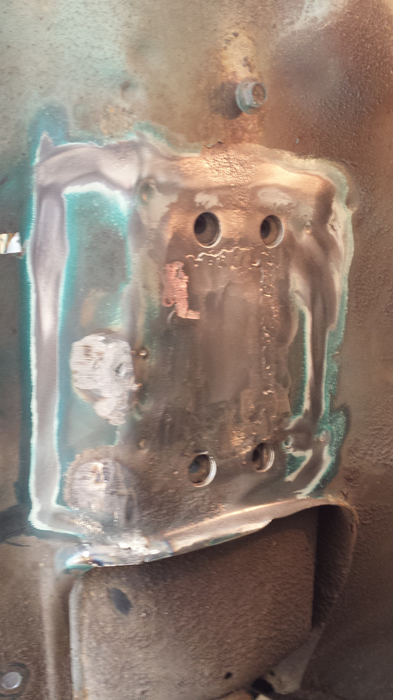
I grind what is left of the old bracket off the sub frame making sure to mark it’s location ready to fit a replacement. I make a replacement from a piece of 3mm stainless steel flat plate I found kicking about in the workshop, after a few test fits and some hammering to get it to fit a bit better, I mark the sub frame where I will be welding it in to place, this is to clean off any paint or dirt where I am going to weld. Holding the new bracket in place with vice grips I seam weld round all the edges where I can. When complete I clean round what I can with the wire brush in the grinder then apply some etch primer, the sub frame will be cleaned and painted later.
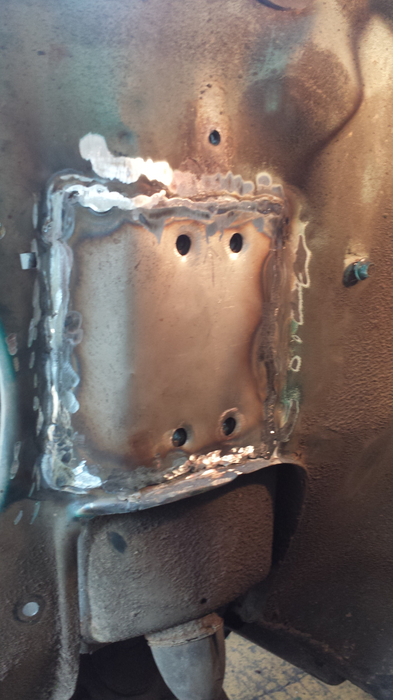
Where I had previously repaired the shocker mount I have decided to give it some additional strength by over plating it, this will also add extra strength where the inner wing had cracked. I make a plate the size I want it then taking the shocker mount I mark where the holes need to be to mount it. I drill these into the plate and user the original bolts that hold the shocker mount in place the hold the plate. All that is required then is to hammer the plate so it sits closer to the inner wing underneath and push the plate in a bit with a long screwdriver as I tack it into place. Weld up between the tacks and tidy up with grinding disc and wire brush, apply some primer then it’s time to clean up, lock up and make our way back home.
Sunday, 25 May 2014
I start the day by removing the shocker mount on the passenger side so I can repair the two small stress cracks in the inner wing. As I expect the rust damage on this side is exactly the same as the other side.
So I start the repair work by cutting out the rusty section with a metal cutting disk in my rotary tool, leaving a nice square hole ready to make up a repair plate to fill it back up again.
I make up the repair patch and hold it in place with a magnetic welding clamp. Tack it in place, then weld up between the tacks.
I also weld over the two stress cracks in the inner wing. Clean up the welds with a grinding disc then clean the whole area with a wire brush in the grinder.
Like the drivers’ side I decide to over plate the whole area, I cut the plate out from the sheet of steel I have been using. Carefully mark where the holes need to be for the shocker mount, drill out the holes, using the holes I hold the plate in place using the original bolts from the shocker mount. The plate doesn’t sit quite flat to I hammer it down and use a long handle screwdriver hold the plate down further while I tack it into place. Then weld up between the tacks, clean up the welds with a grinding disc in the angle grinder then finish off with the wire brush.
Last job of the day is to do a little repair work to the bottom of the inner wing on the passenger side. There is a small crack and some damage left by the stop weld cutter, I weld over these areas with the MIG welder then clean up with a grinding disc then the wire brush.
That’s it for today clean up the workshop, lock up and make our way back home.
Sunday, 1 June 2014
I start the days’ work by starting to strip the front sub frame components, first job is to disconnect the track rod ends. There are a few ways to do this, a ball joint splitter, a ball joint fork or smack it with a hammer. As I am going to replace the track rod ends anyway I release the nut a few turns then whack it with my 2 pound copper and hide mallet with the copper side, both of them release instantly with no damage.
Next I undo the hub nuts both sides, as I have no engine in and no brakes this can be problematic, but I have an air wrench, like they use to change wheels at a tyre dealer, so the hub nuts come undone quite easily once the split pins had been removed. Be careful here if the outer C.V. joints have not been previously replaced one side will have a left handed thread, if you are really unlucky someone has fitted a used outer C.V. joint and both are left handed. If you have to replace an outer C.V. joint you usually don’t get the hub nut, If you have a left handed thread version your old hub nut might not fit.
Next I use the ball joint splitter to undo the top and bottom ball joints, I undo the nut so the nut is level with the top of the threads this is to protect the threads from being damaged by the ball joint splitter. All ours come undone quite easily, when checking them with the hub in the bench I decide to change them all as they are all quite loose. When taking apart one of the ball joints I notice that the grease in it is all black and hard, and the ball joint seat is in six pieces. Again this is down to bad maintenance, ball joints should be greased at every service on a classic mini this should be every 6000 miles.
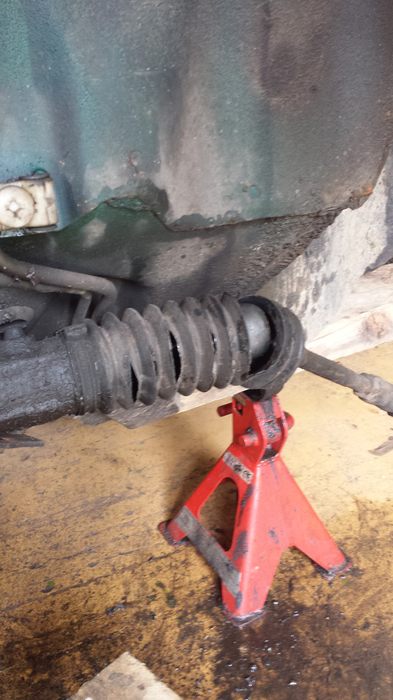
The next job is to remove the front sub frame, as the front panel is already gone there is only the real tail mounts and the top tower mounts. On this one you need a big socket for the tower mounts, I loosen them but don’t fully undo them. I undo the bolts that hold the sub frame to the tail mounts but leave the tail mounts bolted to the body. I support the weight of the sub frame with two trolley jacks, finish undoing the top tower mounts, then drop the sub frame to the floor on the two jacks. For anyone who is observant I had already disconnected the brake pipe for the front brakes. The rubber bushes for the top tower mounts are all badly worn these will go in the bin and be replaced with nylon ones. The tail mounts have both completely separated, we have decided to replace these with solid ones along with solid teardrop mounts on the front panel. More parts to add to the ever growing list.
The last job today is to remove the steering rack, as you can see from the picture the gaiter is not re-usable. While the rack is off the car I can take the time to re-oil and re-grease it, probably give it a re-paint too. Firstly remove the pinch bolt from the bottom of the steering column, then work the splines off the rack, sometimes this needs a little persuasion. Undo the two U clamps and the rack is removed. Make sure you do not discard the little plastic bit that sits between the U bolt and the rack, it is there for a reason.
Time to clean up the workshop, load the car, lock up and go home.
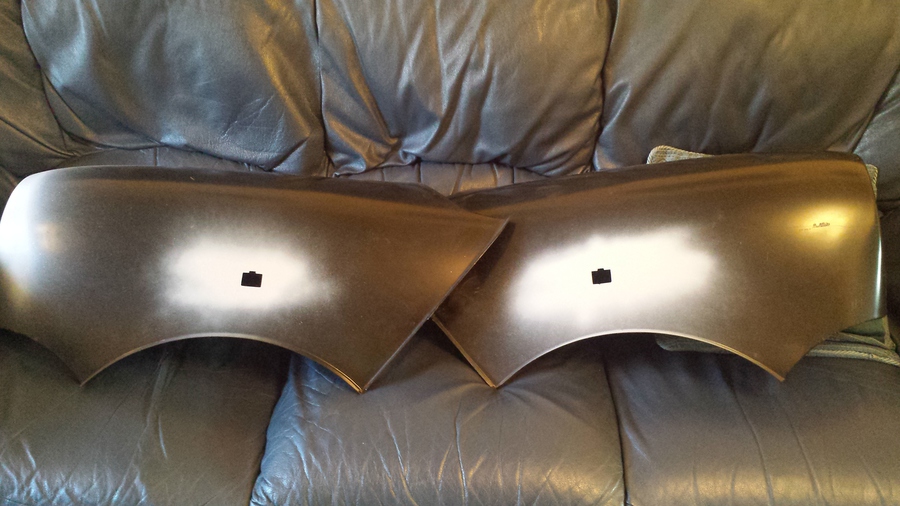
Saturday, 7 June 2014
Today I decide to do some work at home rather than at the workshop, I bought these wings a long time ago for another project that got cancelled due to a house move. I gave them to a friend and when he found out about Project Sasha he gave them back to me. These wings didn’t have the hole in them for the side repeater, so I made a pattern off the original wing, transferred it to the new wings then cut them out using my rotary tool. A bit of wet and dry paper to tidy things up then add some primer. The wings will stay at home until we are ready to fit them.
Sunday, 8 June 2014
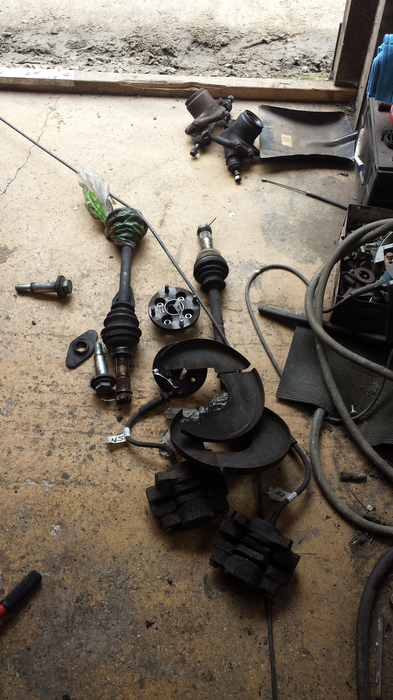
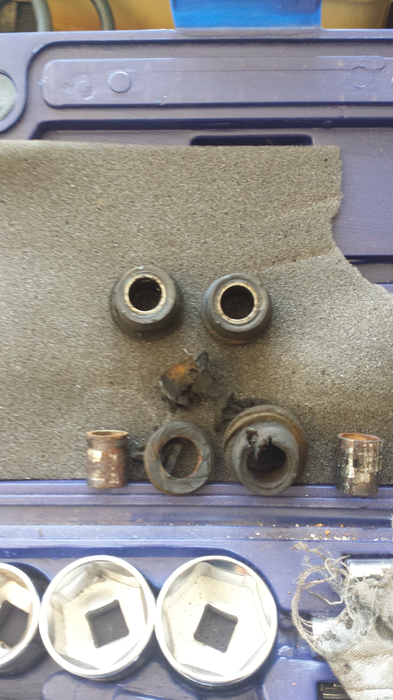
Today’s first job is to finish stripping the rest of the suspension components from the front sub frame. As you can see from the picture the bushes from the bottom suspension arm are knackered, more parts to add to the list.
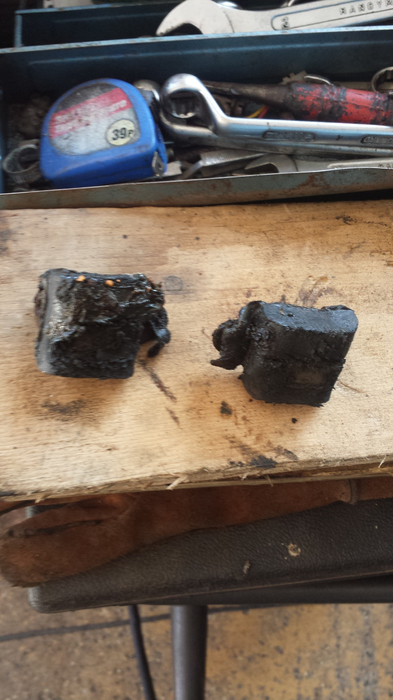
The bump stops are contaminated with grease and oil and have gone all mushy, these will have to be replaced. These can be replace with a nylon version that isn’t affected by grease and oil getting on them, we’ll have to see which version ends up on the parts list.
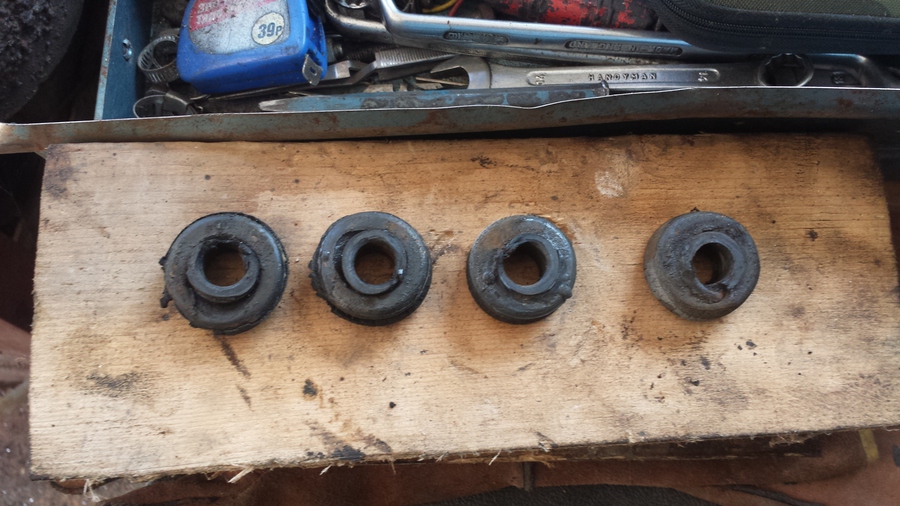
The rubbers from the suspension tie bars are also too badly worn to be re-used, these too will be added to the parts list.
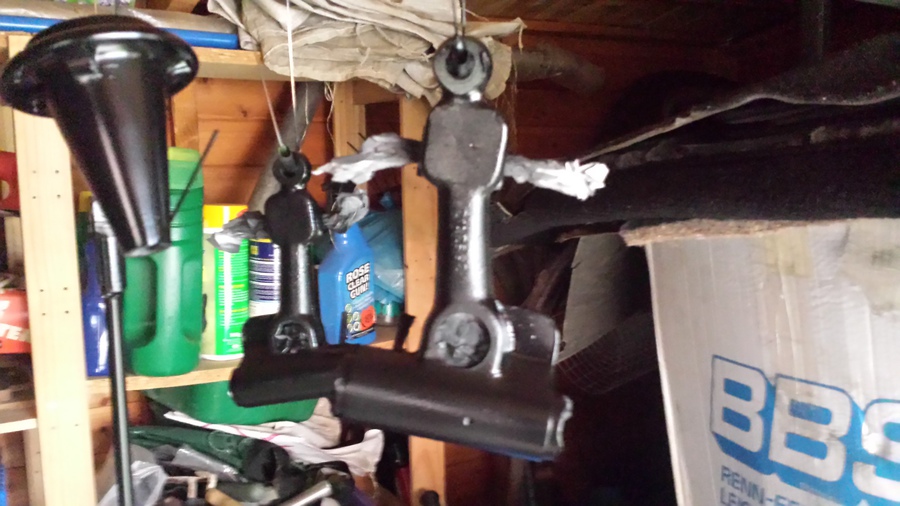
Lastly I remove the top suspension arm, I use a cone compressor to take the load off the arm then unbolt and remove it. With the arms on the bench I have a look at the shaft to assess the state of the needle roller bearings, as I suspect the needles have worn a track in the shaft on both ends, and on both shafts. Rebuild kits will have to be added to the parts list.
I remove the old bearings and carries, this job is a pain, I break a piece out of the carrier and remove all the needles then using a copper drift I knock out the carriers, repeat the on all four needle roller bearings. I remove the grease nipples ready to clean up the parts ready to be painted.
The front sub frame is now bare, ready to be cleaned up and painted by Abi.
It time to clean up the workshop, lockup and make our way home.

Monday, 9 June 2014
It’s a nice evening and I have a little time, I clean the bottom arms in some petrol to remove the grease and oil, clean them up using my bench grinder with a wire brush in it. I then get them primed and painted and hang them in the shed to dry.
I repeat the cleaning and painting process on the pins for the bottom arms, and hang them in the shed to dry.
I repeat the cleaning and painting process on the top bottom arms but mask off any areas where I don’t want any paint, and hang them in the shed to dry.
I had already removed the knuckle joints from the trumpets in the workshop, the trumpets are de-greased in petrol, gently cleaned with the wire brush as they are aluminium, primed and painted. Then hung in the shed to dry along with all the other parts.
The front suspension tie bars are given the same treatment.
Wednesday, 11 June 2014
I have had a delivery of some parts this week, among them were replacement front shock absorber mounts. They were not very well painted so I flat down the black paint that was on them and prime them.
Next basecoat then some lacquer, I decided to use these as a test of colour of British Racing Green paint from Halfords. The match to the car is rubbish, but as these sit under the wheel arches it doesn’t matter, I now know that the Halfords BRG paint is not a good match.
Sunday, 15 June 2014
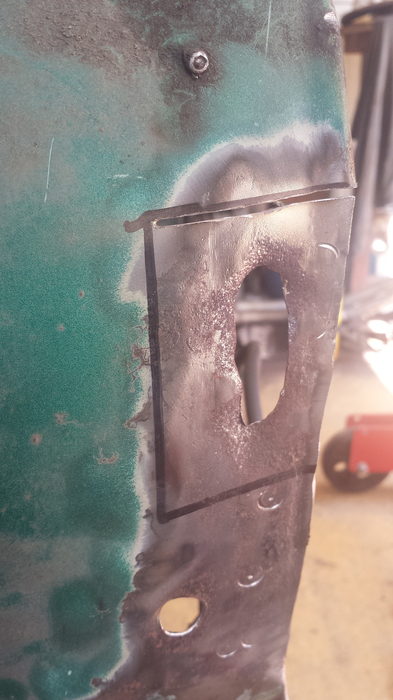
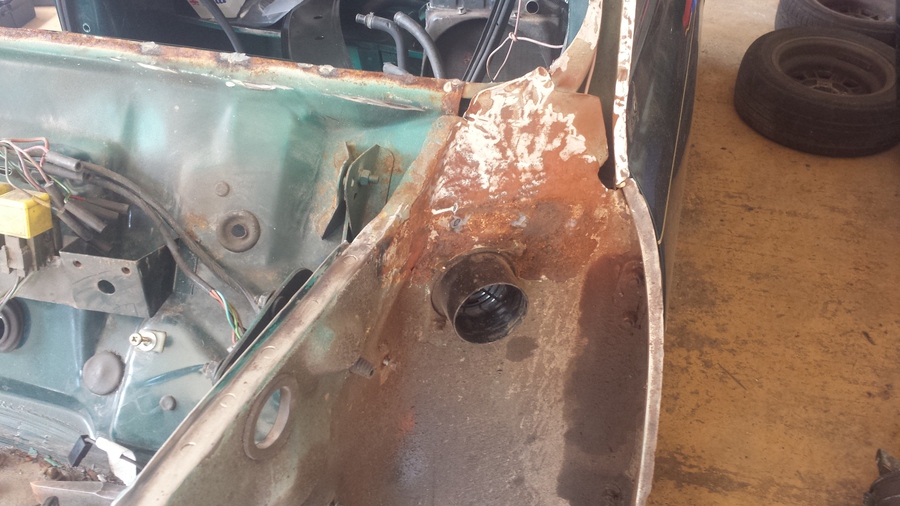
The new scuttle panel has arrived with the parts order, so today’s job is to remove the old one. I make a start by laying the new panel on top of the original one, this enables me to look at he fit and mark out where I need to cut the old panel. With the new panel back out of the way I start cutting the scuttle panel away starting on the drivers' side.
With the corner removed I can see the damage to the closing panel underneath, I was hoping to be able to save it but that isn’t going to happen, this one is rusted all the way through. This is one of the only panels that you can't buy as a genuine/heritage part, but luckily the pattern ones usually don’t fit too badly.
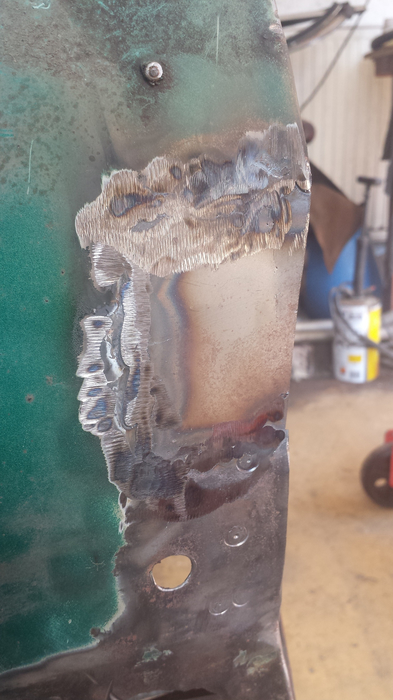
I continue to cut away the scuttle panel leaving just the spot welded joint to the bulkhead and top dash rail, then I carefully grind the scuttle panel away from this joint so I don’t damage the bulkhead and top dash rail.
Continuing to grind the scuttle panel away from the rest of the car I find that the rust has gotten into the top dash rail as well, this is going to have to be replaced so as not to compromise the windscreen fitment and the strength in the bulkhead.
Working my way across to the passenger side removing the old scuttle panel I get to the closing panel, this one can’t be saved either.
Enough bad news for today time to go home.
Wednesday, 18 June 2014
I have a little time this evening after work so I clean the drive shafts and apply primer, the inner and outer C.V. joints have been previously removed ready to refurbish them.

I also cleanup the front brake calipers, these are not actually the ones off the car, I bought these back in back in 2001 for a Mini called Lue that I bought from my friend Darren. I subsequently sold Lue back to Darren who turned him into an ERA, so the new calipers I fitted were not required as ERA’s have Metro Turbo 4 pot calipers. So a decade later Darren gave them back to me for Sasha.
Thursday, 19 June 2014
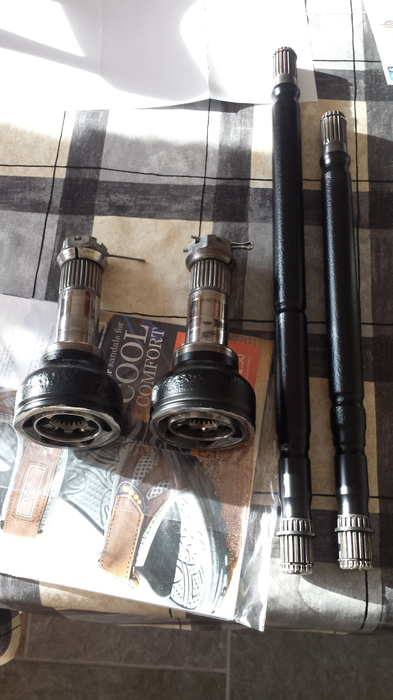
Tonight I prepare and paint the outer C.V. joints, these have been completely stripped and re-built as the grease was badly contaminated because the C.V gaiters had slits in them. I also top coat the drive shafts.
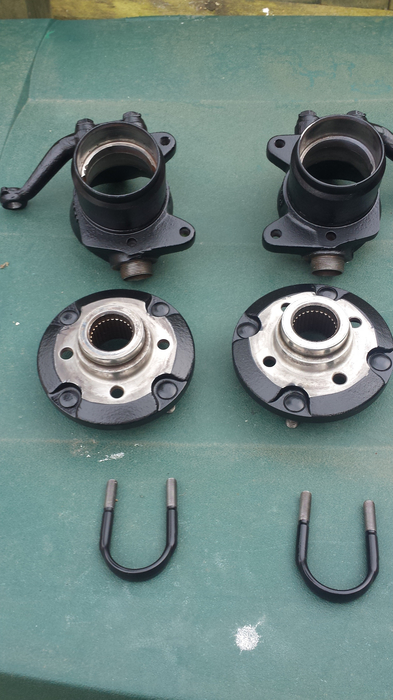
Another job tonight is to clean the front hubs, the bearings and ball joints have been previously removed, I mask the areas I don’t want painted and apply primer.
Friday, 20 June 2014
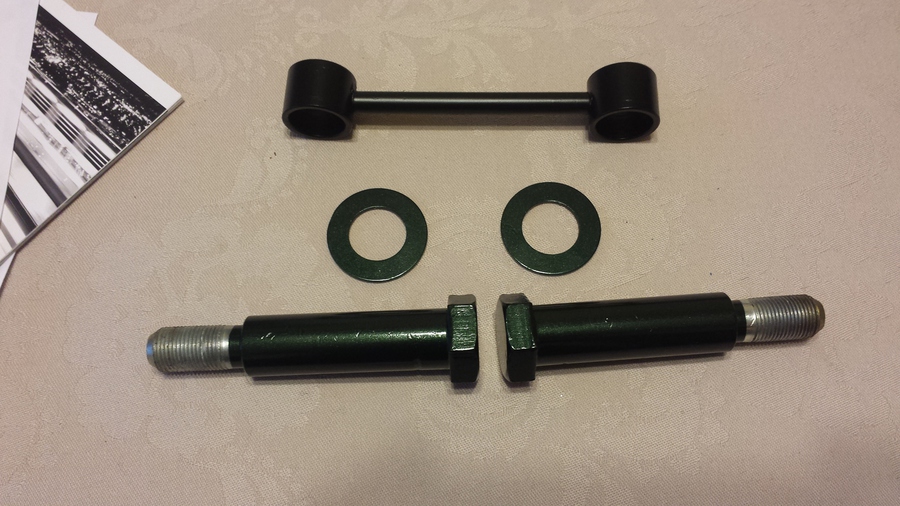
Tonight I prepare and paint one of the engine tie bars and the front sub frame tower bolts and washers.
Sunday, 22 June 2014
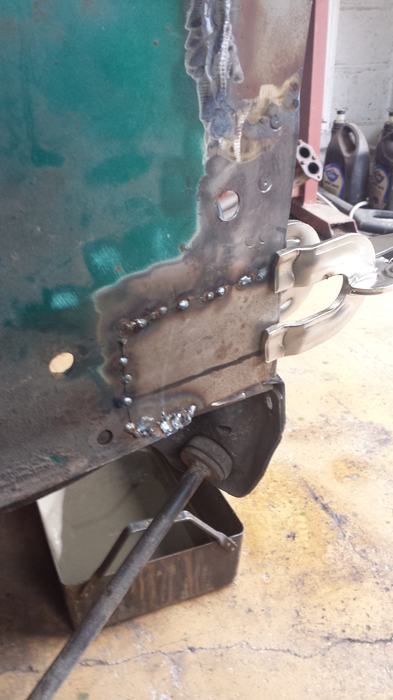
First job today is to grind off the old scuttle closing panels, easy enough to do, just need to be careful not to damage the inner wing.

At this point I also take some time to remove the doors, just a matter of undoing four nuts per door. If the doors have not been removed before make sure you spend some time soaking the nuts in WD40 or and penetrating oil to help removing the nuts without snapping the bolts off. I start to undo them and if I feel them begin to go stiff I do them back up a turn, give them another spray and go again. Ours all come undone without braking any.
I also repeat the process of removing the scuttle closing panel from the passenger side using the same process as the other side. On this side there is a little rust damage but it is serviceable.
That's it for today, I have been doing other jobs as well but not taken any pictures, time to clean up the workshop lockup and head home.
Thursday, 26 June 2014
Tonight I have painted the front hubs and the Rack U bolts, I have also cleaned and painted the front drive flanges. These parts will be ready just to bolt back on when we get to that stage.
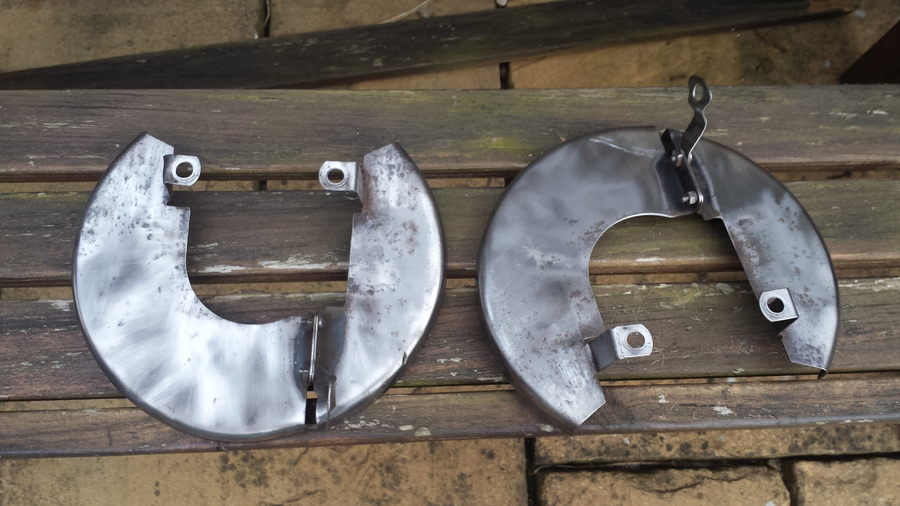
I spend quite a bit of time cleaning the front disc stone guards, be careful with the dust on these as on an old car it could contain asbestos from old brake pads, ours are quite rusty but do clean up ok. Yay a part I don’t have to replace.
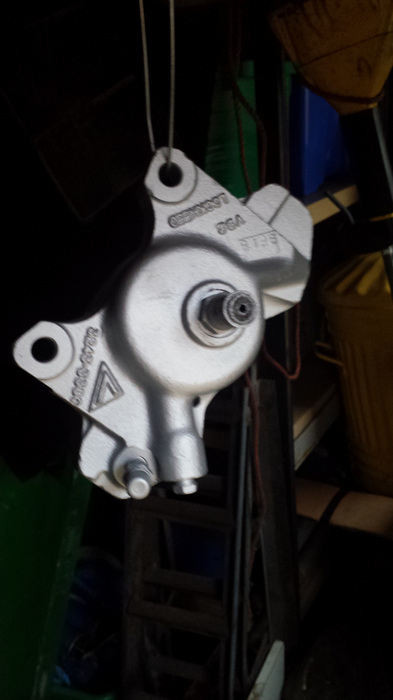
Next I get some high temperature silver paint on one of the front brake callipers, these have cleaned up ready.
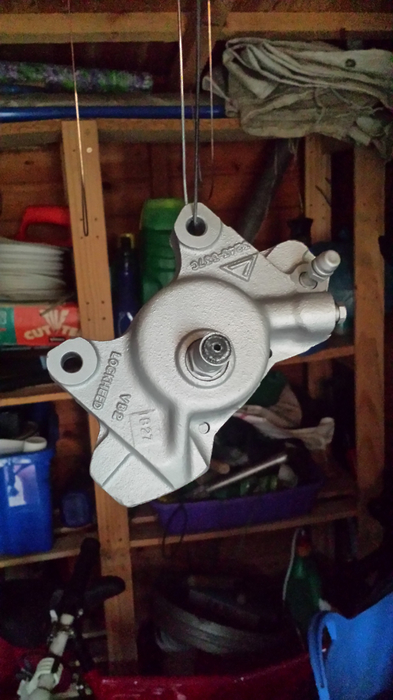
Last job tonight before it gets too dark, finish the other calliper.
That’s another good job done most of the front suspension and front brake components are ready to refit, when we get to that stage.
We are located at:
Market Harborough
Leicestershire
Contact us
If you would like to contact us:
rod@howitt.org.uk
abi@howitt.org.uk
sasha@howitt.org.uk
Or use the contact form.