
Timeline 28 September to 23 November 2014
This is a continuation of the work done to Sasha.
Sunday, 28 September 2014
It’s time to start on the drivers’ side doorstep, all this work has to be done really before the new A panel goes on as the bottom of the A panel welds to the doorstep.
Firstly I use a cutting disc in the grinder to remove what I intend to replace being very careful not to cut to deep and damage something underneath like the stiffening piece for the jacking point and the bottom of the door hinge stiffening panel.
Next I carefully remove the old doorstep panel from the door hinge stiffening panel, this is quite difficult and takes some patience, the doorstep panel is spot welded to door hinge stiffening panel and to the closing panel on the inside of the A post. I need to preserve these as much as possible.
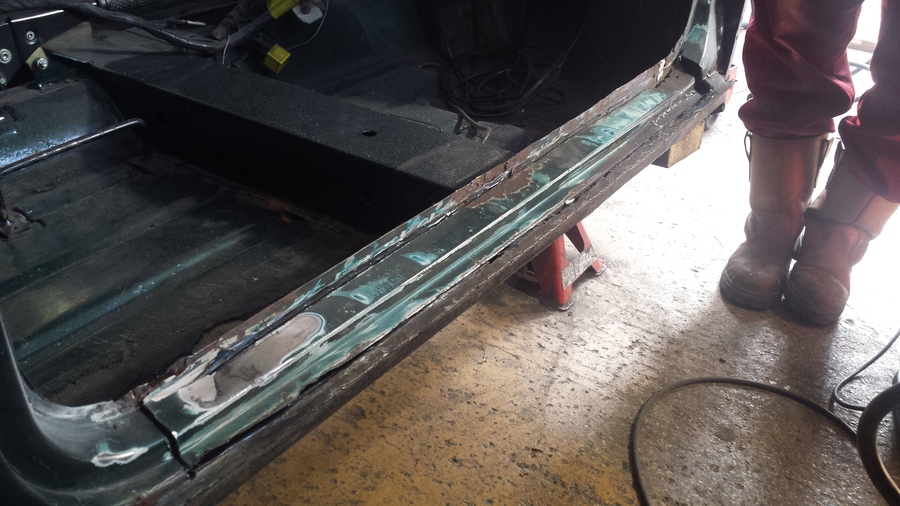
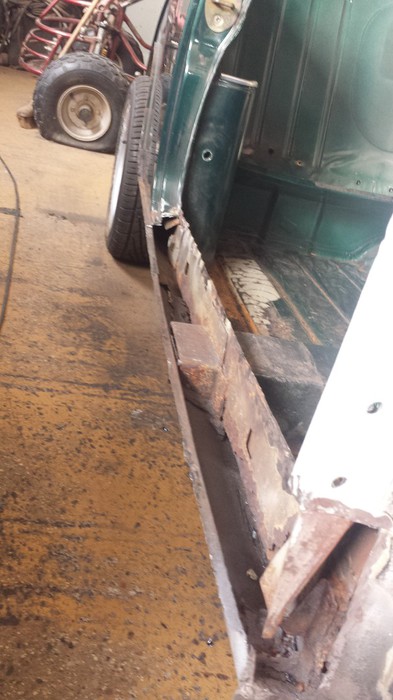
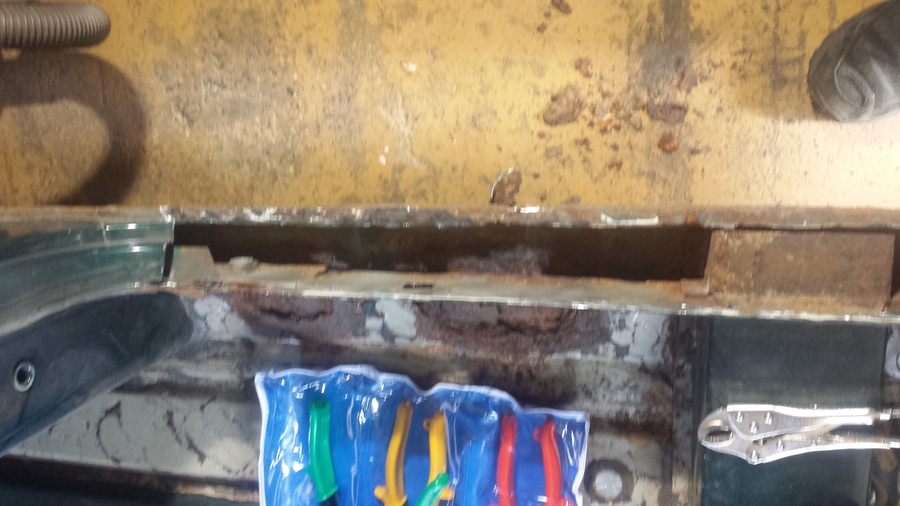
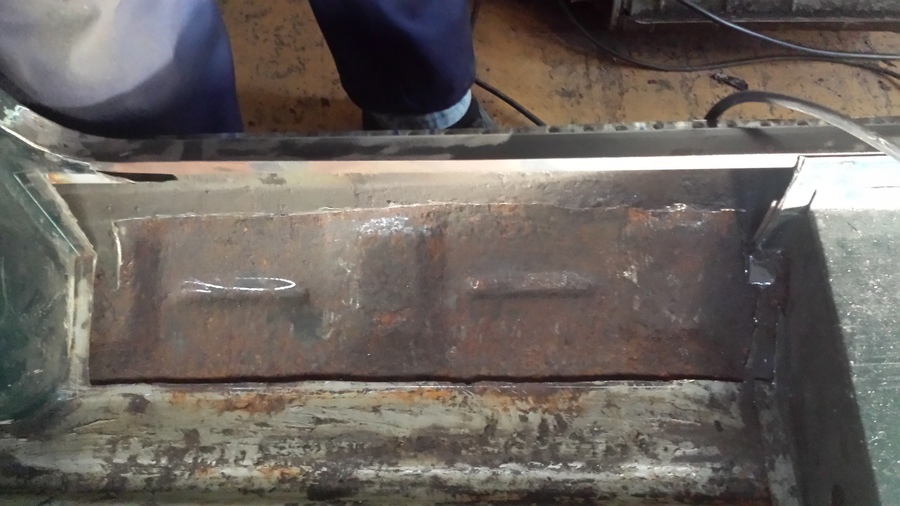
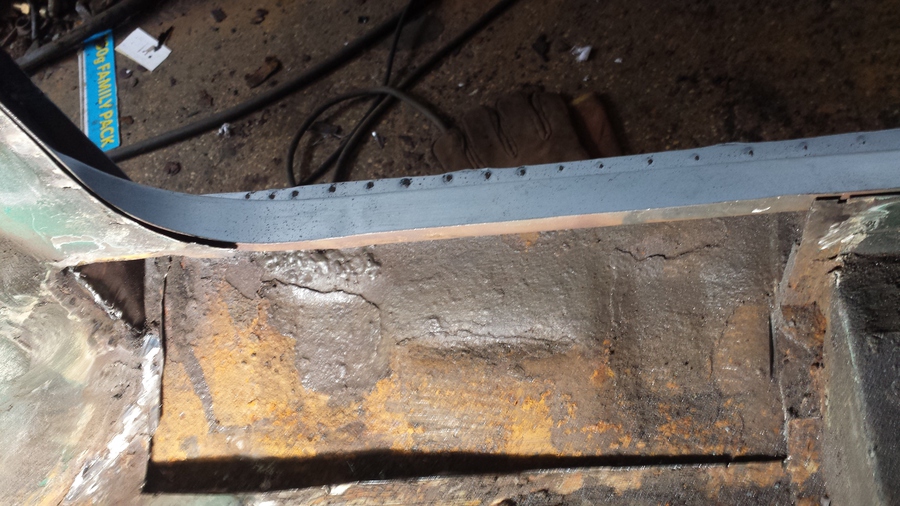
With the doorstep all cut away you can see some of the devastation left behind by putting on over sills ** DON’T DO IT ** If I was doing anything other than a good driver restoration I would remove these over sills and start again, but the additional time and money involved is just not worth it in this case. Whoever put on these over sills didn’t remove much of the old sills before starting they just cleaned round the edges and welded them on, so as you can see from this picture there is lots of bits of old sill in there. I remove as much as I can of the old sill and clean out all the debris and rubbish that has collected in there.
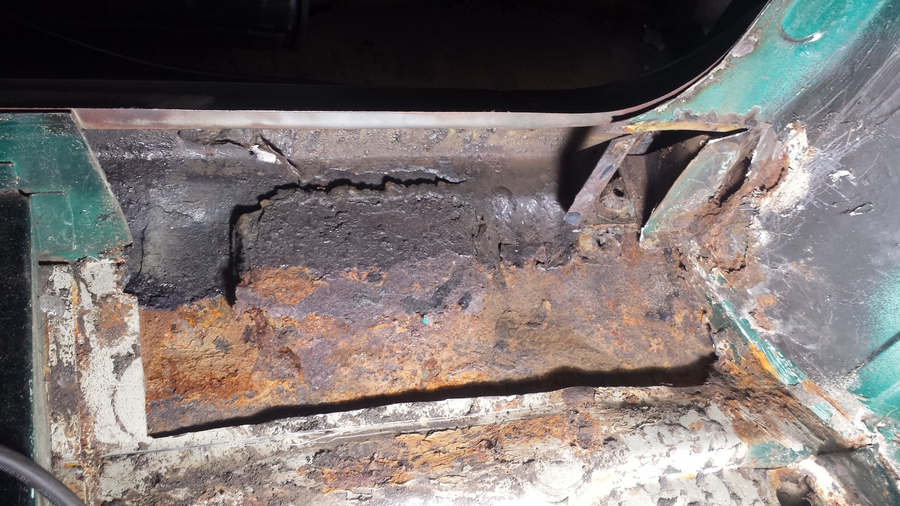
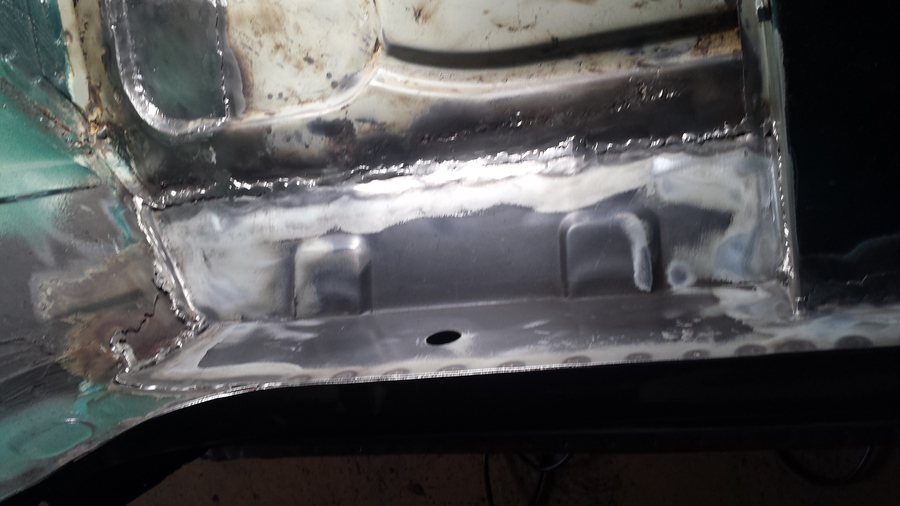
I also cut away the rust from the bottom of the flitch panel, as you can see here water has been getting in and doing plenty of damage. There should be a lot more in here than is left, when the shell was made in the factory there is four locating plates in the Mini floor pan, contrary to popular belief these are not jacking points, but the front ones are slightly stiffened by a piece inside the sill, the rear ones are in a fairly stiff position anyway. But as soon as you use them to jack up your Mini you will either distort them or push the floor up. You see so many Minis with the front foot wells all pushed up, anyway I am getting sidetracked. The stiffening piece in Sasha has just about rusted away, I use the shop vac to suck out what is left and clean up what I can. I will be putting new metal over this but not replacing it, I don’t think you can get it as a item but I have never looked.
With everything cleaned up I am about ready to test fit the new doorstep panel, I will have to cut it down as I am not fitting it all, so I will have to work on the alignment and trim to fit.
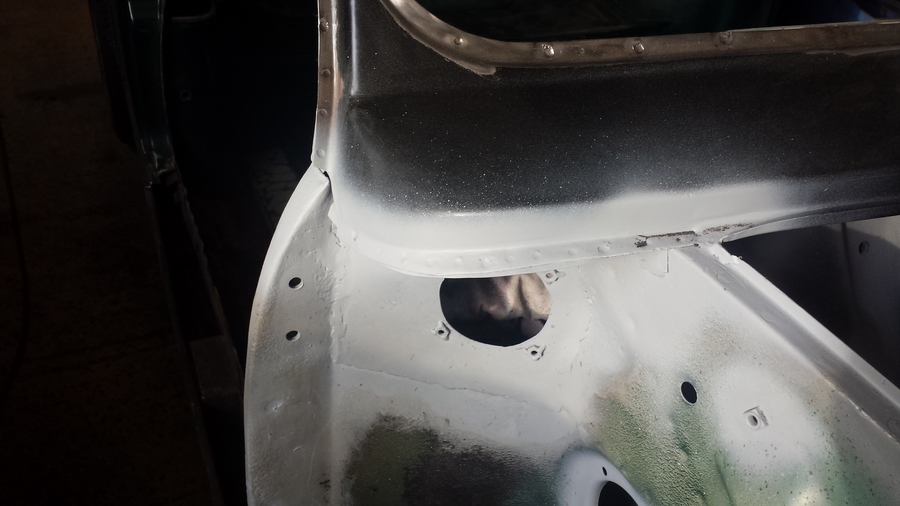
I have now tidied up the welds and straightened the edges of the scuttle panel and closing panel on the drivers’ side, I have cleaned it up with the wire bush in the grinder and treated it with etch primer.
Last job for today is to do the same on the passenger side.
Anyway it’s time for us to go, until next week...
Sunday, 5 October 2014
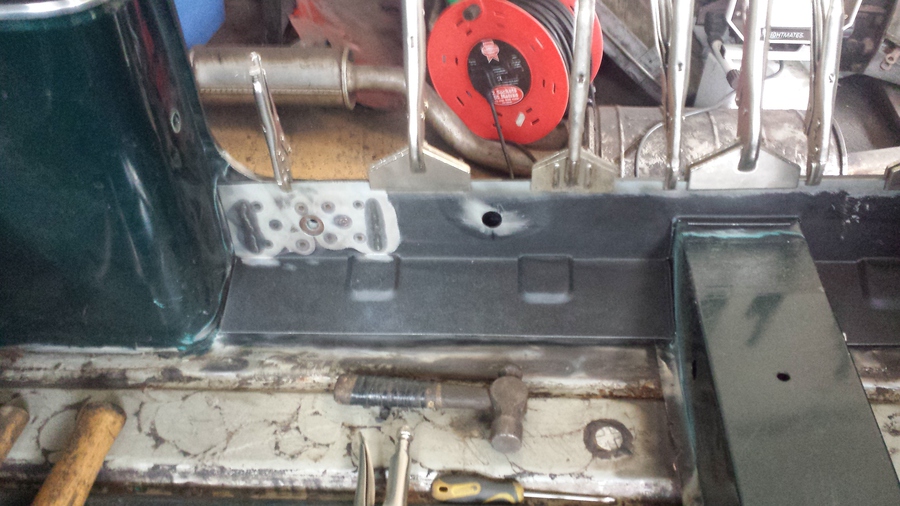
I start today with test fitting the new doorstep panel, as this is a heritage panel the fit and alignment is quite good, on the pattern versions of this you only get the bottom of the doorstep and the profile is usually not very good. After a few adjustments the fit to the rear quarter panel is acceptable.
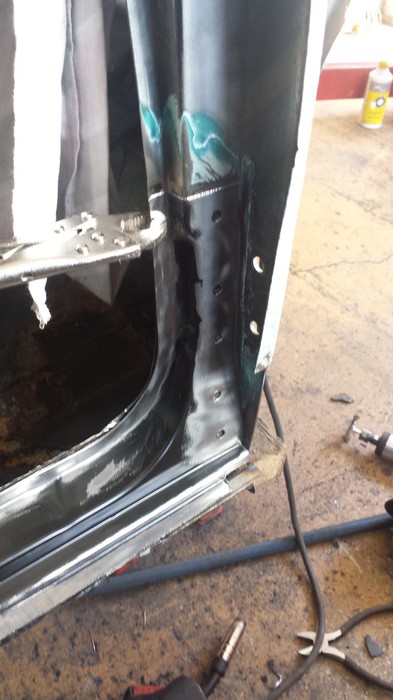
The A post side takes a bit more work to get it to align, I have to trim a little off the panel and cut a little more off the old panel, once I am happy with the fit I drill some holes in the now panel so I can plug weld it to the door hinge stiffening panel as I can’t get the spot welder in. With the panel being held in place with clamps I am just about ready to start spot welding and MIG welding the panel into place.
I start with a couple of spot welds on the A post to hold things in position, I can’t go to far down as the inner sill still needs to be replaced, the inner sill has not been cut out yet because I don’t want to compromise the integrity of the shell.
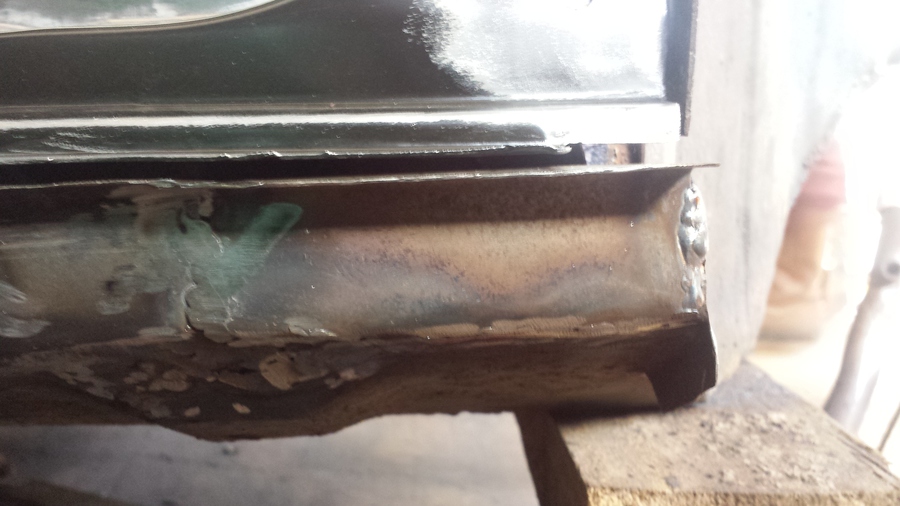
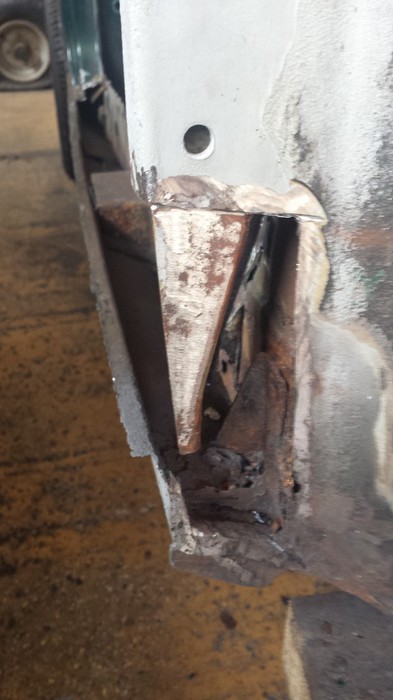
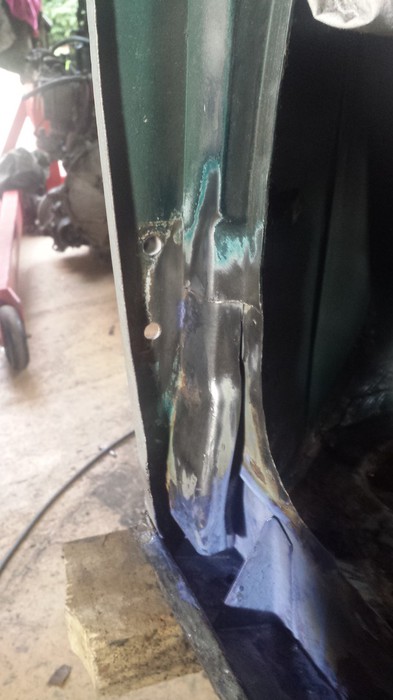
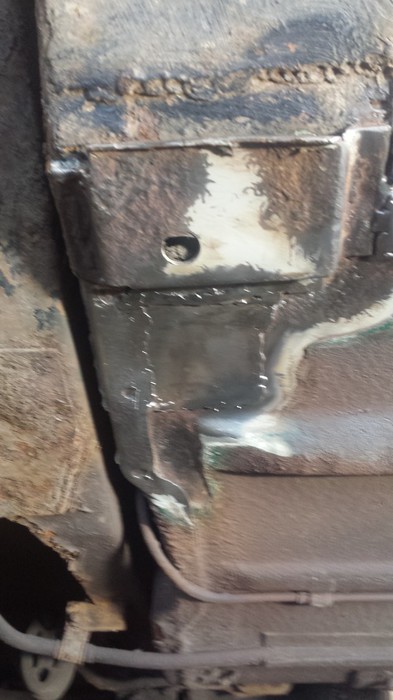
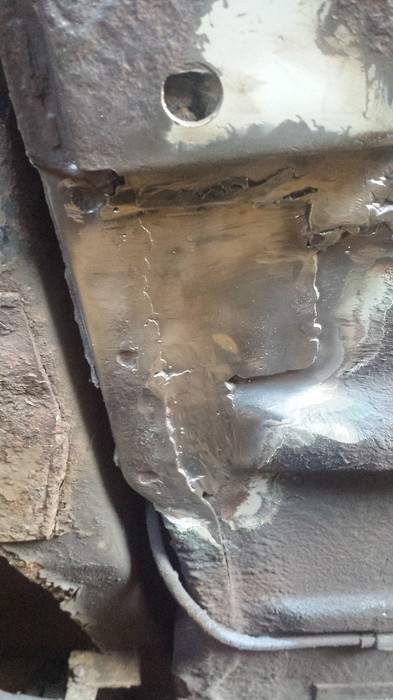
Before I can spot weld the doorstep to the sill I have to make a quick repair to the front of the sill, where the flitch panel has rusted through water has been getting in and the front part has rusted too thin and needs to be fixed. I cut out the section, make up a patch and weld it into place, grind off the excess weld and clean the area.
We are now about ready to finish off the welding.
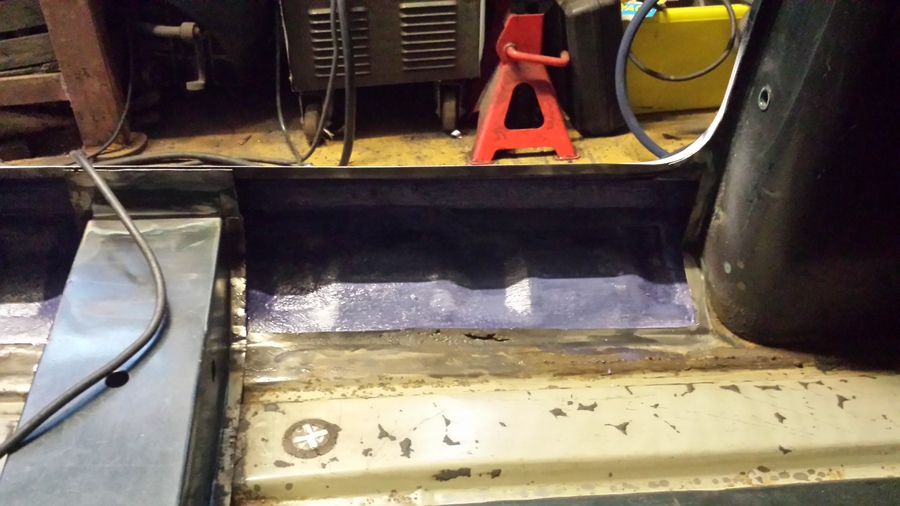
The inside gap in the sill area has been treated with a rust treatment product and when we are all finished the sill will be all wax oiled.
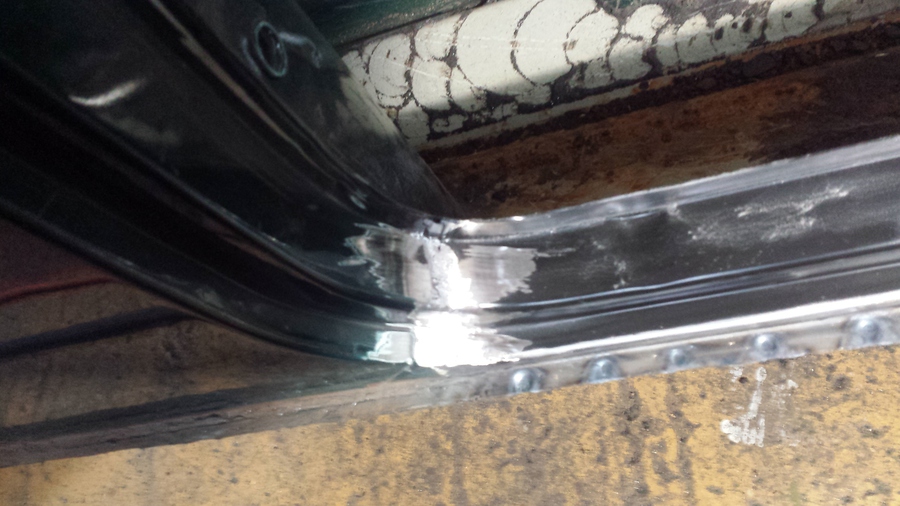
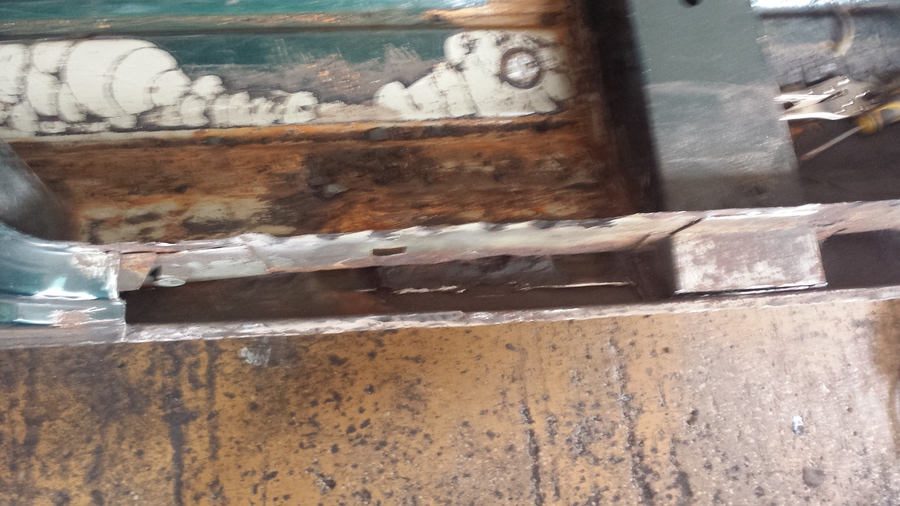
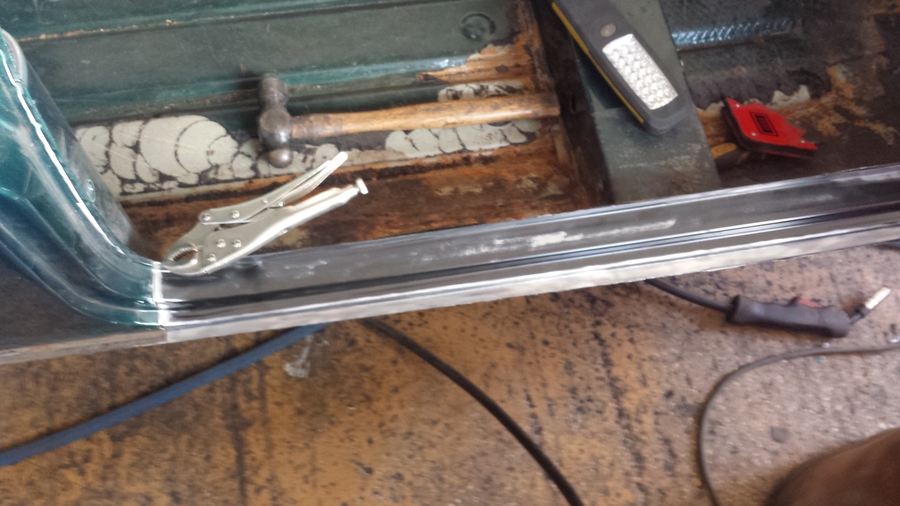
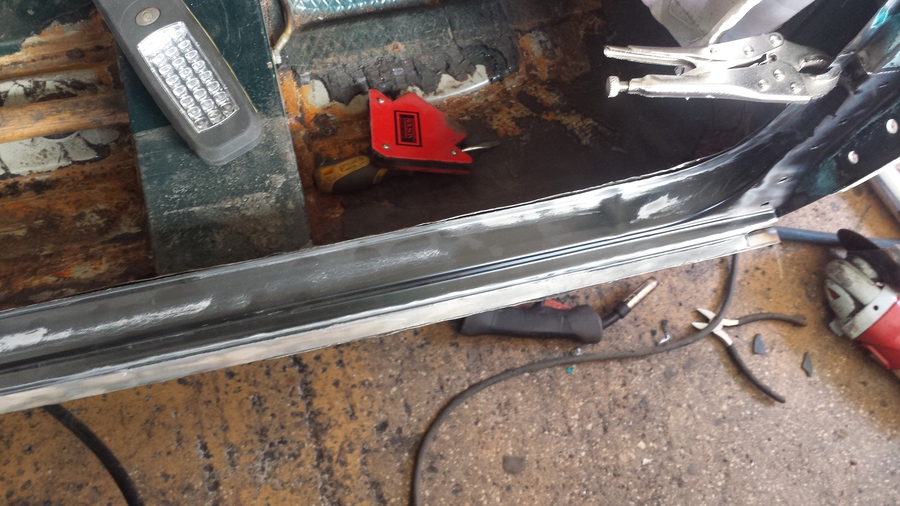
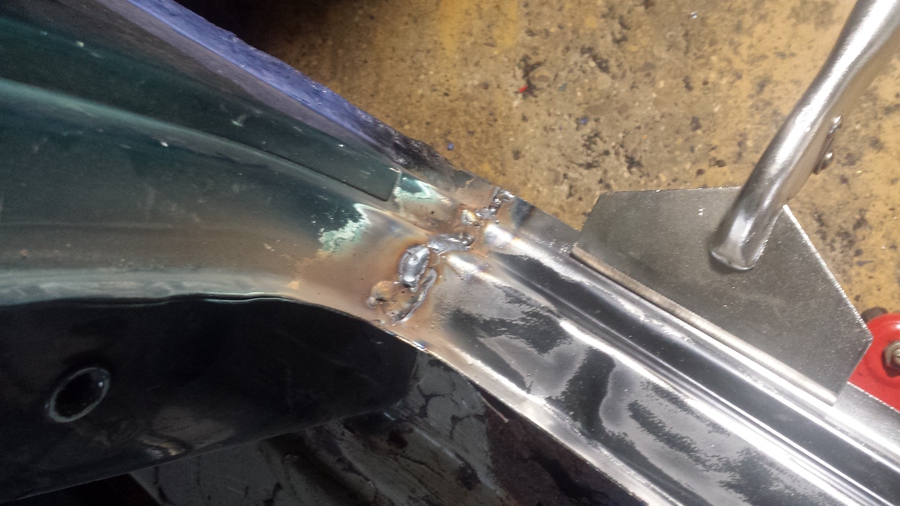
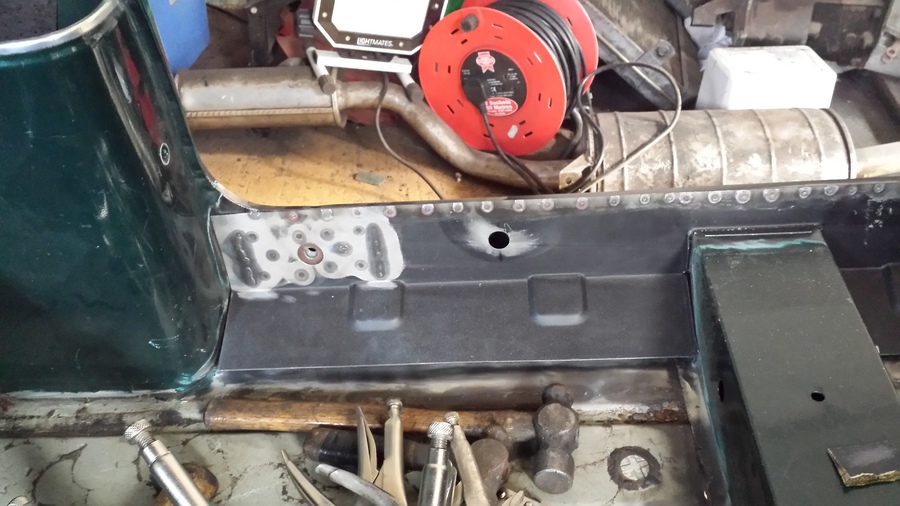
The seam between the sill and doorstep is spot welded together at about 2.5 cm intervals, a bit more than the factory did, also I have MIG welded the join to the old panel by the rear quarter. I grind off the excess weld with the grinder and where the grinding disc won’t fit I use a carbide burr in my die grinder.
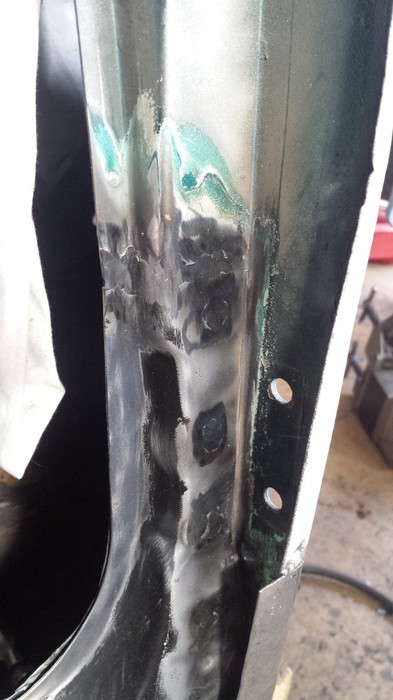
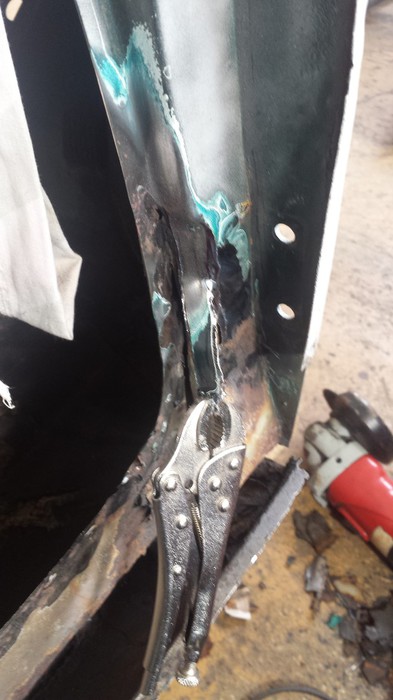
I use the same techniques on the front of the panel by the A post I also plug weld thought the holes I drilled in it while the panel is being held in place with clamps.
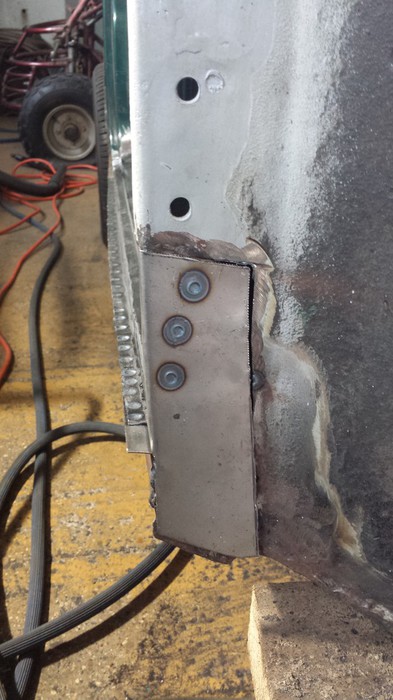
Finally I make up a patch to repair the flitch panel, this also includes a piece to hold the A panel, I am able to get some spot welds on this to hold it in place and provide some extra strength.
Time now to clean up the workshop, lockup and head for home.
Sunday, 12 October 2014
I start working today on the passenger side door step, I use the same process as last time to cut out the center section then start cleaning up the inside of the sill area. There is allsorts of rubbish in here including sand, bits of paper, a one pound coin and what is left of the rusting old sill.
I do the same for the other half of the sill area, no finds in here just rust and dirt.

When the area is all cleaned out I cut out as much of the old sill as I can. I have test fitted the new door step a number of times and cut it where I want it and trimmed the old panel to match. I then treat the whole area with a rust treatment.
I do the same for the front part of the doorstep, I am now ready to clamp the new panel into place ready to start welding.
I start at the back end of the panel adjusting and clamping as I go welding the seam between the new panel and old, I have to keep adjusting it so that the profile of the panel lines up.
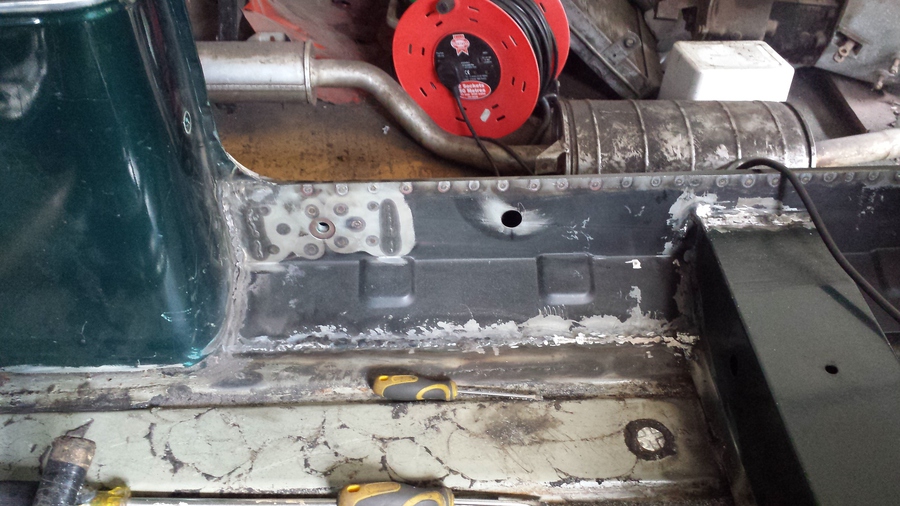
Continuing with the front section I MIG weld the seam between the new doorstep panel and the old A post. To get the door hinge stiffening panel closer to the new door step panel I have to push on it a bit from the back thought the rusty hole in the inner sill to get a better weld on it, I am not able to get a clamp in here. Finishing the job off by spot welding the sem between the door step and outer sill.
I have left all the clamps on the doorstep panel to the inner sill as the inner sill is a lot worse that I had previously thought and it is loosing integrity and bowed out slightly.
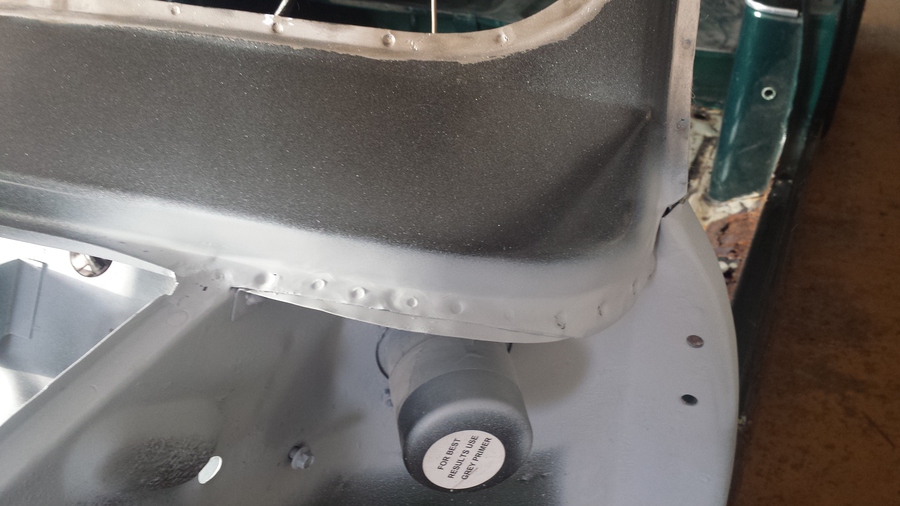
Last job of the day before cleaning up the workshop is to run the wire bush over the work done on the drivers’ side doorstep, clean up with panel wipe and apply some primer.
Now is time for home.
Sunday, 19 October 2014
From the number of pictures it doesn’t look like a particularly productive day but we did get a fair amount of things done I just didn’t take any pictures.
I have cleaned up inside the rear section of the inner sill, removing what was left of the old outer sill and all the surface rust from the over sill that a previous owner has had installed. This section is now ready for the replacement inner sill.
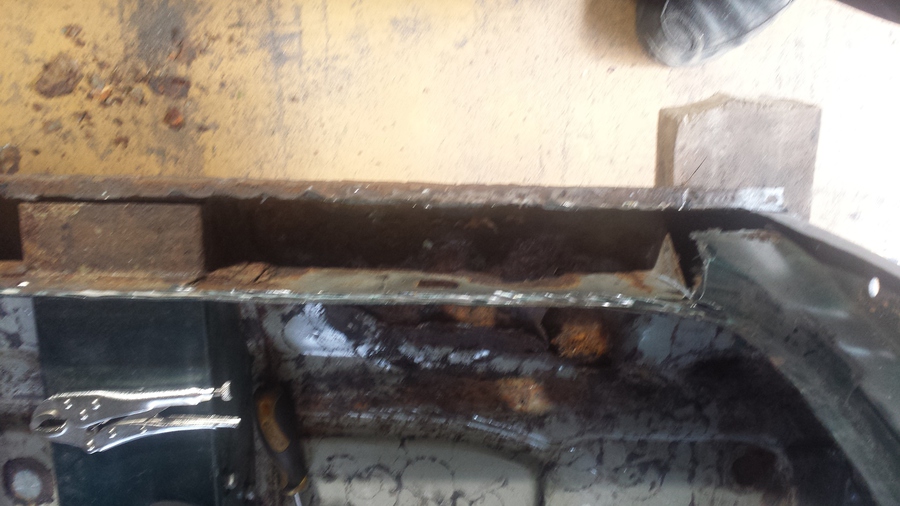
I then make a start in the front section of the inner sill, as you can see from this picture it’s not very nice in there. In an ideal word I would have replaced the inner sill with a heritage part that replaces the inner sill to the first rib and fitted proper outer sills, but time and money have prevented this also I think it would have compromised the integrity of the car removing that amount in one go as the doorsteps were so bad.
Once the inner sill area is cleaned up it doesn’t look so bad, I think the drivers’ side is worse than this side.
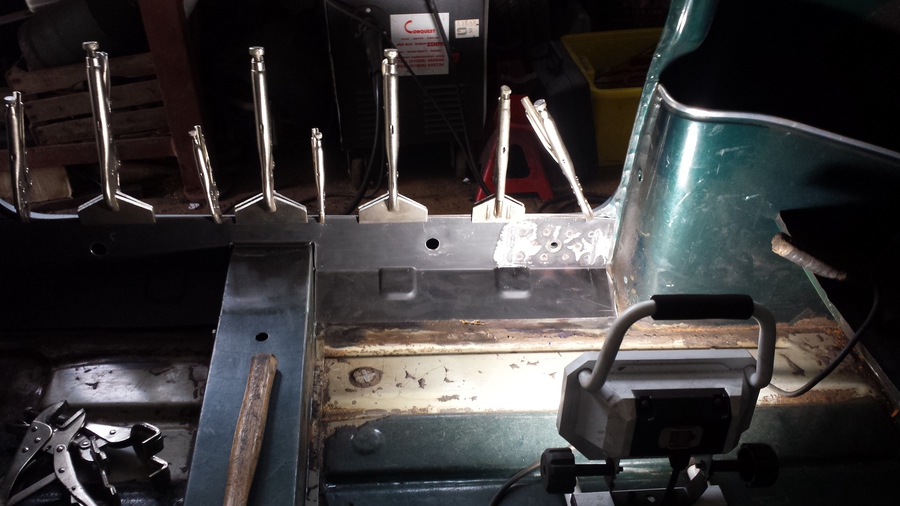
While Abi is using the shop vac to clean up, I get on with preparing the new inner sill to be fitted. I have to remove the seatbelt mount from the old inner sill and weld it to the new one, this takes quite some time. I user the spot welder and MIG welder to fix the seatbelt mount to the new sill in much the same way as on the original.
Monday, 20 October 2014
I know we don’t usually work on Sasha on weekdays but I have a week off work during half term so that Abi and I can try and make some headway, our schedule is falling well behind I want to get Sasha ready for January and Abi’s 17th birthday.
We have some problems today I ran out of cutting discs for the rotary tool which I have been using to cut out bits of the old outer sill and inner sill. I make an emergency call to Popa (my Dad) and he agrees to pick some up and drop them off for use so we can carry on working.
Abi gets on and treats the area inside the sill with rust treatment ready then to start fitting the new inner sill.
Tuesday, 21 October 2014
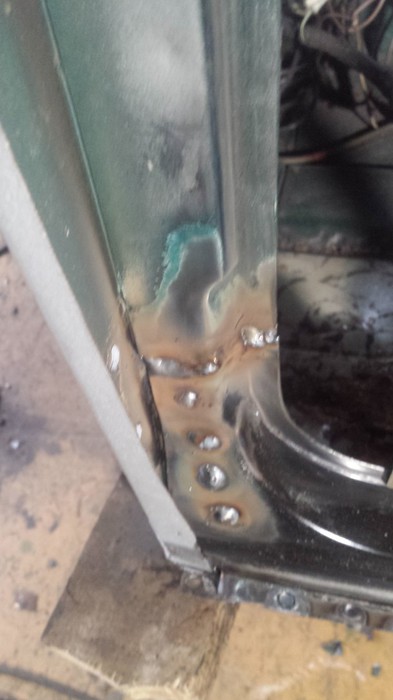
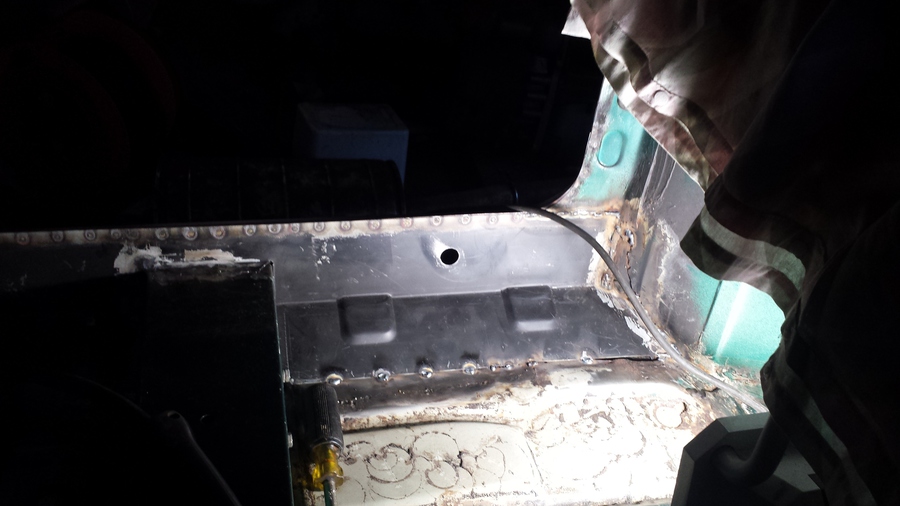
With the inner sill clamped into position I can start spot welding the inner sill to the doorstep, I remove one clamp at a time and spot weld the entire length, using about twice as many spot welds as there would have been originally, this process goes well and I have a nice neat job. My spot welder doesn’t like doing this amount of welds in a short space of time and gets extremely hot and I am in danger or melting the copper electrodes, plus it keep tripping out the electric supply and Abi has to keep putting the breaker back on.
With top edge of the inner sill spot welded to the door step I clean up all the spot welds with the wire brush in the grinder, this then leads to the next problem the grinder just stops working. I spend a while taking the grinder apart but can’t see anything wrong with it, the switch is ok, the brushes look ok and I can’t see any burnt out wiring. So I go in search of my other grinder, this was left in the workshop some time ago when I was helping Matthew do some work on his 1958 Alfa Romeo Julietta spyder, it seems that Brian (Matthews Dad and the owner of Sweethedges) has claimed it and I find it in Brian’s workshop.
So now we are able to continue.
I get the back half of the inner sill all welded into place, this is accomplished with a little help from Ian who has called in to see us today, he has the day off work as it is his birthday and decides to come and see what we are up to, so while he is there he gets roped in to help for a bit holding the long handled screwdriver to hold the panels together while I tack it in place.
Ian is no stranger to Minis he has had a couple of them the last one being Tango, because it was bright orange, unfortunately Tango was only 850, this could have been rectified quite easily as there were any number of 1275cc power units available at the time, but no what did we do? We turbo charged the 850. We even took it to Santa Pod and Castle Coombe but this is another story.
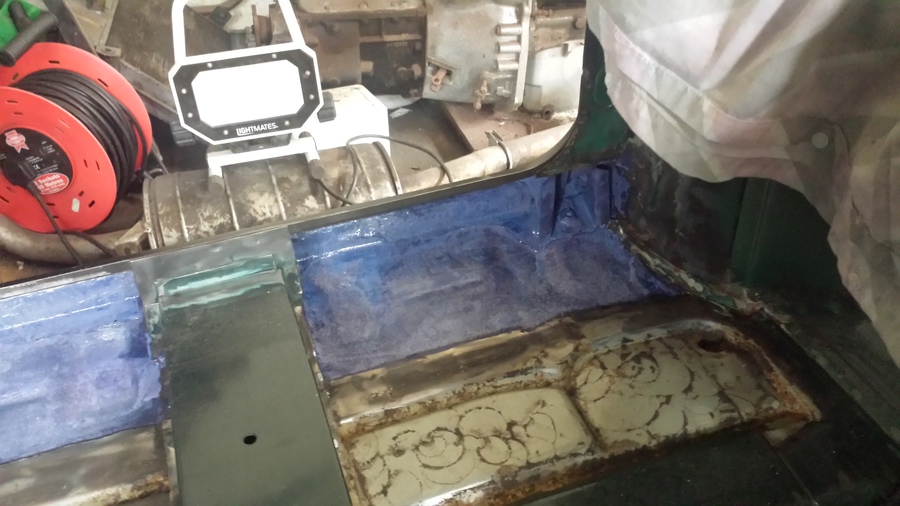
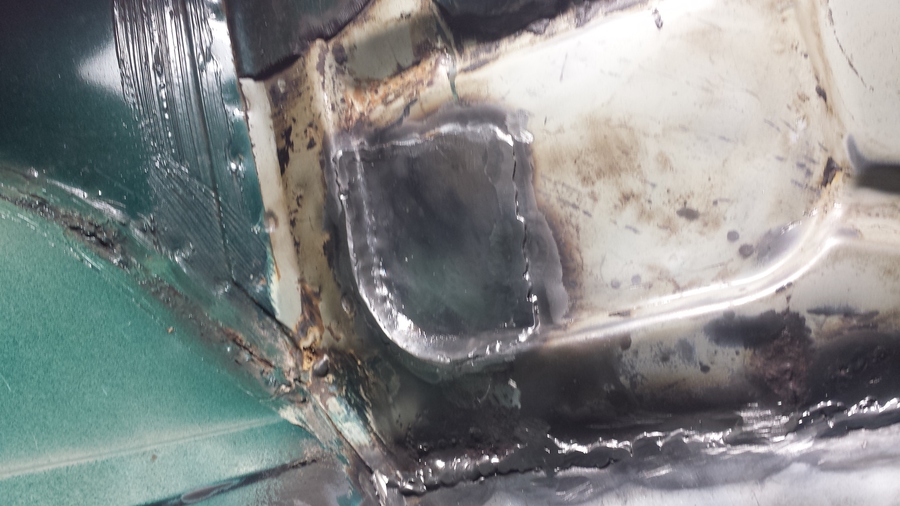
With the rear half complete I make a start tacking the front section in place, This goes fairly well but there is some previous damage to the passenger side foot well, as it has been jacked up under the foot well and pushed it up and the has been some previous repair work that will now need adding to to complete this area.
Wednesday, 22 October 2014
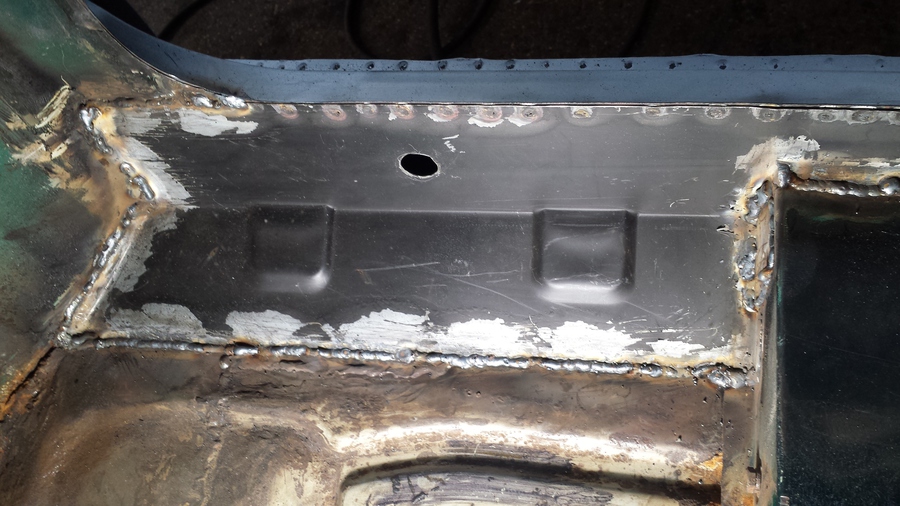
I hammer the floor back closer to it’s original shape and make a repair patch to cover the rusty area around the drain plug in the passenger foot well. I try and shape the patch as best I can because it needs to match the shape in the floor.
I complete welding this patch into position and finish welding the inner sill in place.
I finish off the job on the inner sill by tidying up all the welds with a grinding disc in the grinder and then clean the whole are with the wire brush in the grinder.
Disaster strikes again, the grinder becomes unusable, a bearing has collapsed in it and the wire brush causes it to vibrate so badly we can’t use it. Abi takes a look at the other grinder that stopped working, when she tries it smoke comes out of it and it trips the electric.
Nothing for it now but to replace both grinders, we plan to stop off at Screwfix on the way home and pick up a couple of replacements. It’s very useful to have one grinder with a wire brush in it and the other with a grinding or cutting disc in it.
While I have been working on the passenger side inner sill and floor Abi has been busy refurbishing parts.
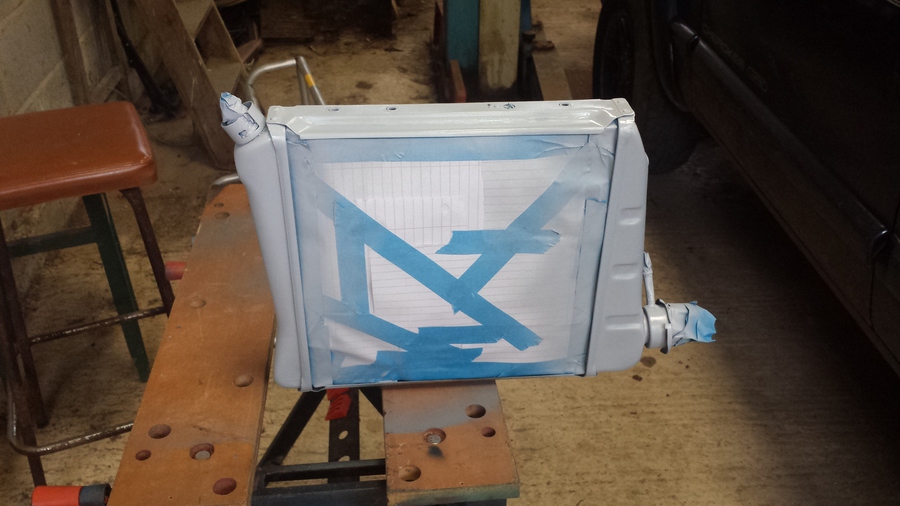
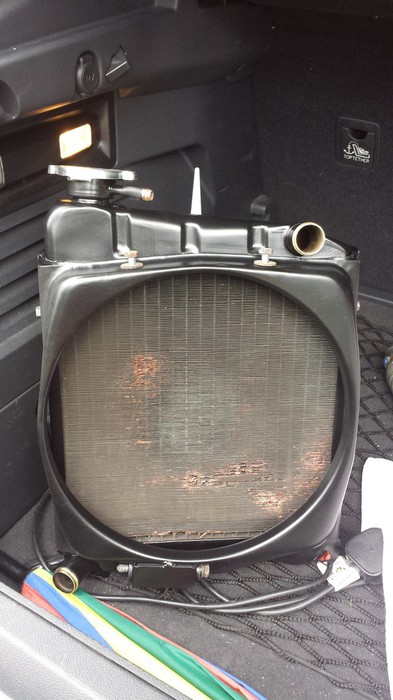
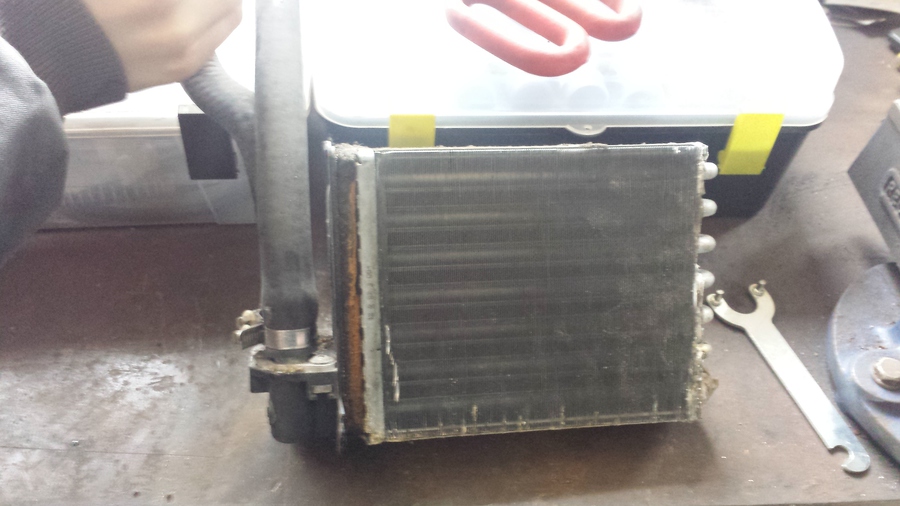
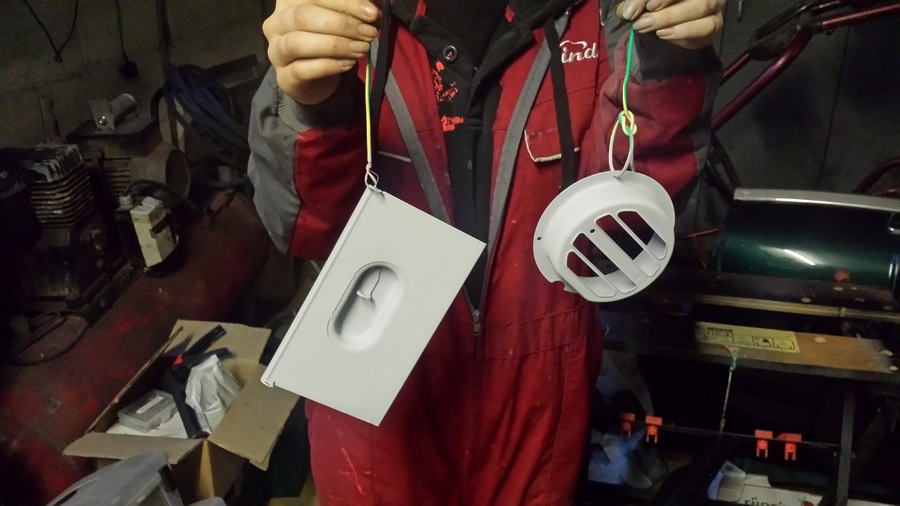
As you can see from this picture Abi has cleaned up the radiater, flatted the tanks and frame down and primed it.
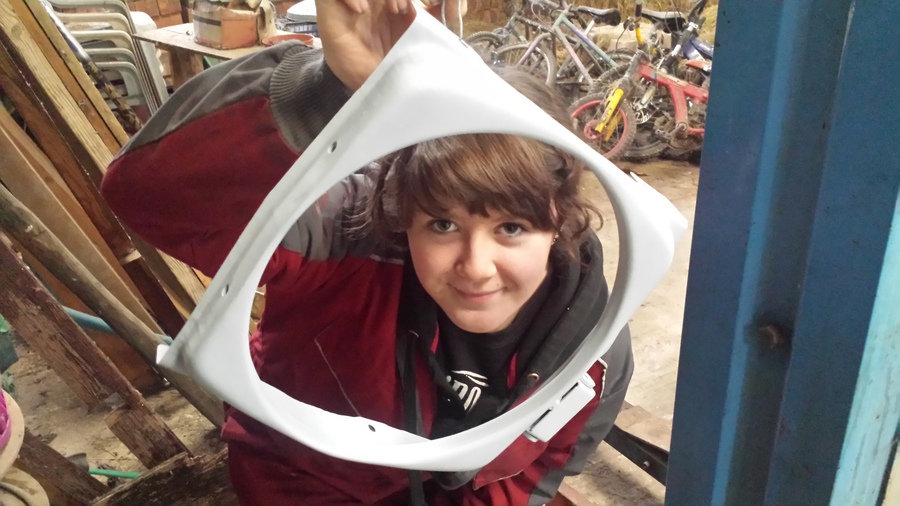
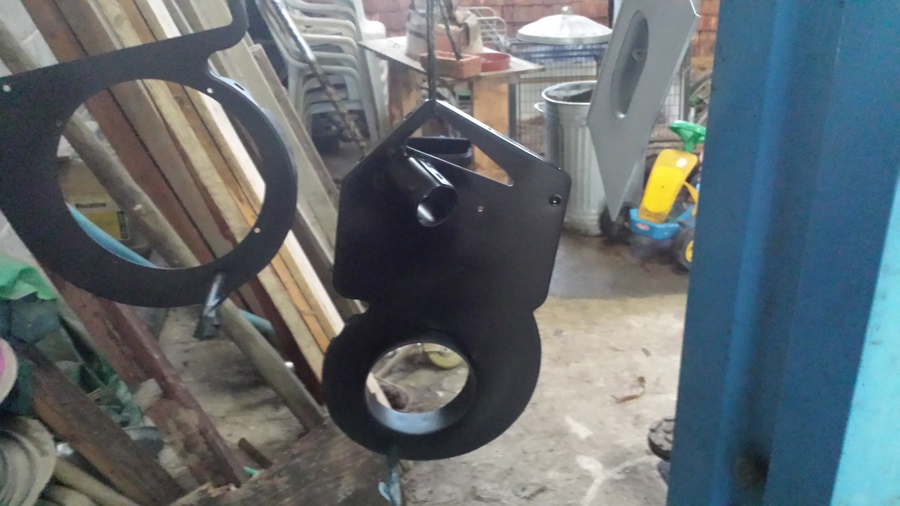
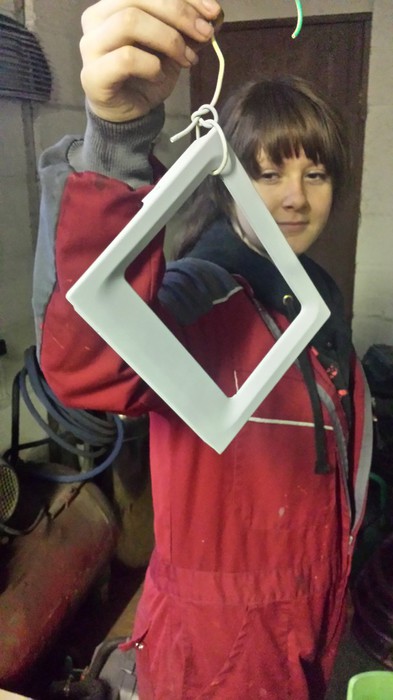
Abi has also prepared and primed the fan housing, or is it a picture frame!
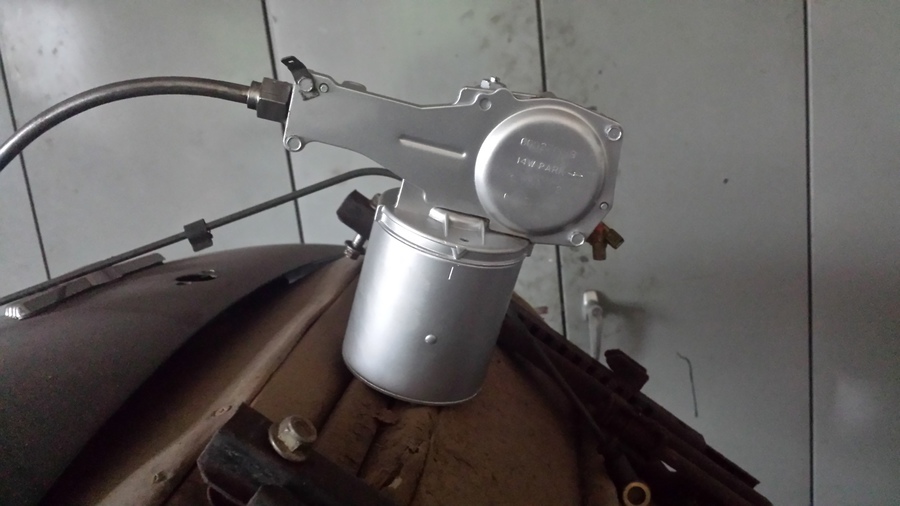
Abi has also prepared, primed and painted the wiper motor.
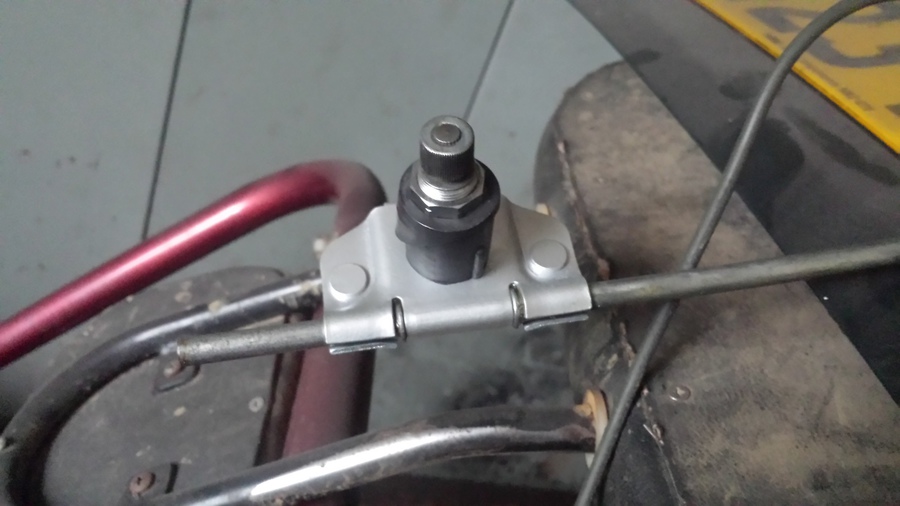
The wiper wheel boxes have had the same treatment, Abi has stripped the and washed out all the old grease and crud, and painted them in silver.
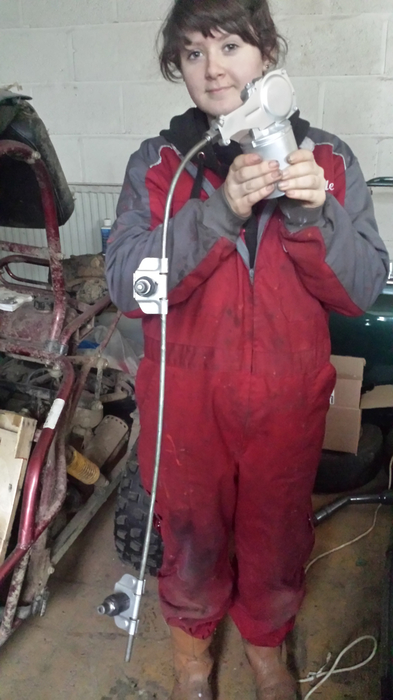
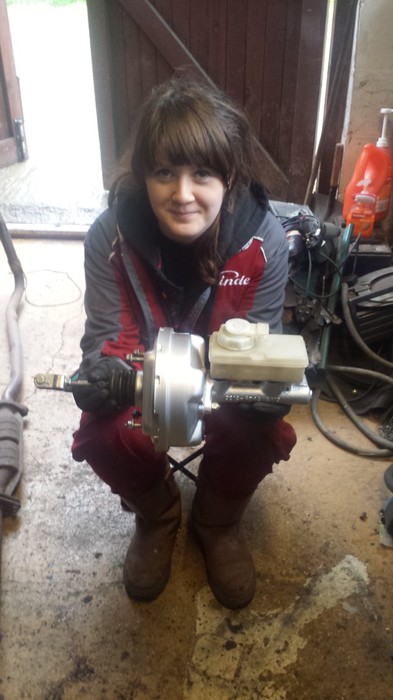
Here is Abi with the finished wiper assembly ready to re-fit (When we get that far). We will make a car restorer out of her yet!!!
Thursday, 23 October 2014
Abi has done a great job with painting the radiator and cowl in satin black.
I have cut out all the old inner sill and begun the clean out process to remove all the old outer sill and everything left behind, all the surface rust has been removed with the wire brush in the grinder or a small wire brush in the air powered die grinder.
The entire area is then treated with a rust treatment, we are now ready to start the process of installing the new sill.
Friday, 24 October 2014
I have prepared the new inner sill for installation, drilling some holes to allow me to inject wax oil into the sill at a later date also attaching the seatbelt mount in a similar way to how it was attached from the factory using spot welds and MIG welds.
With the new inner sill held in the correct position with many clamps I spot weld the seam with the doorstep removing the clamps as I go. Once the seam is complete I clean the spot welds with the wire brush.
Holding the inner sill down in various places I am able to tack the front half of the inner sill into position. Then finish the front half off by completing the weld between the tacks.
Sunday, 26 October 2014
Abi starts the day by stripping down the heater assembly, we noticed when we were driving Sasha around that occasionally white dust would come out of the heater. This is usually a sign that the matrix is leaking and the aluminium of the matrix is corroding. Sure enough when she takes it appart there has been a repair to the matrix on one side and on the other where the pipes enter it they are leaking as well. We take the pipes out of the matrix to find that the aluminium pipes have almost corroded away in places. The matrix and these pipes will need to be replaced, Abi decides that since the heater is in pieces she will re-paint all the pieces.

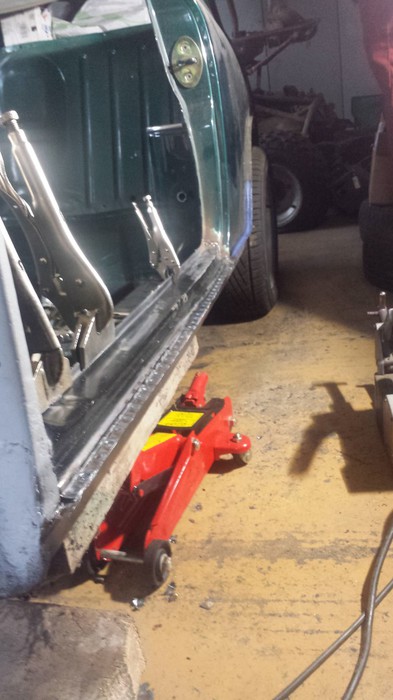
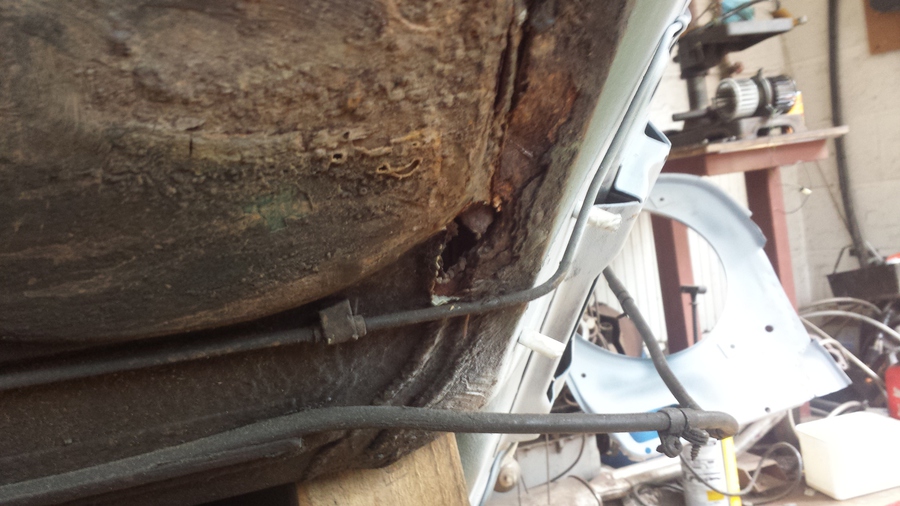
Now that we have finished most of the work inside the car. We need to get underneath to fix some rust we found when we were working inside. We don’t have a turning frame so we just tip Sasha on her side and hold her up with some wood. Not ideal but the best we can do for now.
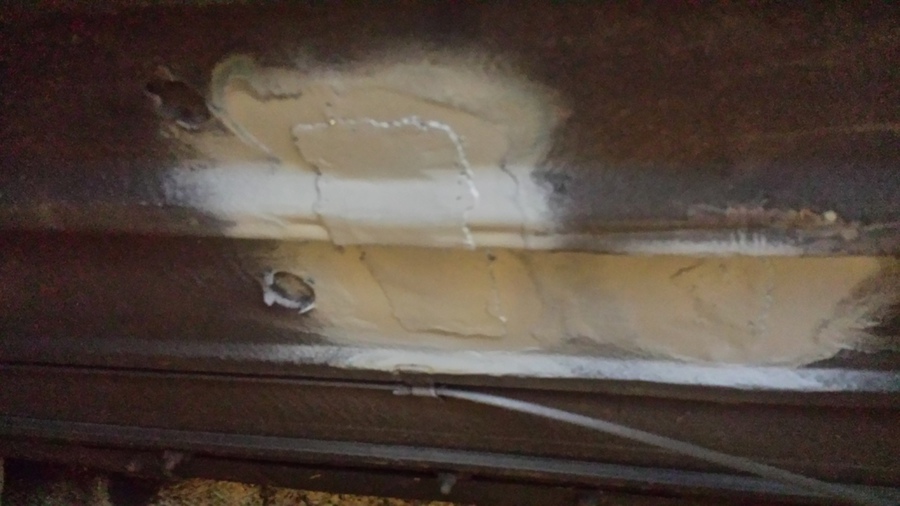
Where a section has been repaired inside I just need to tidy it up on the outside.
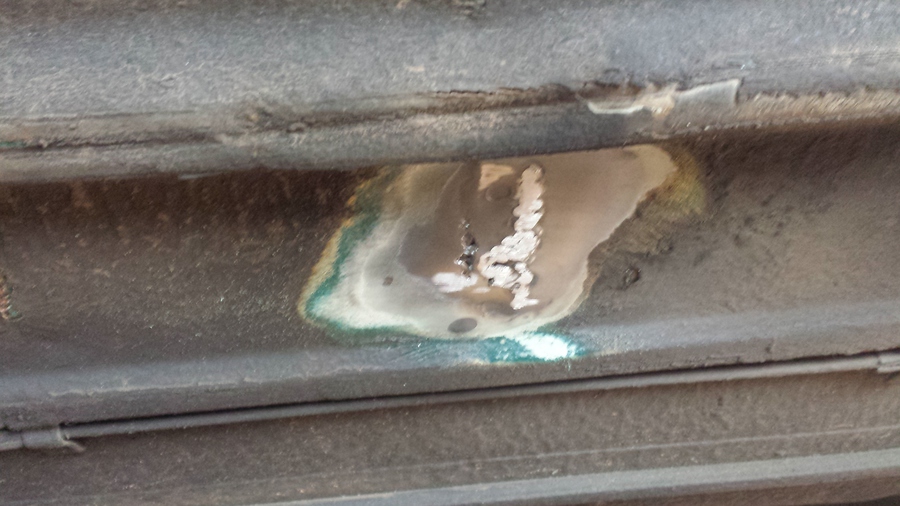
Here is another hole that needs attention.
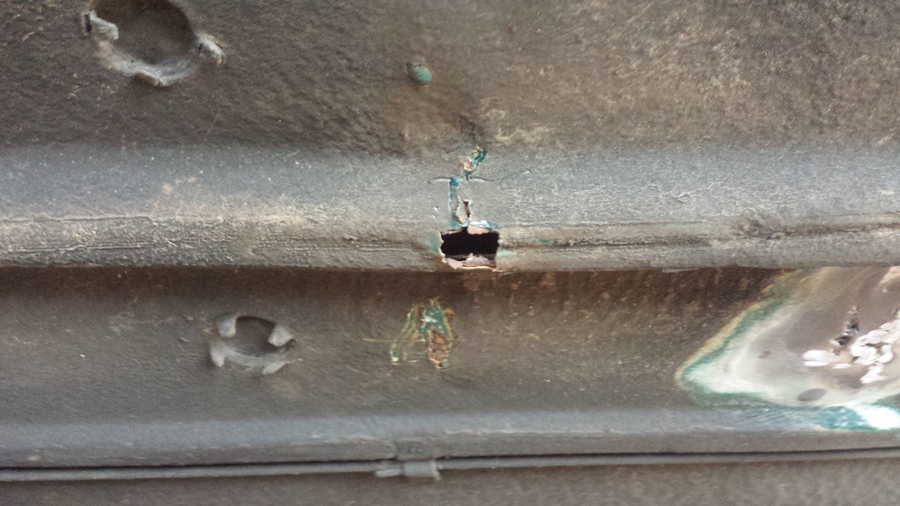
This is another, on this one there was some pin holes visible on the inside around some repairs that had been done before.
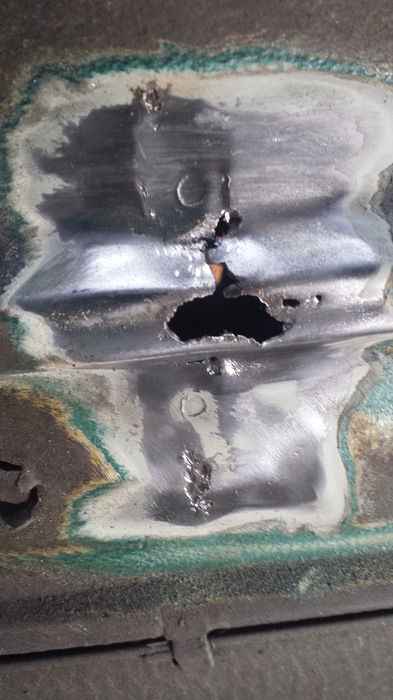
After I run the wire brush over this one, the hole gets a bit bigger revealing a bit more to be done. I end up cleaning up a much larger area stripping paint and under seal off the car.
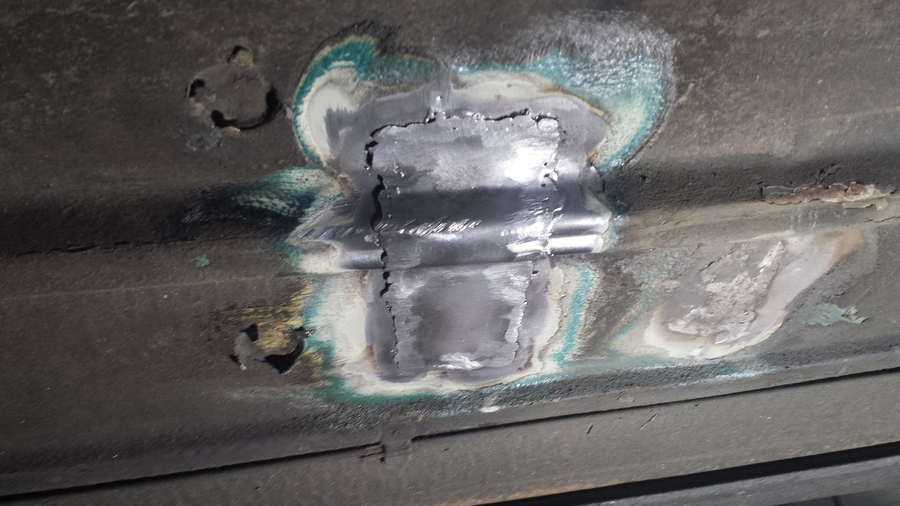
I make up a patch and shape it to try and match the rib in the floor, test fit the patch and mark round it so I can clean up the area ready to weld. I hold the patch in place with the long handled screwdriver and get some tacks on the patch to hold it in place. I can then hammer the edges down, hold them in place and tack them, I then finish hammering down any edges that are not flush with floor and seam weld between the tacks.I then grid back the excess weld and clean up the area with a wire rrush with the wire brush in the grinder. We have another problem the bearing in the new grinder has almost seized up the brush barely turns and the grinder is getting very hot. This is going to have to be returned to Screwfix.
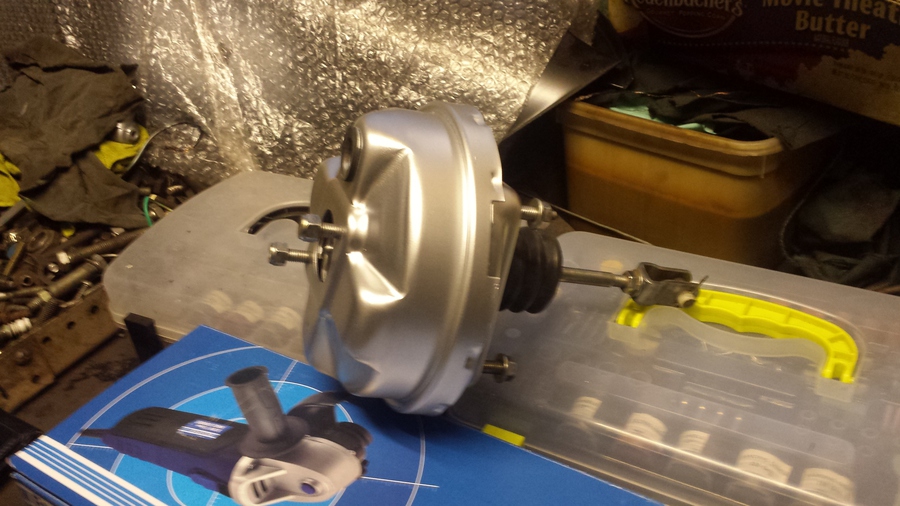
Abi has cleaned off the surface rust from the brake servo unit with a small wire brush in the die grinder, primed it and given it a top coat of silver.
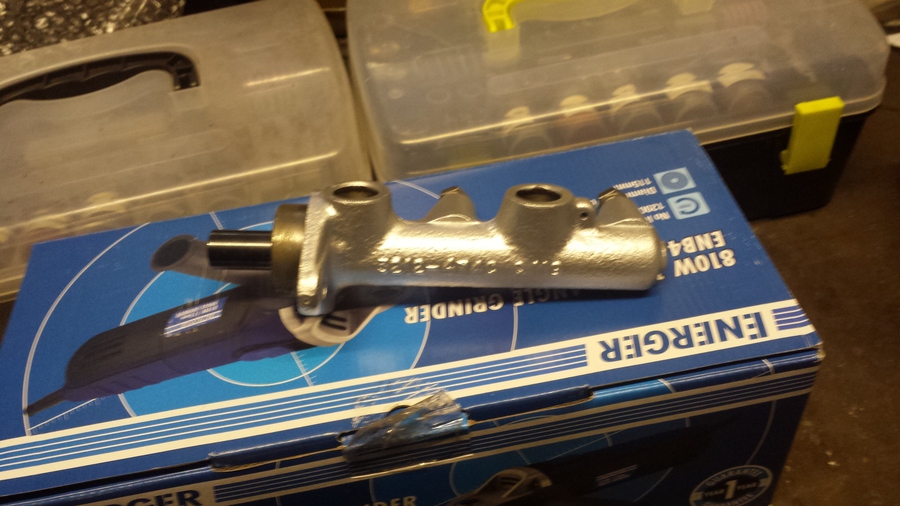
Abi has stripped the fluid reservoir from the master cylinder, cleaned the master cylinder with the little wire brush in the die grinder, primed it and painted it silver. Once the paint hardens a bit more it can be put back together ready for installation later.
We have finished for today, after a long week we have accomplished quite a bit including killing four grinders and a rotary tool.
Oh yes I forget to mention the rotary tool speed switch stopped working, only allowing full speed all the time, eventually it just blew up in a little cloud of electrical smoke.
As I said earlier one of the new Screwfix grinders, the bearing seized, the other the bearing just fell apart leaving the disc wobbling about all over. Another trip to Screwfix to excange them, maybe I’ll upgrade them to better ones.
Sunday, 2 November 2014
We have put the servo, master cylinder and reservoir back together, this is now ready to be re-fitted when we get to that stage.
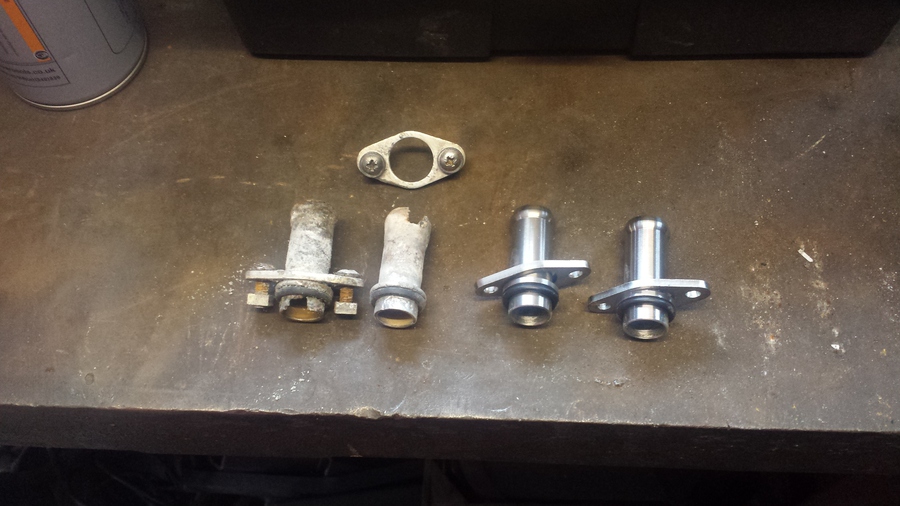
These are the old pipes that came out of the heater matrix along with the new ones, you can see from this picture just how much corrosion there is. The new parts are stainless steel so they should last a lot longer than the original aluminium ones.

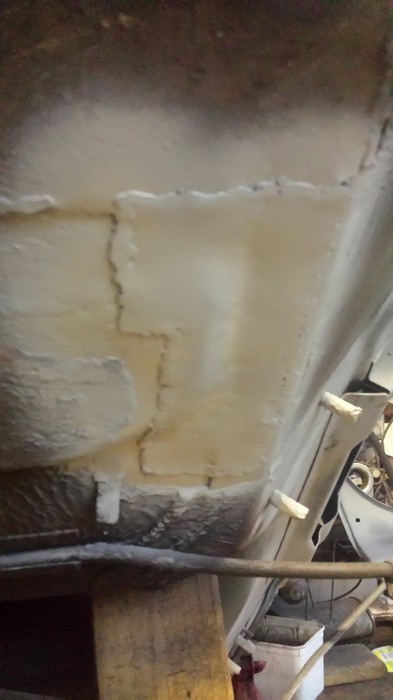
I clean up the section of the floor under the drivers’ foot well, as I remove the old under seal the hole gets bigger, I end up having to make up a sizable patch.
With the patch made up I hold it in place with the long screwdriver and get some tacks on it to hold it in place so I can then hammer it down into the correct position, then finish off seam welding it all the way round.
Abi has been getting on refurbishing the end plates for the heater assembly, she has now painted these satin black, unfortunately it is a bit damp out in the barn and the paint has bloomed i.e. it has got moisture in it.
You can see from this picture as well that the heater assembly body has bloomed also, we will have to wait for the weather to warm up a bit or get some heat on in the workshop to continue any more parts painting.
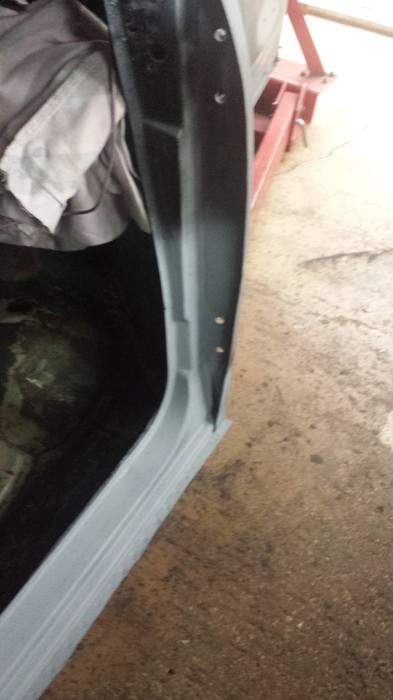
The workshop is a bit warmer so Abi does some painting on some bare metal surfaces on Sasha, with the damper weather we can’t leave bare metal surfaces to long or they start to rust over in a matter of days. So Abi has been cleaning up the drivers’ side doorstep and put on some etch primer to keep the rust at bay.
Abi continues along the doorstep up onto the A post, I must say she is doing a good job.
I finish off the work on the patch under the drivers’ side foot well and get some primer on there too.
The patch under the seat cross member is cleaned up and treated with etch primer.
Abi has cleaned up the direction flap and the motor end cover from the heater assembly and painted them with primer.
This is the part from inside the heater that the direction flap closes against to direct the airflow either to the screen or inside the car, this too has been painted in primer.
Abi is starting to look a bit grumpy so I think it is time to finish off, clean up the workshop, lockup and go home.
Sunday, 9 November 2014
The first job today is to put a small patch over the drain hole near the heal board at the back of the car, I clean off the area with the wire brush in the grinder so I can see the extent of what needs to be covered. I make up a patch, do a couple of test fits, hold it in place with the long handled screwdriver and tack it into place, make any adjustments, hammer the edges down then seam weld it all the way round. Then grind off the excess weld and clean up again with the wire brush.
While cleaning up after putting in the patch I see that there is an additional set of pin holes that need to be fixed a little lower down, I might have gotten away with just welding them over but I decide to make up another small patch. With this little patch in place and cleaned up we can get on with other things.
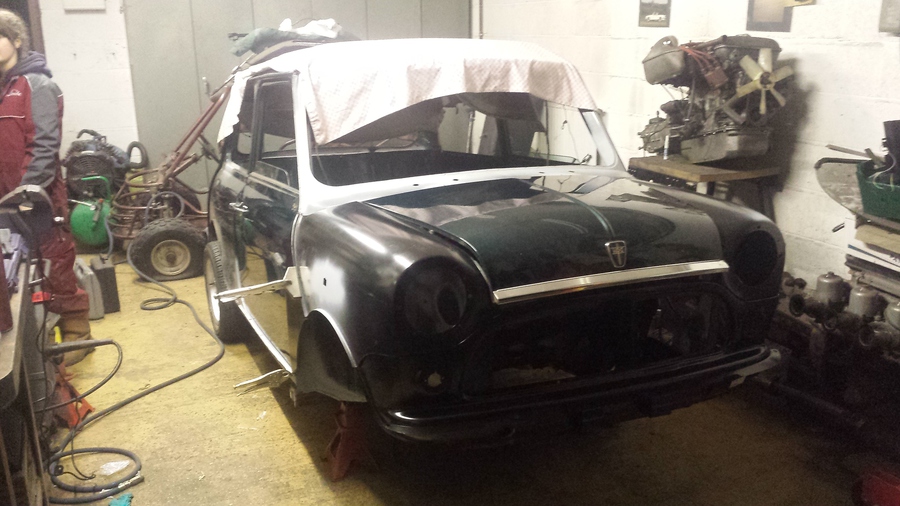
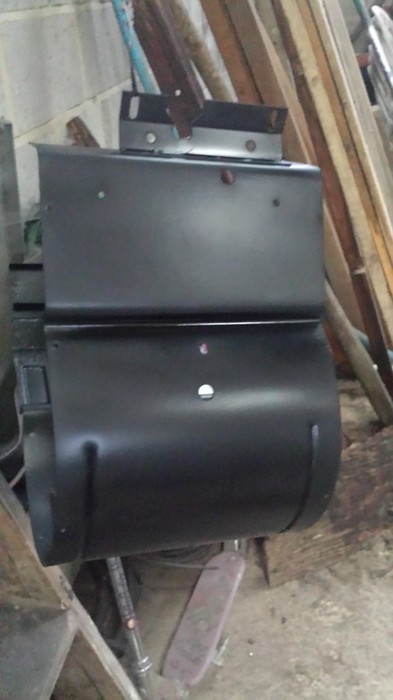
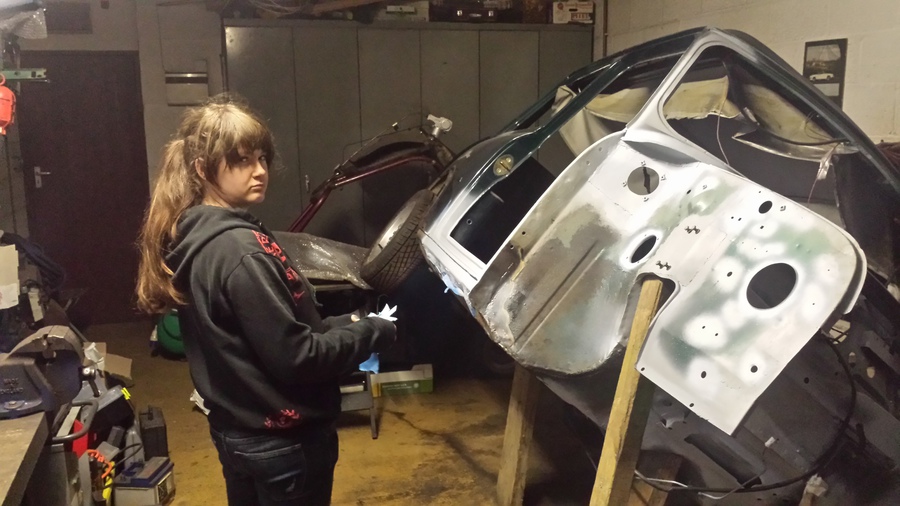
Now that the replacement front panel has arrived we can mock up the whole front end, we decide to check all the panel gaps at the same time. We re-fit both doors, we have been very careful up to now to leave all the shims in the door hinges just as the originally came off that way they should go back on just as they came off.
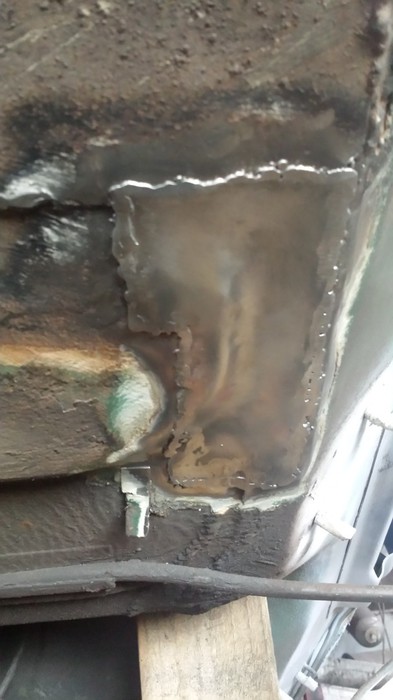
I fit the new rear sub frame mounts to the body, these will not be coming off again so to stop any water getting behind them I coat the area on the body and the back of the mounts with under seal. We have chosen to fit solid steel mounts in favor of the standard steel and rubber ones or even the nylon ones. The solid steel ones from Mini Sport have quite a large footprint onto the body so hopefully we won’t get any stress cracking round them.
Next I put the front sub frame back in using the new poly bushes that we have bought, as the sub frame is still bare it goes in quite well just a bit of levering to get the bolts through the rear mounts, but we are all in and all the bolts are tight.
We re-attach the bonnet hinges, these are a pain to get back in as there is a couple of nylon washers that go in between the hinge and the bracket on the body, but after some cursing we eventually get them back on, the re-fit the bonnet.
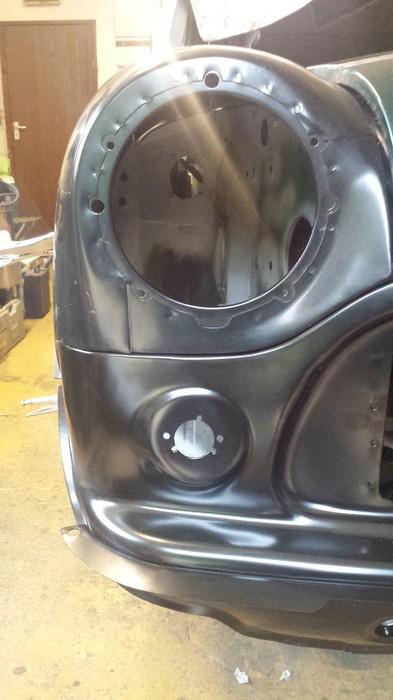
I fit the aluminium front teardrop mounts to the new front panel then loosely bolt the front panel to the front sub frame, I leave it a bit loose for some adjustment.
With the aid of Abi and lots of clamps we fit the wings and A panels.
With the bonnet down we can have a good look at the panel gaps between the door and A panels, the gap under the headlights and the gap around the bonnet.
All said and done considering the amount we had to cut out we are quite happy with all the gaps, we will have to do a little massaging here and there during actual fitting time but I think we are all good.
This has taken us longer than expected and it’s now time to go home.
Sunday, 16 November 2014
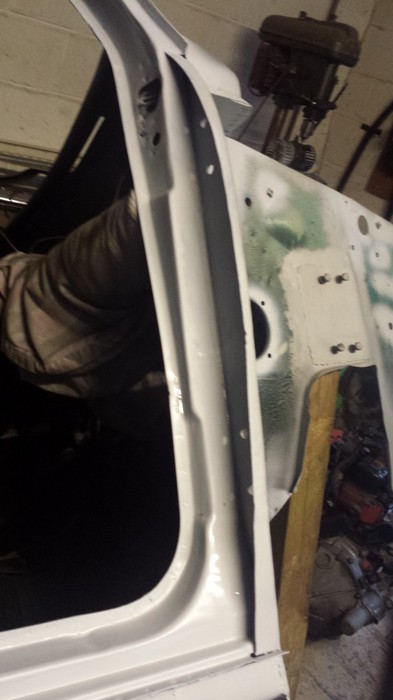
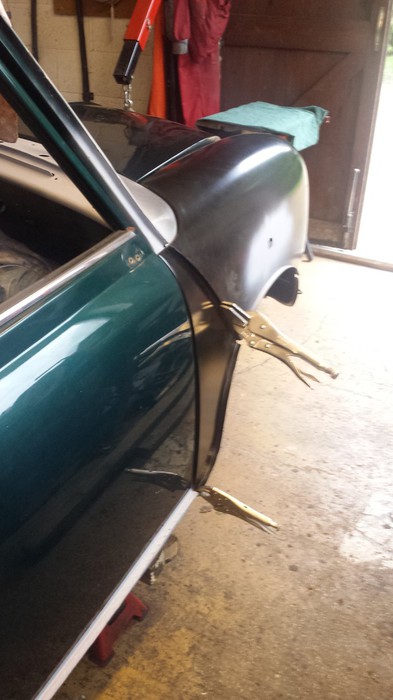
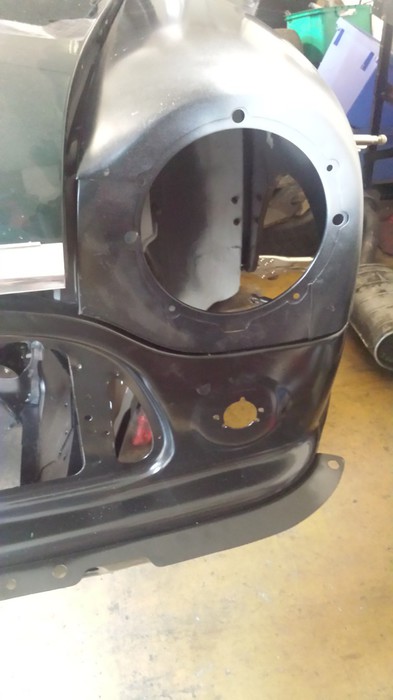
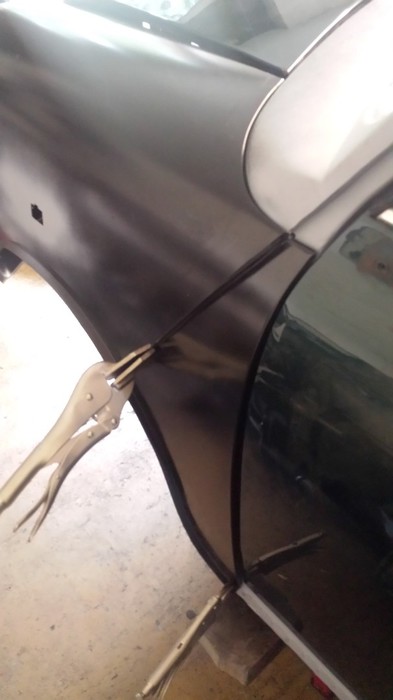
With all the front panels mocked up and the doors and bonnet fitted, you can see in this picture the panel gap between the door and A panel. The A panel is not quite in it’s correct position as I haven’t fitted it properly to the flitch panel but even so the alignment is good.
In this picture you can see the alignment of the wing with the front panel, I am very please with this although it will take some work to align the wing and front panel near the wheel arch.
The alignment between the wing and font panel on the passenger side wing is also very good, in this picture you can also see the alignment of the bonnet to the front panel and the bonnet to the wing.
I didn’t take any pictures showing the alignment between the bonnet and the scuttle panel but that too is good.
The alignment between the door and A panel on the passenger side is good as well, over all I am very pleased with the fitment of the front end.
Anyway, enough time spent procrastinating over the fitment of the front end panels it’s time to start actually fitting them to Sasha.
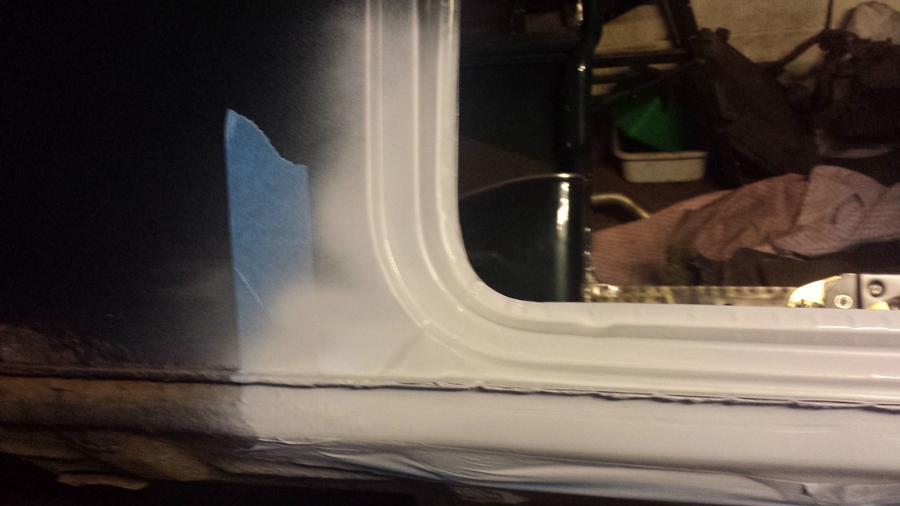
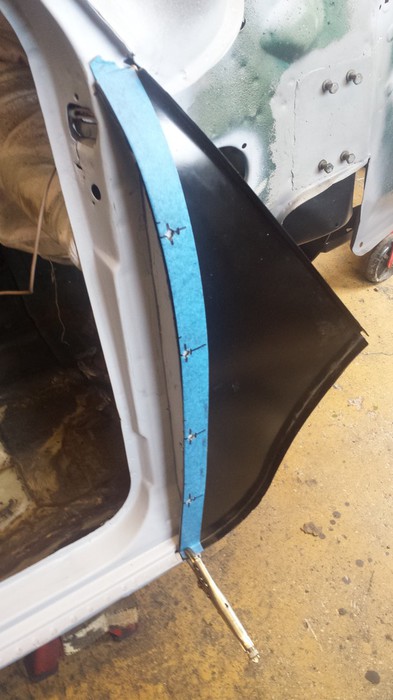
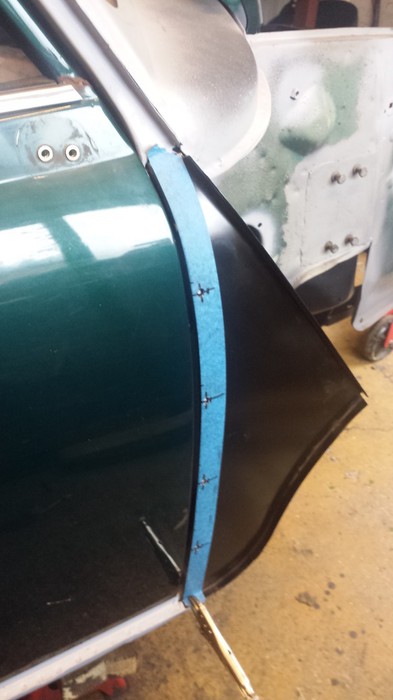
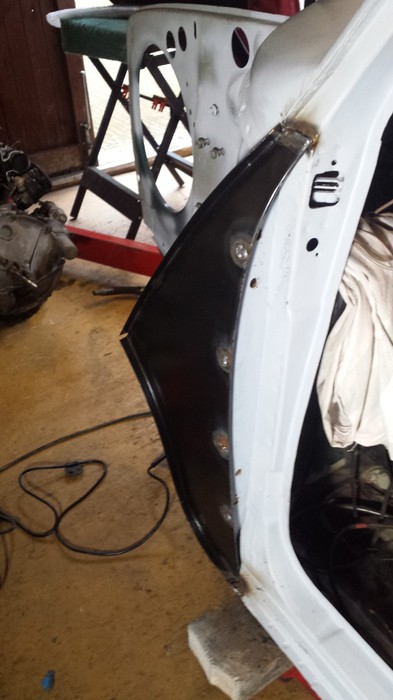
I start with the drivers’ side A panel, as you can see from the picture I have put some masking tape along the edge of the panel, this serves a couple of purposes, one to protect the panel while I fit it to the flitch panel and secondly so I can mark out where I am going to drill the panel to plug weld it into place. I then drill the holes in the A panel ready to weld it.I have a door skinning tool somewhere but I have spent ages trying to find it with no success so I use a strip of hardboard to protect the face of the A panel while I use vice grips to bend the lip of the A panel round to edge of the flitch panel.
Once I have the A panel properly fitted, I re-attach the door so I can align the A panel. I am very pleased with the fit and the panel gap.
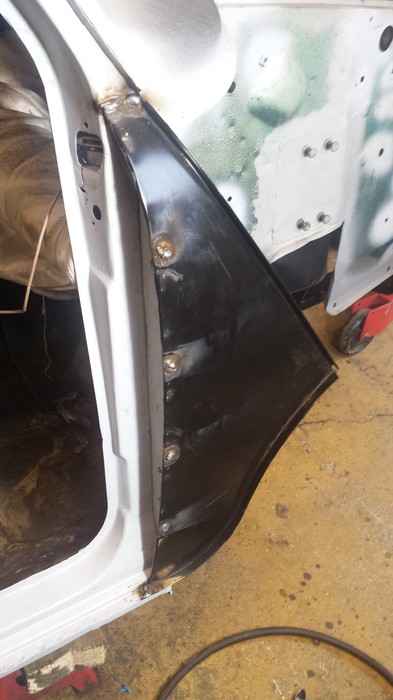
With the door off again, I plug weld the A panel to the flitch panel with the MIG welder, I just can’t get the spot welder in here to do it with that. I also MIG weld the top of the A panel to the bottom of the windscreen pillar and weld the bottom of the A panel to the sill/doorstep.
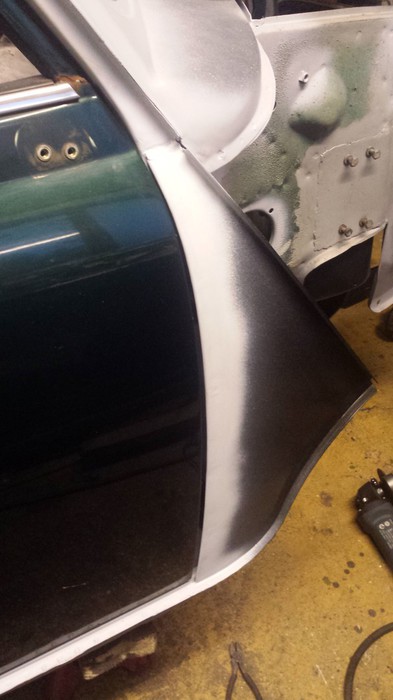
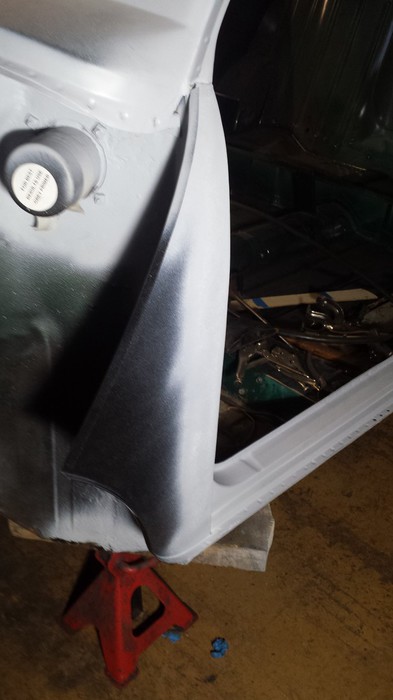
After grinding back the weld to leave a more or less flat surface I clean up the area with the wire brush and treat it with some etch primer.
I then put the door back on to check that the A panel alignment is still as it should be, the A panel has moved a little as I have welded it into place but it is still ok.
The final job today I start the same process on the passenger side, I fit the A panel and clamp it into position, then to check the alignment I put the door back on. Satisfied that the alignment is good it’s time to finish for the day.
Sunday, 23 November 2014
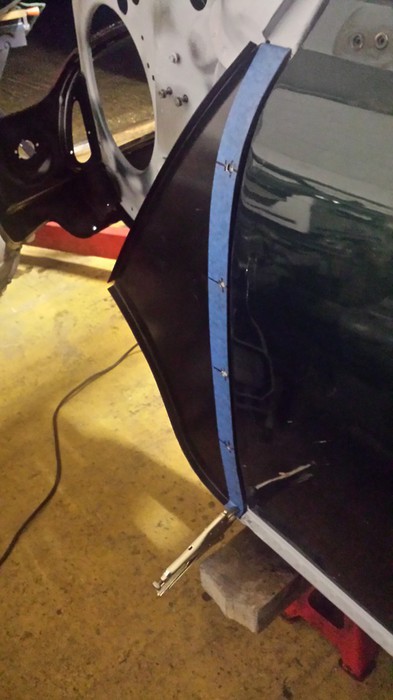
Following the same process for the A Panel on the drivers' side I test fit it and clamp it in place having already put some masking tape down the edge, marked the holes ready to plug weld. I re-fit the door to check the alignment, and then remove it again after making some minor adjustments. I then bend the edge over tight against the flitch panel using a length of hardboard to protect the face of the A panel from the jaws of the vice grips. I don’t bend it straight together but very carefully going from top to bottom working it tighter and tighter each time, doing it to quickly can crease the panel. When I am happy with the seam I plug weld it to the flitch panel then weld the seam it the top of the A panel to the bottom of the windscreen pillar, then finish the last weld at the bottom of the A panel to the doorstep/sill.
Next job is the grind back the welds leaving the A panel nice and flat, clean up the area with the wire brush then apply some etch primer.
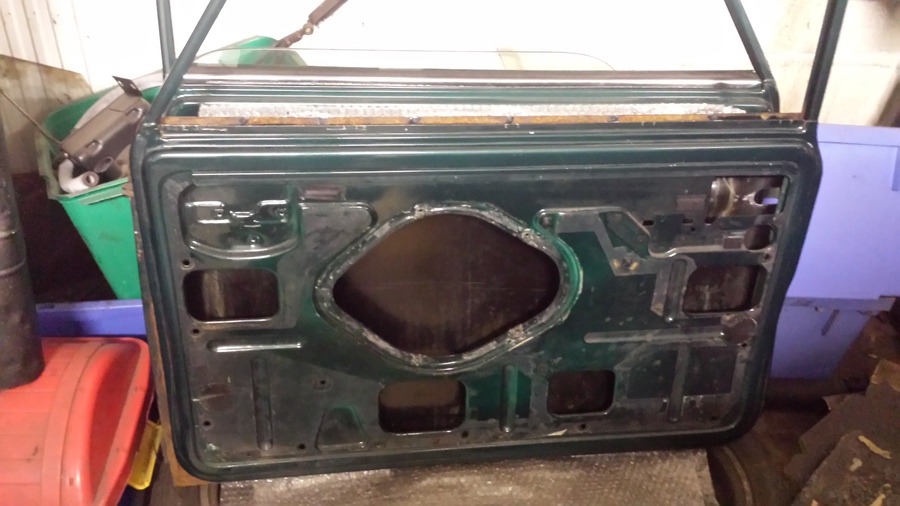
While I have been working on the A panel Abi has been stripping out the doors, removing the windows, winding mechanism, locks, handles and rubbers. The rubbers are going hard and starting to crack and the fixings on the bottom of the glass that hold it to the regulator are all rusting quite badly and need to be replaced this is stopping the windows from going all the way down properly and making a graunshing sound as they catch on the way up and down. The door skins have both been replaced at some point and there is no sound deadening on the door skins so they ring when you shut the doors, this will need to be addressed. Also on the drives’ side door a bit of weld has broken loose allowing the door to drop slightly making it catch on the striker bar if this is not sorted it is just going to get worse. We also want to clean up the doors and re-paint the inside before the outside of the car is painted. But we have a fair bit more to do before we can get that far.
We are located at:
Market Harborough
Leicestershire
Contact us
If you would like to contact us:
rod@howitt.org.uk
abi@howitt.org.uk
sasha@howitt.org.uk
Or use the contact form.