
Timeline 16 November to 8 March 2015
This is a continuation of the work done to Sasha.
Sunday, 23 November 2014
We finish the day by putting the wings back on again to check the alignment of the wings now that the A panels are properly fitted. The panel fit is quite good but when we do the final fit on the wings there will be a bit of adjustment required, we have taken so much off the front of the car I think things will have moved a bit, but overall it all looks quite good.
Anyway time has caught up with us again, we clean up the workshop, lock up and make our way home.
Sunday, 30 November 2014
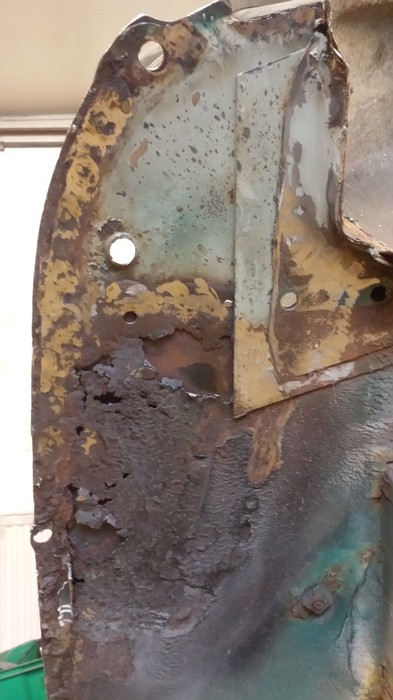
Today I start off by cleaning all round the door hinge and A panel area on the drivers side, I use the wire brush in the grinder and small wire brush in the die grinder to get into tighter areas also some 180 grit wet and dry paper to smooth some bits off. Then complete I go over the area with some panel wipe as the area is now quite dirty and dusty. When the panel wipe is dry the whole are is treated with etch primer, giving that time to dry seam sealer is carefully applied all round the joints in the panels, sometimes using fingers to squeeze the sealer into the joints and in some places using a small screwdriver to get the sealer into difficult areas. A little tip to stop the sealer sticking to your finger or screwdriver etc. Is to dip it in to some cellulose thinners, I don’t remember who told me this but it is quite useful.
Before I start putting the wings on I get some seam sealer into the joint between the A panel and the flitch panel while there is a bit more room. I clean up the whole are using the wire brushes and wet and dry paper, give it a little panel wipe to clean it up. Wait for it to dry, then treat it with etch primer. When the primer is dry apply seam sealer using a mastic gun to squeeze the sealer right into the joint, sometimes this sealer is just skimmed across the top and not forced into the joint, but I try and make sure I get it right in there, when everything is back together this will be under sealed as well to try and keep the rust at bay.
I do exactly the same with the joint between the A panel and the flitch panel on the passenger side, making sure to squeeze the sealer right into the joint.
I also do the same to the area around the door hinge and the A panel on the passenger side using the same techniques used on the drivers’ side.
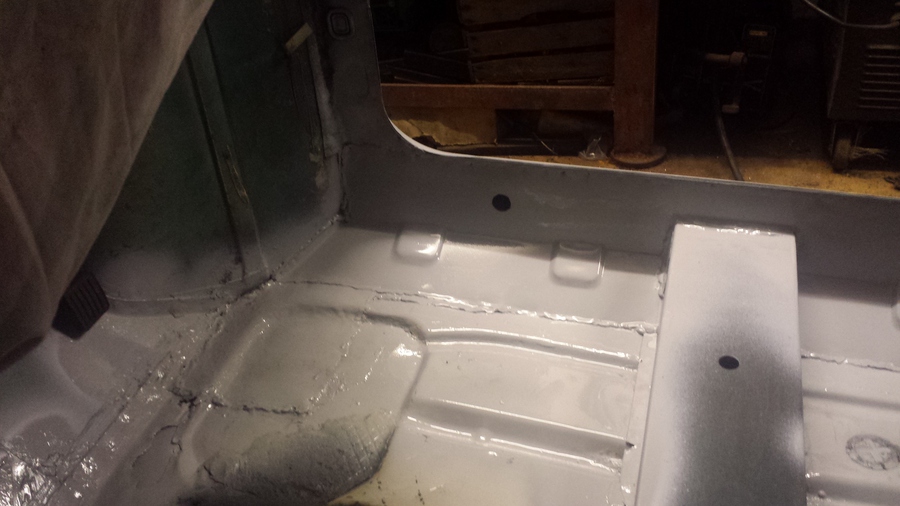
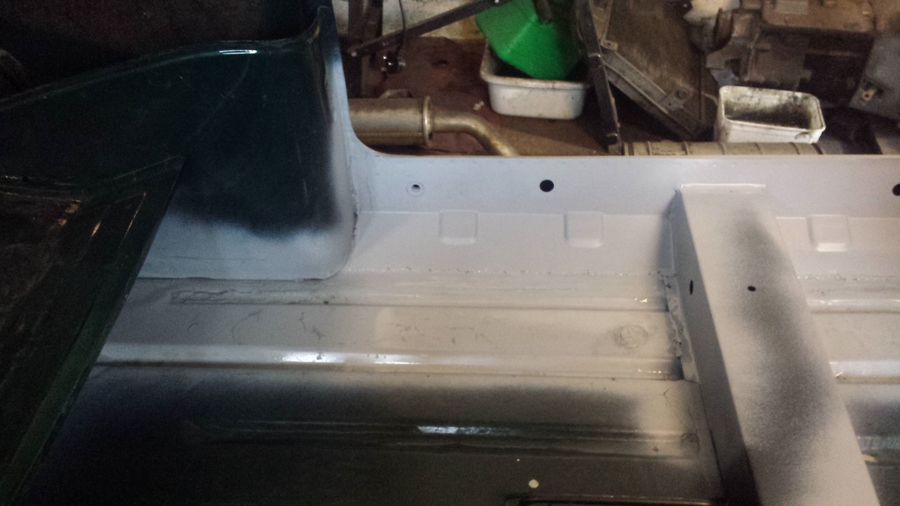
While I have been doing the seam sealer Abi has been cleaning up the front section of the floor on the driver side, it has been getting a bit of a mess in there and it hasn’t had any paint on it so a bit of surface rust has built up on it. Once she got it all cleaned up she treated it all with etch primer.
With that done she continues with the rear section of the floor on the drivers’ side.
We have run out of time again today, we clean up the workshop, lockup and head off home.
Sunday, 7 December 2014
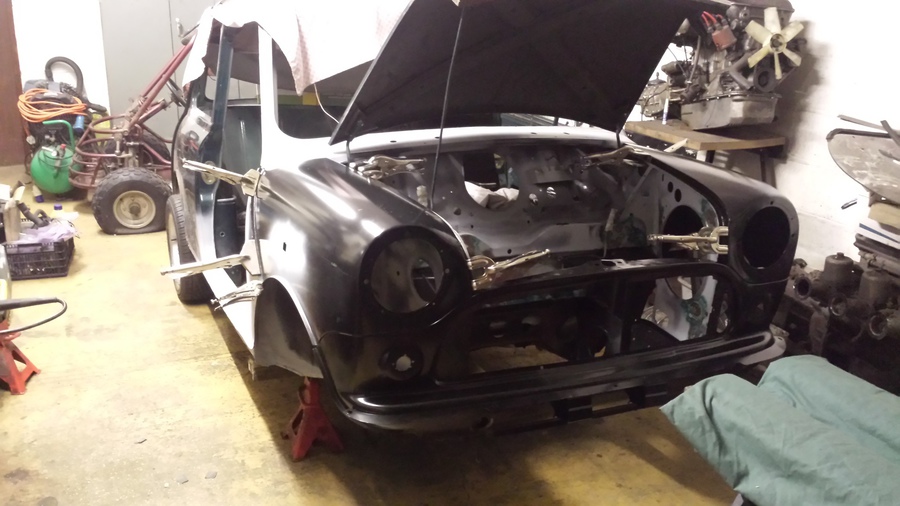
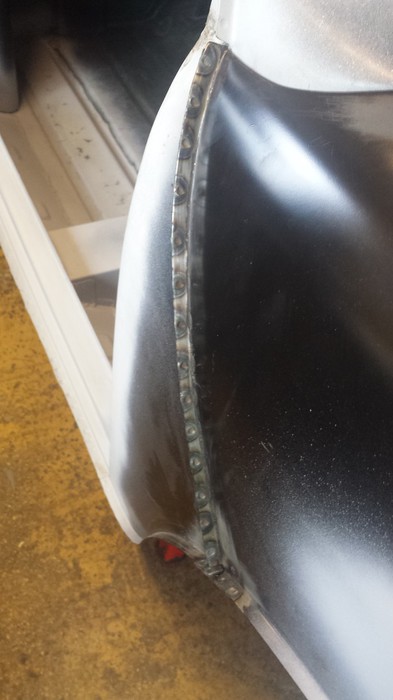
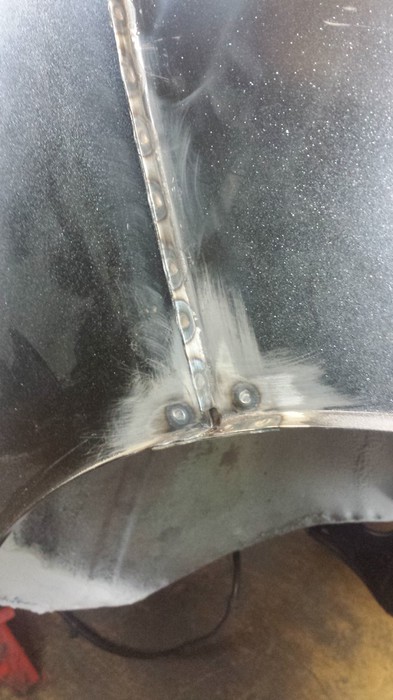
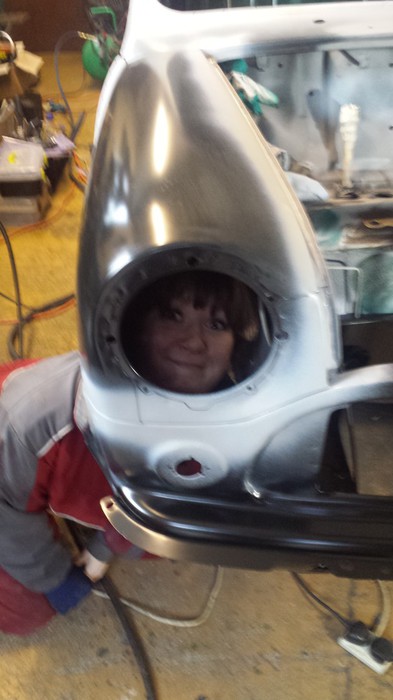
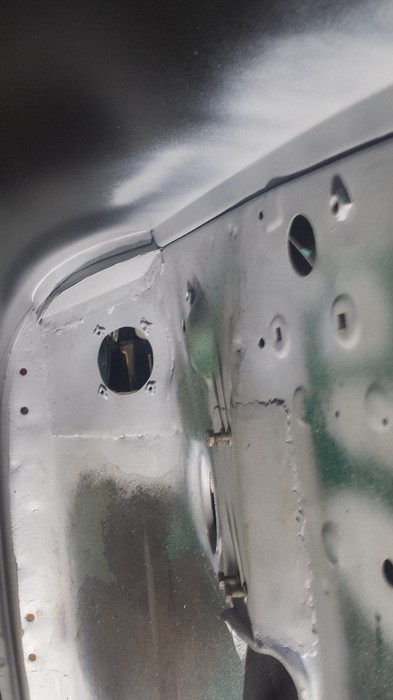
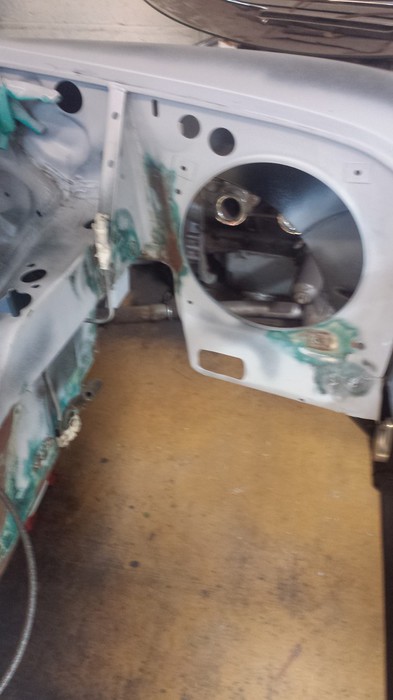
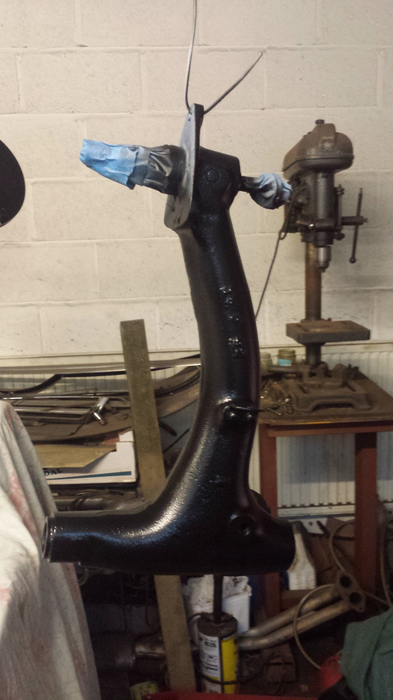
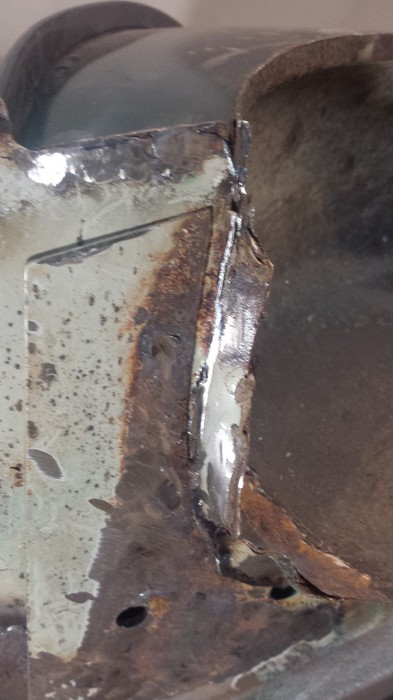
Today I make a start on getting the front end spot welded on, I get the wings lined up and adjusted and clamp them in place using all the clamps I have, every single pair. I clamp the A panel to the wing, the inner wing to the wing and the seam on the inside between the wing and the front panel. Some of the joints need moving around a little to get them into the right spot. At this point the front panel bolts are still loose so that the front panel can be adjusted to get the right gaps for the bonnet and the correct alignment of the wings to the inner wings. Abi and I mess about with the clamps for quite some time before we are happy with the alignment. It seems that the scuttle panel is about 5mm forward on the drivers’ side so that the gap between the wing and the scuttle panel is very small, we take the wing off again and adjust it a bit and camp it back on again, this is a little better but we can’t do a lot with the gap. She tells me I am procrastinating too much, it looks good and I should just get on with it. I can’t help it I like to do the best job I can and if something is not quite right it will bug me forever. I spot weld the seam between the wing and the A panel, this goes quite well but as we have found before after a couple of spot welds the electric trips out and you have to keep stopping to clean the electrodes on the spot welder and reshape them now and again.
I even make up the little stiffening piece that goes between the wing and A panel and spot weld it in.
Now the A panel joint is done it has stiffened up the wing a fair bit and it has pulled the seam between the wing and inner wing a little, we have to release the clamps on that joint work it a bit and clamp it back down before I can spot weld the joint to the inner wing. It’s a little bit tight towards the front of the wing near the headlight and it takes a bit to pull the panels together but we get there.
Next I spot weld the seam under the headlight from the back, this is a bit difficult for me as I am a bit big to fit into such a small space, but after a while I squeeze myself under the wheel arch and get it done.
I follow the same process on the passenger side, spot welding the seam between the wing and the A panel.
I have made up the stiffening piece for this side as well and spot weld it into place.
The seam between the inner wing and the wing goes together much better on this side, I think the gap between the wing and the scuttle panel is almost perfect.
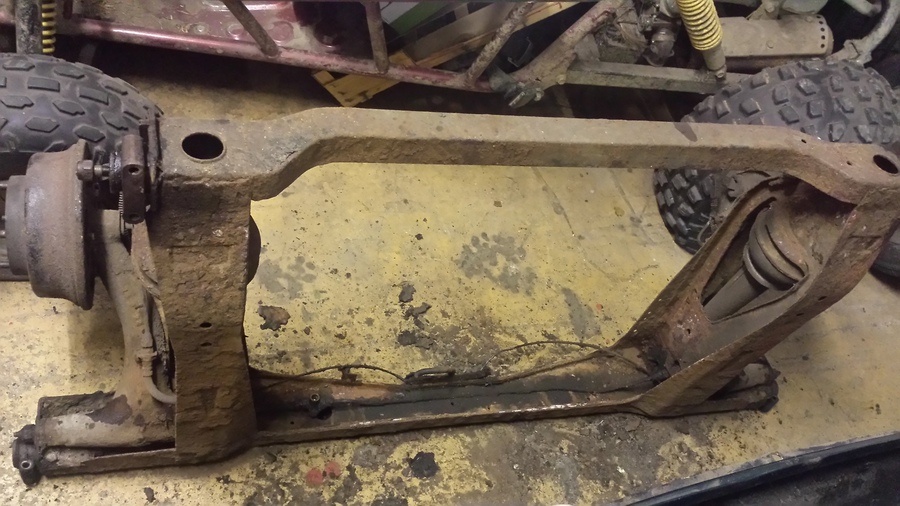
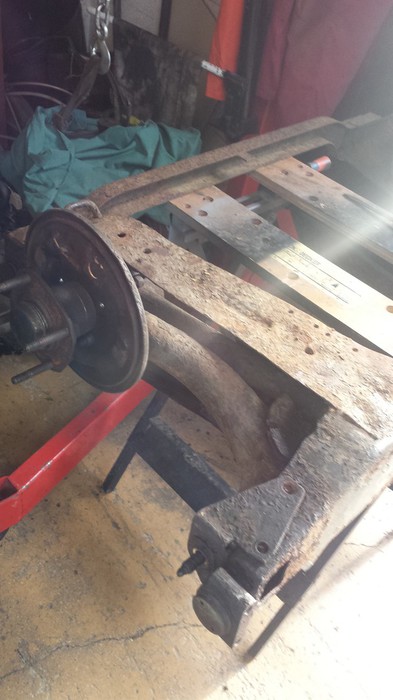
While I have been putting the front end back together Abi has been taking out the rear sub frame, this is usually a crap job, but to give her credit she has worked at it and got it out, only breaking one bolt in the process. For weeks we have been spraying all round the bolts with WD40 to hopefully give us a chance of getting them out. So I think she has done as good as I could have.
On the last MOT there was an advisory that there was surface rust on the rear sub frame, when Abi drops it out, well oh dear!!!! It is knackered!!! It is going to have to be replaced.
I finish off spot welding the wing to inner wing seam, I still have to finish the seam under the headlight on the passenger side.
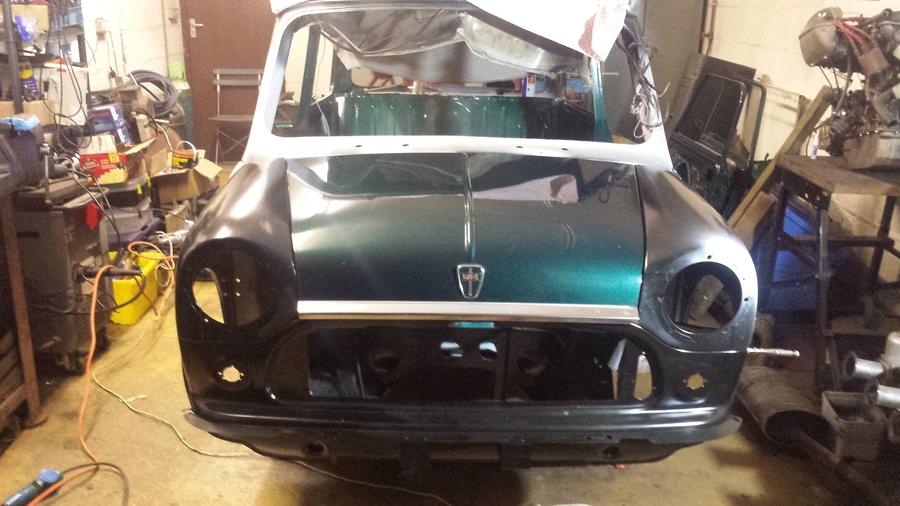
With the front end mostly welded together I put the bonnet down to check the gaps. I am quite impressed with our work, I think it looks really good.
It nice to see Sasha look like a Mini again not a pile of scrap.
We still have a long way to go.
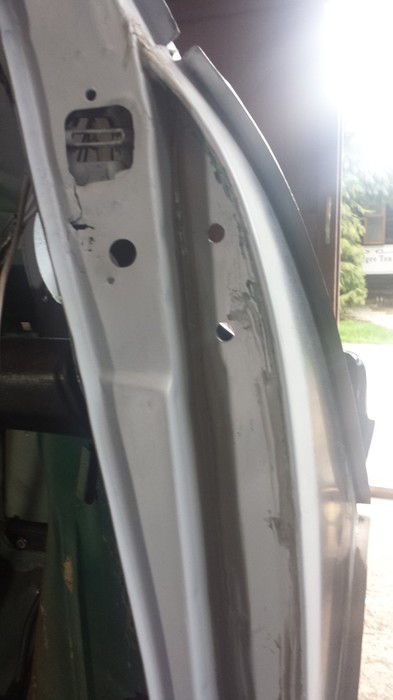
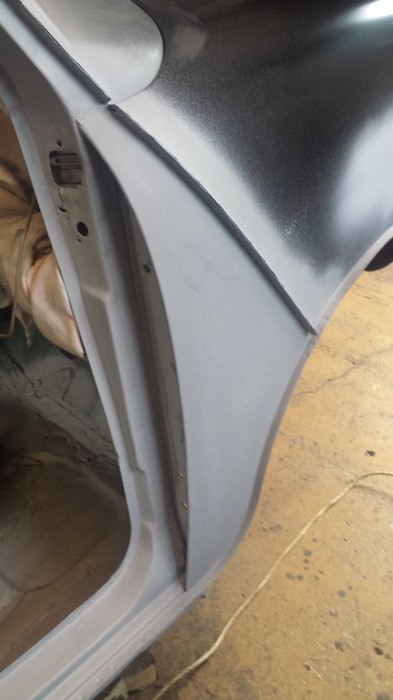
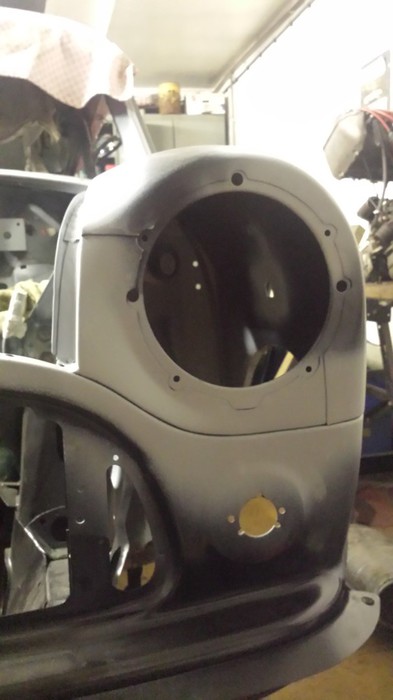
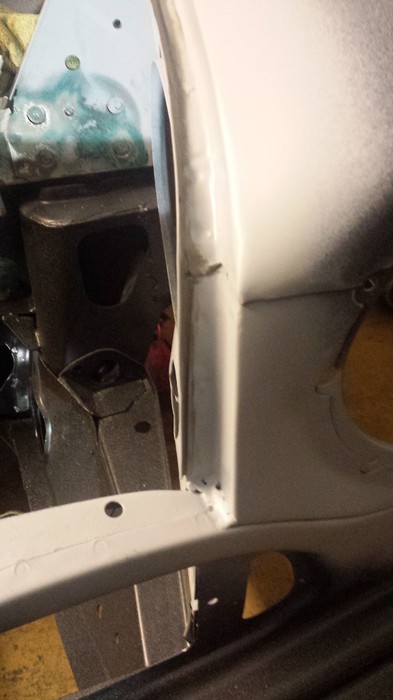
The alignment of the panels under the headlight on the drivers’ side is as good as it was on the originals. Sasha is looking good.
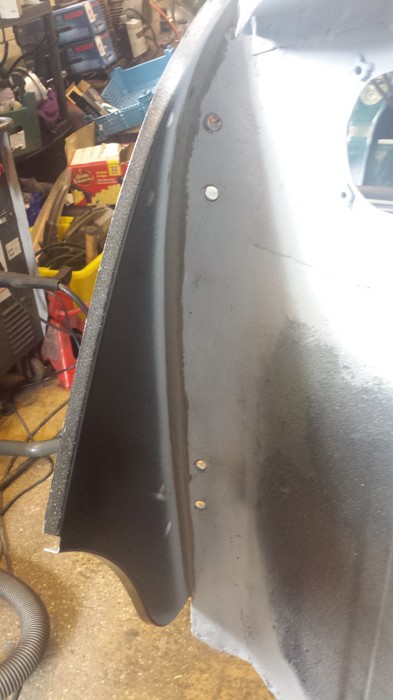
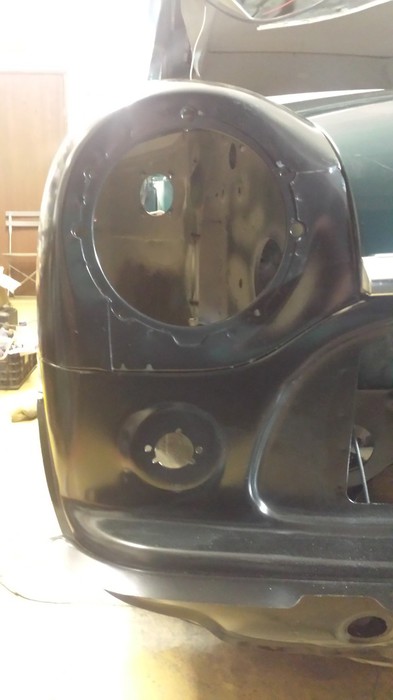
The passenger side is not welded yet under the headlight but still held together with clamps, the alignment looks very good though.
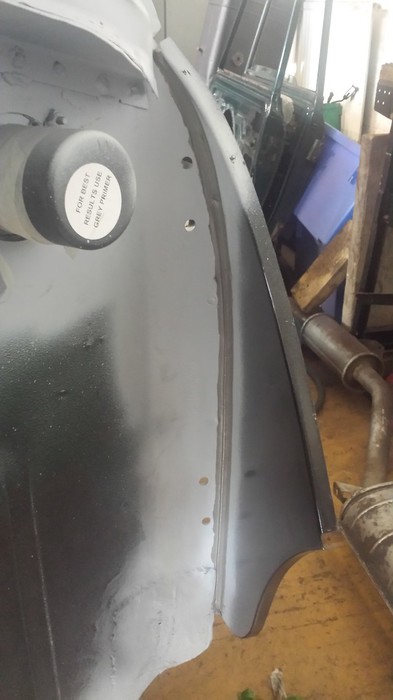
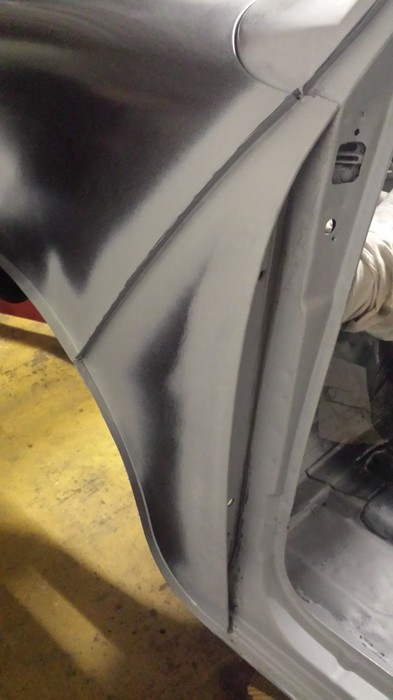
This part was quite difficult to get right and took some time and messing about to get it to look right, there is actually a fair amount of pressure on the seam close to the edge of the wheel arch, I was considering putting another stiffening piece in there, but they don’t put one in in the factory so I didn’t bother.
We have got a lot done today but now it’s time to go home.
Sunday, 7 December 2014
Today I start by cleaning up the spot welds on the A panel to wing seam, sometimes there is some residue left by the electrodes that needs to be ground off the rest is cleaned up with the wire brush, I then treat the area with etch primer.
Abi is working on the floor and inner sill in the rear of the passenger side, cleaning the floor and sill with the wire brush in the grinder and die grinder, when complete sucking all the rubbish out with the shop vac she treats it with etch primer.
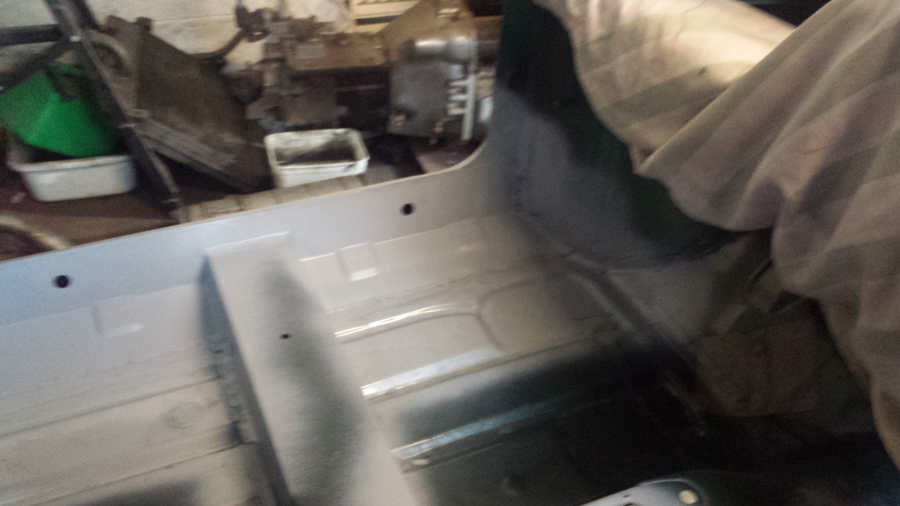
She does the same with the passenger side front section, finishing it off with a coat of etch primer.
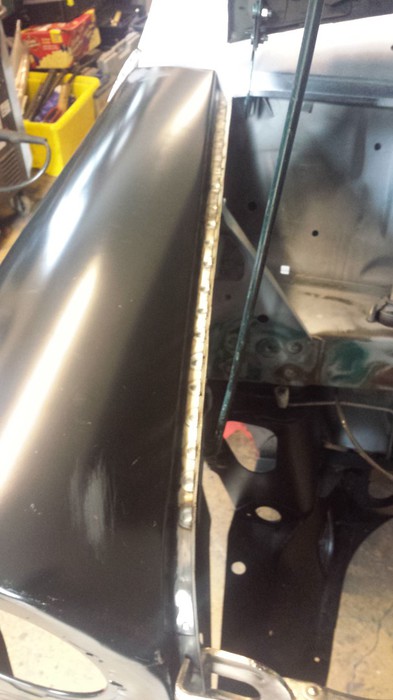
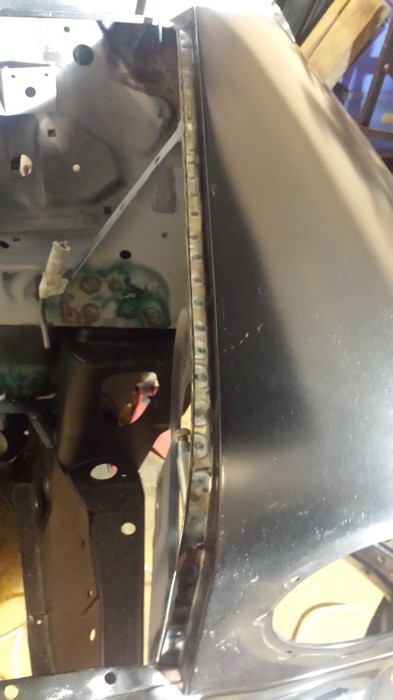
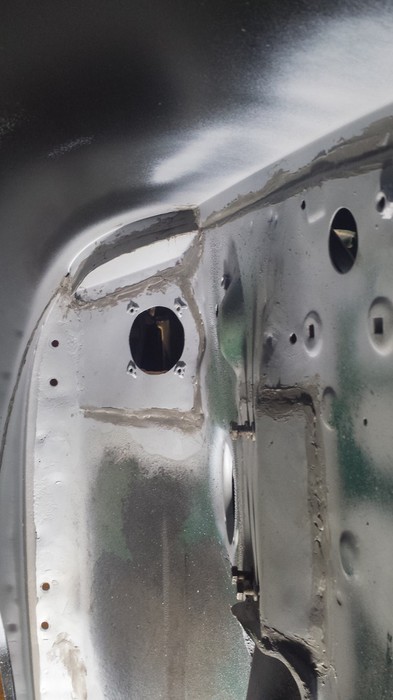
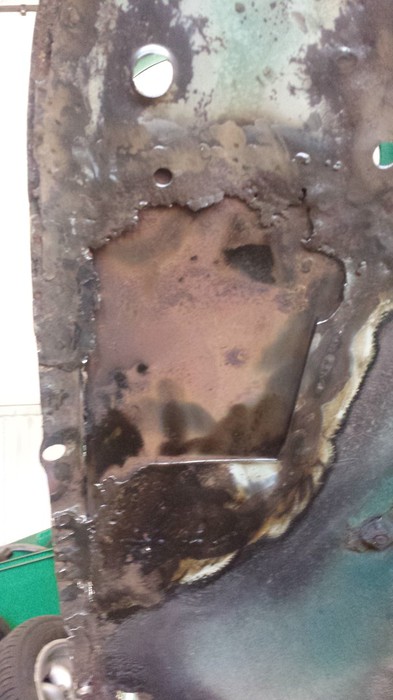
I clean up the area where the scuttle panel meets the wing and the area where the wing meets the inner wing, it’s quite important to get some paint into these areas to prevent rust getting in. At some point soon I will get some seam sealer into these joints but not in the wing to scuttle joint, I hate to see that joint full, I will sealer it from underneath.
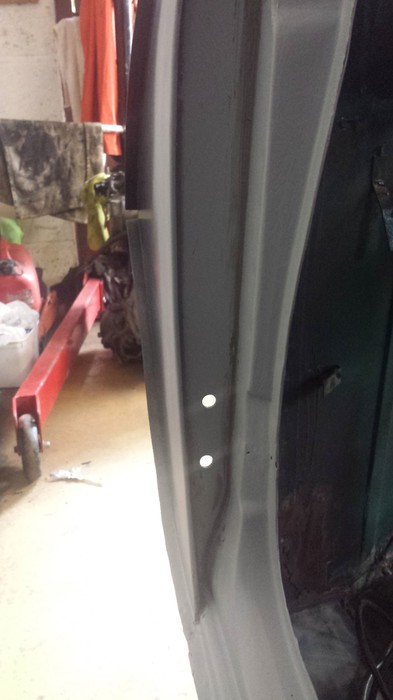
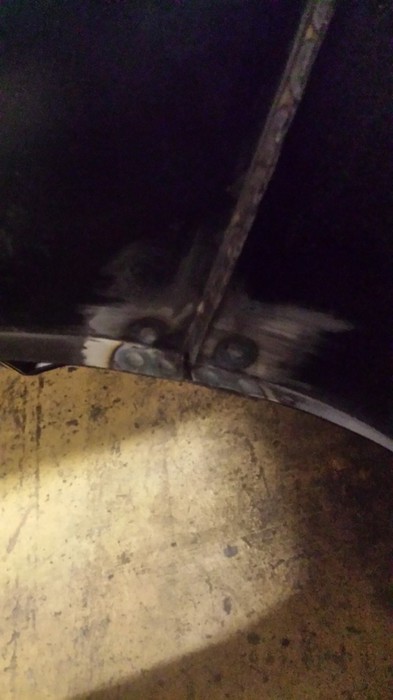
I also clean the joint under the head light on the drivers side and spray it with etch primer, carefully trying to get some paint deep into the joint for protection, this joint will be filled with seam sealer and not filler, filler will go hard and crack, seam sealer is rubberized and will flex instead of cracking.
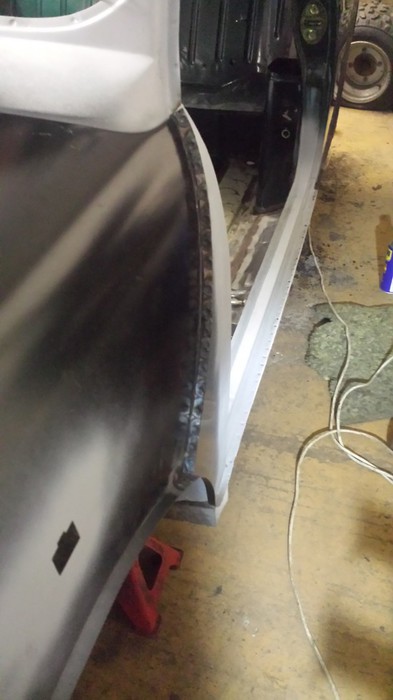
The seams around the passenger side wing are treated the same, now that the passenger side wing to front panel seam has been spot welded I think it looks very good, I am pleased with the way all the front end has gone together.
I finish off today by cleaning up the A panel to wing seam on the passenger side, treating the area with etch primer.
By the look of Abi it's time for us to go home.
Sunday, 21 December 2014
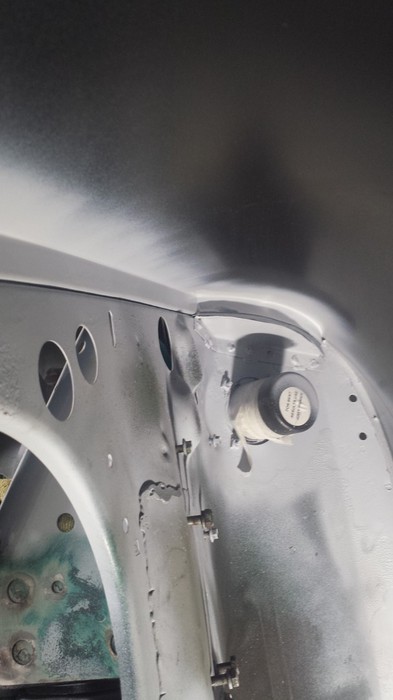
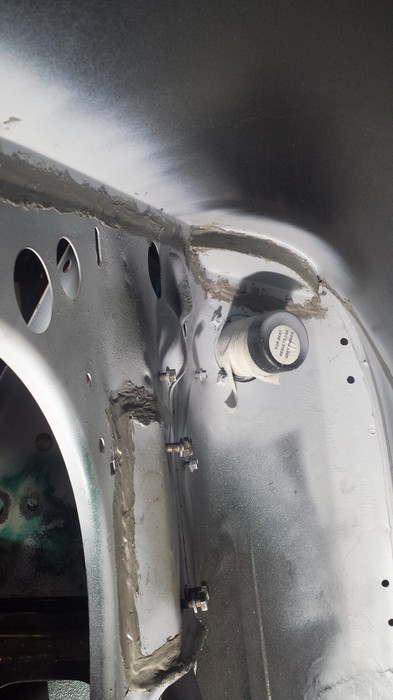
I start today by cleaning all the joints under the drivers’ side wing and then treat with etch primer making sure all the bare metal gets covered.
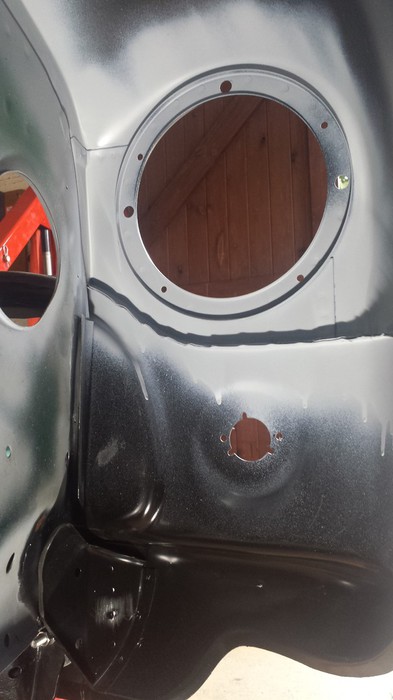
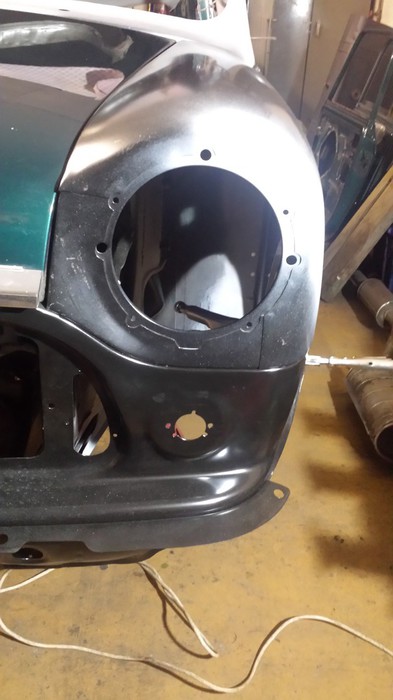
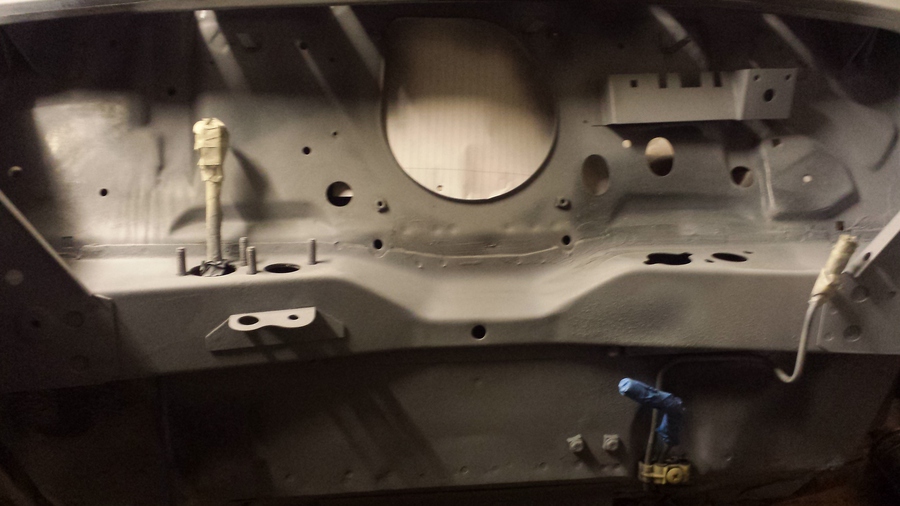
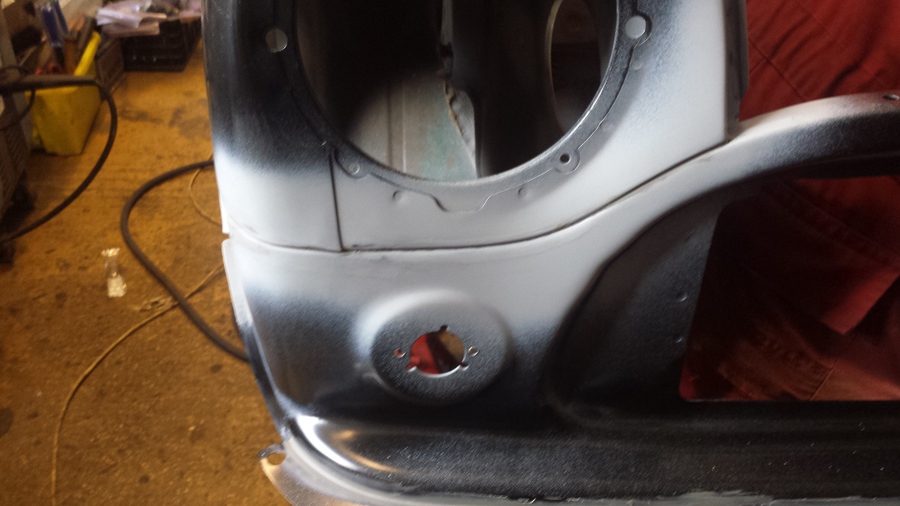
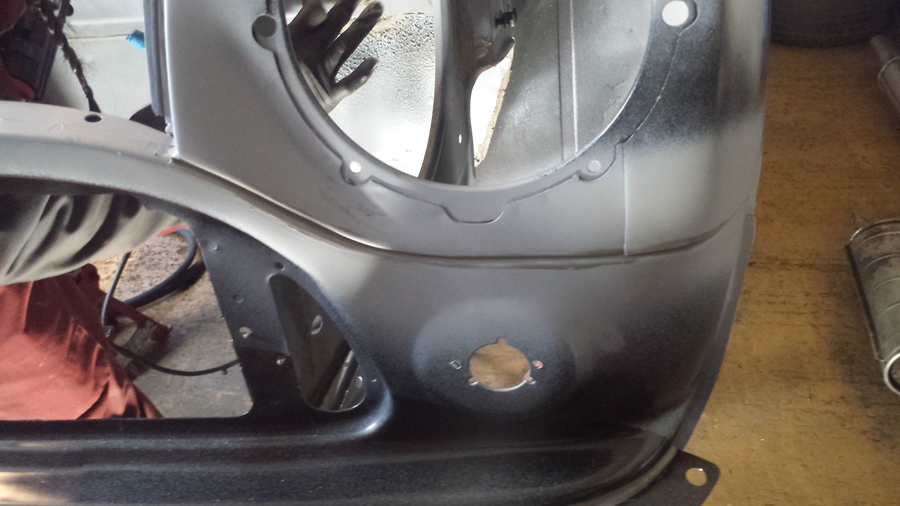
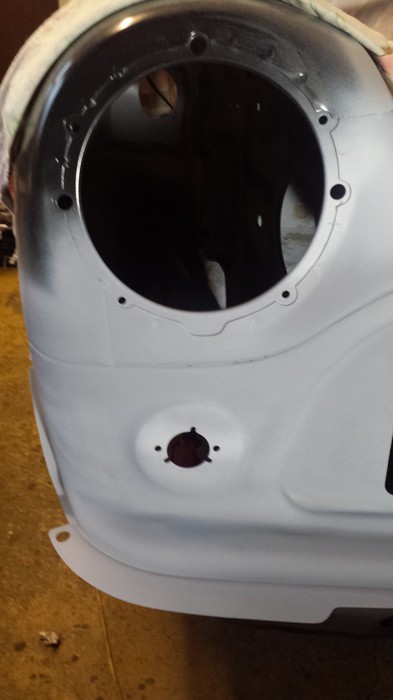
Carrying on from the flitch panel end to the area around the headlight, I clean the whole area then coat with etch primer, I try and get primer into the joint as much as possible and all round the headlight ring, on Minis this is a major rust trap which I want to try and stop as much as I can.
I do the same thing round the scuttle and inner wing seam on the passenger side, and apply some etch primer.
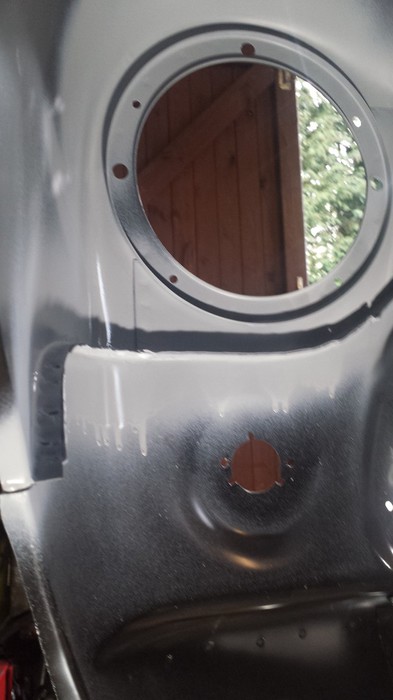
Also round the headlight and seam the same as on the drivers’ side.
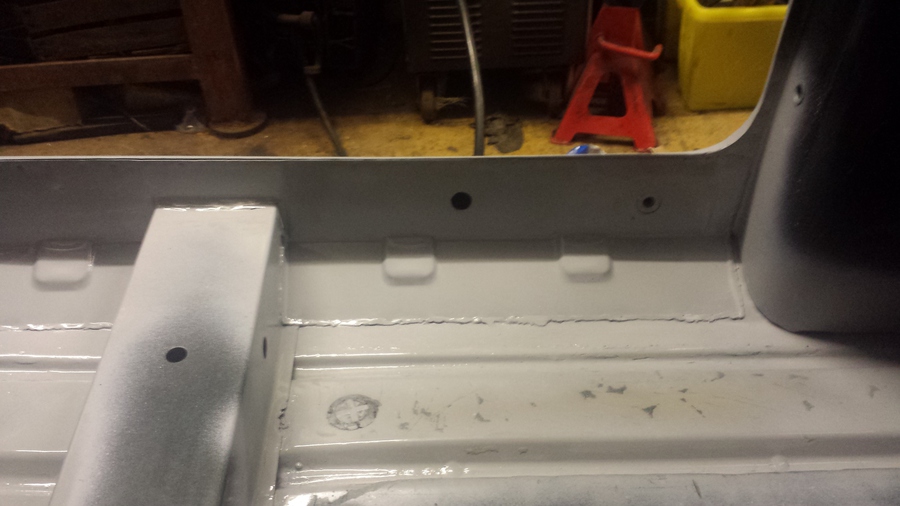
At the moment the tabs on the back of the front panel are not welded to the inner wing, I will do this soon when I take the front sub frame back out, this needs to come out again as it will need building up with suspension components and it will enable me to spot weld the bottom tabs in place. I would have liked to spot weld the top ones in as well but the arms on my spot welder will not reach.
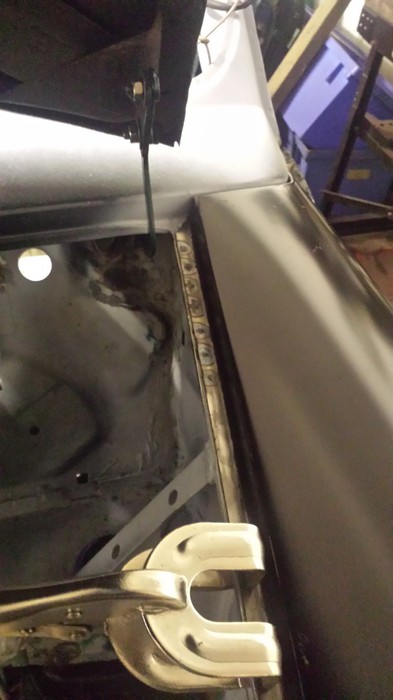
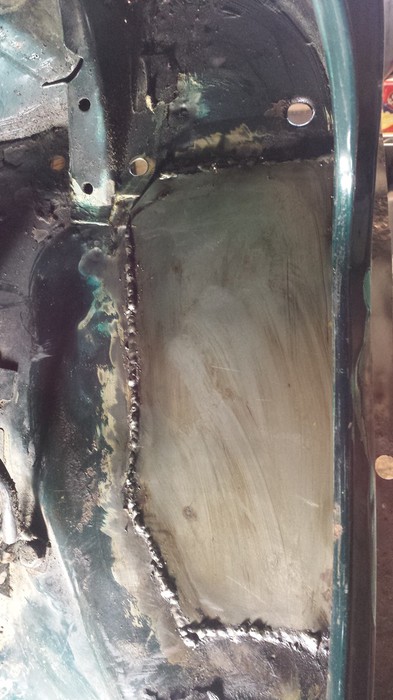
Now that the primer has dried on the drivers’ side I apply seam sealer to all the joints including the weld repair I have done on the inner wings and shocker mounts this will add extra protection. I make sure to get a good amount of sealer squeezed into all the joints.
With the primer dried on the passenger side I do all the joints and welds with seam sealer there as well.
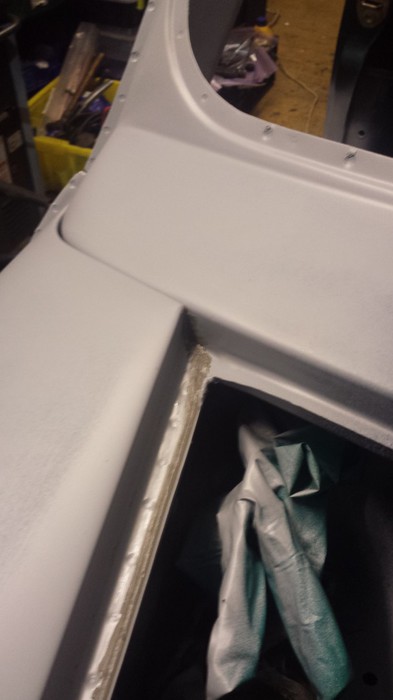
Next I run a bead of seam sealer down the joint between the inner wing and the wing, trying to make sure that the sealer is squeezed in as much as possible.
Continuing I seam sealer the passenger side too.
With all that I have run out of time, it’s time to go home. It doesn’t look like we have done much today, but some of these jobs just take time to finish.
Sunday, 4 January 2015
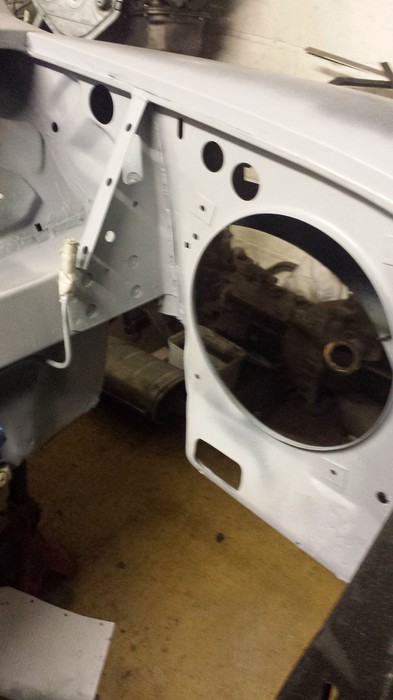
First job today is to take the front sub frame back out again, Abi then sets to work cleaning up the inner wings and the bulkhead ready for primer.
Abi starts to strip down the rear sub frame ready for it to be scrapped, while she is doing this I am busy welding the tabs on the back of the front panel to the inner wings. When I have finished this Abi can continue to cleanup the inner wings as the welding process will burn of some of the paint on th inner wings.

Sunday, 4 January 2015
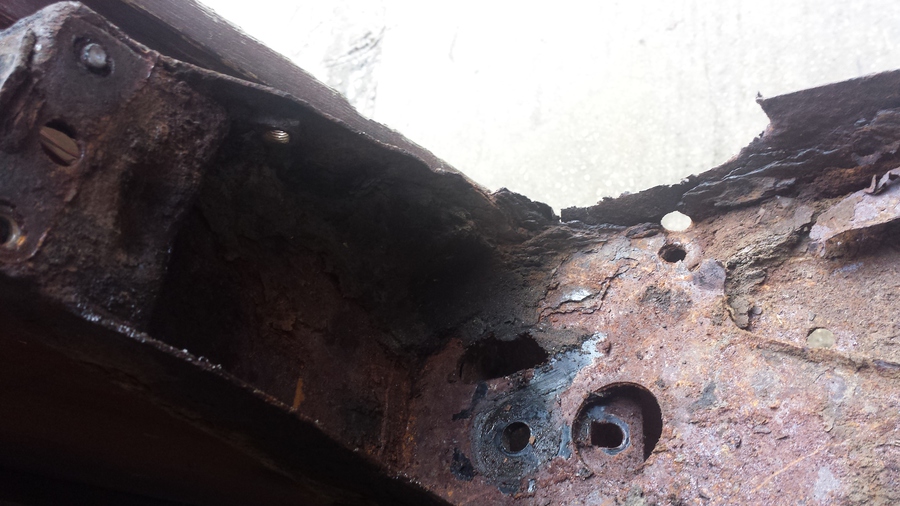
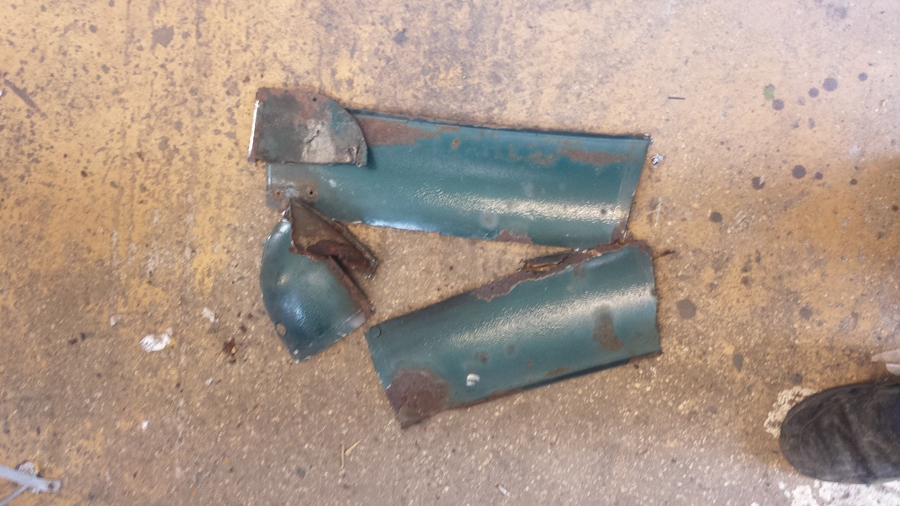
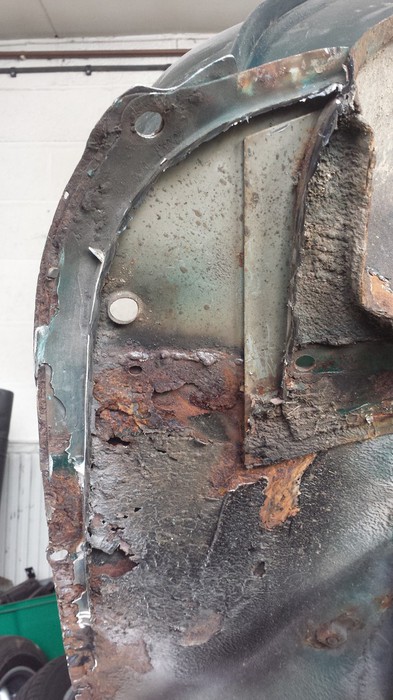
In this picture you can see big pieces of the rear sub frame have rusted away completely, this sort of rust doesn’t appear in 12 months, how could this has gotten through an MOT.
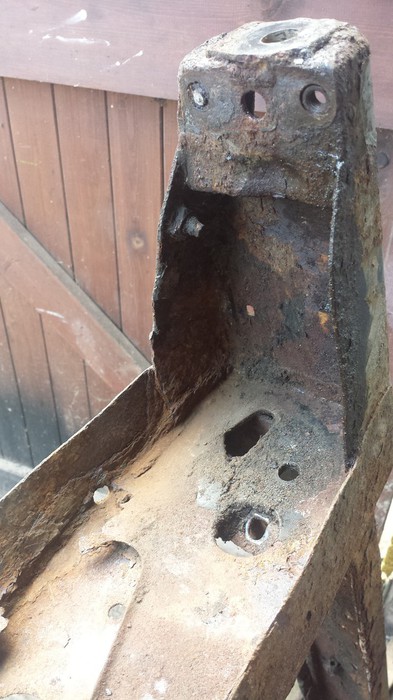
Here you can see more damage caused by rust.
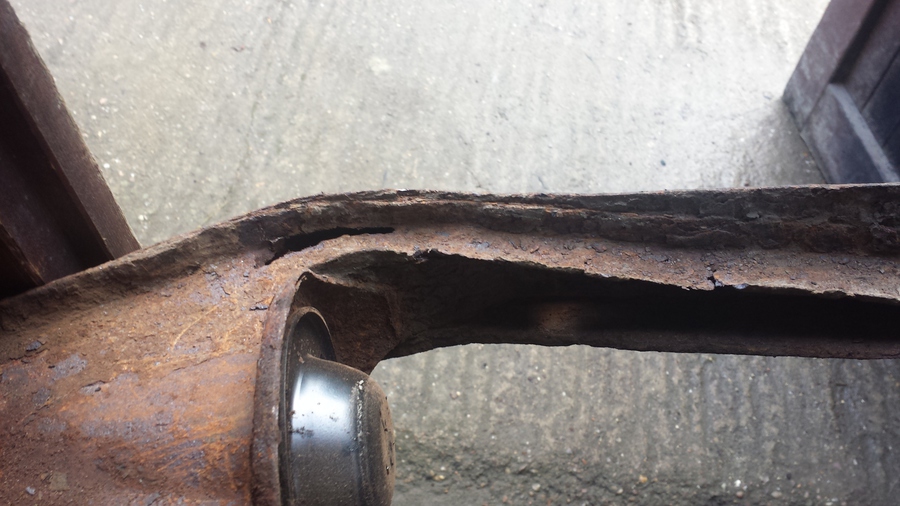
The more we look at this rear sub frame and scrape at it the more we find.

I start to have a look at the component coming off the rear sub frame, the rear brake slave cylinders look in quite in quite good condition, I try to undo the bleed screws, one comes out straight away, I am shocked they normally break off for me. The other one doesn’t want to move, so I heat it up the blow lamp to try and loosen it up and put some WD40 in it and try again, bugger it just breaks straight off. I can drill it out and put new bleed screws in no problem. I take the rubber dust covers off and one on each has brake fluid in it, no point now in trying to save them as bleed screws and seal kits will cost about the same as new ones. More parts to add to the list.
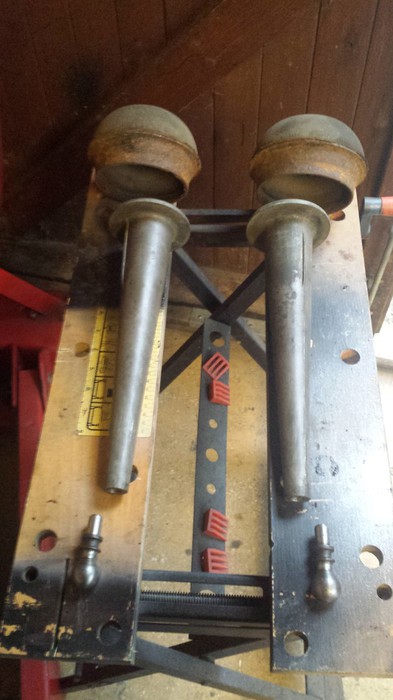
Last job today I take the knuckle joints out of the rear trumpets, this sounds easy but I find it never is. As I am going to fit new knuckle joints anyway, I put the Knuckle in the vice and heat up the end of the trumpet with the blow lamp, spray some WD40 inside the trumpet then twist the trumpet off the knuckle joint. This takes a little while but I soon have them both off and cleaned up, I also clean up the rubber doughnuts, I will paint both of these later.
Out of time again for today, I am ready to go home after cleaning up the workshop and securing everything.
Sunday, 11 January 2015
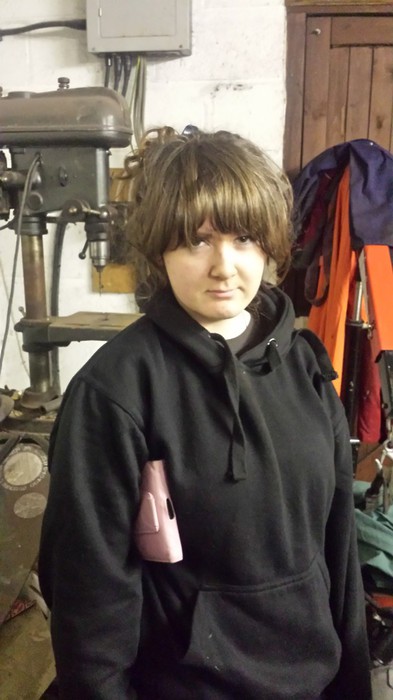
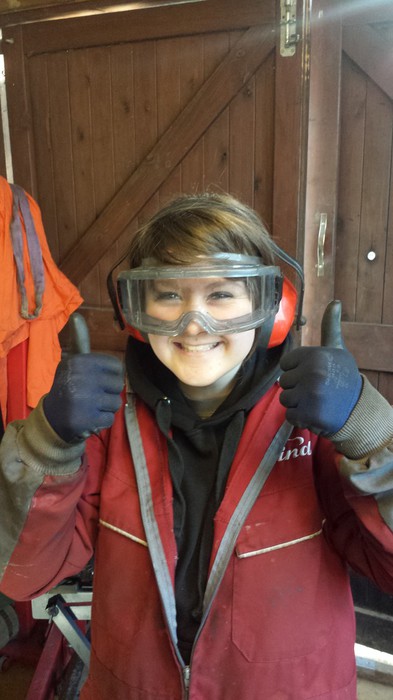
Another day working on Sasha, Abi is keen to get started she has her PPE on all ready.
Abi get the passenger side inner wing cleaned up and treated with etch primer.
The same with the bulkhead, all cleaned up and primered.
Also the drivers' side inner wing is cleaned up and treated with etch primer.
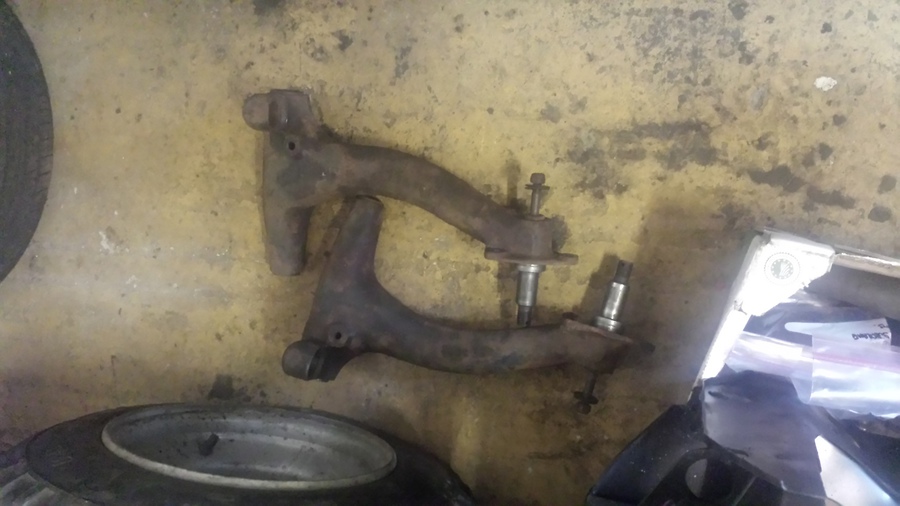
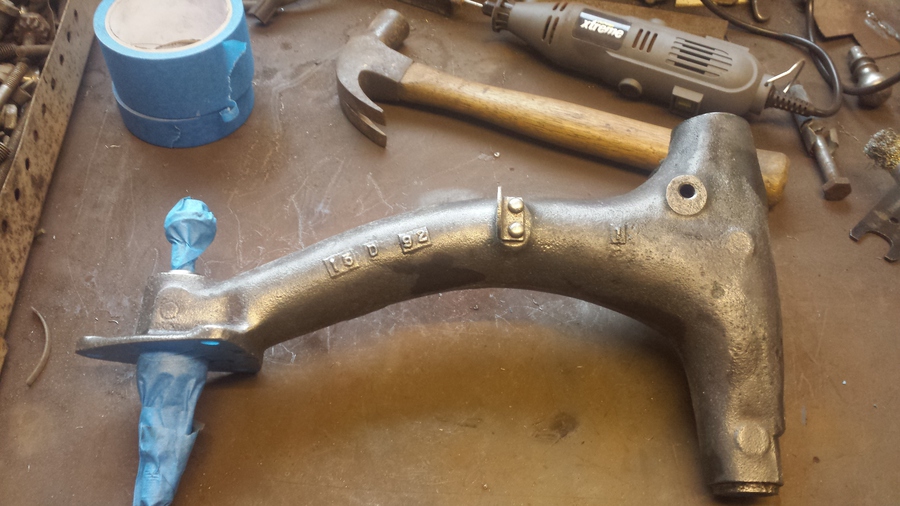
Wile Abi has been doing this I have been working on the suspension compoments that have come off the rear sub frame. I the taken apart all the rear brake assemblies and removed the radius arms. I have also removed the radius arm bearings as these need to be replaced. This is not an easy job but it can be done, the way I do it is I remove the needle roller bearing first by breaking the edge of the carrier and removing the needles then using a long copper drift, I drift out the carrier. Then remove the plastic insert, then using the copper drift I drift out the other bearing. Repeating the process on the other radius arm.
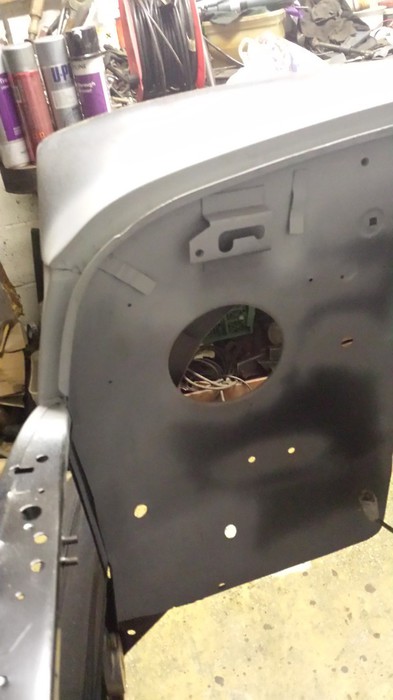
My work on the radius arms takes quite a while so as I have been doing that Abi has been working on the passenger side door, there is a fair amount of filler in it and at some point the door has opened to far and cracked the filler, also there was some bubbling in the bottom corner cause by rust. At some point I’ll treat the rust and fix the filler, the doors will be good to go for a bit longer before we have to do something major with them.
Time to put all the tools away, clean up the workshop, lockup and make our way home.
Sunday, 25 January 2015
Well we had last weekend off as it was Abi’s 17th birthday, so I have missed the deadline I set myself to get Sasha ready.
Best get on or it won’t be ready for her 18th birthday.
I start off today finishing getting the bearings out of the radius arms.
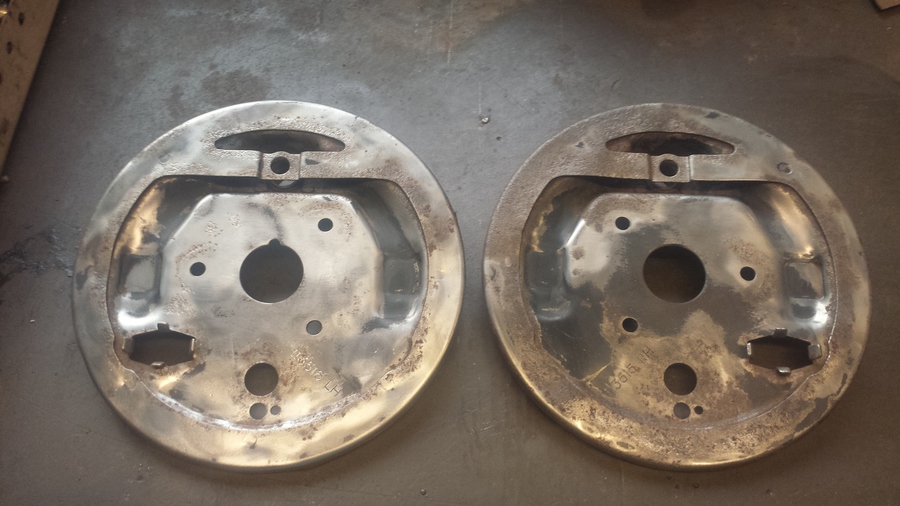
It doesn’t seem like I have done a great deal today but I seem to have been busy all day. I have worked on the on the rear brake back plates, I have removed the adjuster and cleaned them up ready to refit them. The rest of the back plates have been cleaned up with a wire brush either in the grinder or die grinder. I now have them both ready for paint, but I have run out of time and paint today, I didn’t realise how much paint Abi had used the other week.
I will have to finish now and get some more paint ready for next week.
Sunday, 01 February 2015
I start today by cleaning up the radius arms with the wire brush in the grinder, there is quite a lot of surface rust on them, it takes some time to get it all off. They are now both ready for paint.
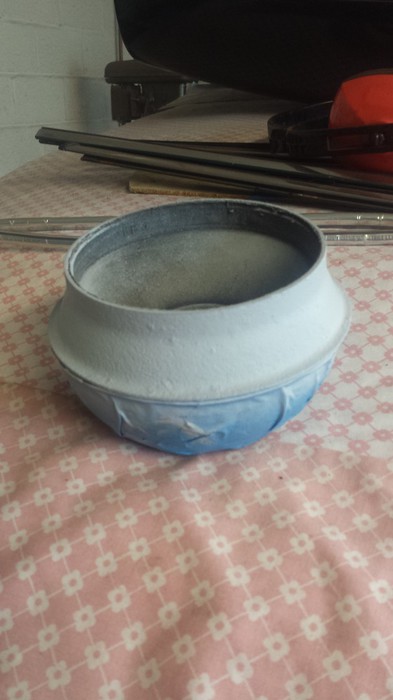
The rear doughnuts I had previously cleaned up, I give them another going over then mask up the rubber just leaving the steel bit showing, I then paint the bare metal with etch primer.
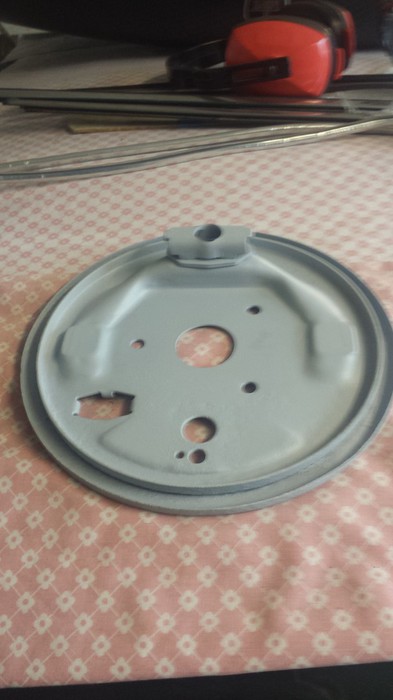
Next job is to get some paint on the rear brake back plates, I try to get some paint in the gap between the two parts of the back plate, then I turn them round 180 degrees and apply a second coat to make sure I get everything covered.
I have previously cleaned the trumpet and now I paint them with etch primer,
There is a big screw in the ceiling of the workshop I use this to hang the radius arms one by one so I can paint them with etch primer.
Now that the primer has dried on the trumpets I paint them in satin black.
Last job for today is to paint the steel part on the doughnuts satin black.
That’s it for today, time for home.
Sunday, 15 February 2015
Today I start by putting seam sealer in the joint under the drivers’ side headlight, trying to squeeze as much into the joint as possible without leaving too much excess about to clean up later.
I do the same on the seam under the headlight on the passenger side.
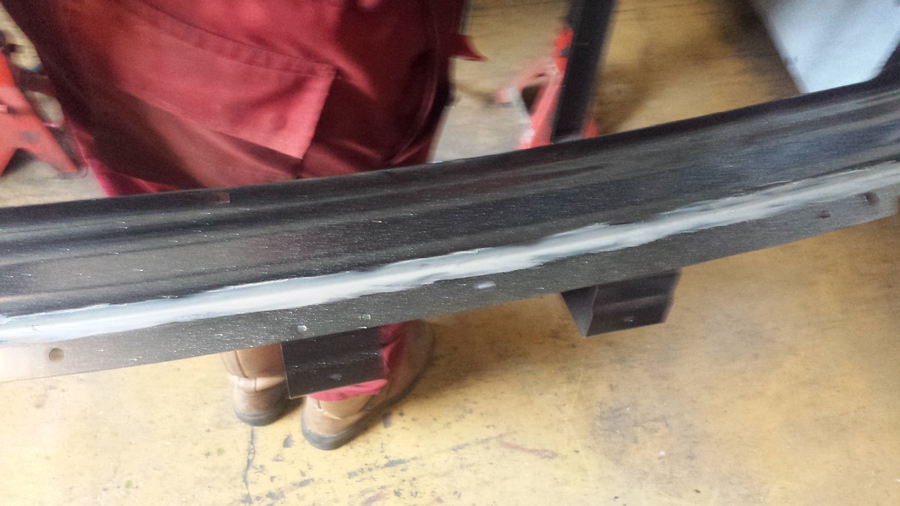
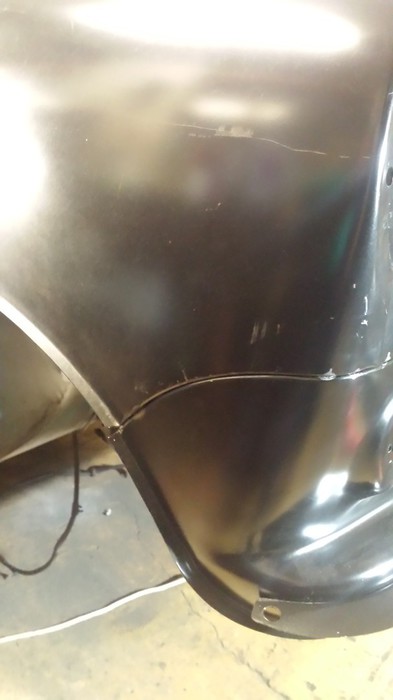
I also squeeze some seam sealer into the gap behind the front bumper mounting flange, I try and limit the amount of excess again so there is less to clean up later, although I don’t seem to be able to make such a good job of this one.
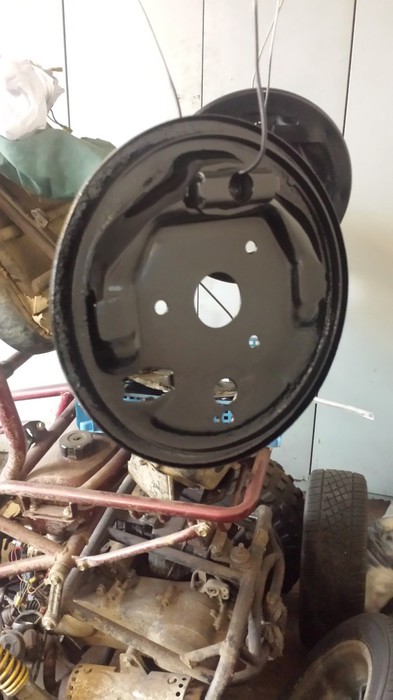
Next I paint the rear brake back plates, giving them a coat of satin black on both sides, then when dry turning them round and giving them a second coat, trying to make sure I get some paint into all the edges and gaps.
I then paint the rear radius arms with satin black, letting the first coat dry then applying a second coat.
I don’t seem to have gotten a lot done today and now I have run out of time.
Sunday, 22 February 2015
I don’t know what has gone on today but I don’t seem to have gotten anything done, I have cleaned up the seam sealer under the drivers’ side headlight and put some primer on it. The seam sealer has shrunk back quite a bit and in a couple of places I will need to put a little bit more in, but on the whole it looks ok.
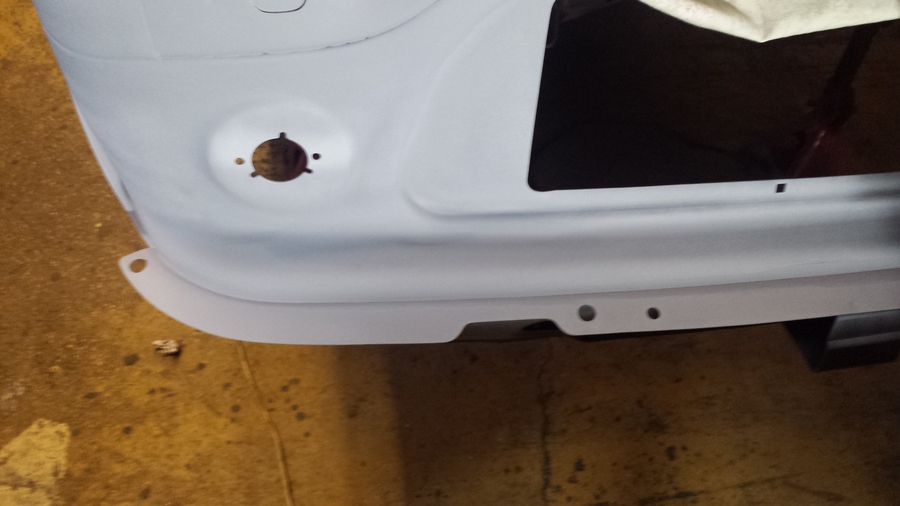
I make a start on cleaning up the seam sealer on the bumper flange but only get about a quarter of the way across before running out of time.
I finish off the day by putting Sasha back on her side ready to start work next weekend on the rear end.
Time now to clean up the workshop, turn off the lights, lockup and get off home.
Sunday, 1 March 2015
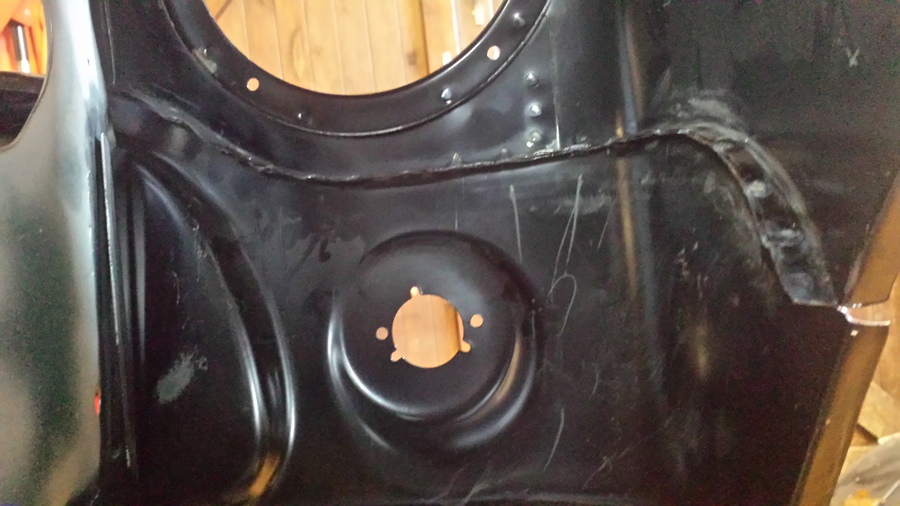
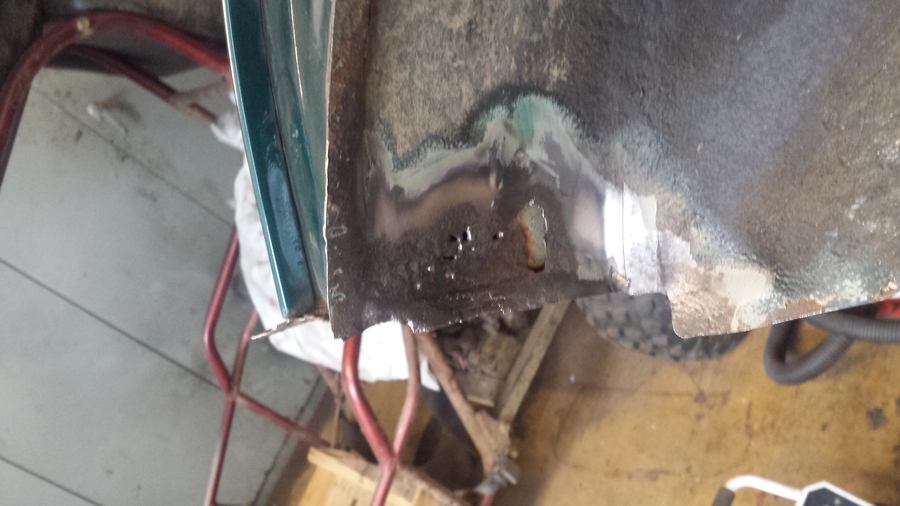
I make a start this morning by using a cutting disc in the grinder to cut off most of the rear valance, including the closing panel on the drivers’ side up to the closing panel on the passenger side.

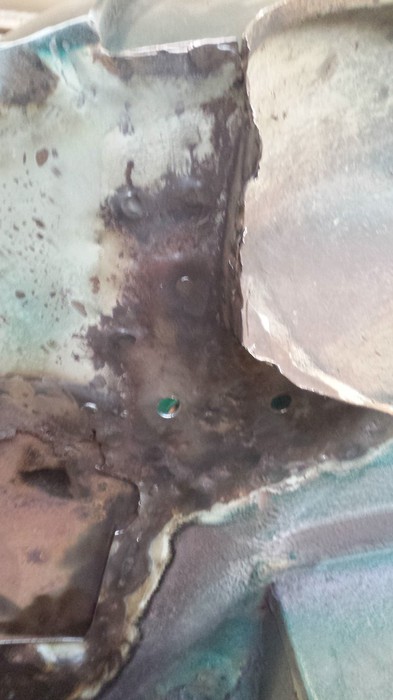
Now Sasha is back on her side I can asses the rust damage round the rear sub frame mount point in the heal board. It’s not as bad as I though it was going to be, there is a small bit that as rusted through but I think I can fix this by just going over it with the MIG welder. The metal round it looks quite solid.
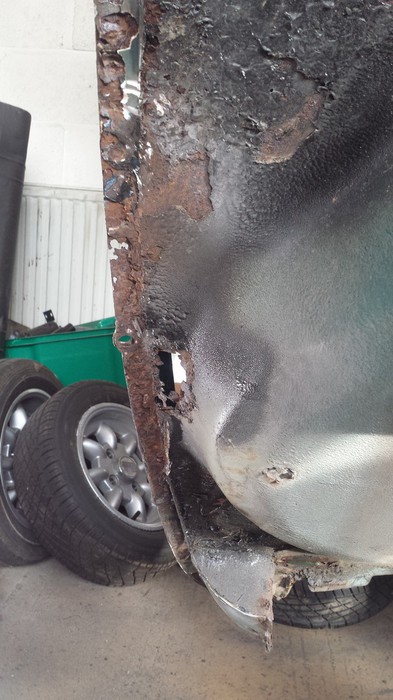
There is also some rust in the rear drivers’ side wheel arch that is going to need sorting out.
After I have had a clean round with the wire brush in the grinder you can see the extent of the rust and a previous repair. This will have to be cut out before I can repair it.
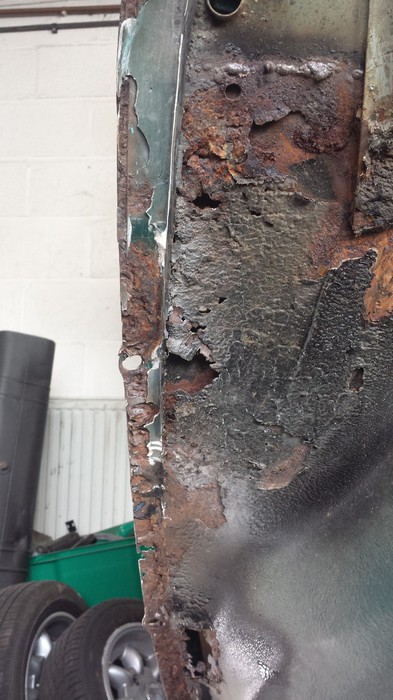
Going further down towards the center of the rear valance the boot floor has rusted all the way through, a previous owner has taken a piece of metal covered it in under seal and stuck it over the hole, classy repair!! NOT!!
Carrying on down towards the passenger side closing panel this is quite crusty too, I won’t even try to repair this section, I will cut it all out and fit a boot floor repair section before fitting new closing panels and valance.
I finish off today’s work by grinding off as much or the old valance as I can starting up by the drivers’ side wheel arch and working my way about half way down.
I have generated quite a pile of rubbish on the workshop floor today, time to clean up, lockup, and make my way home.
Sunday, 8 March 2015
Today I start work removing the sub frame closing panel and the stiffening piece from the boot floor on the drivers’ side. This is a long process as the three layers of metal are spot welded together, I have to grind through the spot welds and lift up the edges of the panel with a screwdriver and grind it all away, I get what is left of the closing panel off first.
I have found some more rusty holes in the wheel arch close where I am grinding off the sub frame closing panel, I clean this area off with the wire brush in the grinder so I can see better what I need to repair.
Once the closing panel is off I use the same process to remove the stiffening piece, carefully trying not to damage the boot floor too much. The new panels have arrived so I can see exactly what I need to remove ready to put the new ones in. I eventually get the stiffening pieces off the boot floor panel and clean up the area with the wire brush in the grinder. There is a little damage but this should be ok, when the new panel goes in I can have a look what need to be sorted out.
I tidy up under the boot floor where a previous repair has been made, it is an ok repair as far as an MOT is concerned, I just think it look bad and as I am going to have to do more repairs in this area I am going to cut this repair out and fit a boot floor repair panel.
In this picture you can see the inside of the boot floor where this previous repair has been done, the welds have not been cleaned up which I like to do and they have just covered the whole thing in under seal, I hate to do this as well as the under seal gets on everything you put in the boot. I have cleaned off all the under seal with the wire brush in the grinder and wiped up any residue with some petrol on a rag.
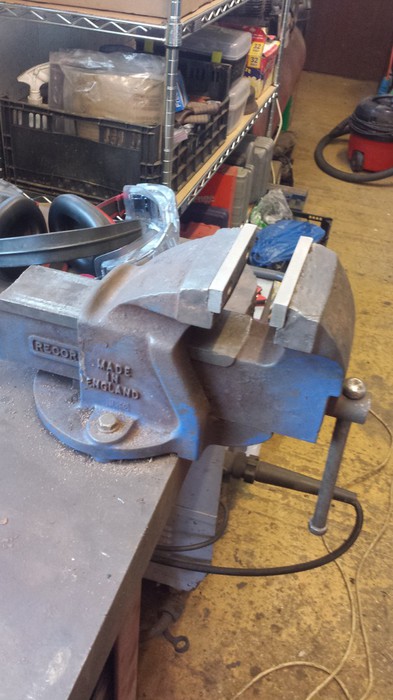
I finish off the day by doing some workshop maintenance, the jaws on the vice have been broken for some time so I have bought some new ones and fitted them.
The cheap Screwfix plastic racking we had in the workshop to store tools and parts now has a 10 degree list so last time I was in Costco I bought some chrome plated steel racking for £80. Abi and I moved the old plastic racking into the back room last week, so this week I have put the new racking together and put all the tools and some parts on it, most of the parts are on the other racking in the back room.
Anyway I have run out of time again, now the workshop is clean and tidy, I turn out the lights, lockup and go home.
We are located at:
Market Harborough
Leicestershire
Contact us
If you would like to contact us:
rod@howitt.org.uk
abi@howitt.org.uk
sasha@howitt.org.uk
Or use the contact form.