Timeline 15 March to 17 May 2015
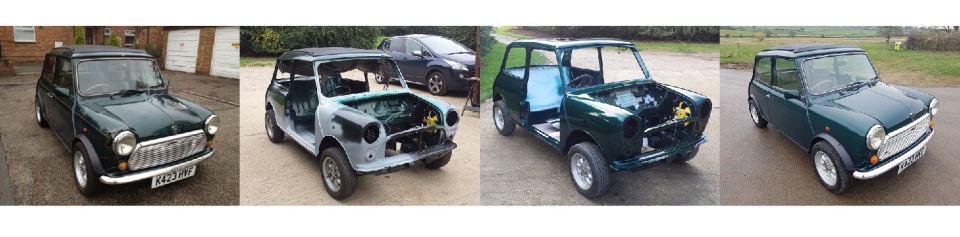
This is a continuation of the work done to Sasha.
Sunday, 15 March 2015
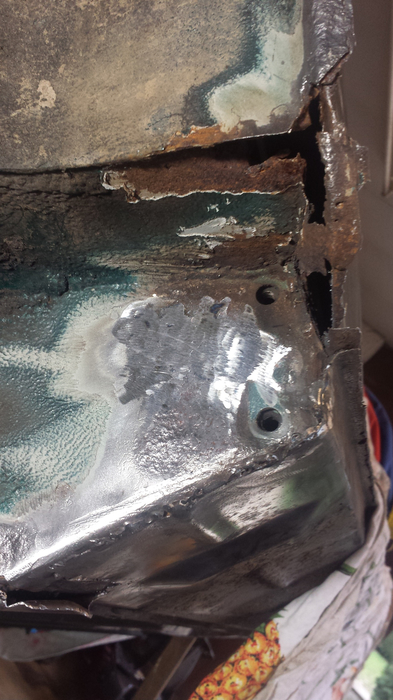
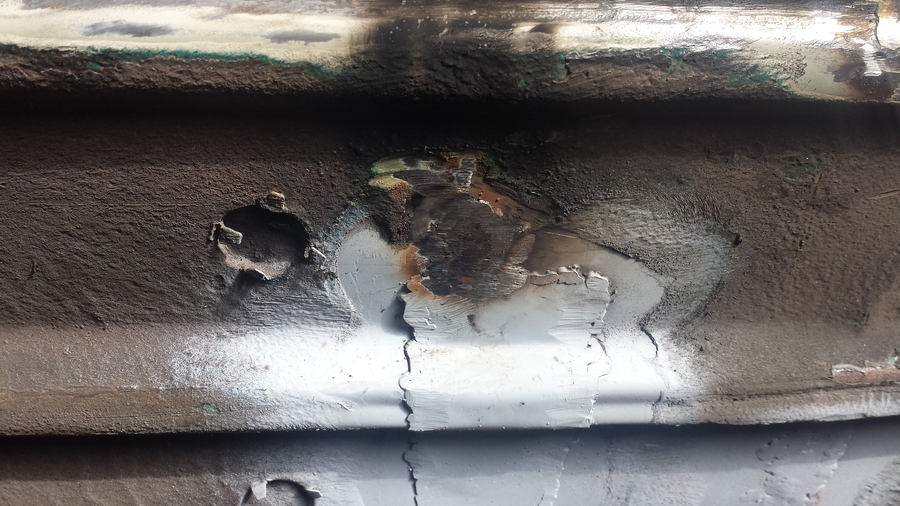
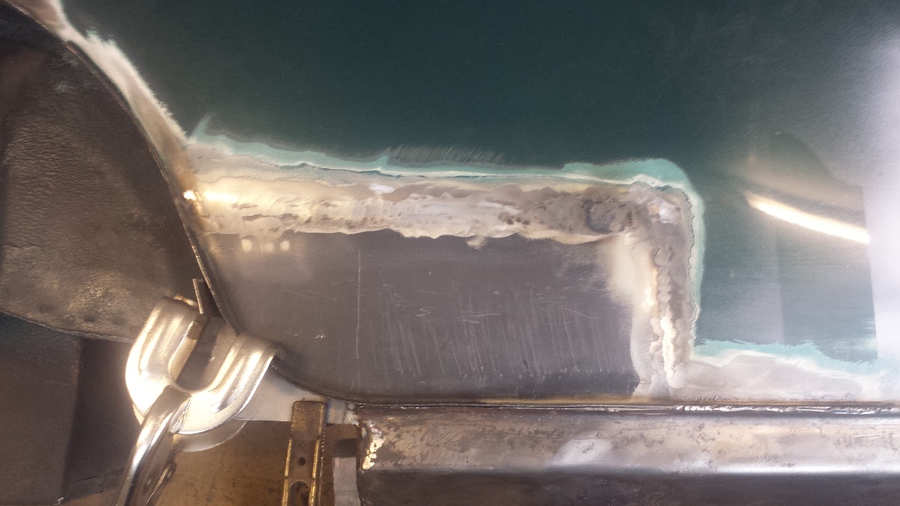
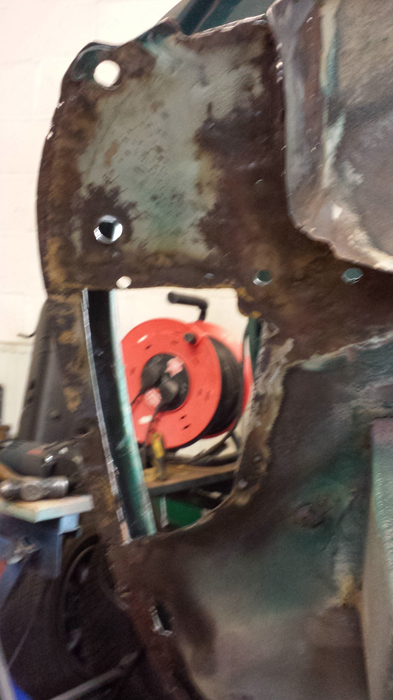
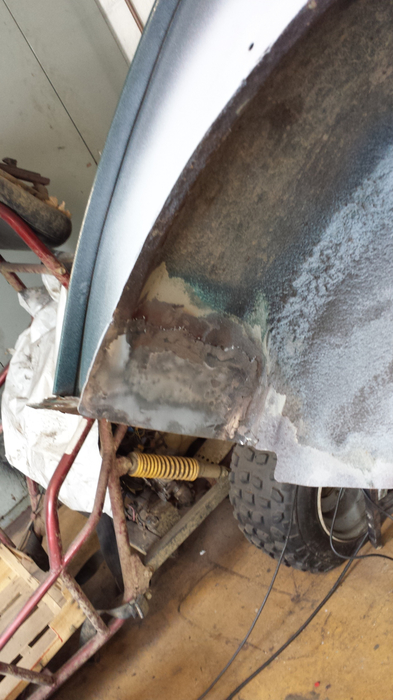
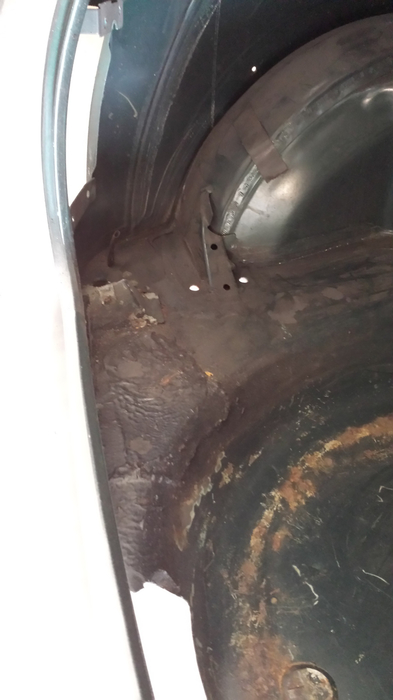
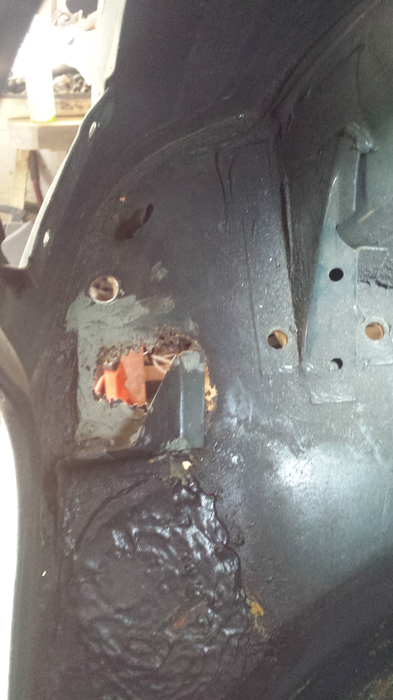
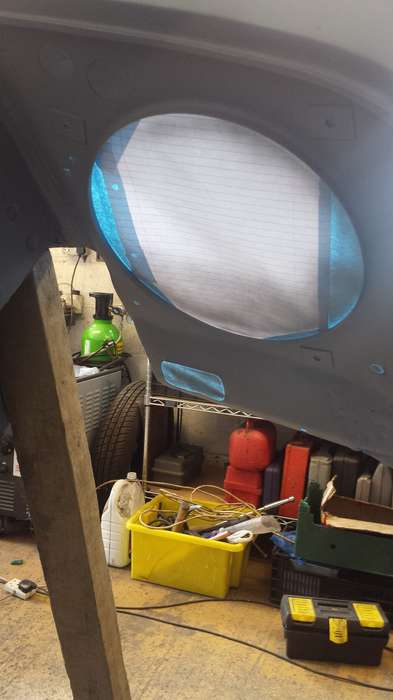
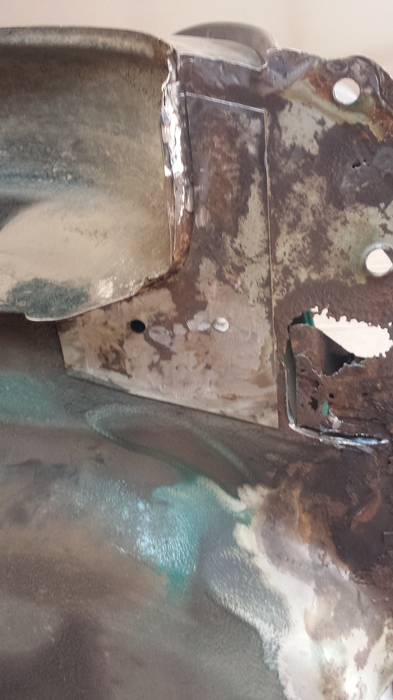
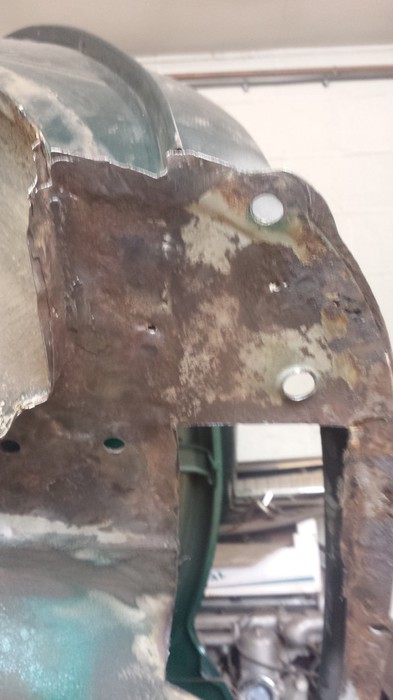
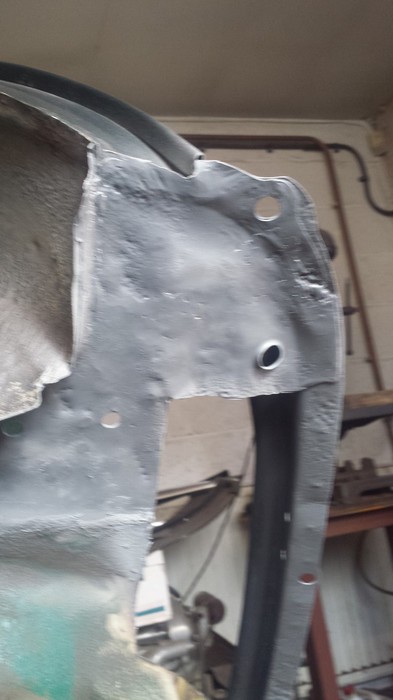
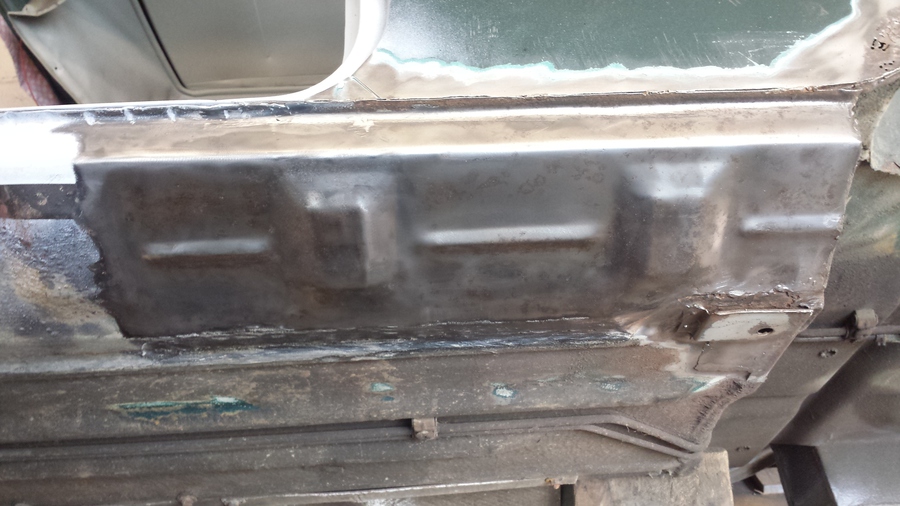
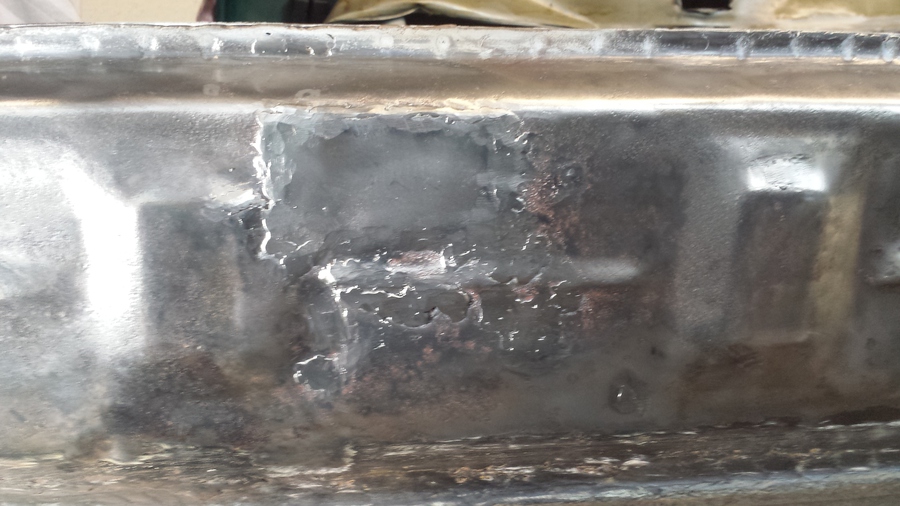
I start today’s work off by cleaning up the area around the Drivers’ side rear sub frame mount by the rear quarter panel, this area is quite rusty. I clean off all the old sealer with the wire brush in the grinder and I also use the wire brush in the die grinder in the more difficult to reach areas. From this picture you can see the extent of the rust damage.
The piece of metal that closes off the inside of the rear quarter panel has all but rusted away, I am going to have to cut this out and put a piece in to repair it.

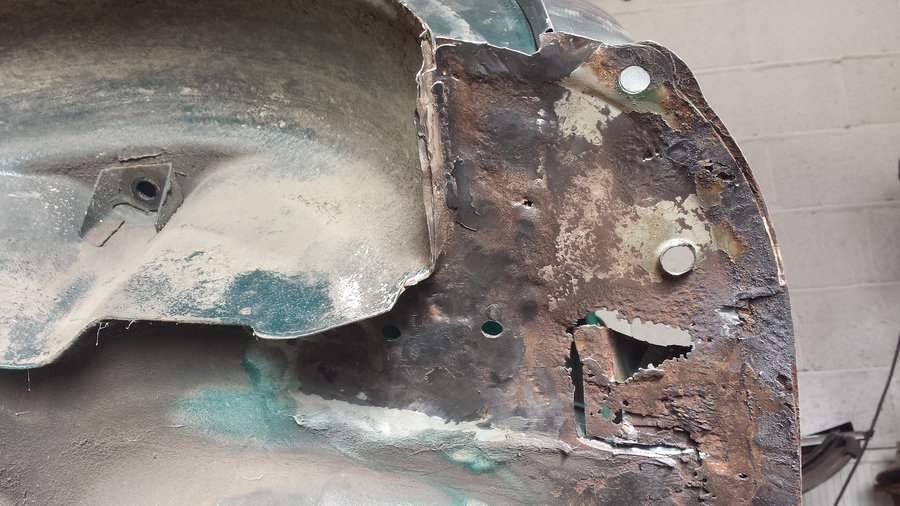
I clean off the paint and filler from the bottom of the rear quarter panel so I can see the extent of the rust also so I can see how much I am going to cut out.
I cut the bottom off the rear quarter using the rotary tool with a cutting disc, these little discs only last about 5 minutes and it take a few of them to cut this little bit off the bottom of the rear quarter panel.I also start to trim the rust off some of the surrounding panels.
With that done I can start repairing it next week.
For now it’s time to put all the tools away, clean up and go home.
Sunday, 22 March 2015
I did make a repair piece for this last week but it just didn’t fit right so this morning I started it again, I think this one fits a bit better, I clamp it in where I can then start to weld it in place.
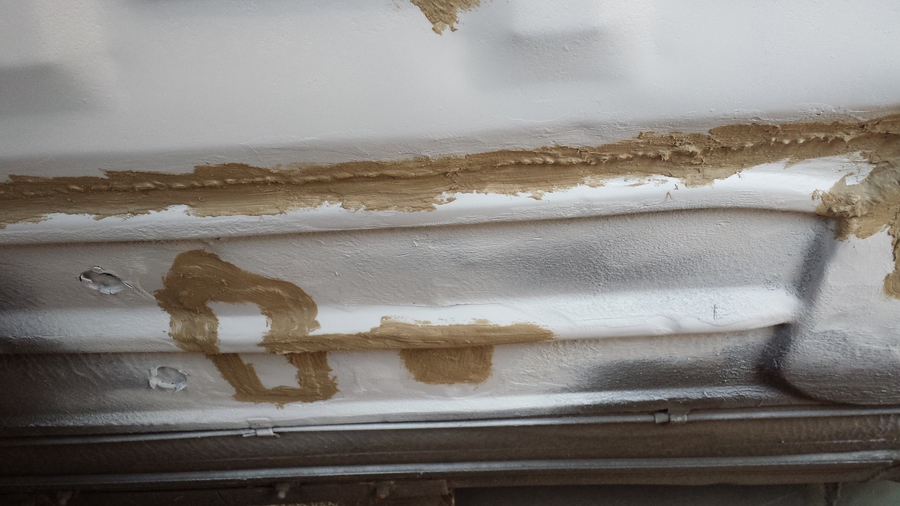
Abi has been cleaning off some of the loose bits along the sill and she have found some damage caused when the over sills were fitted, whoever did it left some deep grinder tracks in the floor and some of them have gone all the way through. I weld over these with the MIG to fill them in again, then run the grinder over them to tidy them up.
When Abi was cleaning up the sill with the wire brush she also found an area with some pin holes, I weld these up as well.
Some of the welding I have done on the inside just needs a but of tidying underneath, to make it look a bit more presentable.
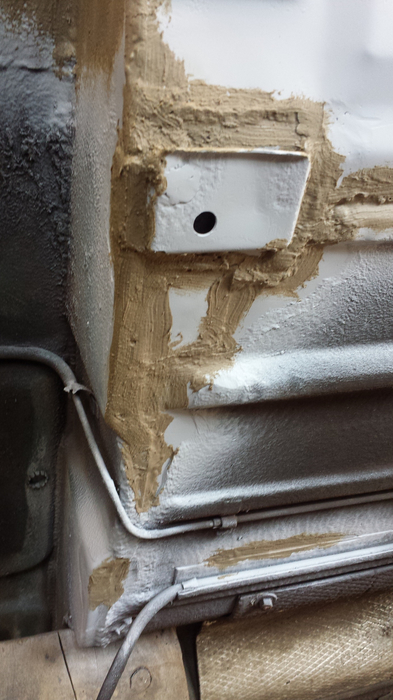
The stiffening piece round the proper jacking put has rusted very thin and as there is no standard jack for this car I decide to help preserve the sills I will weld a plate over the jacking point. So I grind off the old stiffening piece with is just spot welded on and clean up the area ready to put a patch over it.
I continue to do a bit more welding on the piece I have put in by the rear quarter, I have welded it a b it inside and underneath where I have cut the rust out of the old one.
Now with the patch welded over the jacking point I am finished for today.
Time to put the tools away, clean up, lockup and head off home.
Sunday, 29 March 2015
Today I start by marking out where I am going to fit the repair piece into the rear quarter, I cut down the replacement panel to the size I need, place it on top of the original panel and mark it out. Then using the wire brush I strip off the paint and filler down to bare metal where I am going to cut out and weld. Then I re-mark where I need to cut the quarter panel.
Then using the rotary tool with a cutting disc I carefully cut out the quarter panel just inside the lines drawn, I can always cut more out but putting more in can be an issue.
I carefully refit the repair panel and trim the rear quarter to get a good fit. I do this a number of time to make sure I get it right.
When I am happy with it I hold the panel in place with my magnetic welding clam and some vice grips.

I then carefully and slowly tack round the repair panel, I keep stopping and adjusting the clamps and the panels to try and get the best fit I can.
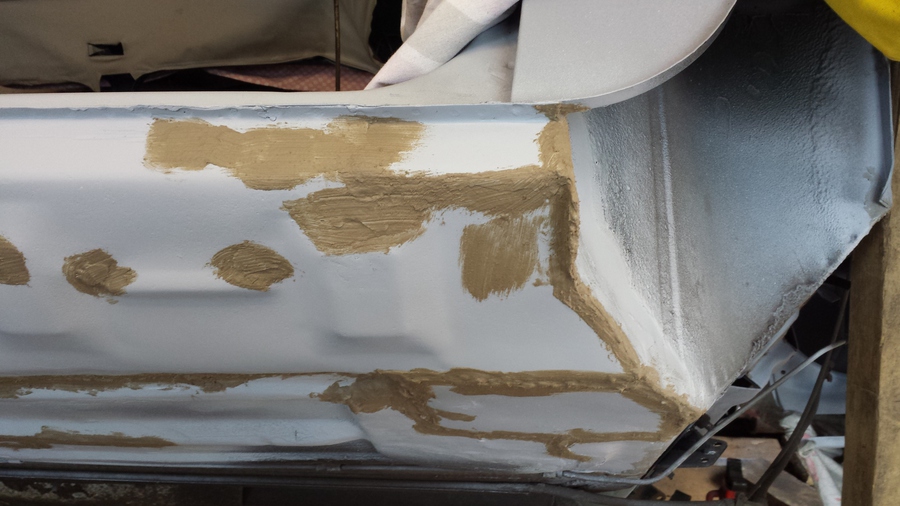
I them weld up between the tacks and grind back the welds to try and get a good finish, I am also trying very hard not to warp the panel. I fail in this and warp the panel a bit I should be able to beat the worst of it out before filling the rest later. I also spot weld the joint with the sill, and clean that up as well.
The excess metal I left on the closing piece I now trim to the right shape, heat it up with the blow lamp and bend it up towards the lip on the quarter panel repair.
After some messing about and adjusting I spot weld this seam together and tidy it up with the grinder and wire brush. I also make up a small repair patch to fix a bit of the wheel arch, I shape it as best as I can on the bench clamp it into place, tack it in a bit, adjust it, spot weld it on the wheel arch seam, them MIG it into place. Clean up the area with grinding disc then wire brush, this opens up some more rust that I will need to repair.
But that will have to wait until next week, time to clean up now and get off home.
Friday, 3 April 2015
I continue today with repairing the inner wheel arch, in the past I have tried to do this with one piece of metal but it never bends into the correct shape without puckering because of the complex curves, so I always do this repair by putting in a number of smaller patches about 10cm to 12cm, adjusting the shape for a good fit in the bench before welding them into place with the spot welding and the MIG welder.
I carry on cleaning up the wheel arch and making small patches and putting them in s I go, cleaning up afterwards ready to put the next one in.
This last one is a bit different as the rust has eaten away part of the wheel arch seam, I know this is going to be covered up by the wheel arch extensions when they get fitted later but I just like to put it right when I can.
I make up the last patch and fit it into the wheel arch, with the MIG welder I patch up the lip of the wheel arch on the outside, then grind off the excess weld leaving it looking much like it did originally, I am quite pleased with the result. I also MIG over some more areas where the metal is a bit thin or has been burnt away by the spot welder.
I make up a patch to repair the wheel arch at the back, I weld it in across the top and down both sides but leave the bottom, I will weld this together when I put the valance closing panel in.
Enough for today, time to put all the tools away, clean up, lockup and make my way home.

Sunday, 5 April 2015
Abi and I start work today by cleaning up the sill and floor on the drivers’ side ready for some etch primer and seam sealer. As Abi cleans the sill area with the wire brush we do find some more areas that need attention.
I am starting to think I should have just cut these sills off and replaced them, but I have gone too far now and we are nearly done.
With that bit welded up we can carry on with something else.
I now sart to do some more cutting out of the old boot floor and tidying up of the are where the stiffening/closing panel has been taken off.
There are quite a few areas where the factory under seal is starting to lift, Abi goes over them with the wire brush so we can treat them with etch primer and get some new sealer on them.
Nana and Popa come over to see how we are getting on and bring us over a food parcel. Enough interruption time to get on.
We finally get the floor all cleaned up and a coat of etch primer on it.
When the primer has dried we go over all the welds, and joints with seam sealer.
We also go over the areas where we removed the old loose sealer.
I also treat the areas I have repaired by the rear sub frame mount and round the rear wheel arch.
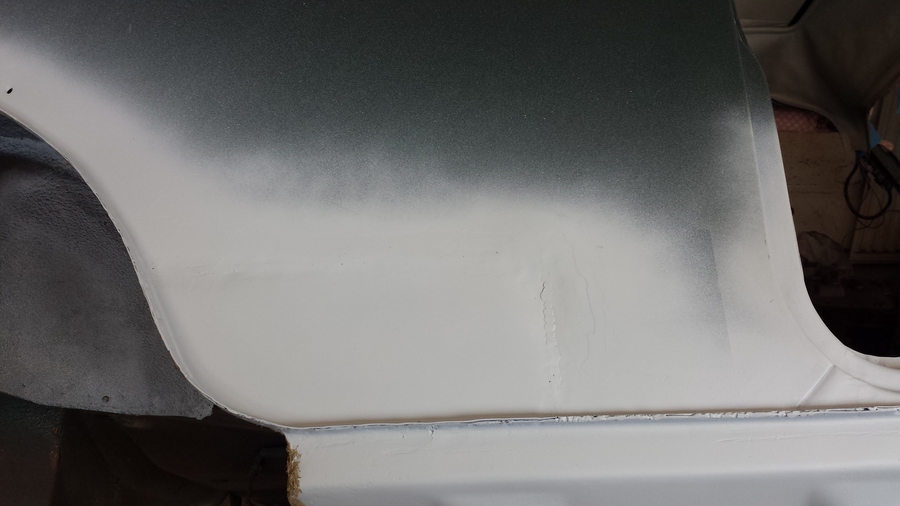
I clean up the area around the repair to the rear quarter and round the top of the wheel arch and treat it with etch primer.
I clean up the area at the back of the wheel arch but put on some weld trough primer as I have more work to do in this area.
We find some more bits to do round the shocker point under the wheel arch.
The battery box is in good condition, there are just a few bits round the edges that need some attention.
I clean up the area under the floor where I have removed the old valance closing panel and stiffening piece, this area I treat with weld through primer as I will be putting the new panel in here soon.
I remove all the old paint and filler from the bumper rear mount seam and treat the whole with weld through primer to keep the surface rust away until I finish the repairs to the boot floor.
I also clean up inside the boot and put some primer on the bare metal.
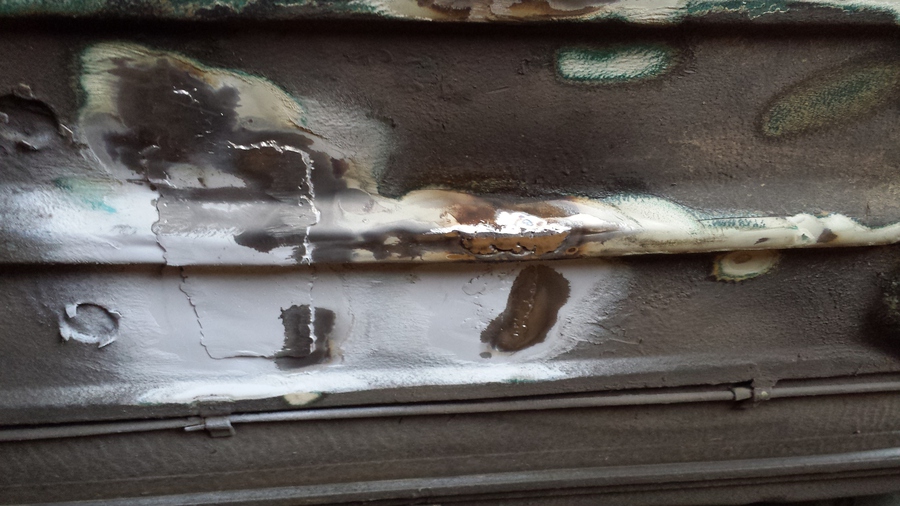
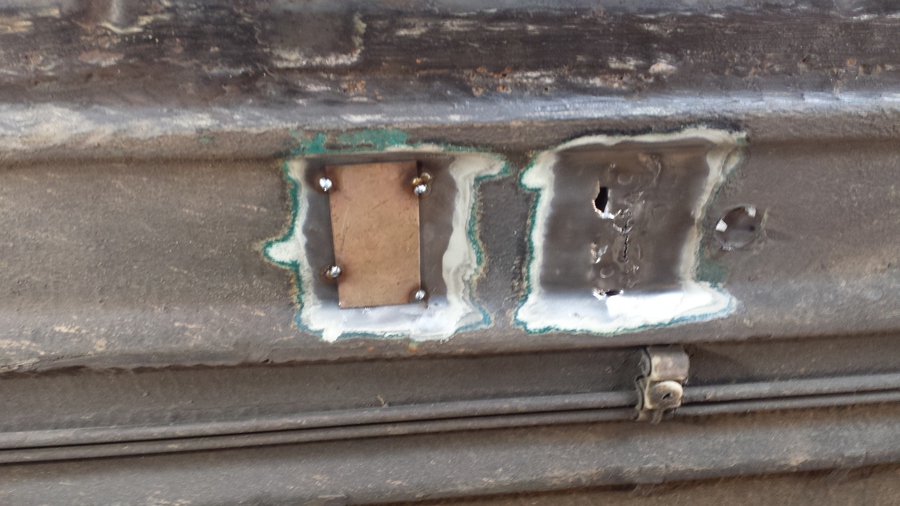
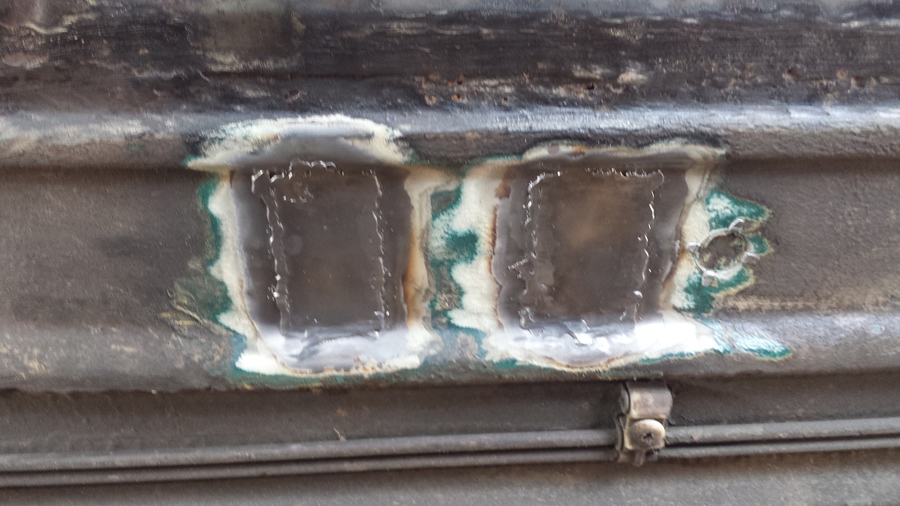
With one side done as much as we can for now, I start to look at the other side, behind the fuel tank mount someone has not bothered to repair a rust patch, they have just covered a piece of metal with under seal and stuck it over the hole.
That’s it for today, time to go home.
Sunday, 12 April 2015
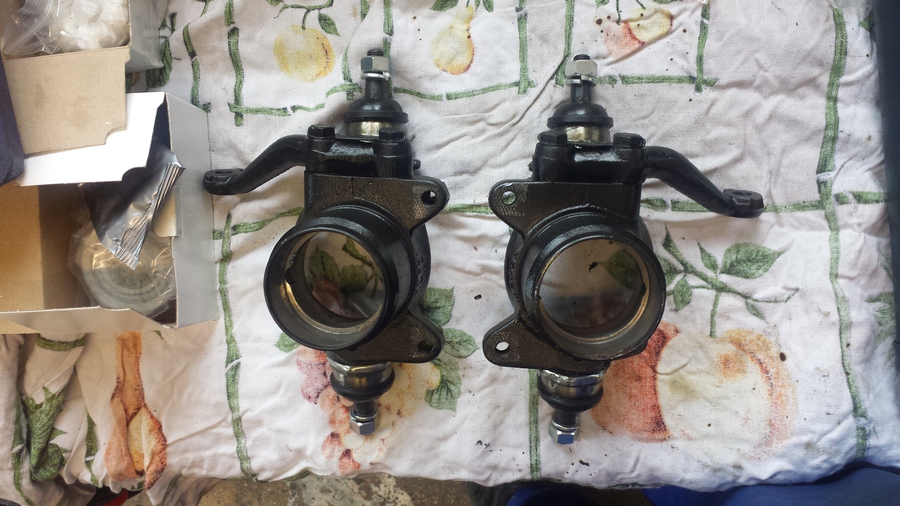
I decide to take a break from cutting, welding and grinding. I rebuild the front hubs instead, firstly I install all four new ball joints. I don’t like the job of shimming up new ball joints it take forever, keep tightening it down checking it, pulling it apart again, changing the shims and putting it back together again. Once they are all setup I grease them using a grease gun to fill them with grease until it comes out.
Next task is to fit the new wheel bearings, I start by using a copper drift to drift the new bearing seats into place. Then I pack the new bearings with grease, and hold them in place using the new oil seals, bear in mind that the oils seal with the extra lip on it goes at the back to hold the dust shield in place.
Well all that took longer than I expected and I have run out time for today, I put away all the tools, clean up and make my way home.
Sunday, 19 April 2015
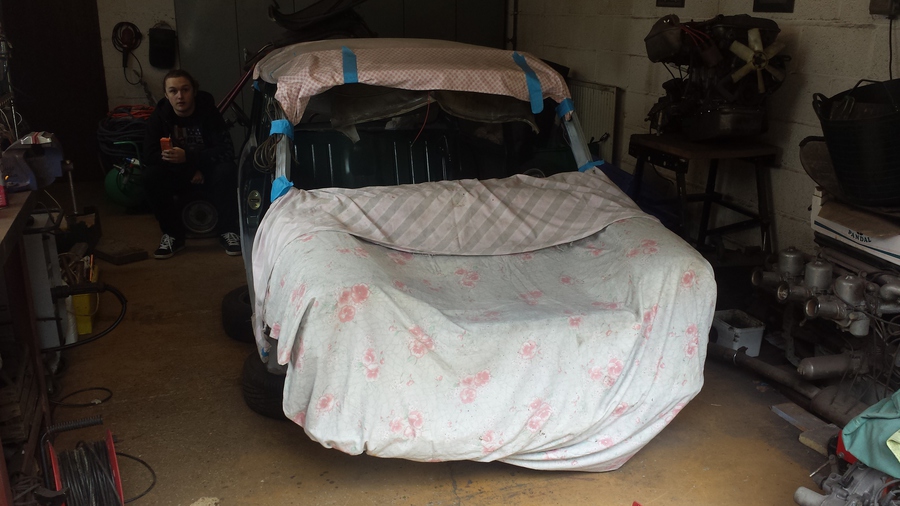
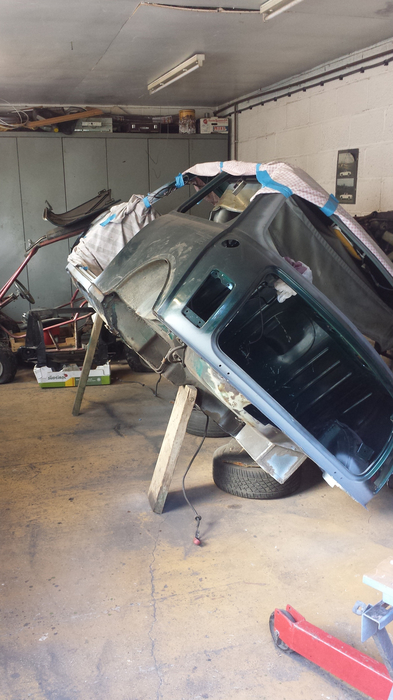
Another day ready to get some work done on Sasha, she has been tucked up nice and warm under her blankets.
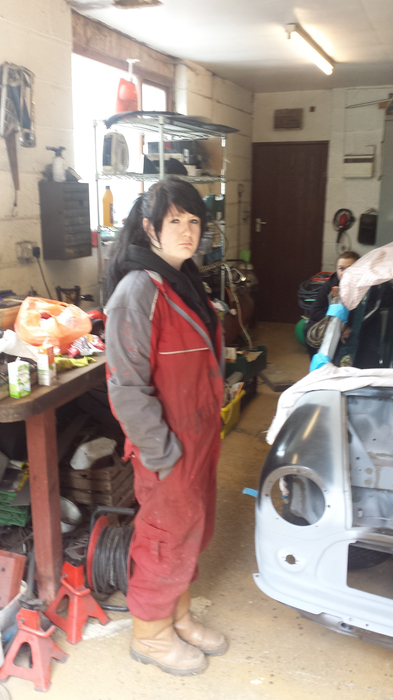
Abi is ready for work, she has even bought her boyfriend with her today to give us a hand, we intend to turn Sasha round today so I can work on the other side and the back end.

Now that Sasha has been turned round I can start on the other side of the boot floor, I begin cutting off what is left of the rear valance.
I need to cut the rust out of the boot floor, I also need to remove the fuel tank mount as this will have to be welded back in to the new boot floor when I get that far.
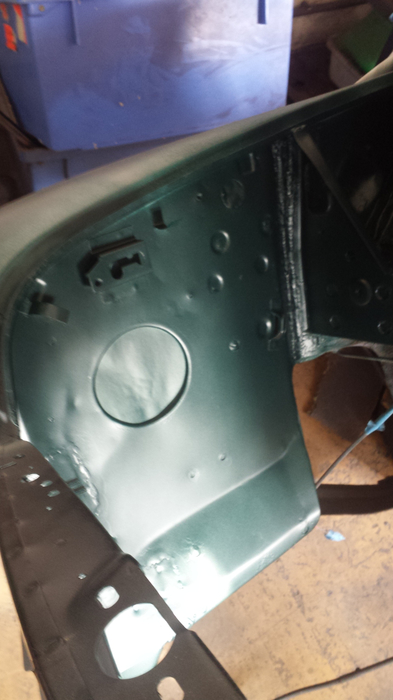
While I have been working on the back end of Sasha Abi has been flatting down the primer and paint in the engine compartment to get it ready for painting.
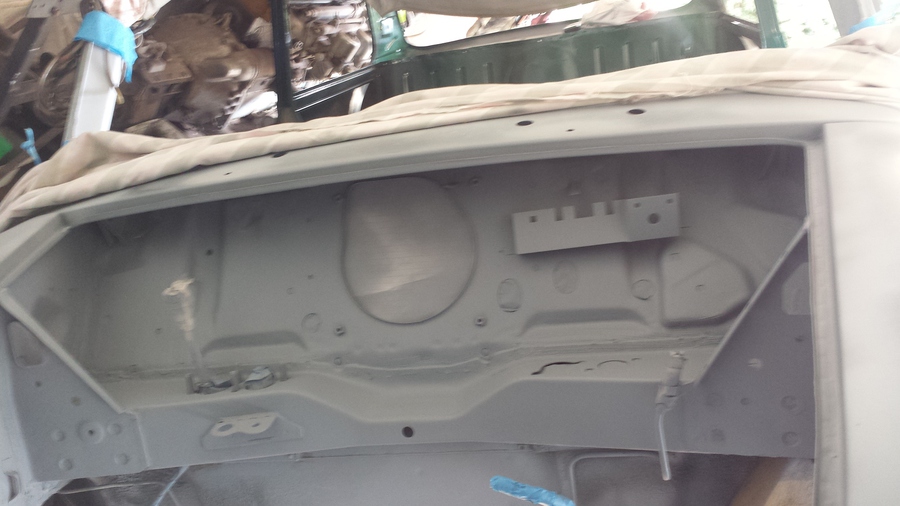
Once Abi has finished the rubbing down she goes over the while area with panel wipes ready for a good coat of primer. Abi has the bulkhead all primed, I think she has done a good job.
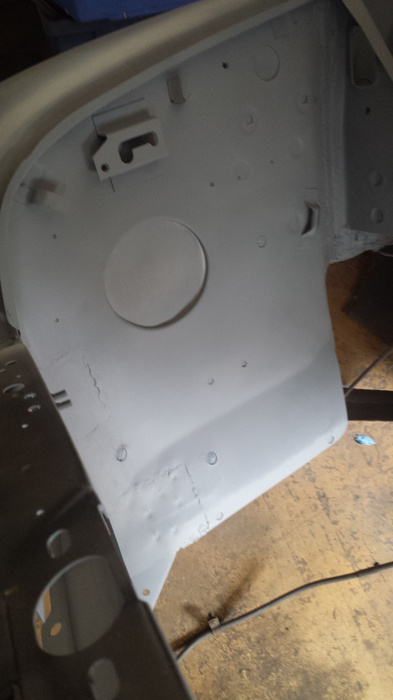
Abi gets the drivers’ side inner wing primed.
Also Abi paints the inner wing on the passenger side, she is now about ready to get some British Racing Green on Sasha.
While Abi has been busy at the front I have been cleaning up and removing what is left of the old valance and starting work to remove the valance closing panel from the boot floor.
I also grind off the stiffening piece from the boot floor, this seems to take ages, grinding a bit off peeling the panel up and grinding off a bit more until eventually it’s all off.
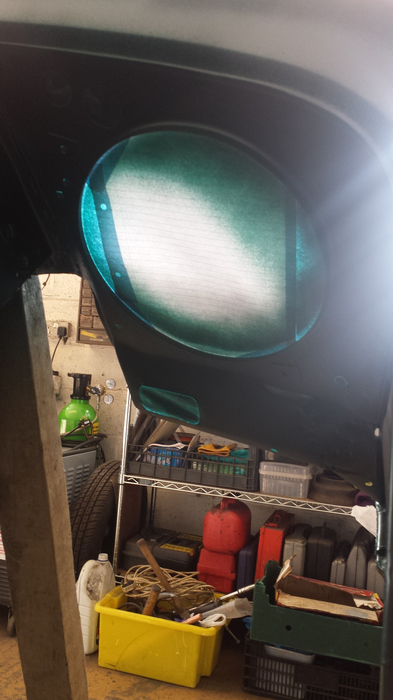
Abi now has a coat of BRG on the drivers’ side inner wing, it’s starting to look good.
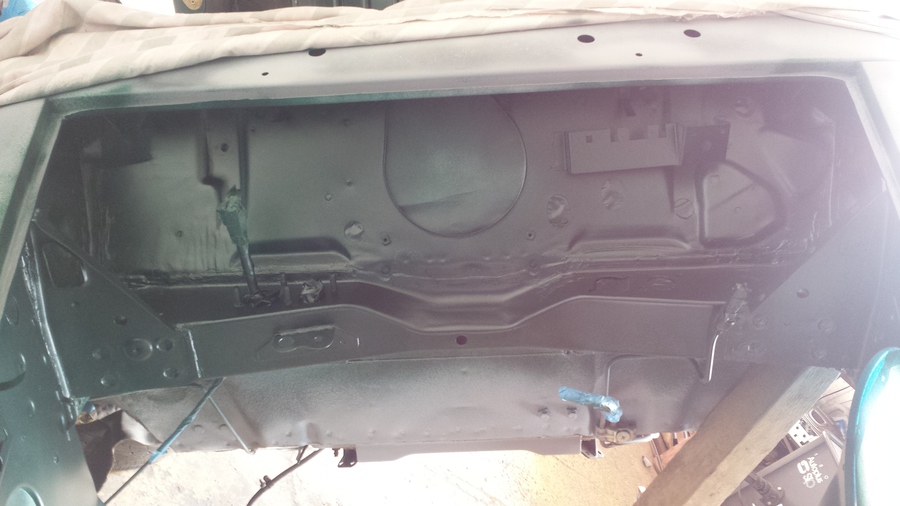
The bulkhead looks great as well, especially as it is just from a spray can, I am going to have to order some paint soon so we can paint the engine bay properly, we will also need to paint the inside of Sasha and the inside of the boot.
Abi has also done the passenger side inner in and the inside of the front panel.
Well, that’s it for today, we put all the tools away, clean up the workshop, lockup and make our way home.
Sunday, 26 April 2015
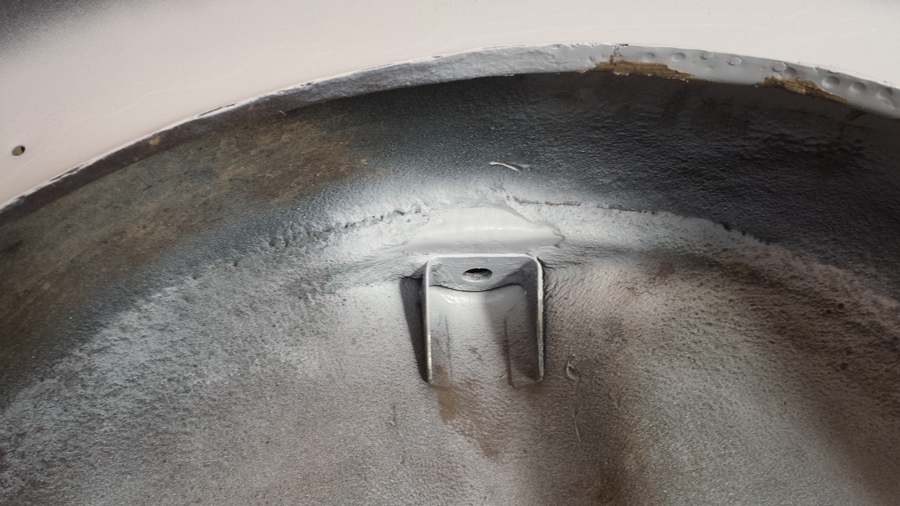
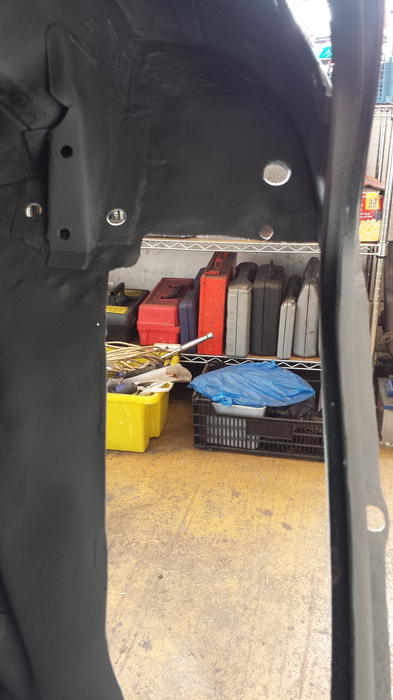
Today I make a start by cleaning up the bracket from the boot floor that hold the fuel tank strap in place. One of the previous boot floor repairs had been welded over this bracket so I had to grind all the old weld off it, it’s now cleaned up ready to be re-fitted.
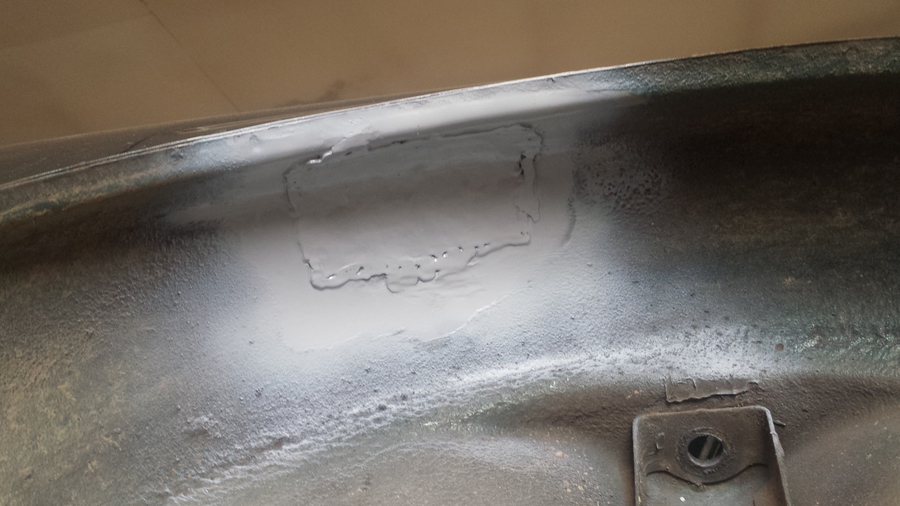
I have also cleaned up the part of the boot floor that I plan to leave in place, there was some pin holes in this that I have now welded over and cleaned up with the grinder.
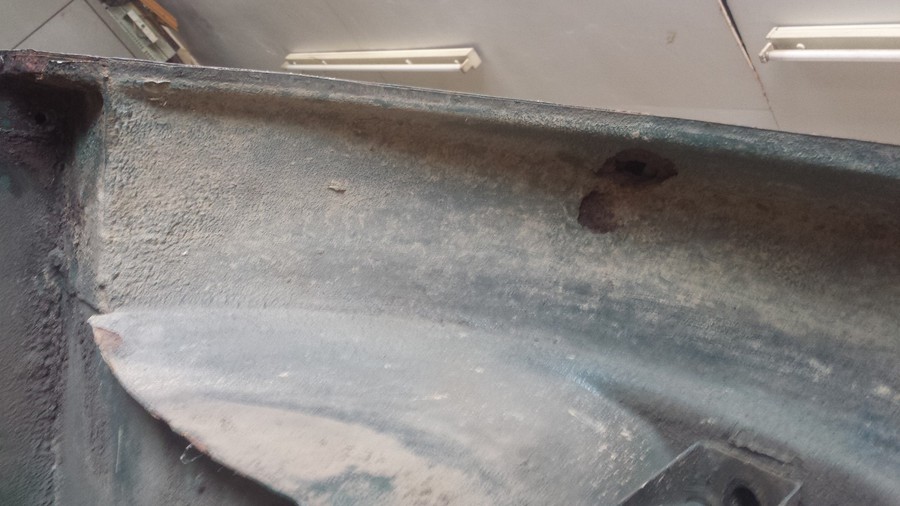
In this picture you can see a rather crusty area in the passenger side wheel arch, this will need to be patched.
I clean up the area with the wire brush in the grinder, removing all the rust and old sealer. I then make up a patch, bending it into roughly the right shape of the wheel arch.
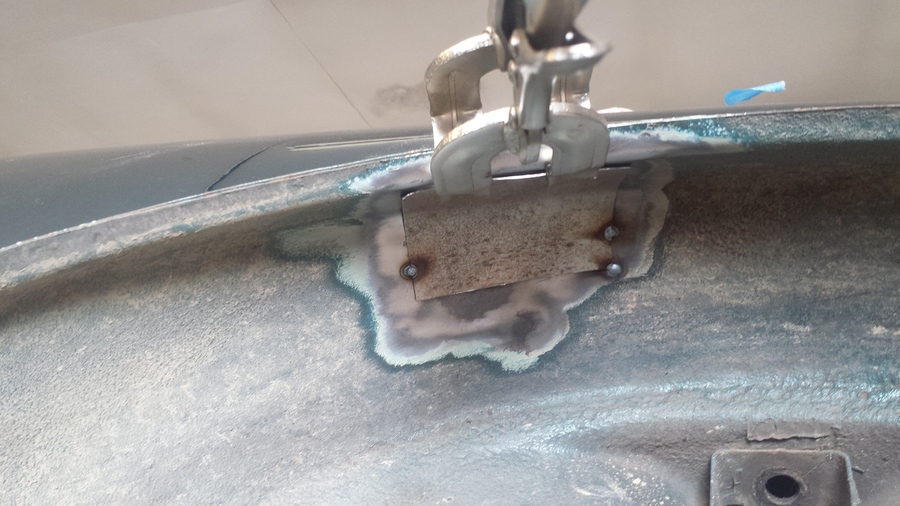
I hold the patch in place with a clamp, I also hold the patch in place with the long handled screwdriver while I get some tacks on it. With it tacked in place I can hammer the patch into a bit better shape and finish off welding it into place. I then grind off the excess weld and clean up with the wire brush.
I apply some weld through primer to the bare metal of the boot floor, it will be a little while until I get round to putting the stiffening/closing panel in and the rear valance.
I treat the repaired section of wheel arch with some etch primer.
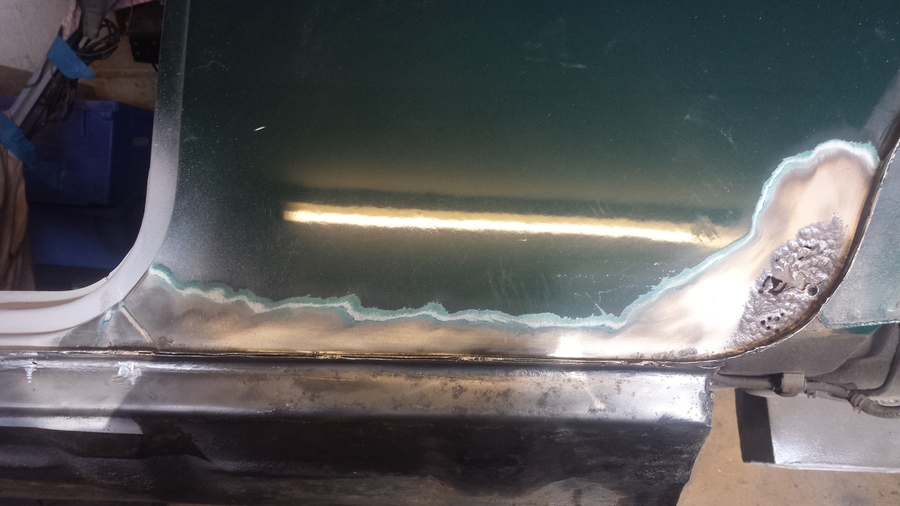
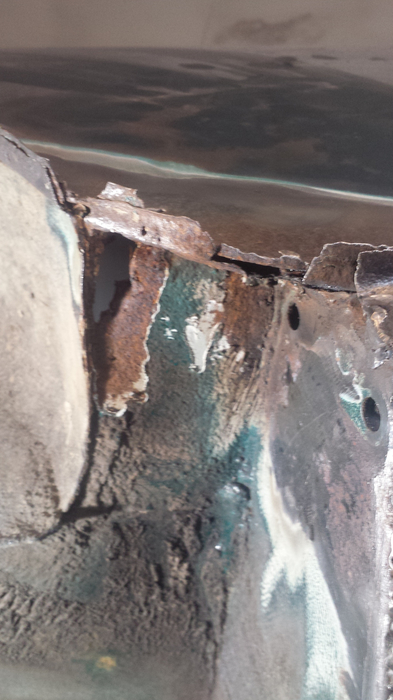
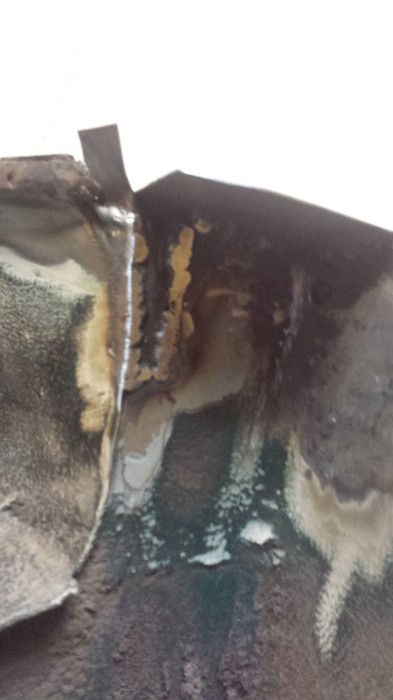
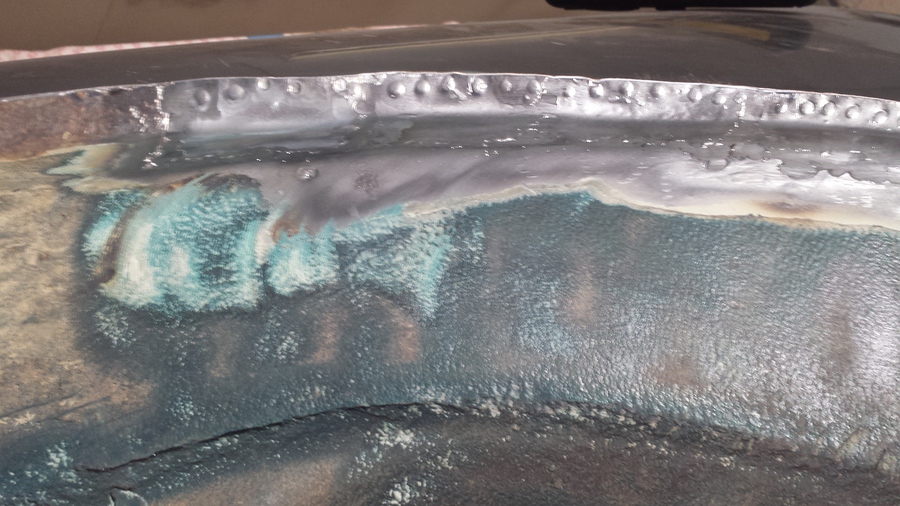
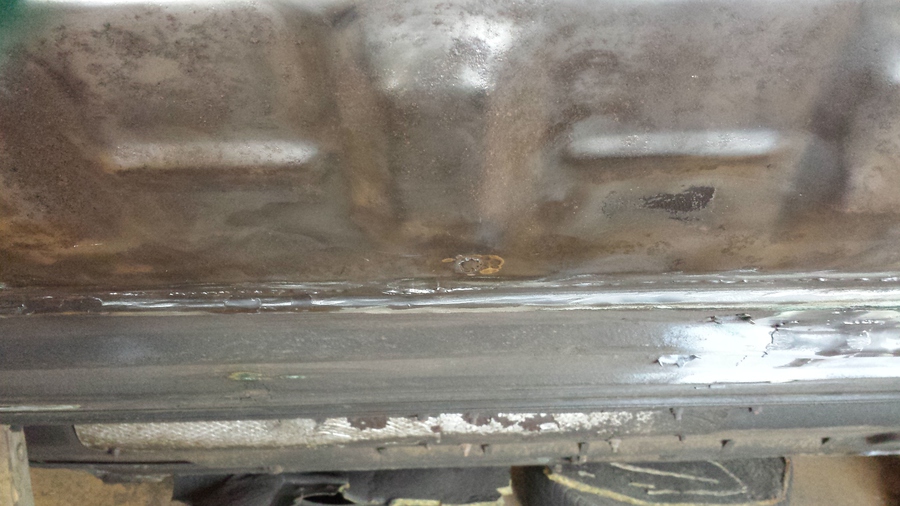
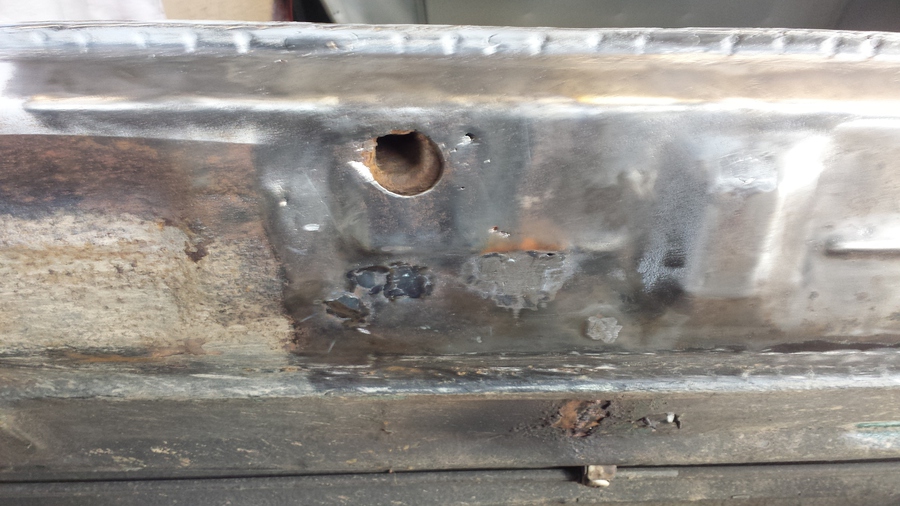
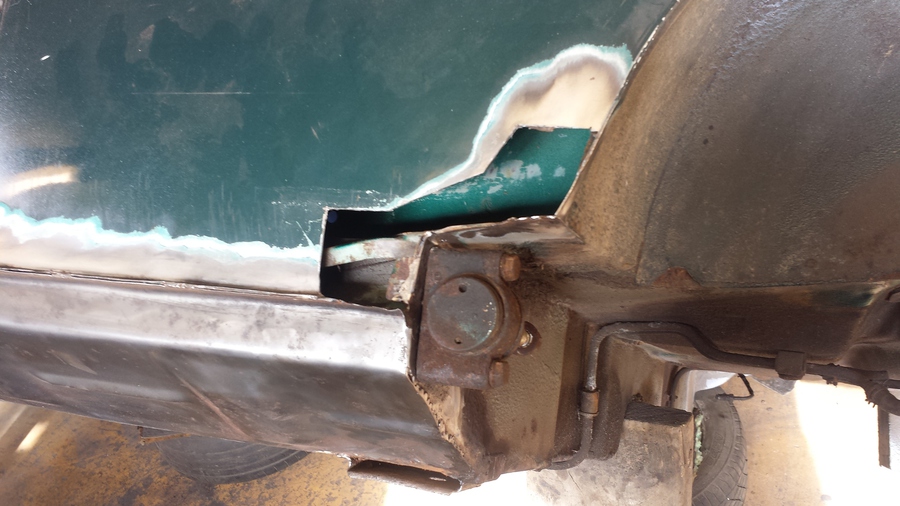
I clean up the passenger side rear quarter panel at the bottom where there is some rust, the corner by the bottom of the wheel arch is like Swiss cheese and the closing panel behind it has all but rusted away.
I have run out of time today so I will start repair to this section next time, for now I clean up the workshop and put everything away, lockup and make my way home.
Sunday, 2 May 2015
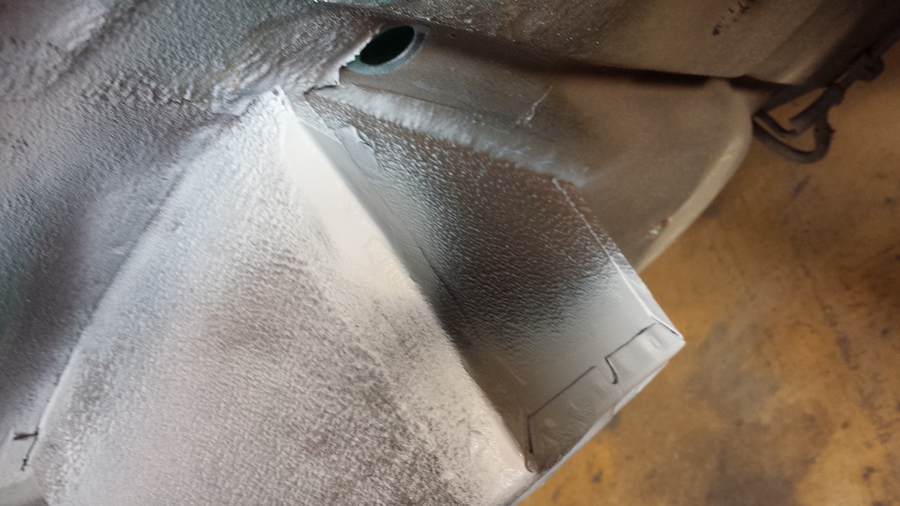
I make up a small patch to repair the area around the drain hole near the heal board and weld it into place.
With that done I carry on cleaning up down the length of the sill with the wire brush to remove all the old under seal and the surface rust. I do find a couple of bits that will need attention but I will come back to those in a bit.
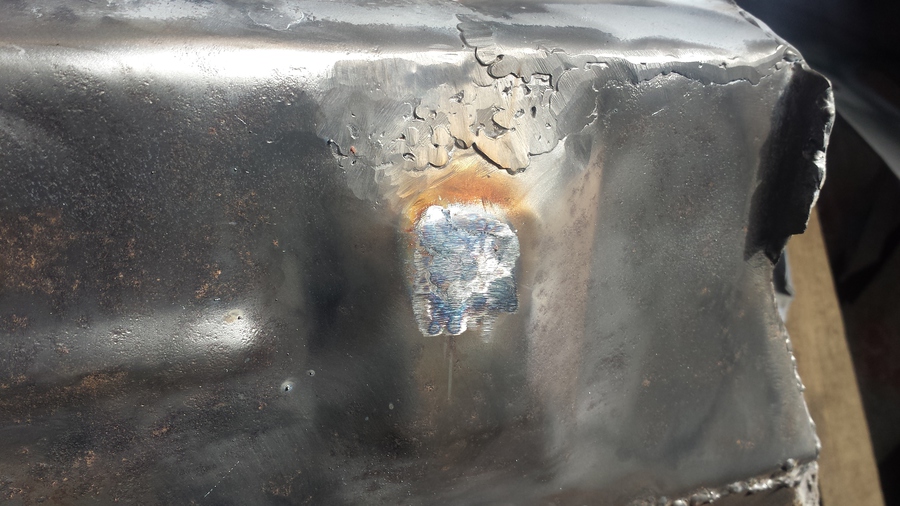
Like the other side the jacking point needs to be plated over, this will stop any more water getting into the sill and as it has over sills on it the water can’t get out again so it has been sitting in there rusting everything away. I grind off the old stiffening piece from round the jacking point and prepare the surrounding area to weld the patch in place.
I make up a patch to cover the jacking point and some other thin areas, I hold the patch with the long handled screwdriver and get some tacks on it, in places the metal just blows away, this is because it is getting too hot as the gas for the MIG welder has run out.
I finish off cleaning up the sill and a bit of the floor, I need to get ready and go before Parkers shut so I can get some more gas for the MIG welder.
A quick clean up of the workshop and off to get gas.
Sunday, 3 May 2015
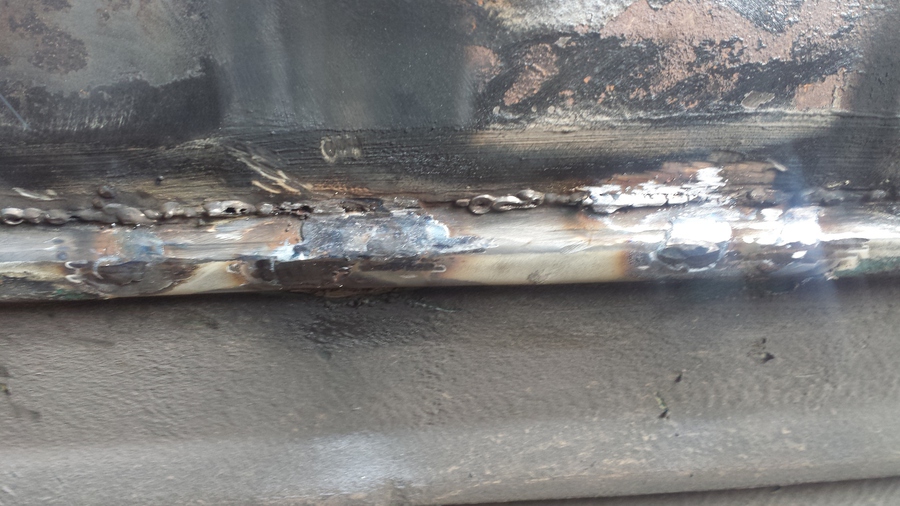
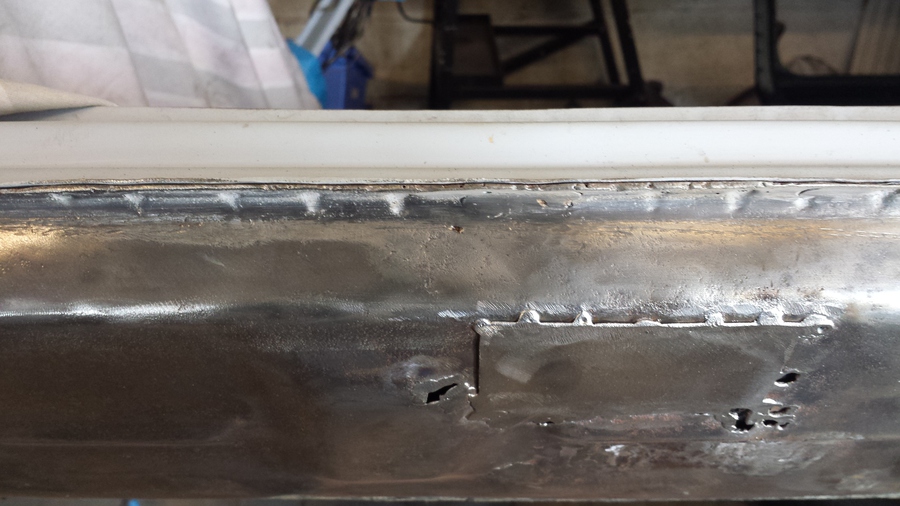
I start today where I finished off welding yesterday, with a fresh bottle of gas I finish off welding the patch round the jacking point and fix a few other holes around that area, I make the weld a bit neater with a grinding disc the clean up with the wire brush.
While cleaning up the floor and investigating any loose bits I find some damage under the seat cross member, I clean up both areas and make two patches up ready to weld over them. I hold the first one in place with the long handled screwdriver and get some tacks on it. With the patch hammered into place I finish welding all the way round it, I grind off the excess weld and clean up with the wire brush.
I do exactly the same with the second patch, then clean up the whole area ready for some etch primer.

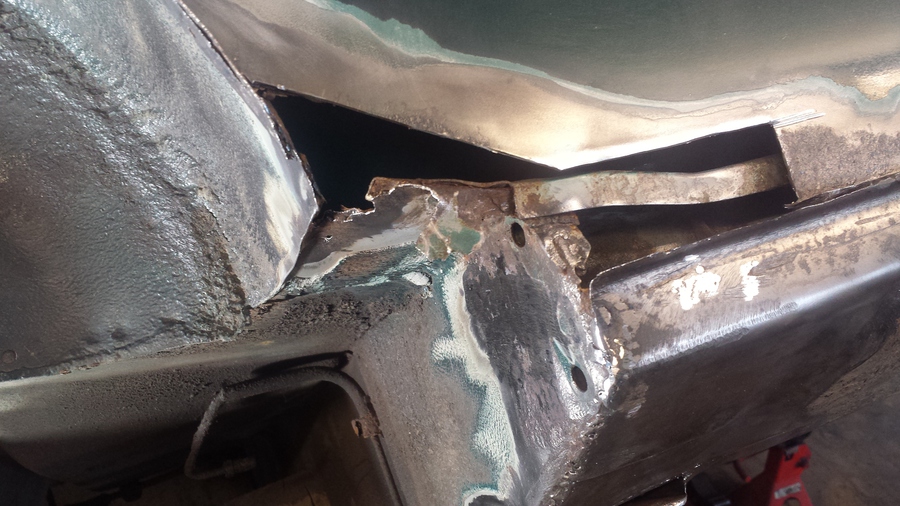
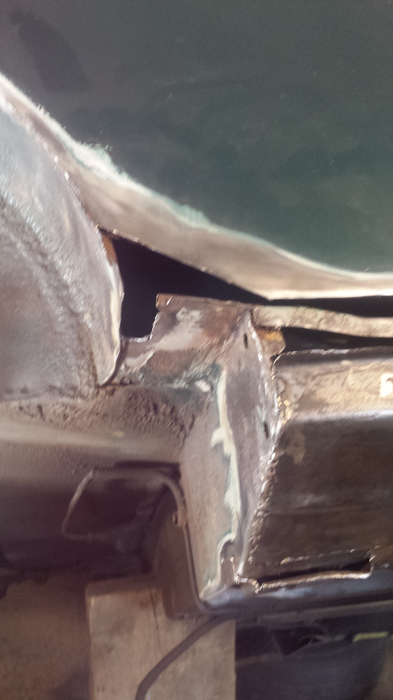
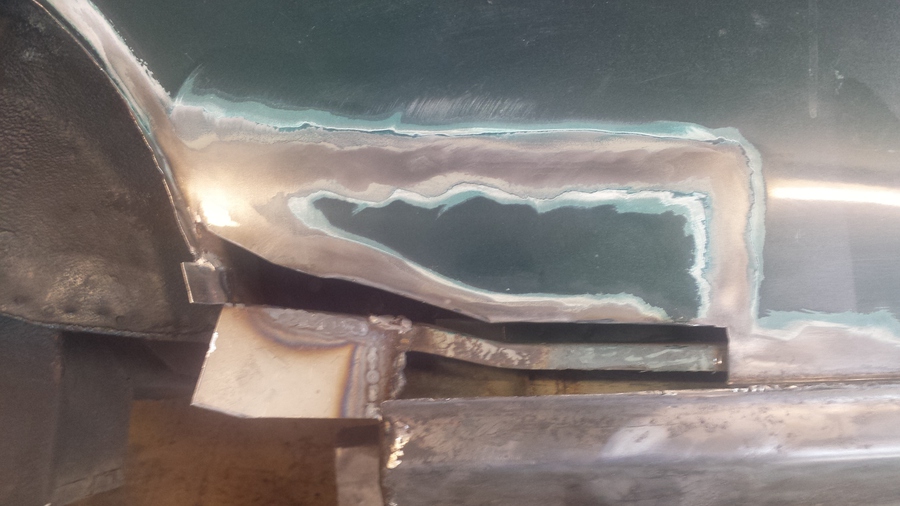
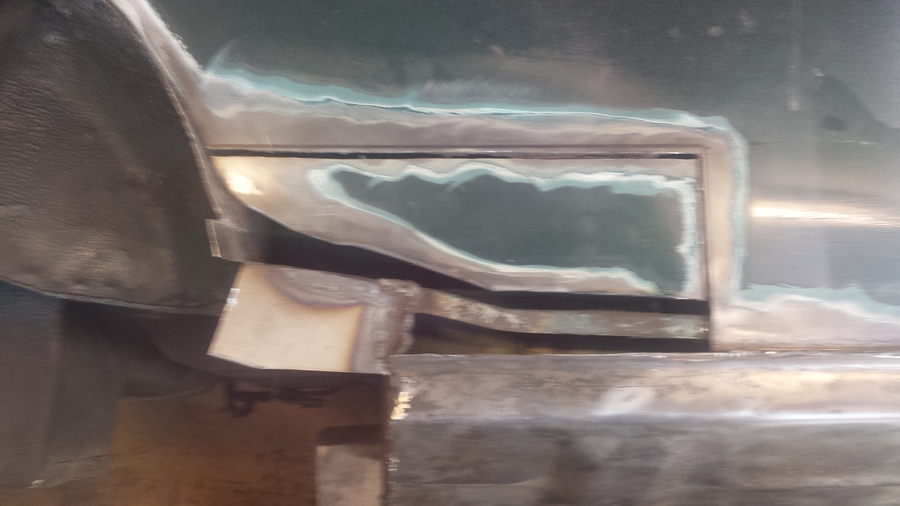
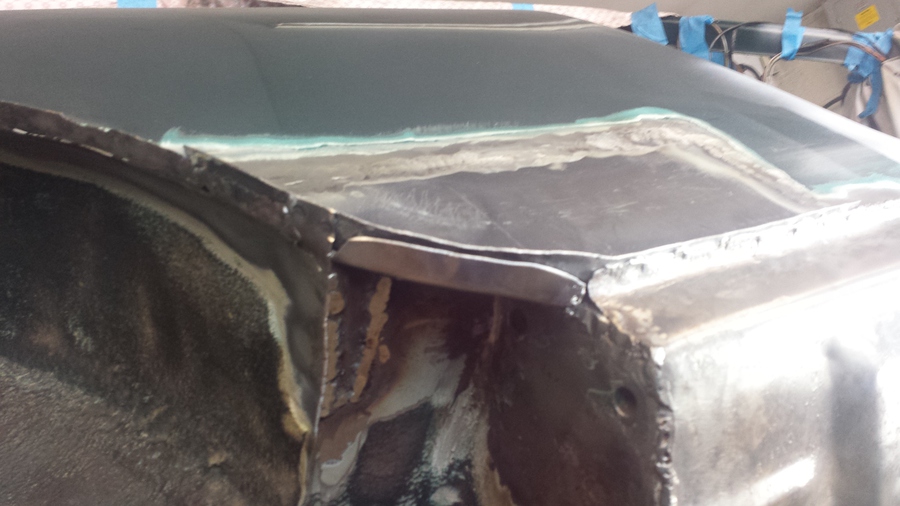
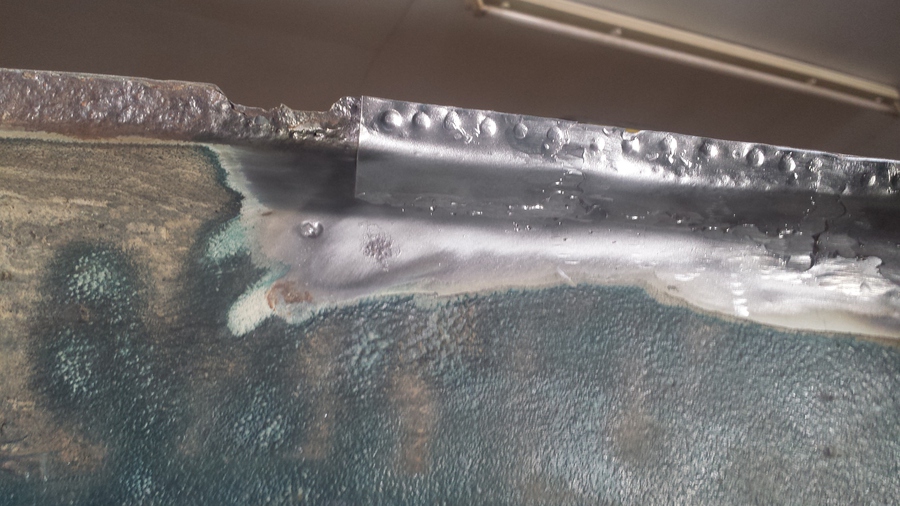
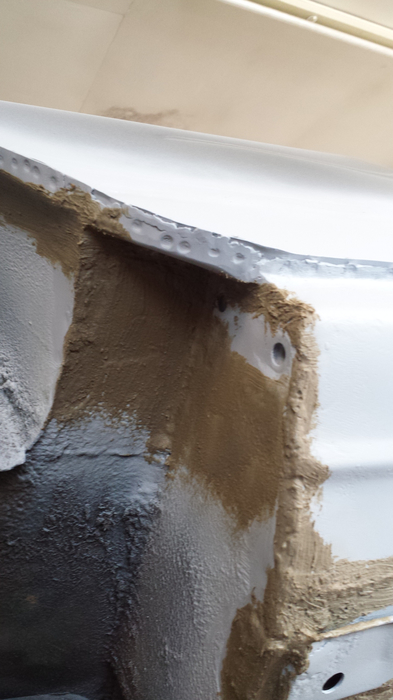
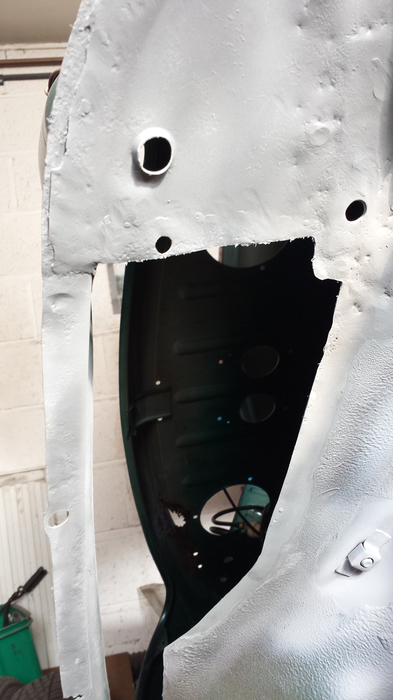
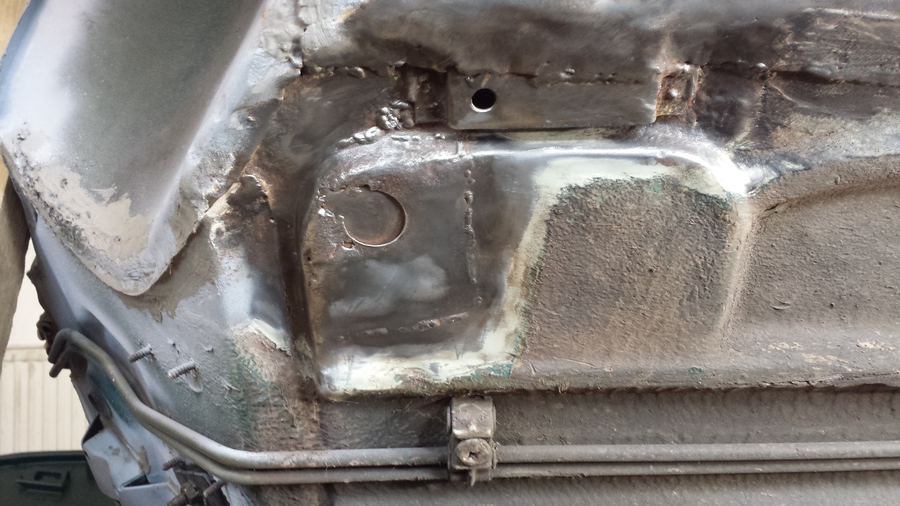
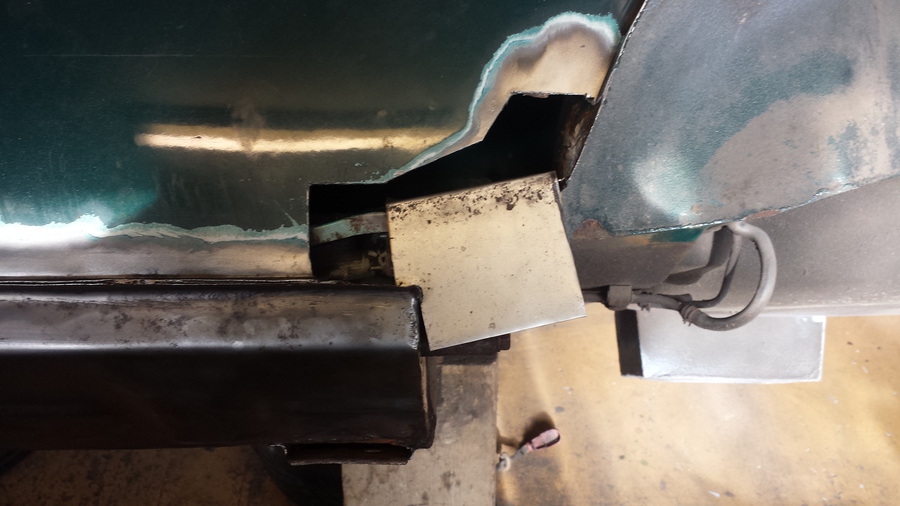
Next I make a start cutting the rusty section out of the passenger side rear quarter panel, I use the rotary tool with a cutting disc, at this point I don’t want to remove too much material, I just want to take enough out so I can get to the closing piece to repair that before I get ready to fit the rear quarter panel repair section. With the sections cut out of the quarter panel you can see that there is very little left of the closing piece.
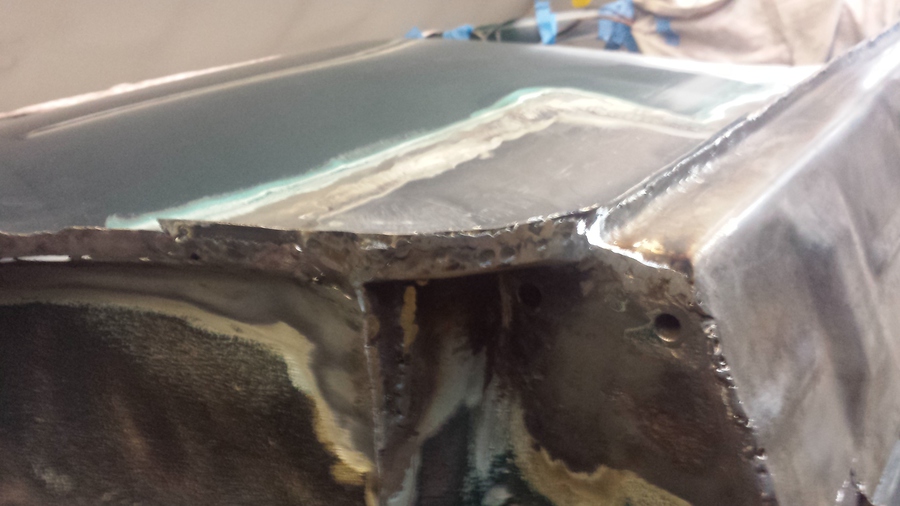
I them cut off a little bit more to give me better access to make up a repair patch for the closing panel.
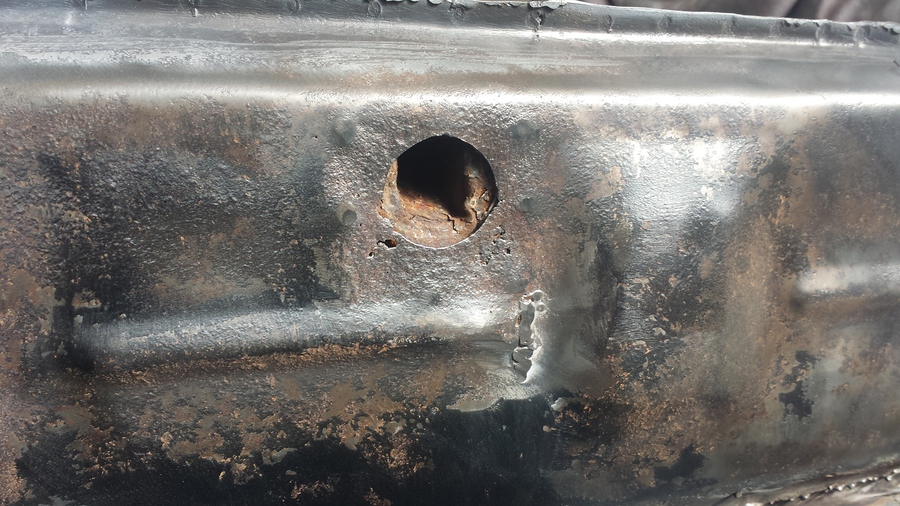
While I am here I will try and remove the broken bolt from the sub frame mounting point, I have been spraying WD40 into this for weeks hoping to free it up. The first step is to drill a hole through the broken off bolt, this needs to be as close to the center of the bolt as possible. With a 3mm hole through the center I open this out to 4mm, I then try and use a screw in type stud extractor, this is not successful all it does is tighten and it starts to move the captive nut, I remove the stud extractor and apply some heat with the blow lamp, when I have it starting to glow I spray on more WD40 hoping it will penetrate a bit more with the heat. I screw in the stud extractor again and tighten it in, the broken stud still doesn’t move it just starts to me the captive nut again, not wanting to break off the captive nut I give up in favor of an alternate method. I open the hole through the bolt to 7mm the using a tap with the correct thread, I slowly and carefully run the tap through the hole, this cuts new threads through the hole. To make sure the threads are good I run one of the original bolts through the new threads. While I have goo access to all these bolt holes I run the tap through all of the to clean out the threads ready to refit the sub frame at a later stage.
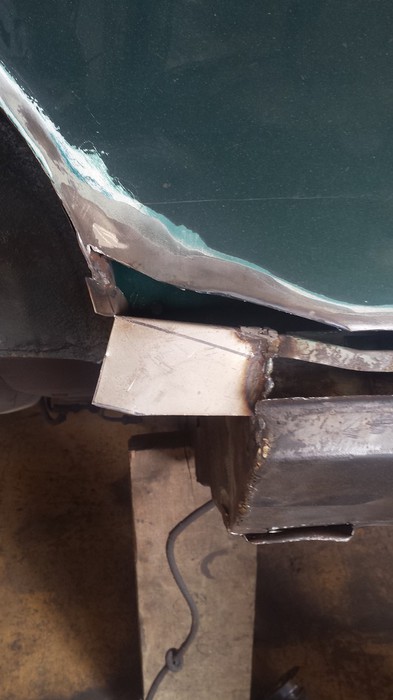
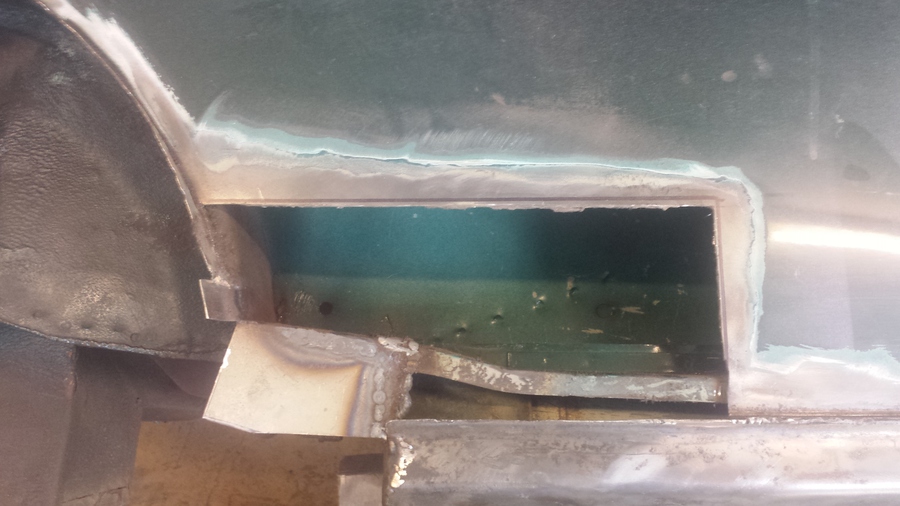
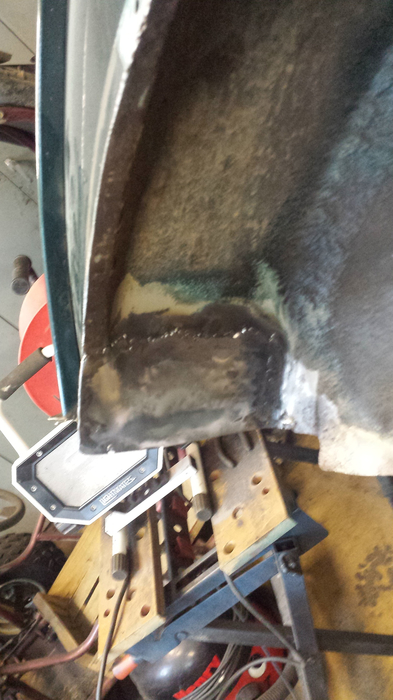
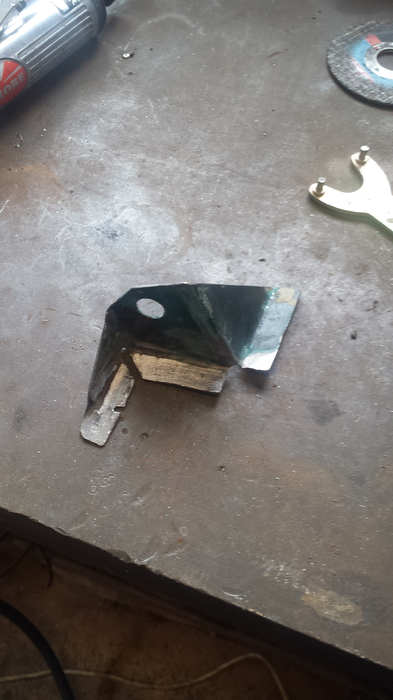
I make up a patch the replace the closing piece that goes under the corner of the rear quarter panel, taking some time to make it fit the best I can, I grind some of the old panel away to get a getter fit, I also grind some off the end of the heal board. Now I have quite a good fit I am ready to start to weld it in place, looks like I will be doing that next week as I have run out of time today.
I put all the tools away, clean up the workshop, lockup and make my way home.
Sunday, 17 May 2015
We took a weekend off last weekend and went to Himley Hall to pick up some parts, I had arranged for Mini Sport to bring a rear sub frame so I didn’t have to pay carriage, it was quite a good show and we did meet up with Darren and Julia in Lue. We picked up a few parts and the new rear sub frame.
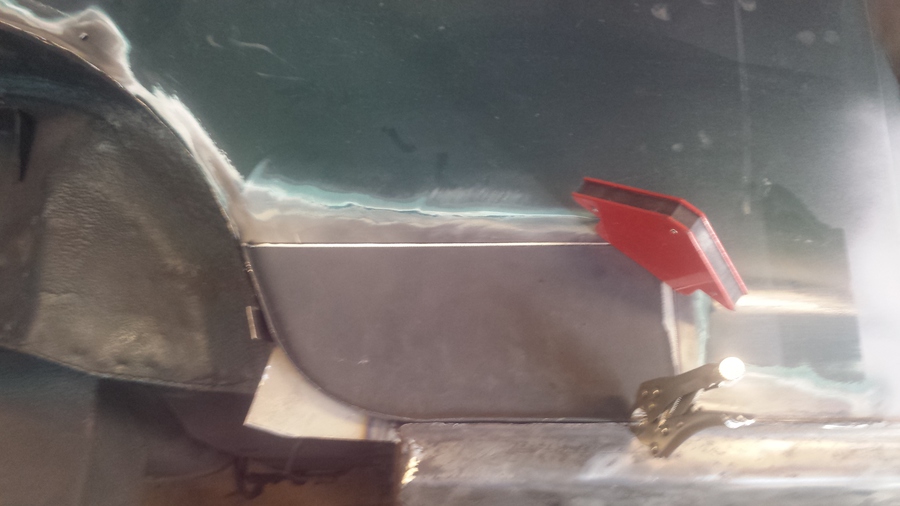
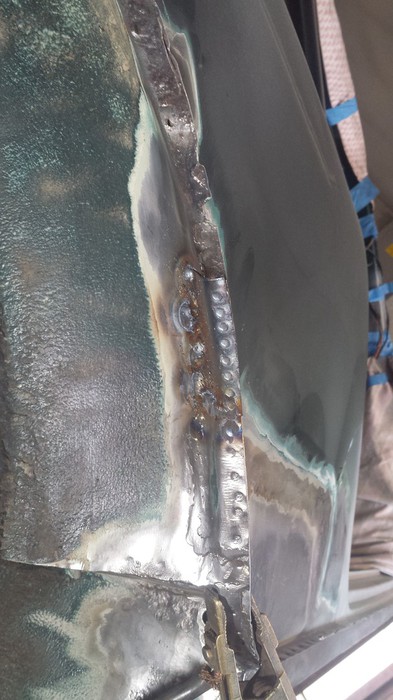
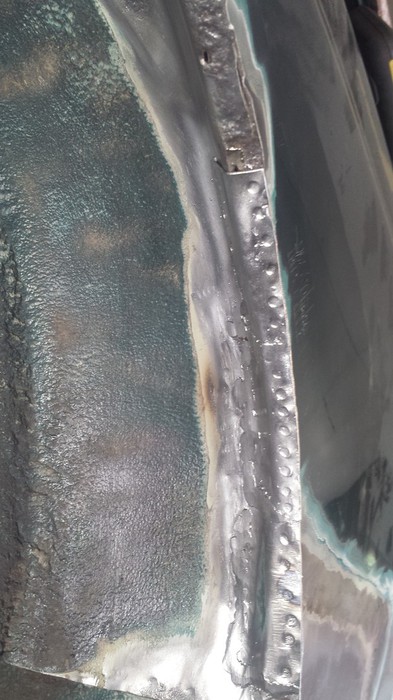
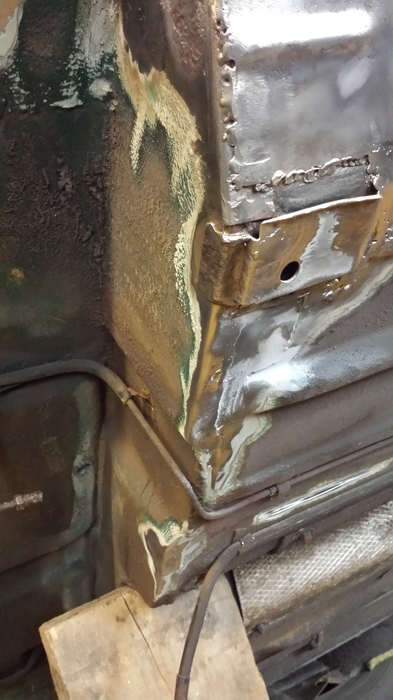
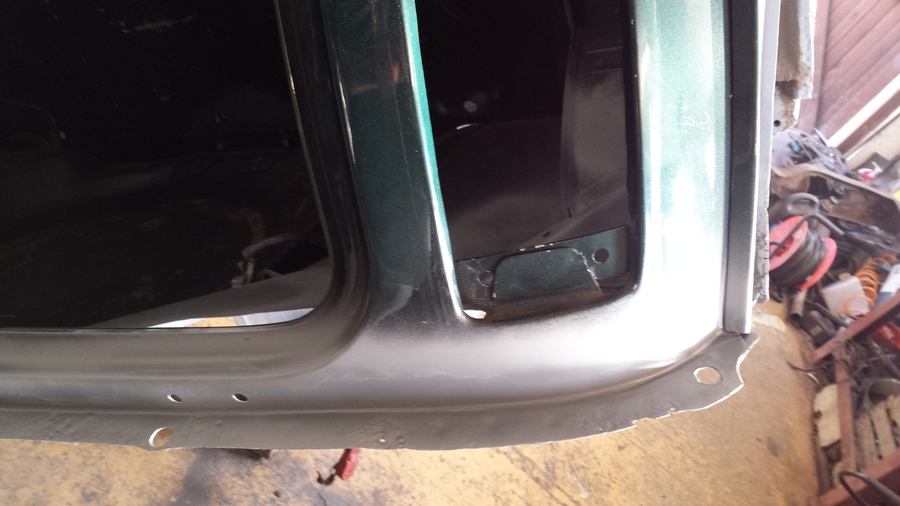
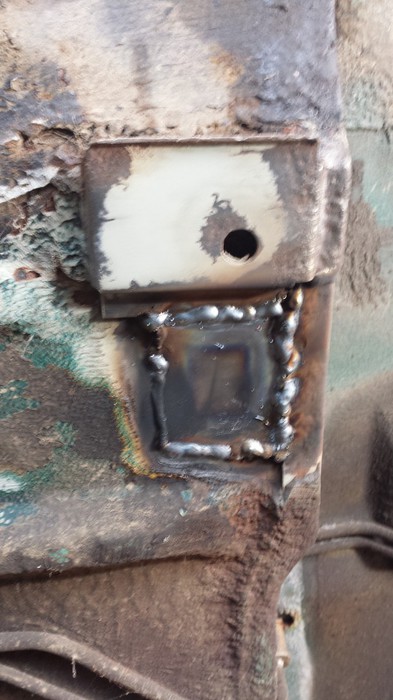
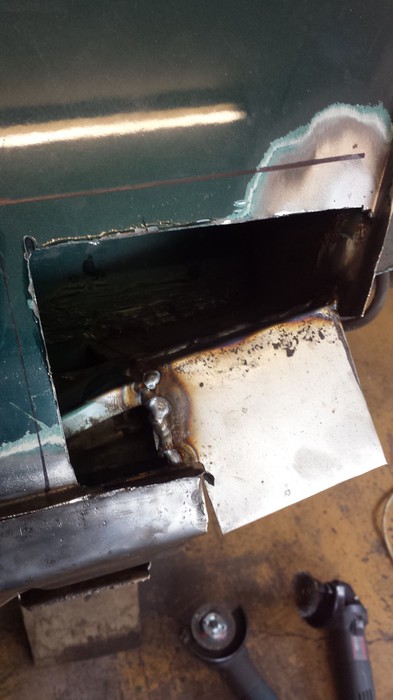
I begin working on welding the repair patch into place along one edge, then along the top which is inside the rear storage pocket.
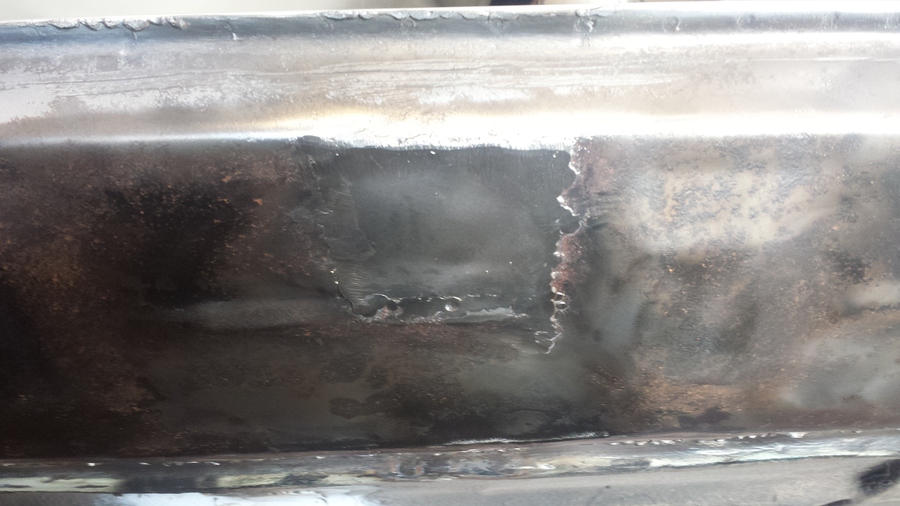
As you can see from the picture I have marked out and cut some more out of the rear quarter panel.
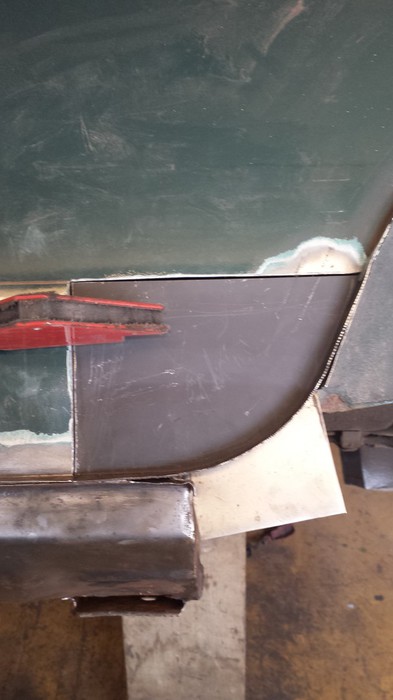
I cut the rear quarter panel out to the guide lines with the rotary tool with a cutting disc in it, after a number of test fits and some more trimming I am about ready to start welding the repair panel in place. In this picture you can see I am using the magnetic welding clamp to hold the panel in place.
We are located at:
Market Harborough
Leicestershire
Contact us
If you would like to contact us:
rod@howitt.org.uk
abi@howitt.org.uk
sasha@howitt.org.uk
Or use the contact form.