Timeline 1 February to 20 March
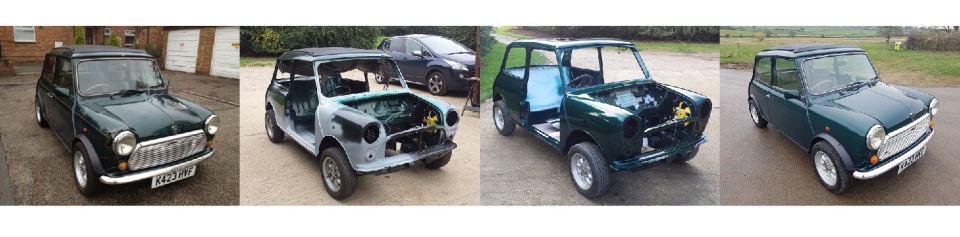
This is a continuation to the work done to Sasha
Monday, 1 February 2016
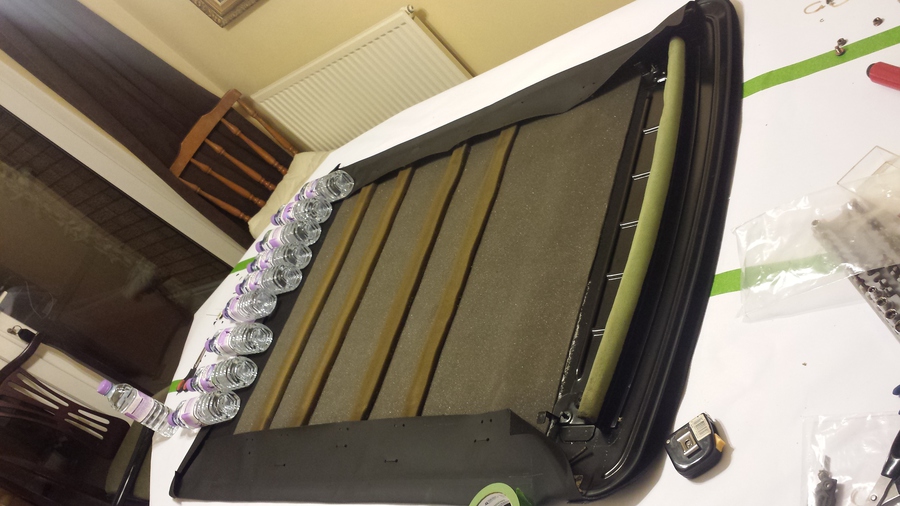
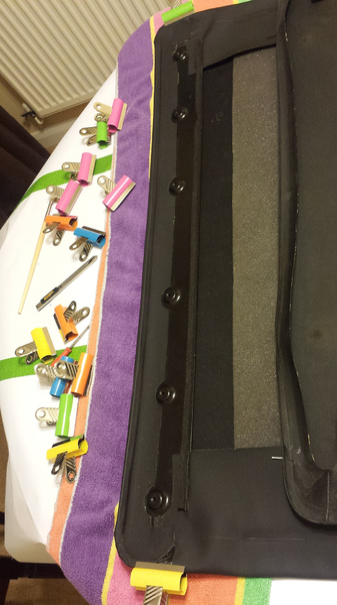
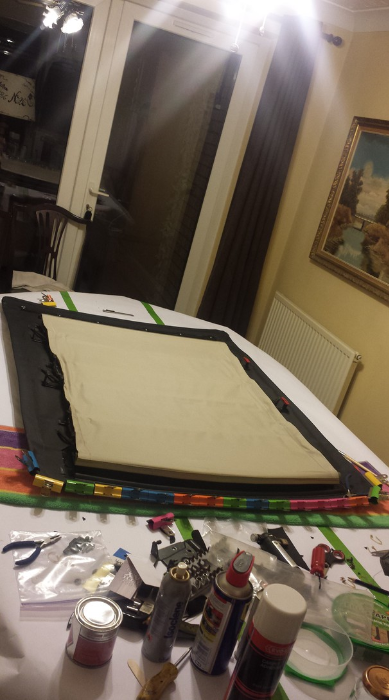
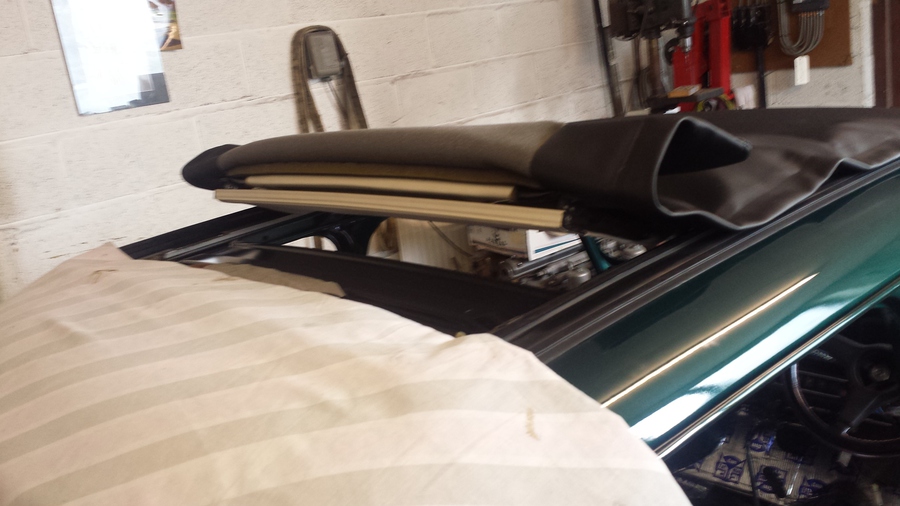
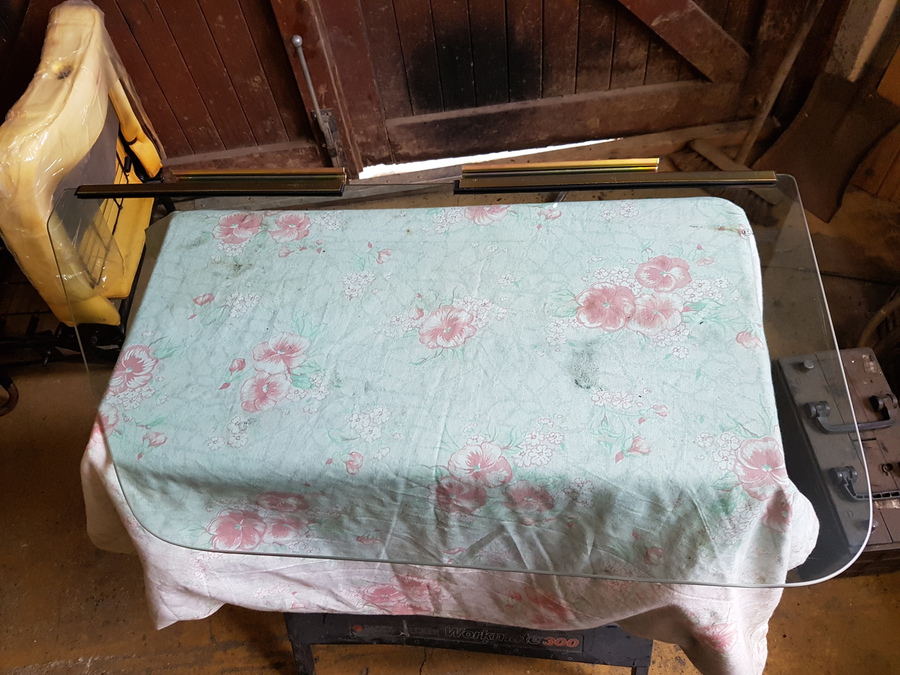
Tonight after work and after tea I decide to do some more work on Sasha’s sunroof, I use some spray adhesive to fix the foam rubber protective pieces to the inner of the sunroof’s outer cover using the tape previously attached as a guide and to stop the adhesive going everywhere. I turn the rear edge the right way in preparation for starting to fit the frame, the cover is quite thick and wants to straighten its self back out so to hold it in place I stand some water bottles on it.
Next I re-thread the wires through the outer edge of the outer cover leaving the ends ready to connect to the frame.
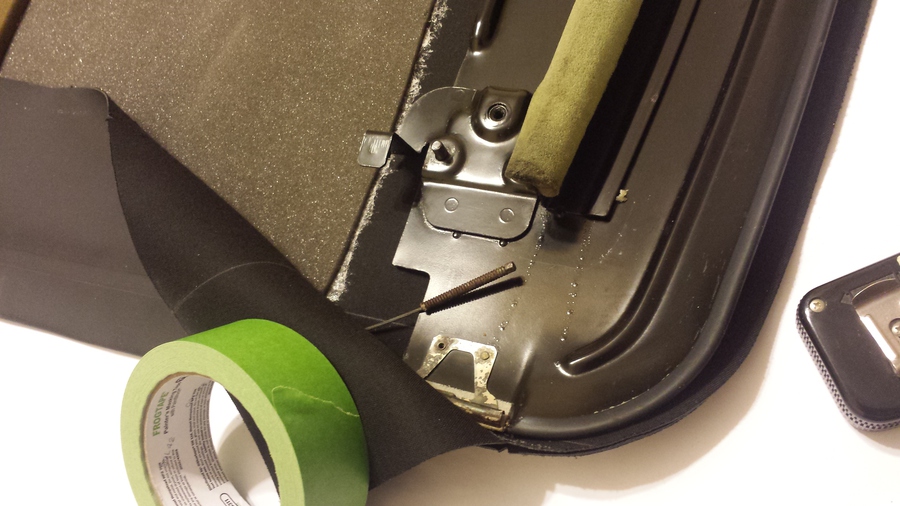
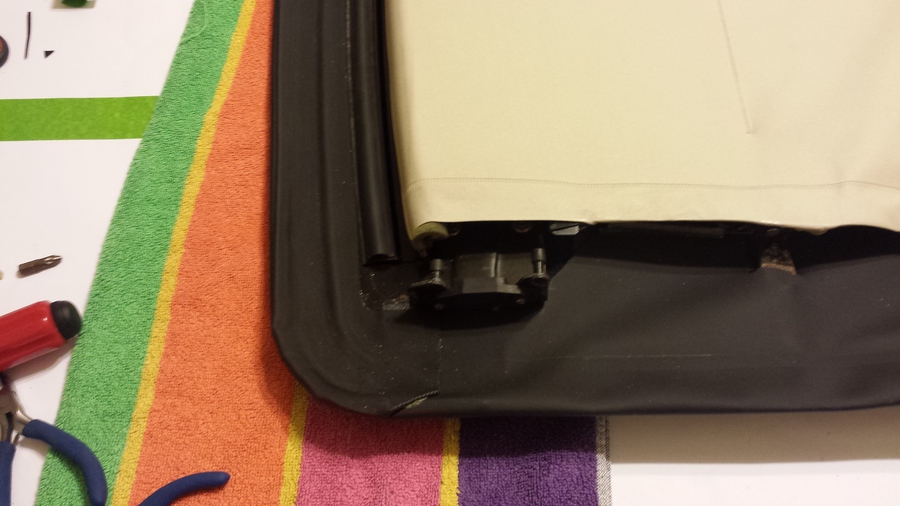
I dry fit the rear frame section, this is so I can mark where the material goes ready to apply the adhesive and so the vinyl outer cover can be trimmed where required. I mark the frame using a pencil, using a very sharp craft knife I trim the vinyl round the raised piece where the rear section is secured to the roof of the car to hold the vinyl in place on the frame I use some bulldog clips that I bought before Christmas from a local stationers.
Tuesday, 2 February 2016
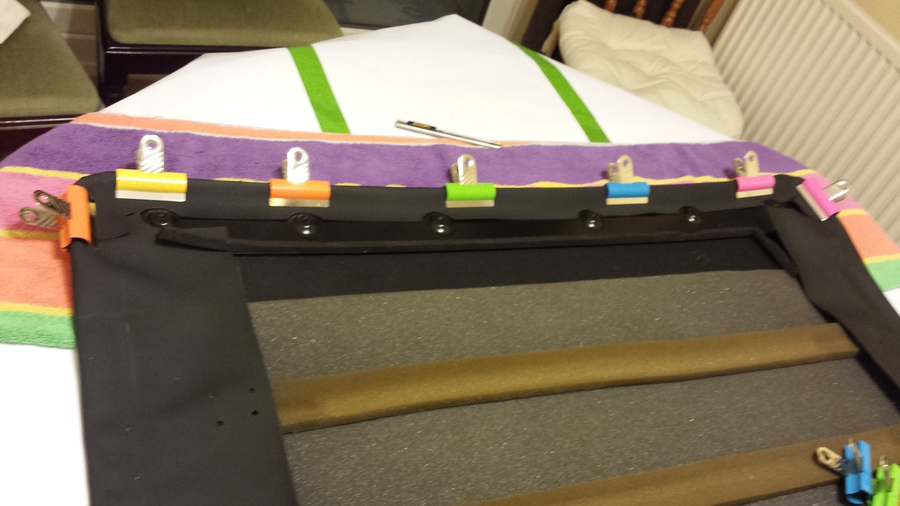
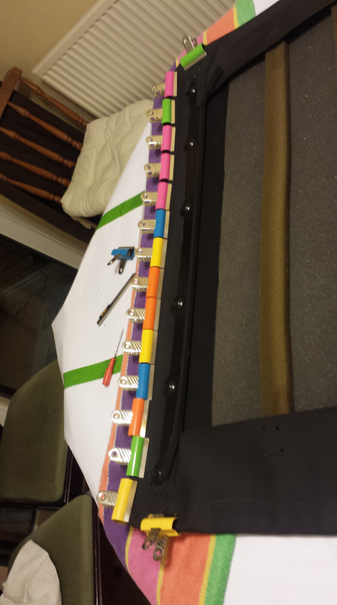
I connect the two wires to the rear frame section, these just connect under a spring steel retainer. I coat the rear frame section with an even coat of impact adhesive where I had marked it previously, and then I coat the corresponding section of the vinyl outer cover with impact adhesive, then leave them to cure for a few minutes. Next I very carefully start to stick down the outer cover after fist checking that the rear frame section is in the correct location, I start in the middle and use some bulldog clips to hold the seam down evenly. I continue working my way out to the sides securing it as I go finishing off at the very edge by folding the material in on its self and holding it in place with another clip.
While the rear section is curing I start to prepare the front section.
I remove most of the clips from the rear section and using the end of a paint brush and the handle of a small screwdriver I make sure the vinyl is pushed in the all the tight areas. The corners have not stuck enough yet so I leave the clips on those overnight.
Wednesday, 3 February 2016
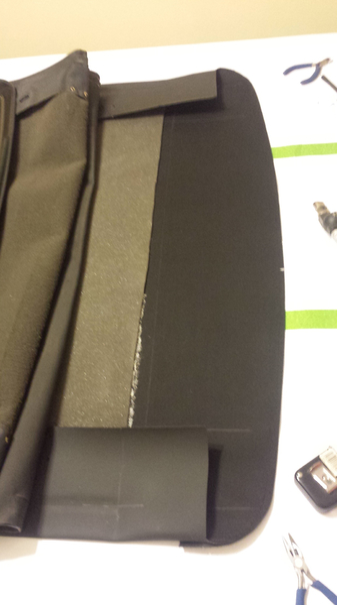
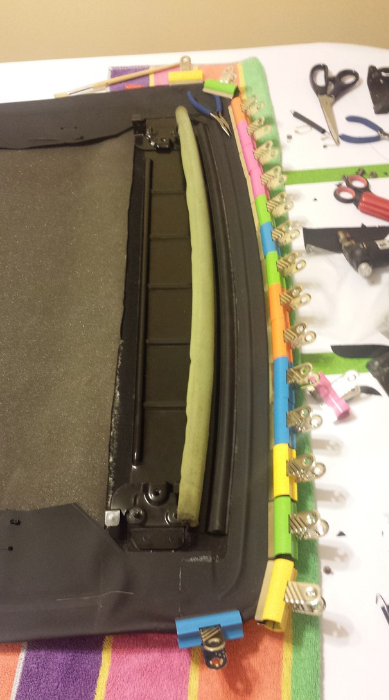
The front section is a little different to the rear in that it is glued underneath and not just on the top, I mark the vinyl where I am going to spread the impact adhesive and I mark the frame section, then I coat both surfaces with the adhesive. Very carefully and with some assistance from Frances we get the frame section in place, after much cursing I smooth it all down, It’s not gone quite as good as I would like but now it is bonded in place. Next I coat both surfaces of the outside as shown in the picture, which is actually the inner side of the sunroof, using the same method as the rear section I start in the center putting the outer cover in to the right place and securing with bulldog clips, there are more shaped areas on the front part of the frame so I push these into place with the handle of a paint brush and the handle of a small srewdrive.
While that is curing I fetch the rest of the frame with the headliner and put it in roughly the right place on the outer cover.
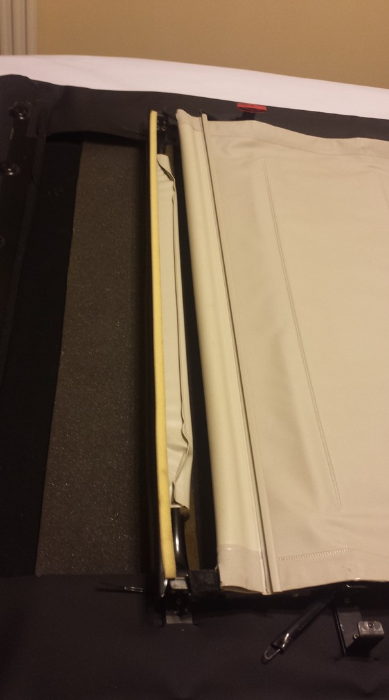
I put some cable ties in through the holes in the outer cover ready to secure it then feed the outer cover over the frame sections, I release the springs to take the tension off the outer cover until everything is in place.
Thursday, 4 February 2016
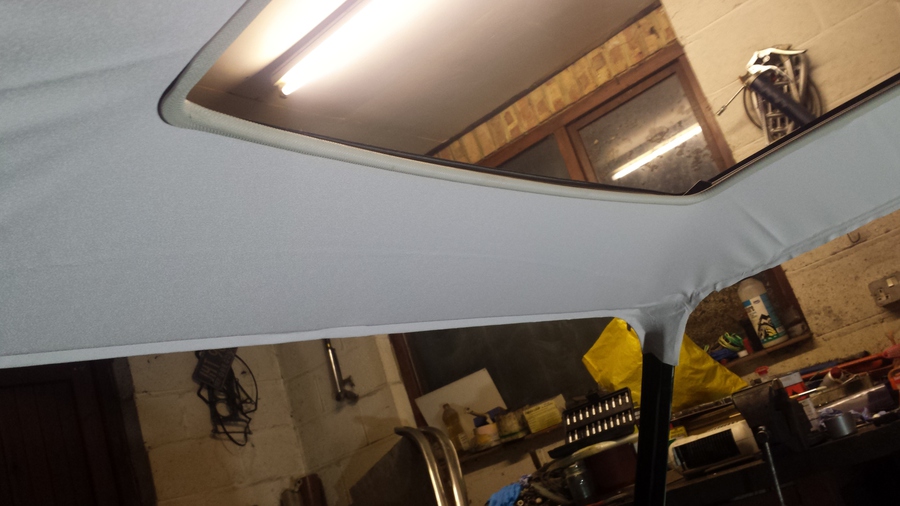
I secure the vinyl outer cover to the frame with the cable ties I put in earlier, hopefully to try and make it more secure I add an additional cable tie the other way round, there are ten frame sections to do.
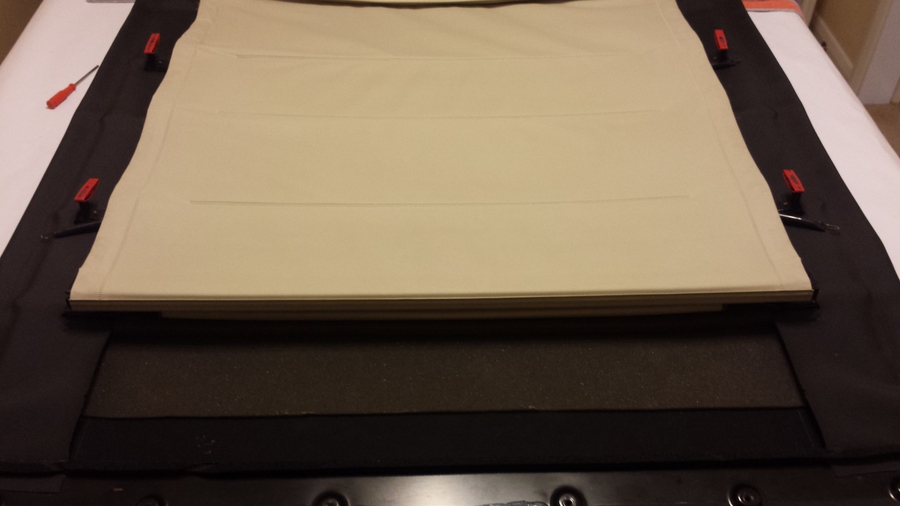
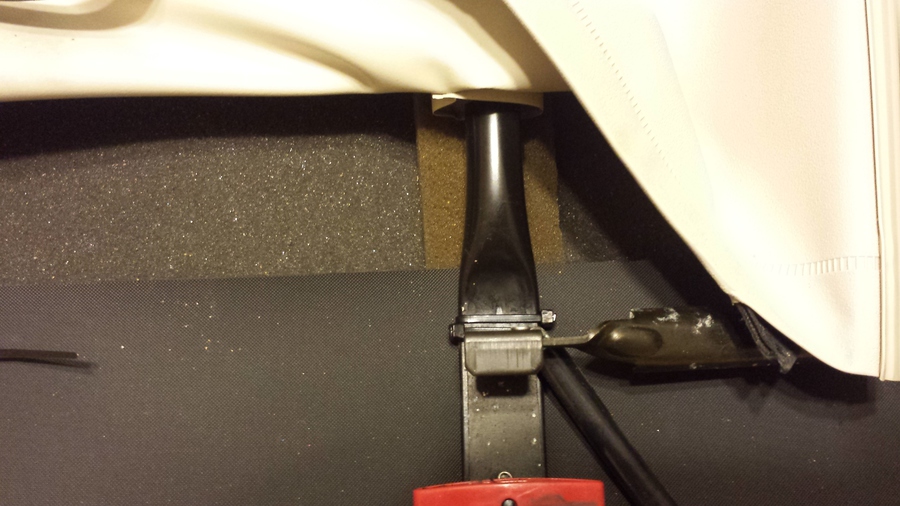
I then secure the headliner in place using the elastic tape that is fitted into the headliner, I also secure the rear section of the headliner to the frame, this just clips into the frame.
The front mounting brackets are held in place with a screw and two nuts, and then the front of the headliner is clipped into place. The sunroof is now ready to be installed back into Sasha, I just need to clean and lubricate the frame that is in the roof of Sasha and we will be ready to go.
Sunday, 7 February 2016
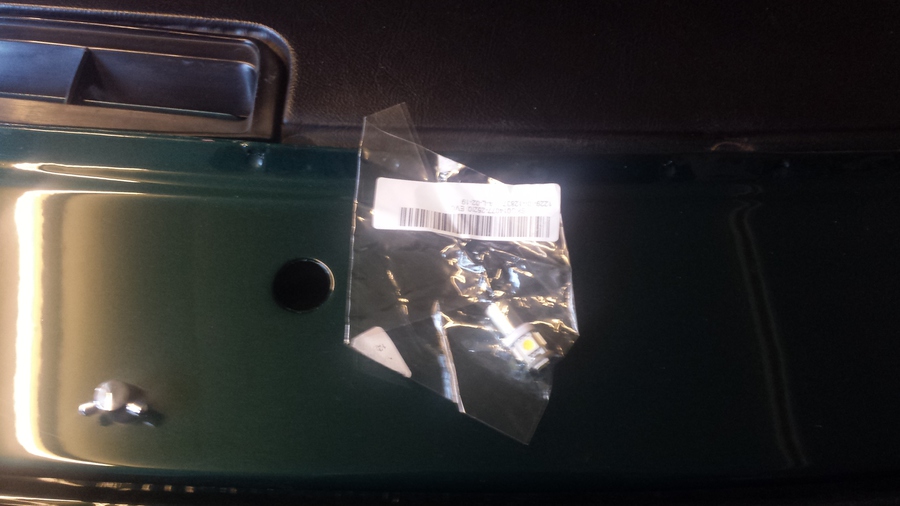
I got to th workshop this morning and there was a little present waiting for me on Sasha’s scuttle panel, Matthew has bought some LED bulbs for his Alfa Romeo and he feft a couple for Sasha’s sidelights.
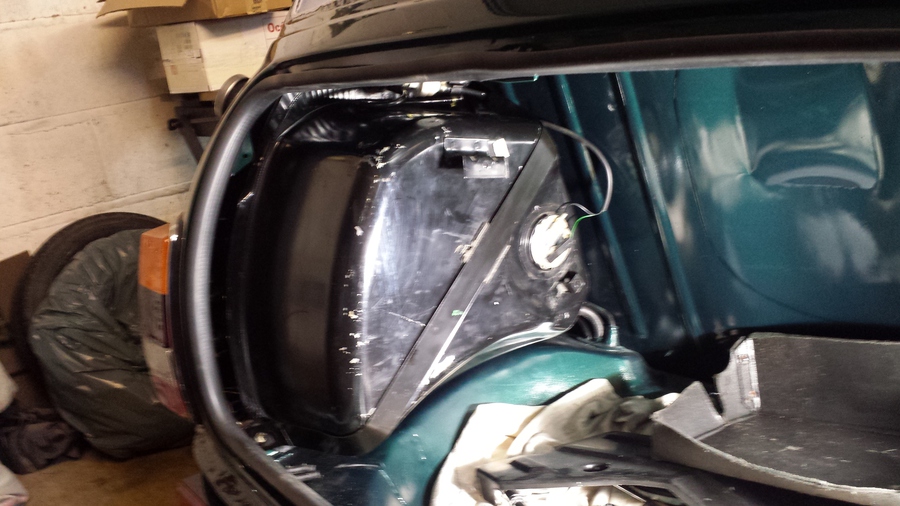
So first job today is to fit the LED sidelight bulbs, I remove the chrome ring and the light unit retaining ring, I pull out the headlight and remove the sidelight bulb holder, I swap the bulb the reinstall everything. I took a picture so you can see the difference between the LED bulb and a standard bulb. Then I follow the same process on the passenger side to install the new LED sidelight bulb.
I use my battery drill with the correct size alan key to operate the sunroof mechanism so I can try and clean out the old grease so that the sunroof will operate better. With as much of the old grease cleaned out as possible I operate the mechanism with the alan key in a small ratchet so I can re-grease the mechanism.
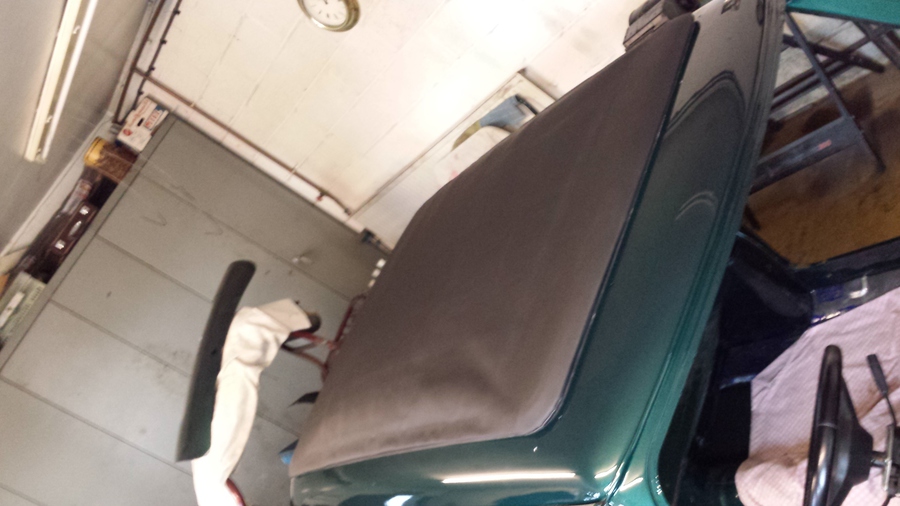
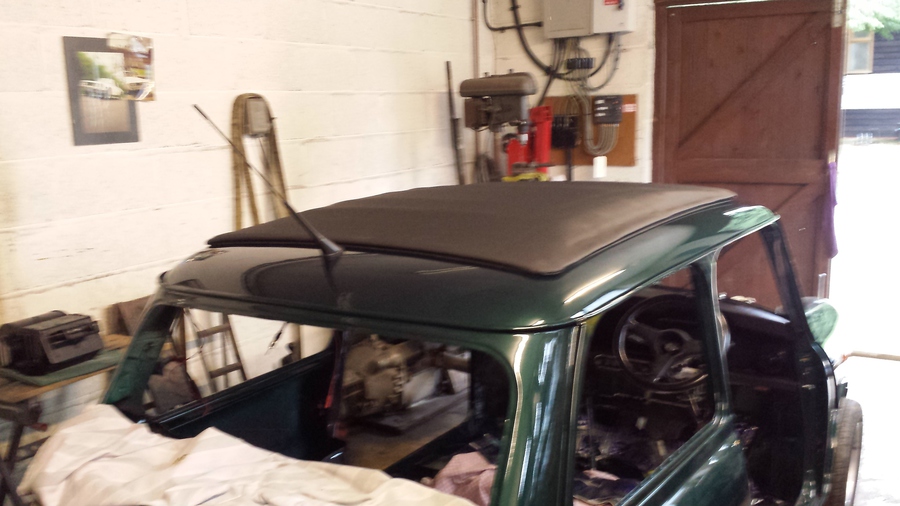
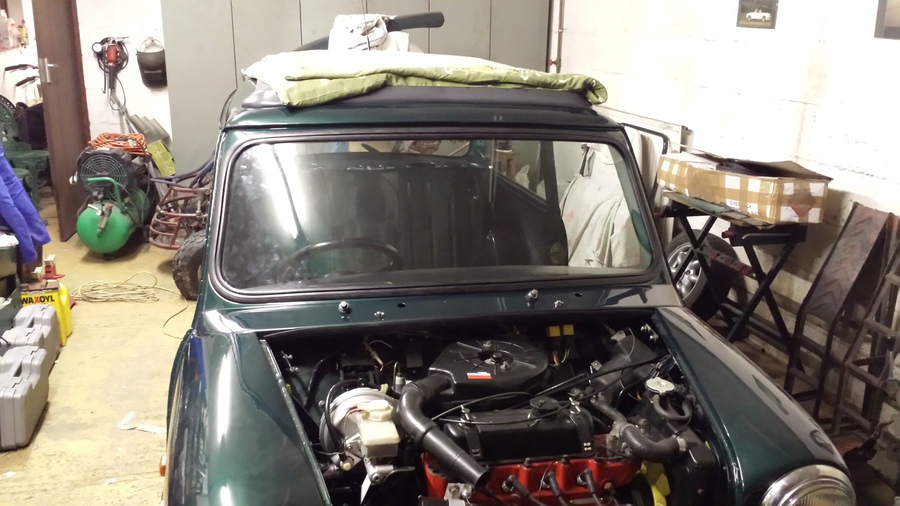
Next job is to re-install the vinyl top, I start this by putting a folded sheet over the back of the car to protect the paint then I lay the hood on the roof so I can connect the brackets on the hood to the mechanism, the two parts are held together with a circlip. I align the rollers at the front with the channel in the roof and then move the mechanism forward, it takes a little while to align the rollers. I operate the hood further so I can align the first set of sliders into the channel, I grease the sliders before slotting them into place and then move the hood further forward. I do the same thing to get the next set of sliders into the channel and move the hood further forward to align the rear of the hood so I can get the retaining screws in.
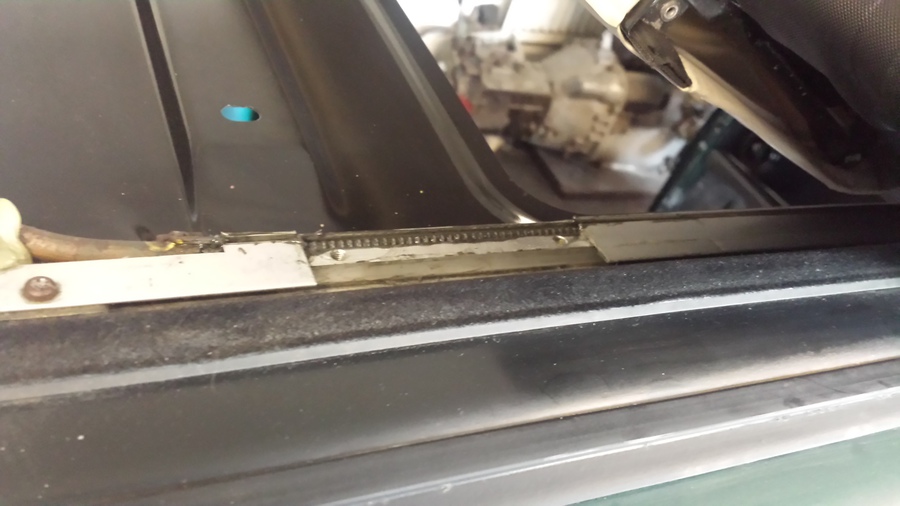
I refit the cover plate both sides of the frame, this stops the sliders coming back out and keeps the cable in place. To get the retaining screws in I have to remove the stiffening piece from the rear of the sunroof to get to the screws. I get the screws in but don’t tighten them all the way, I then shut the sunroof all the way, I have to help the roof mechanism as the new top is a little tight.
With the roof shut I tighten the screws and re-install the stiffening piece and tighten the retaing nuts.
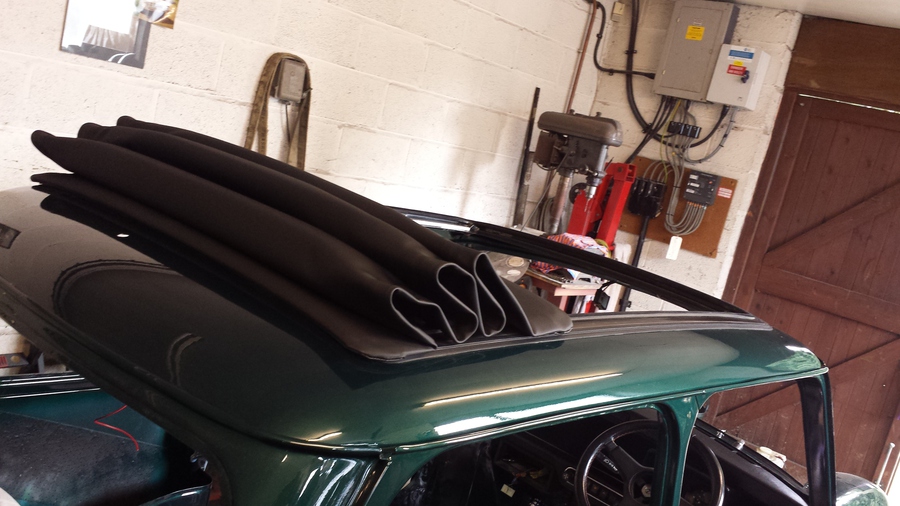
I operate the roof all the way back and all the way forward a few times to try and bed in the new top cover. I still have to help the mechanism to fully shut the roof, I leave the roof closed to hopefully allow it to stretch a little.
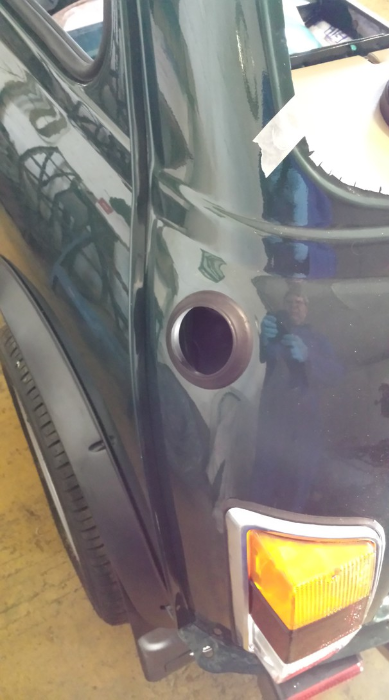
I remove the nut from the new roof aerial ready to install it, I put some black silicone sealer on the bottom of the aerial base, carefully thread the wires through the hole in the roof and through the nut, I screw the nut back on the base of the aerial, alight the aerial the tighten the nut to keep it in place.
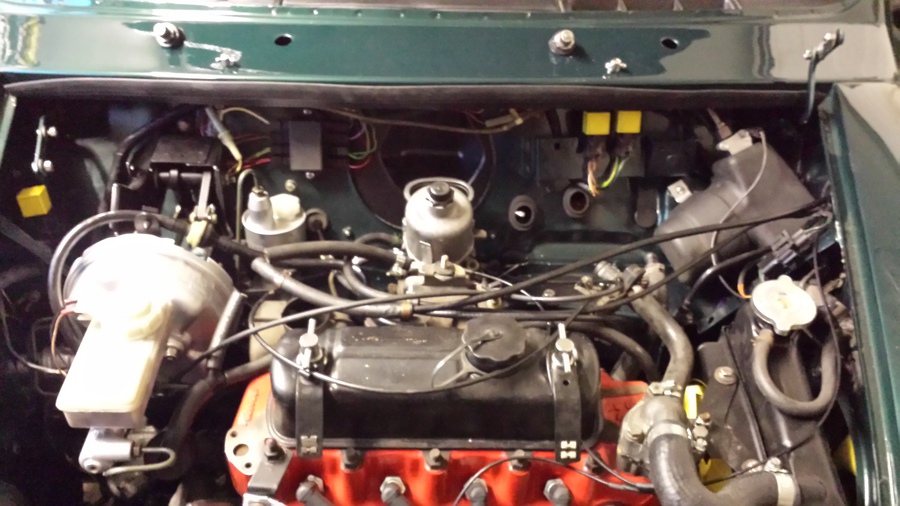
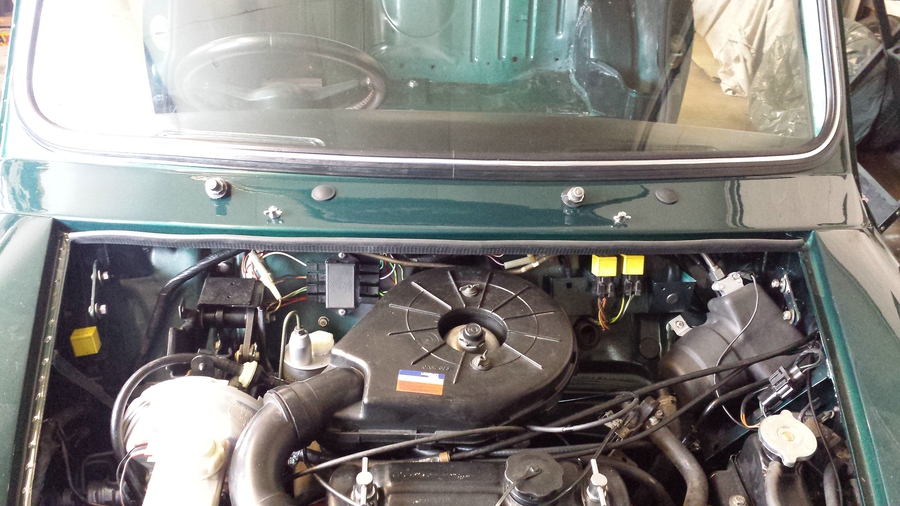
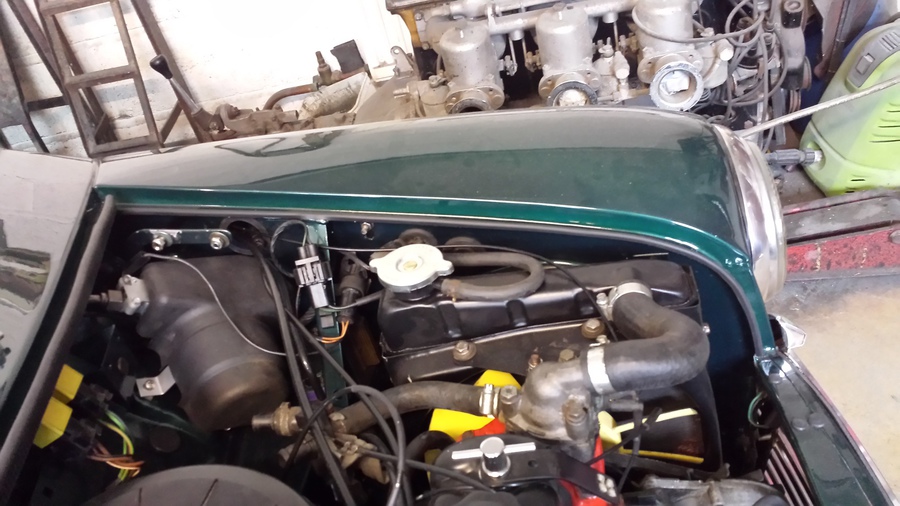
Next task is to re-fit the carburetor, I smear a little grease on the gasket and bolt it into place, I then reconnect the fuel line, throttle cable, choke cable, fuel overflow pipe and the pipe from the engine breathers. Unfortunately the pipe from the engine breather has a T-piece in it that I have managed to break so I will have to get a replacement.
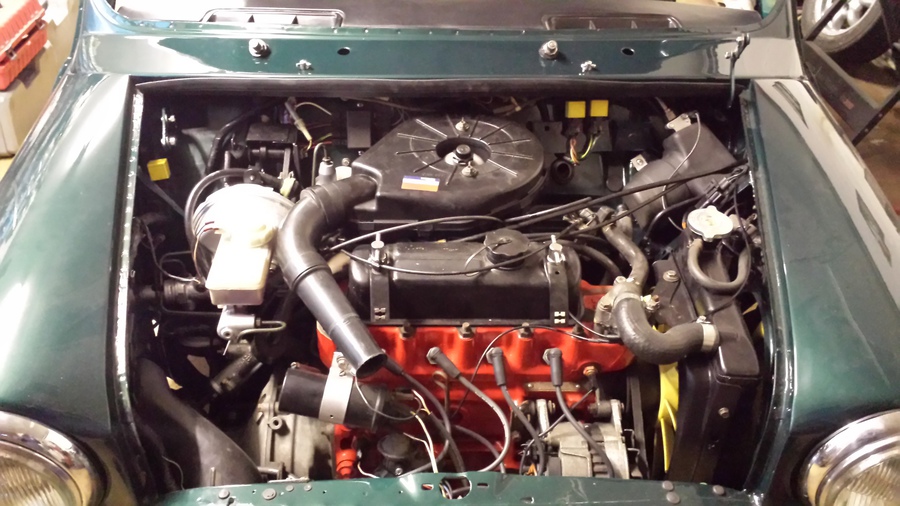
Last job today is to re-fit the air cleaner box, this just fits over the two bolts and is secured in place by the two long nuts, I will have to remove this again when I get a replacement T-piece for the crank case breather pipe.
Well that’s it for today, I clean up the workshop, put all the tools away and then make my way home.
Saturday, 13 February 2016
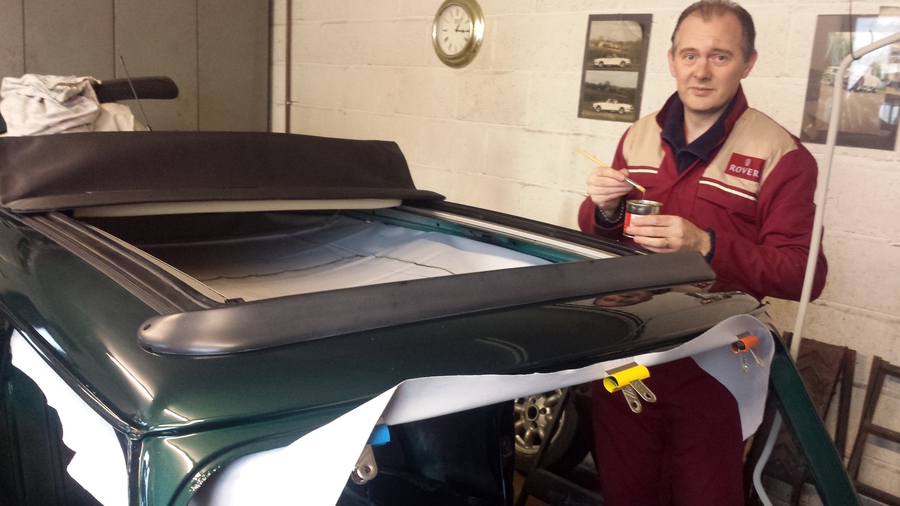
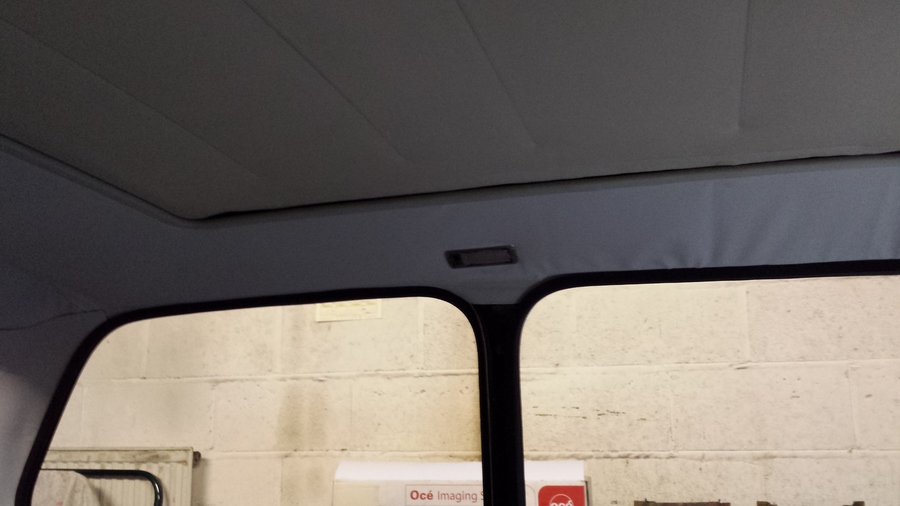
Darren has come to help me with the headliner today, firstly though we install the t-piece into the engine breather pipes. Before we can start to install the headliner we need to fit the wind deflector, after making sure it is clean and de-greased we put some black silicone sealer round the screw holes and across the back edge of the wind deflector. We put screws into the holes in the wind deflector this aids lining it up with the holes in the roof, with it in place we put the outer most two screws into the holes and secure it in place with nuts. With the wind deflector in place Darren glues the foam blocks to the roof round the wind deflector mounting nuts this is to protect the headliner from the protruding screws. Now it’s time to start on the headliner, I put the headliner support rail into the new headliner and put it in place in the roof of Sasha. Darren and I then use bulldog clips to hold the headliner in the correct position around the front and rear windows, door frames and side windows, we the adjust the tension to allow us to mark the headliner where the sunroof sits, Darren uses the mark on the headliner to apply impact adhesive to the headliner we also apply the adhesive to the underside edge of the sunroof. Once the adhesive has gone touch dry we push up the headliner on the the edge of the frame to bond the two parts together, when it is bonded all the way round Darren trims the headliner round the sunroof with a craft knife. We then apply more adhesive to the small lip of headliner left and the outer edge of the sunroof frame, when this is touch dry it is folded over the frame and the trim is re-installed around the edge of the frame.
Starting at the front drivers’ side we use the impact adhesive to secure the headliner around the front window then working back to the rear of Sasha. We try very hard to get the creases out of the headliner as we go, this proves very difficult and very time consuming. As we get to the rear section of the headliner where the loop is in the headliner for the support bar it becomes evident that the headliner has been made wrong, the stitching that forms the loop should be shaped like the curve of the roof but this one has been stitched straight so it will never be quite right, Darren and I do the best we can and complete installing the headliner.
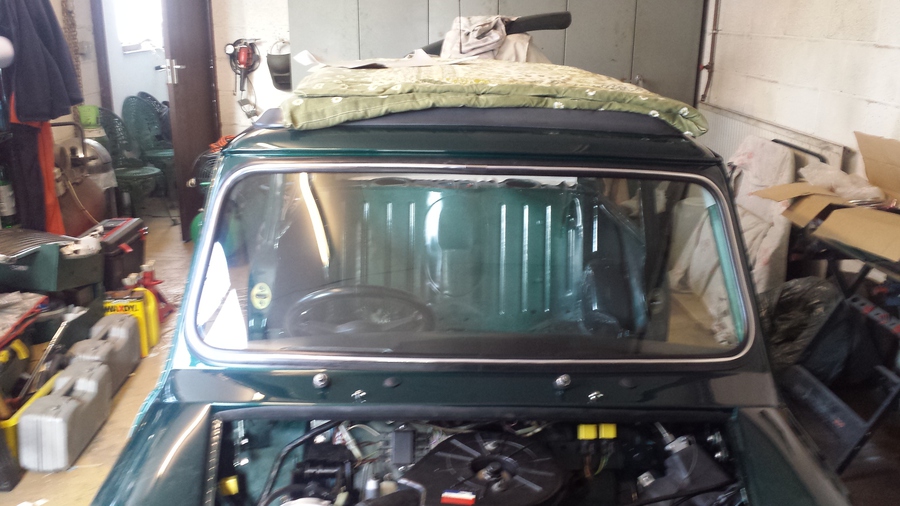
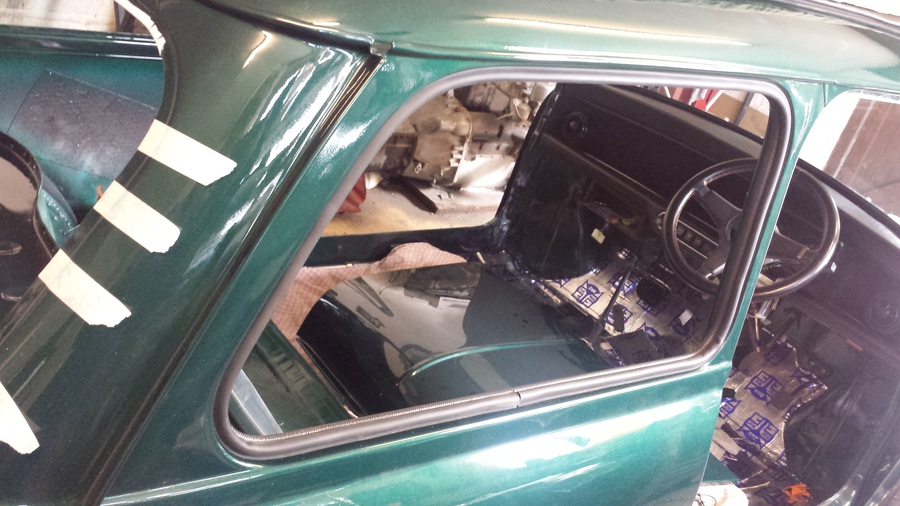
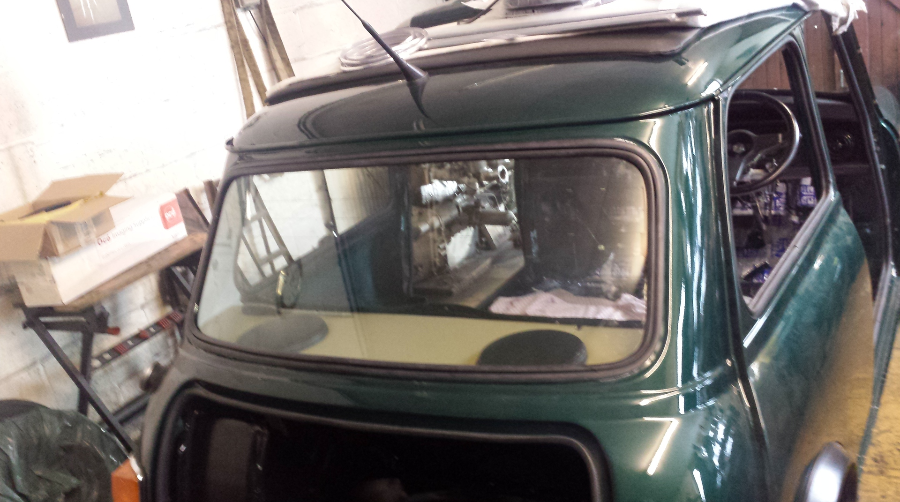
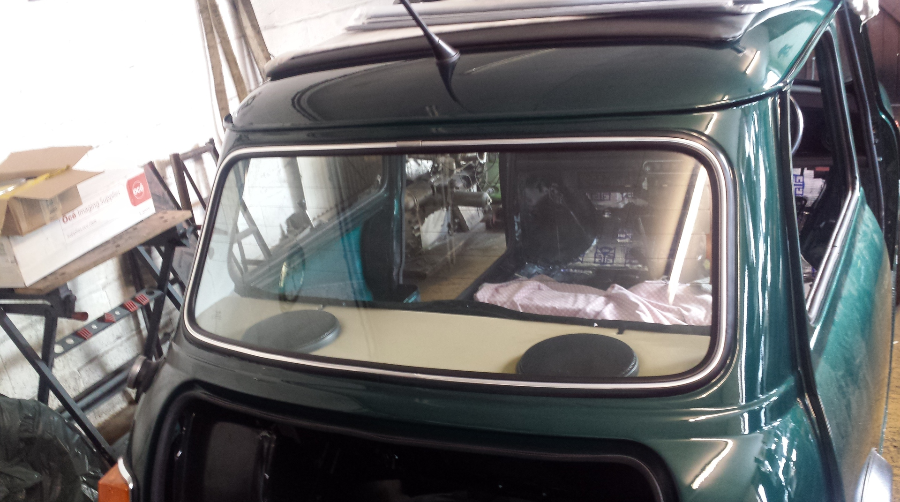
Whilst Darren is here to give me a hand we get the front windscreen in, after a big setback that I won’t go in to we eventually get the rubber and the screen in. It’s now quite late so we don’t put the filler strip in, I’ll do that tomorrow.
We don’t bother cleaning up as I will be back tomorrow, so it’s off home and something to eat.
Sunday, 14 February 2016
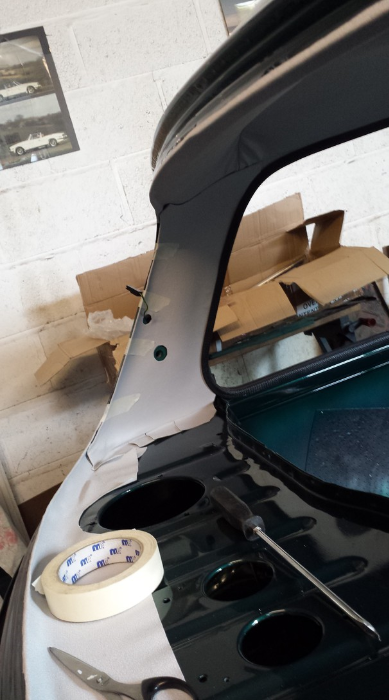
I start today by doing a little tree surgery before starting work on Sasha, first job is to install the trim piece that goes between the rear window and the parcel shelf. I test fit it fist and hold it in place with bulldog clips, I put a crease in the trim to guide where I can then apply the impact adhesive. I also apply impact adhesive to the body, wait for it to be touch dry then fit it in place. I trim off the excess leaving 6 or 7 mm to wrap over, then apply adhesive to the little flap of material and the rear panel, when it’s touch dry I fold it over into place. Lastly I trim the material round the speaker holes ready to re-install the speakers at a late time.
Using a special tool I bought some time ago I insert the filler strip into the front windscreen rubber, I make it a little easier by lubricating it with a little washing up liquid. After cleaning up all the excess washing up liquid I install the finishing strip into the rubber to cover the joint in the filler strip. I also re-install the two grommets into the scuttle panel in the empty wiper arm holes.
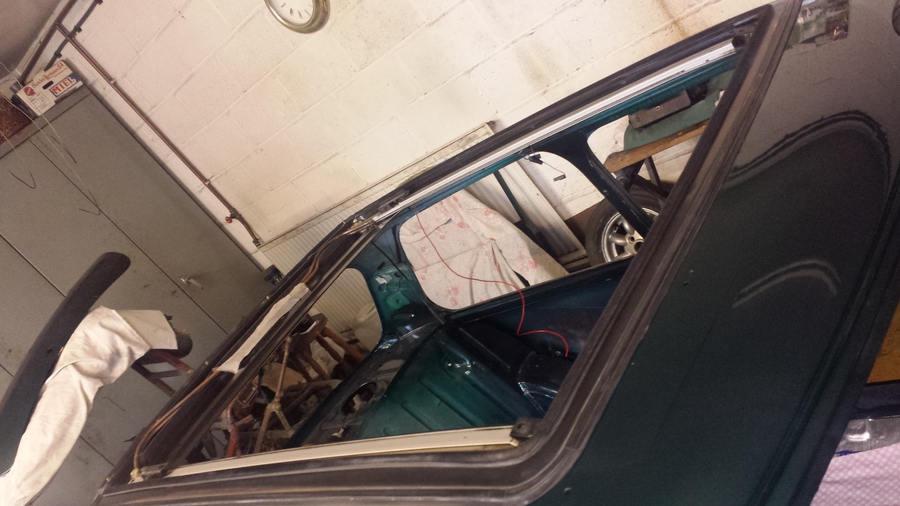
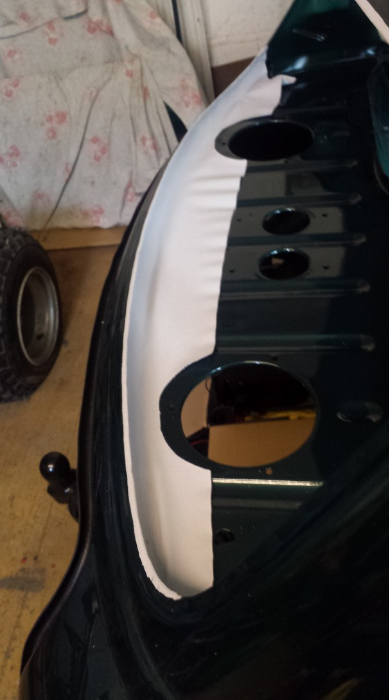
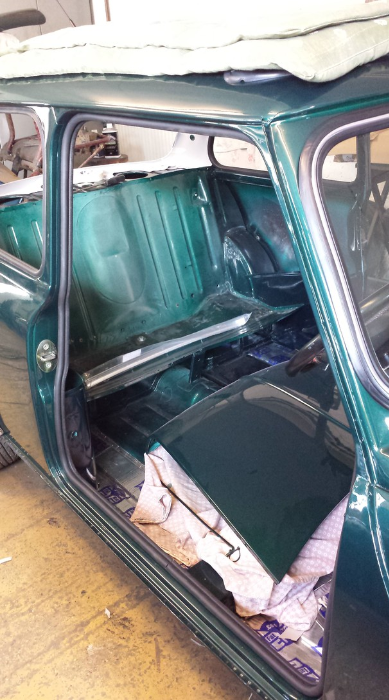
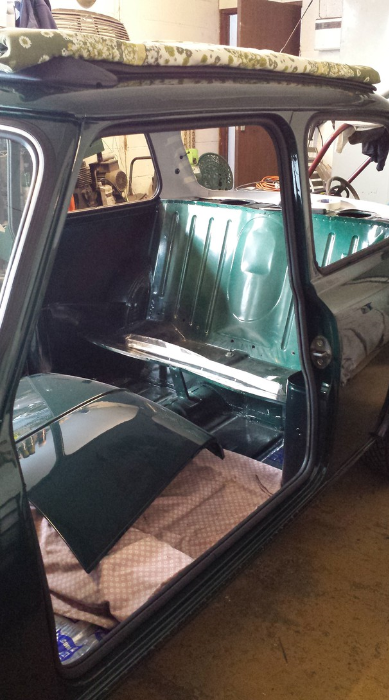
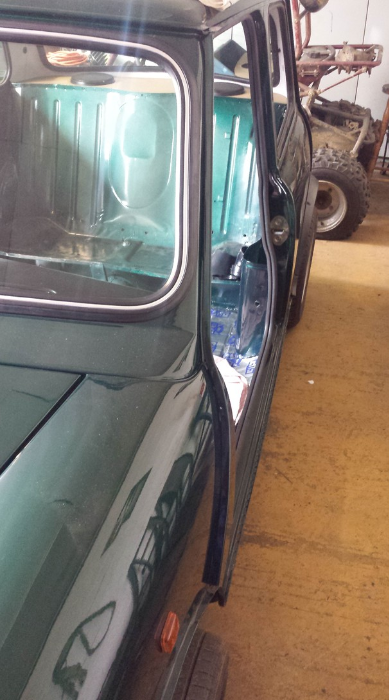
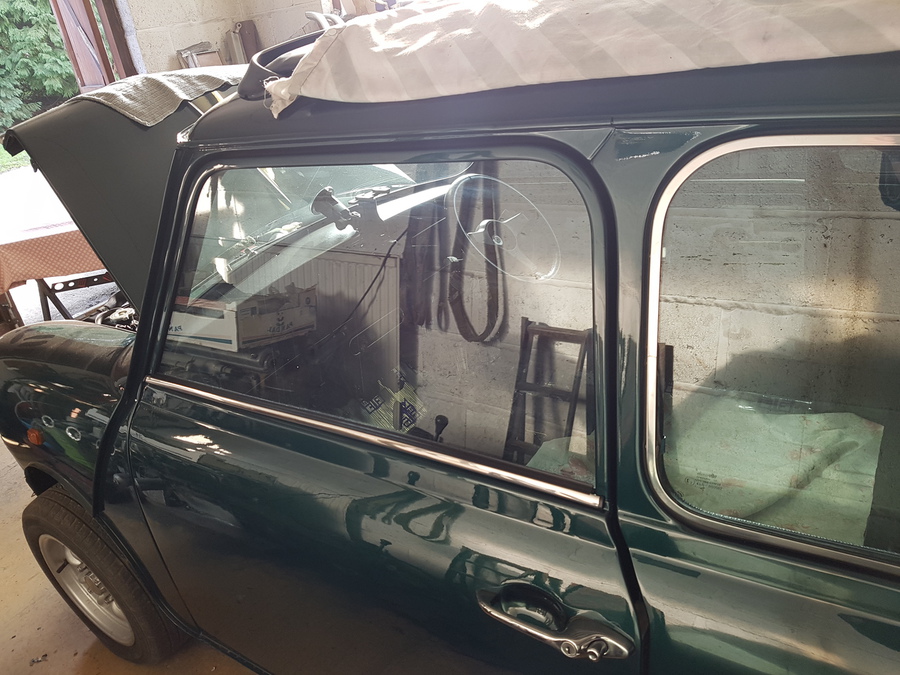
I install the drivers’ side rear side window rubber, I start in the middle at the bottom and work my way round until I get to the back, I have installed the trim piece that goes between the side window and the rear windscreen the rubbers hold this in place so I have to make sure the side windows rubber goes over it whilst keeping it in the right place.
I do the same thing on the passenger side, in this picture you can see the trim piece.
Then I install the door seal on the drivers side.
Next I install the passenger side door seal.
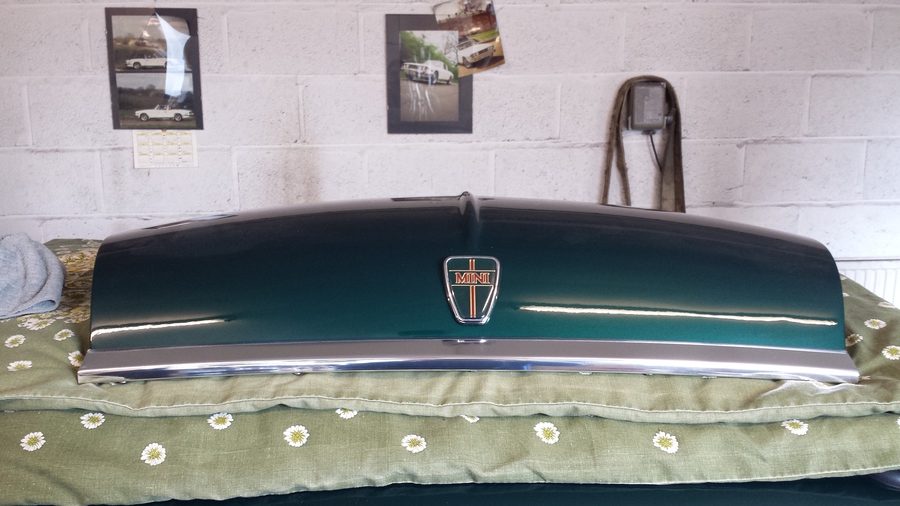
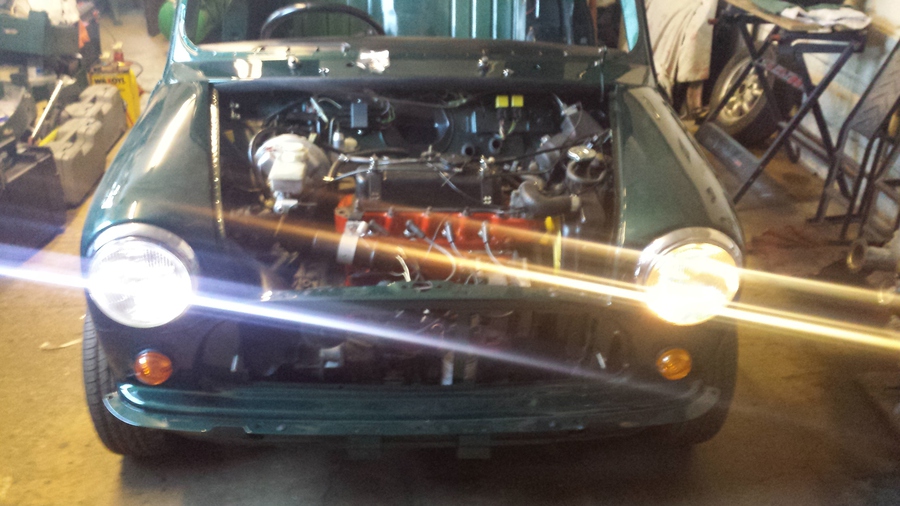
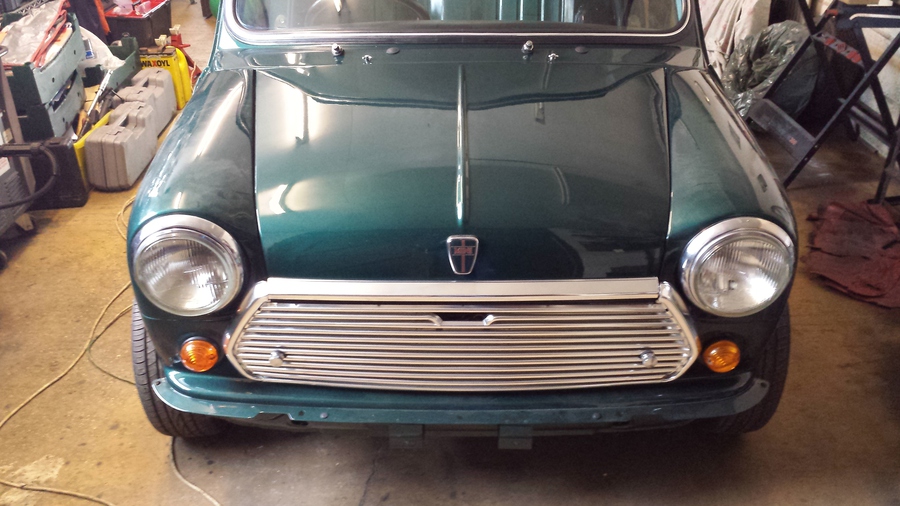
I fetched the bonnet and some of the other parts that were still at Paul’s yesterday so next I re-fitted the bonnet badge and the bonnet trim.
I have temporarily re-installed the grille to keep it safe, I still need to install the bonnet catch and weather shield.
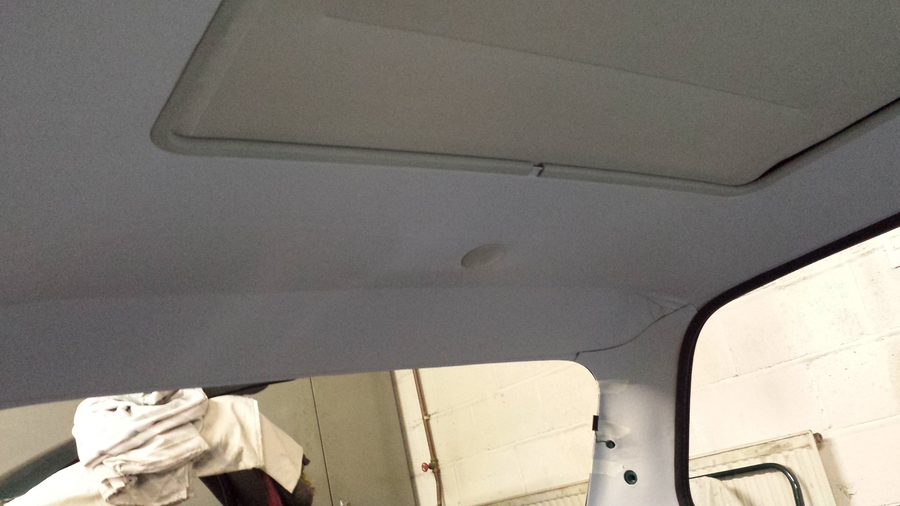
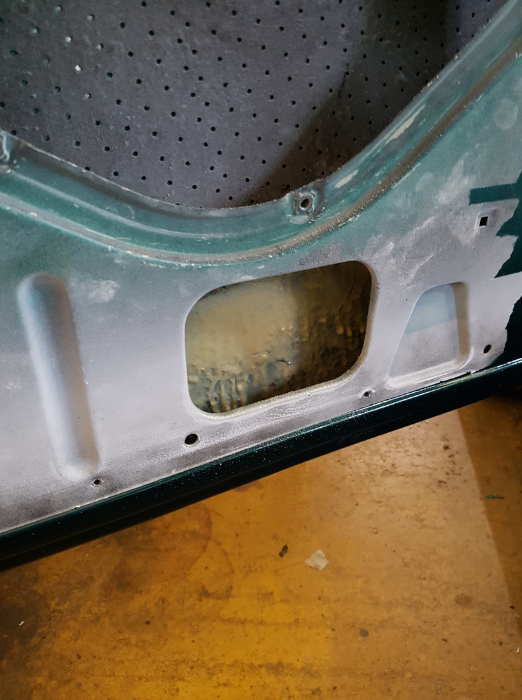
I cut the headliner to re-fit the blanking piece that covers the hole in the motor case so you can manually operate the sunroof.
I have to cut into the headliner above the passenger side B post the install the interior light, after fitting it back in I test it but it doesn’t work, I pull it back out and test the LED bulb and everything seems ok. It then comes to me that the LED bulb will only work one way round but the interior light is wired the other way round. So after I put an ordinary bulb back in, it works just fine.
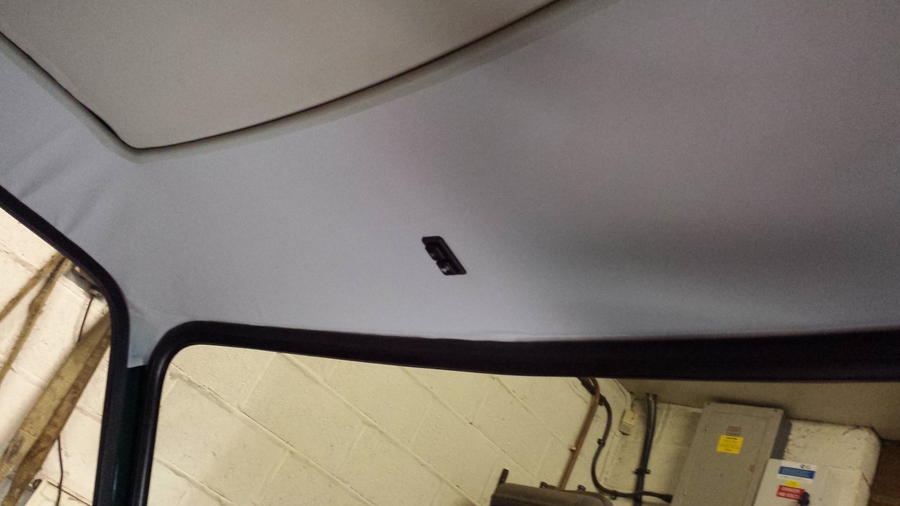
One last cut into the headliner to re-install the switch for the sunroof.
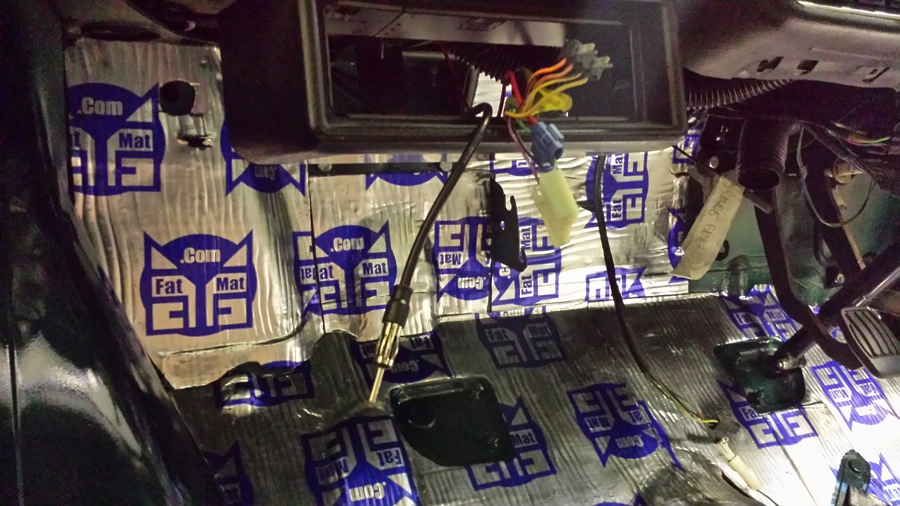
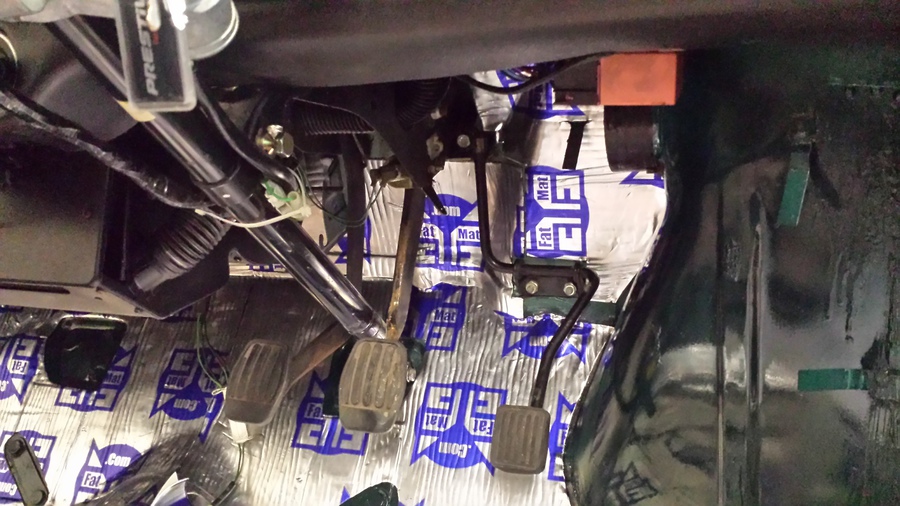
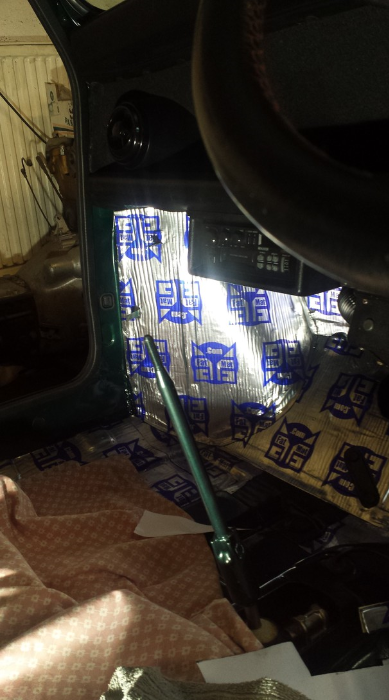
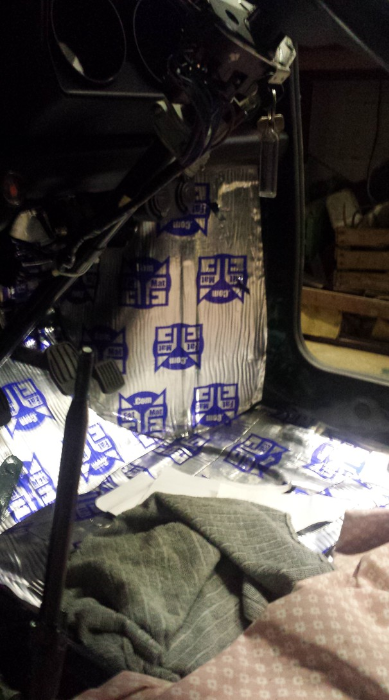
Last job today is to install some more sound deadening material on the front bulkhead, as before I make a paper template, then cut it out of the sound deadening material, then install it. I roller it into place then heat it up with the heat gun and roller it some more, the heat activates the glue making it stick into place. I do three smallish pieces because of the location and to make it easier for me to install.
That’s all I have time for today, I clean up the workshop which takes me longer than usual as there is two days worth of mess, then make my way home.
Sunday, 21 February 2016
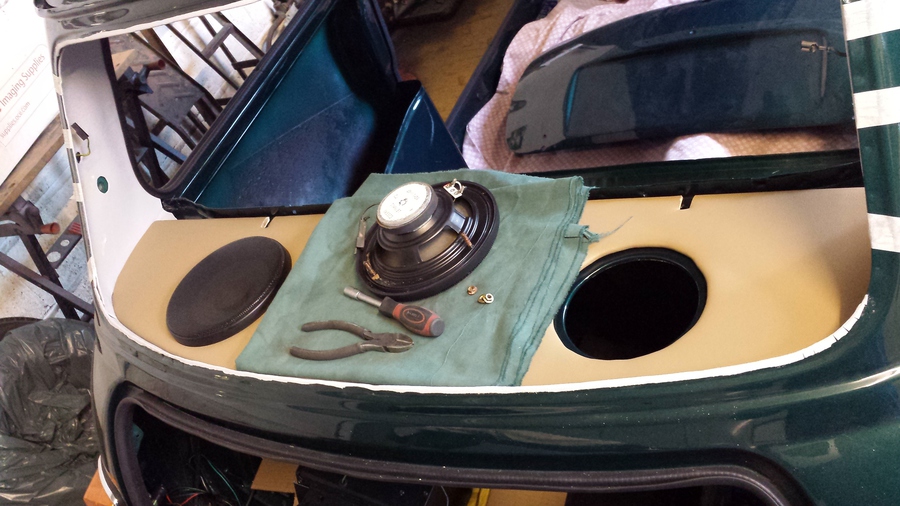
On Friday I called in to Mini Trimmings in Stoke-on-Trent to pick up Sasha’s new parcel shelf now that we have managed to match the colour of Sasha’s interior. I put the new parcel in place and line up the hole in the parcel shelf with the holes for the speakers. The passenger side one lines up ok and I get the speaker in place and put the retaining nuts on the back, on the drivers’ side speaker I have to clip a little bit out of the parcel shelf to allow the retaining bolt to go through. With that done I tighten up all the retaining nuts.
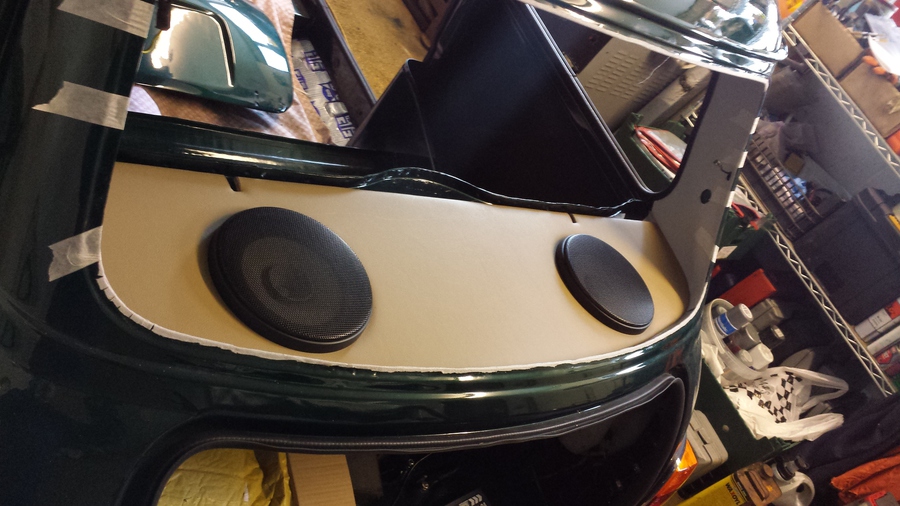
This is what the parcel shelf looks like now with the speakers in.
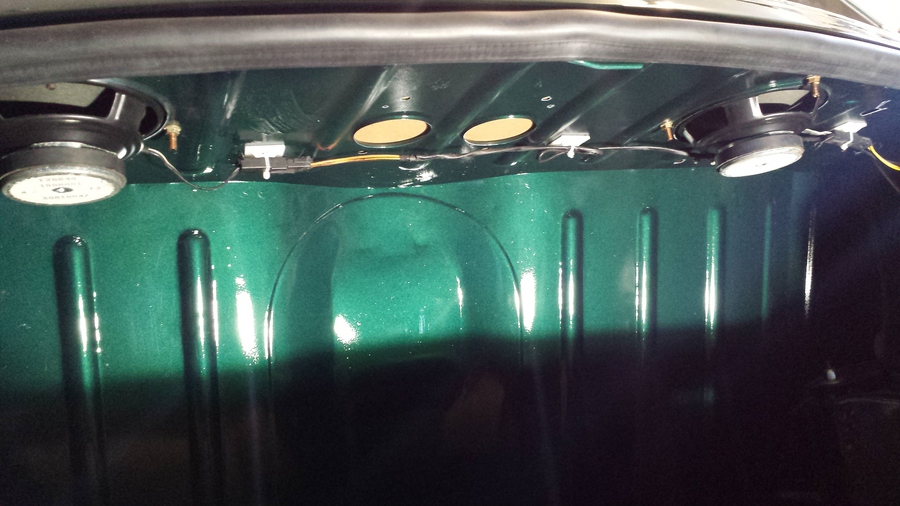
I use some wiring sticky pads to hold up the speaker wiring now it is all connected up.
I ordered a replacement seal to go on the scuttle panel, with that fitted I can move on to installing the bonnet.
While ordering seals I also ordered some edge strip to go on the inner wing drip rail and on the edge of the bonnet this should stop the paint being rubbed of the two surfaces.
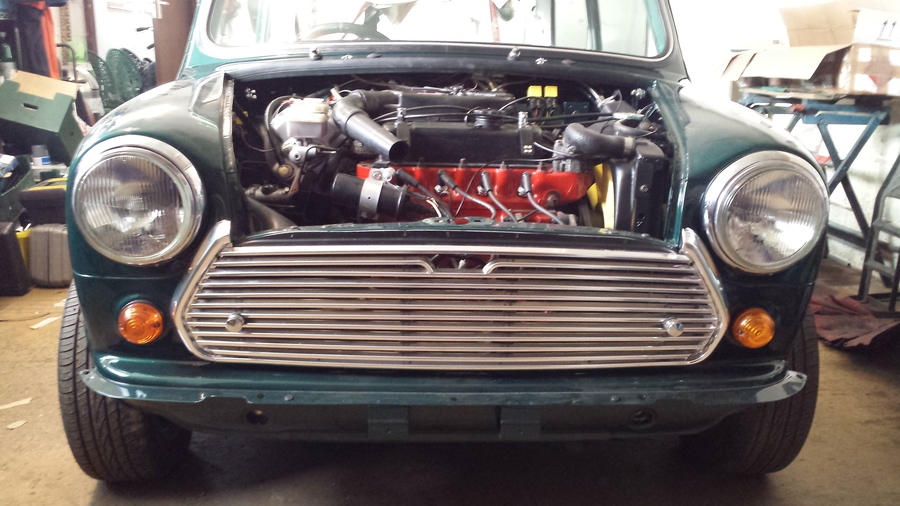
After some messing about with the hinges I get the bonnet lined up about right, then I am able to tighten the nuts up.
I use some panel wipe to clean the fuel filler neck seal then install it, ready to start to fit the fuel tank.
I re-install the fuel tank retaining strap, then get the tank ready to install. I put a cloth in the spare wheel well to protect the boot floor, I get the tank into the boot then maneuver it into the right location, before bolting the strap in I locate the breather pipe and the wiring for the sender unit. I then tighten up the strap securing the tank into place, and then connect the wiring for the sender unit. Using my big snips I shorten the fuel line to the correct length and secure it to the outlet on the tank and tighten the hose clip. At this point I can’t find any more hose clips for the piece of fuel line for the breather pipe, so I have to get Frances to pick some up for me from Halfords. Frances runs them over to the workshop for me so I can finish off the fuel tank and put a couple of gallons of fuel in Sasha.
With some fuel in Sasha I do actually manage to get her started after flattening the battery and having to poor some fuel straight into the carburetor. I don’t run her for very long as there is now water in her yet. I can’t put any water in until the heater is in and connected. Before I can do that I need to finish the sound deadening in the bulkhead, I finish the last two pieces on the bulkhead.
I install the two pipes into the heater and tighten the hose clips up, I get the back of the heater onto the brackets on the bulkhead, and feed the pipes through the bulkhead into the engine bay. Next I connect the wiring for the heater fan and then put in the two retaining screws into the front of the heater. I then connect the two pipes under the bonnet with hose clips, I mix the antifreeze in an old antifreeze container 50/50 as recommended on the container and fill the radiator. I start Sasha again and let her warm up a bit and allow the water to circulate, the water level quickly goes down and I top it up to the correct level. I let her run for a bit longer then turn her off and let the water settle, I top it up again and then re-fit the radiator cap. I then re-start her and let her finish warming up, while Sasha gets up the normal temperature I re-install the radio and test it and the speaker I re-fitted earlier today. After leaving her running for about 20 minutes I turn her off, everything looks ok.
It’s now getting late so I have a quick clean up and put all the tools away then make my way home.
Sunday, 28 February 2016
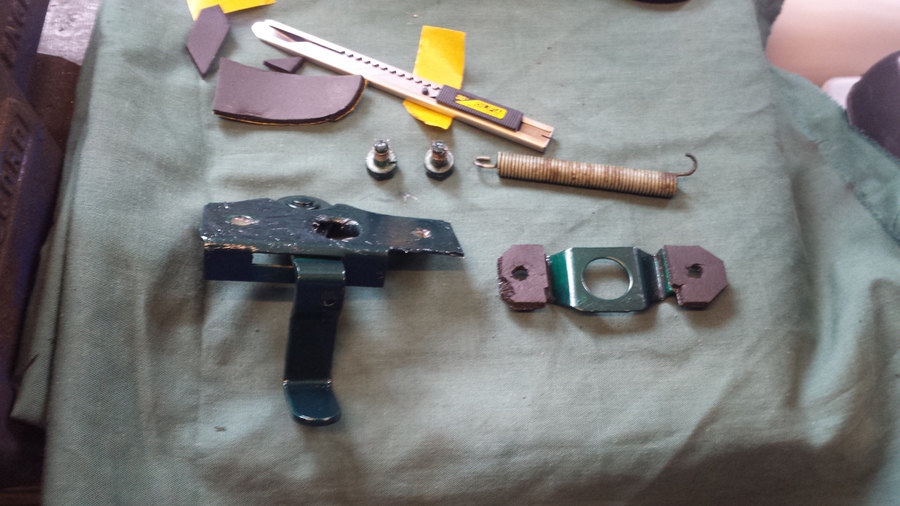
I start off today by getting the bonnet catch ready to install, the top part of the catch I stick on some small pieces of draft excluder to protect the painted surfaces.
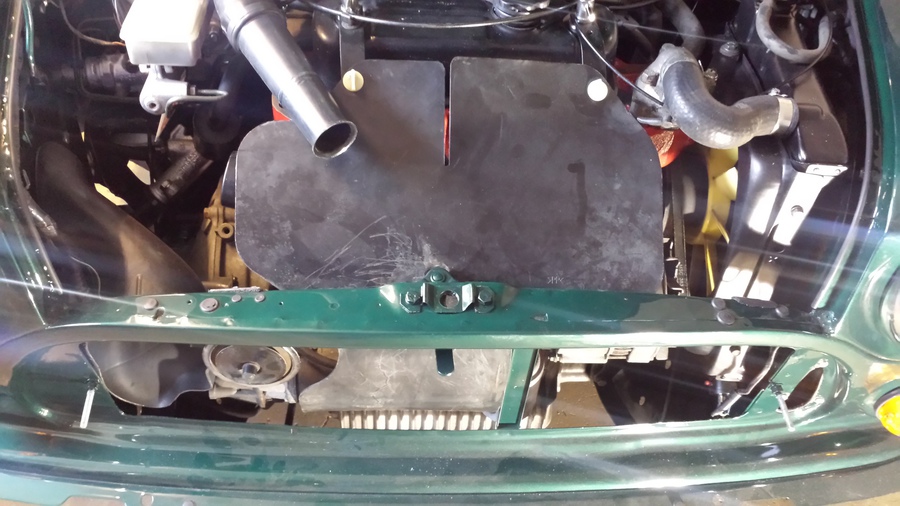
I re-fit the spring for the bonnet catch and place the bottom half of the catch in the correct position, then I put the top piece in place and secure the two parts together with two bolts, these two bolts have also been painted body colour. Next I reinstall the bonnet catch pin, it needs adjusting so I shut the bonnet to see how close it is, I then adjust the pin so that the bonnet latches without rattling on the front panel. Now that is done I lock it in place with the lock nut. Now the bonnet catch is done I re-install the weather shield, this just pushes down between the engine and front panel then secures in place with a quarter turn of the three securing catches two at the top and one at the bottom.
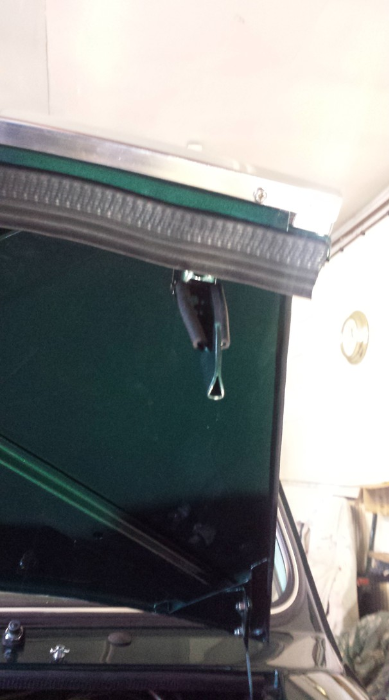
Last job on the bonnet is to re-fit the safety catch, this was easier said than done, it took me quite some time to get the pin back through. I ended up levering the sleeve that goes inside the spring with a small screwdriver before I could get the pin all the way through. Once through I install a new split pin to hold it in place.

Now I have the seam covers back from Paul I can start to install them, they are held on with five clips. I push the clips on to the body, as the clips have barbs they cut into the paint so to try and keep rust at bay I put some grease over them.
I start to install the rear windscreen, I have bought a new rubber for it so I start off by wiping it over with soapy water. I install the rubber seal onto the body then slide the bottom edge of the glass into the seal, then work round the glass to get it into the rubber seal. Once it is in I adjust it to try and get the glass seated in the seal.
While the rear windscreen glass settles for a while I install the seam covers, these just push on over the clips I previously installed.
I install the fillet strip into the rear window rubber seal, I spray soapy water into the rubber seal so that the fillet insertion will slide round easier and the fillet strip will slide in easier. I start at the top in the centre and work my way round, the fillet insertion tool comes out a few times but eventually get the fillet strip in all the way round and trim off the excess. Last job on the back window is to fit the finishing piece to cover the small gap in the fillet strip, this takes me longer than expected, I end up working it in using a small screwdriver.
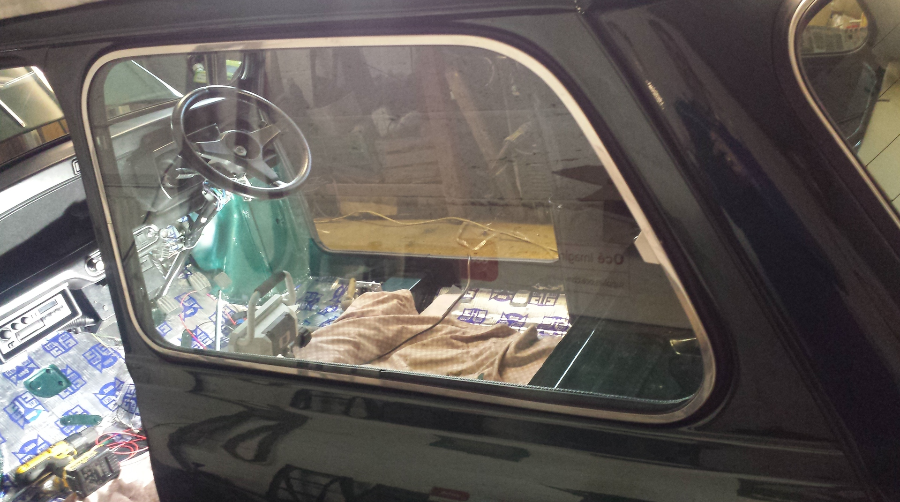
While Matthew is available to give me a hand we get the rear side windows in, these just secure with four screws, two at the front in the hinges and two at the back through the catches.
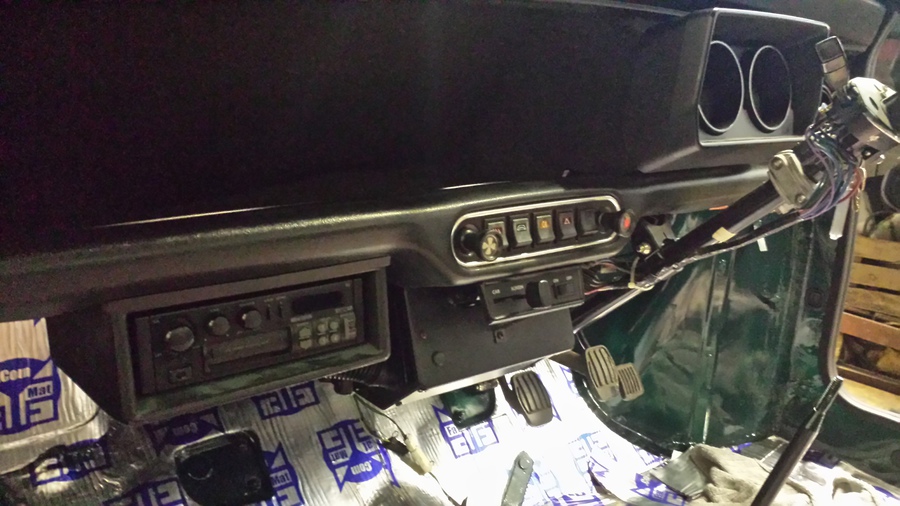
We have always intended to leave the factory fitted stereo in Sasha so that means no USB and no hands free as part of the stereo, to make up for this I decided to install a USB charging socket and 12 volt power socket. I bought a box that contains two USB sockets and a 12 volt power socket from eBay a few weeks ago. I wire up the two sockets and install the box under the dash on the drivers’ side of Sasha, I connect the negative to a bolt under the bonnet and connect the positive to the fuse box.
I make up a paper template for the passenger side inner wheel arch, when I am happy with it I transfer the template to the Fat-Mat then cut it out. I then install the piece of Fat-Mat onto the passenger side inner wheel arch using the roller and heat gun to activate the adhesive.
Using the template I just made for the passenger side I flip it over and modify it for use on the drivers’ side. I then transfer that to the Fat-Mat then cut it out and install the same as the passenger side.
That’s all I have time for today, after cleaning up the workshop I make my way home.
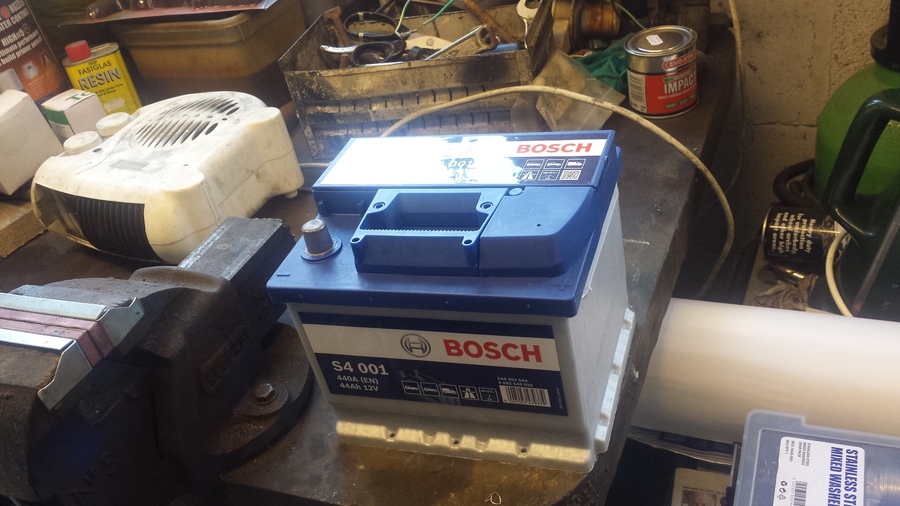
Last week Sasha turned over very slowly make her difficult to start, so during the week I purchased a new Bosch battery. First job today is to install the new battery, I undo the nut closest from the battery retaining bracket, and then I undo the negative terminal followed by the positive. I left the old battery out and replace it with the new one. Refitting is the opposite of the removal.
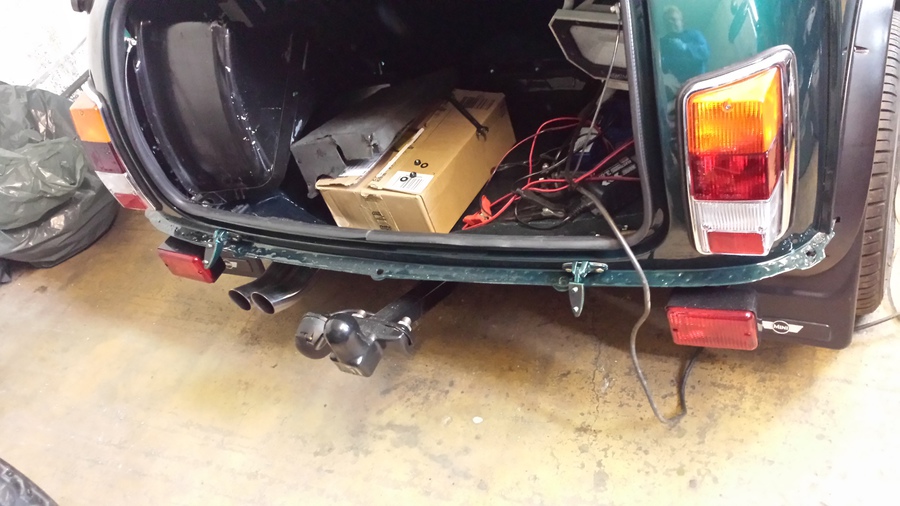
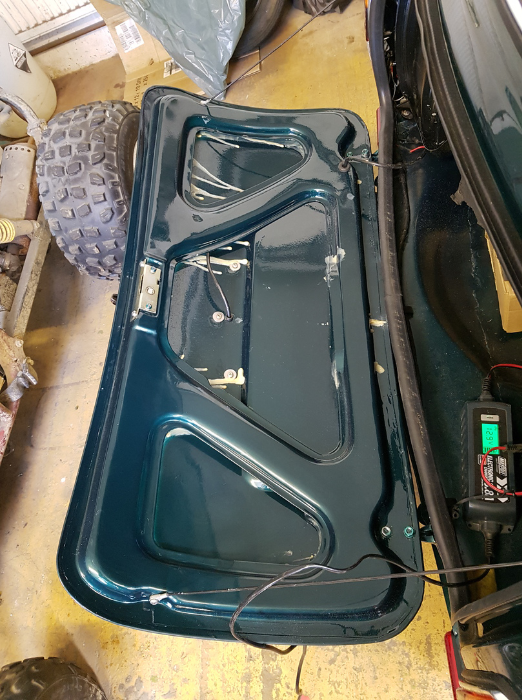
Next I start to install the boot lid, firstly I install the hinges I use new gaskets, screws, washers and nuts. I leave the nuts slightly loose so that I can adjust the fit of the boot lid later. Then I reinstall the two wires that prevent the boot lid from opening too far, these just bolt into the brackets at the side of the opening. One of the original plastic spacers was missing when I bought Sasha and I haven’t found a replacement so I use four nuts instead.
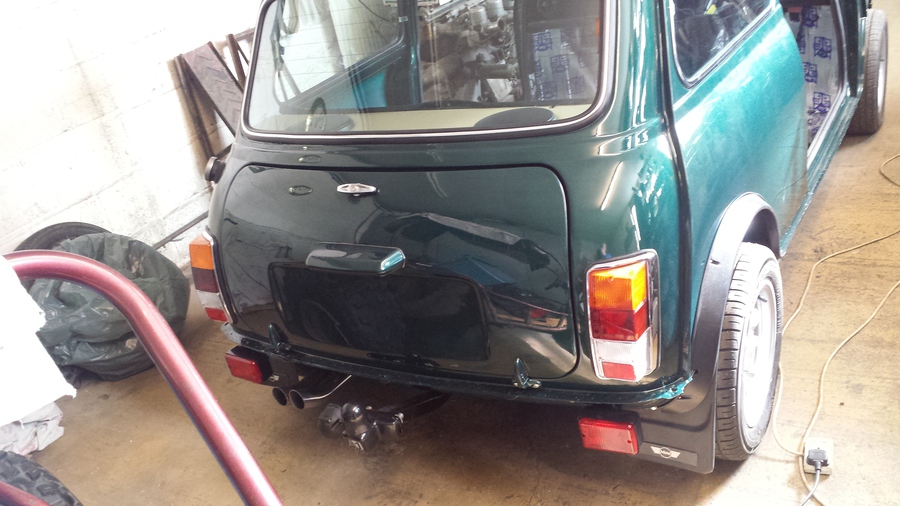
I can then fit the boot lid, I put the holes in the boot lid over the studs in the hinges then support the boot lid until I can get the washers and nuts to hold the boot lid in place. I support the boot lid to stop it resting on the tow bar and damaging it, I then use screws to attach the wires to the boot lid. I had previously installed the new handle and latch mechanism. I shut the boot lid and then adjust it before tightening up all the nuts. I then re-fit the number plate light, this should be easy but it ended up take lots of time as the seal that goes behind it has shrunk a bit an kept slipping behind the number plate light. Once installed I test the number plate light, one of the light is not working so I have to take it off again to repair the LED bulb, then put it all back together again and re-install the number late light again.
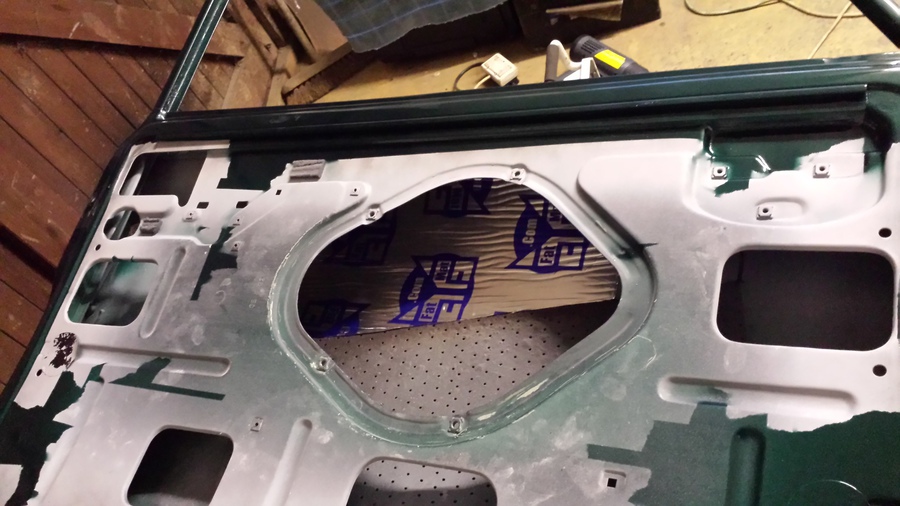
Next job is to get the drivers’ door ready to re-install, firstly I install some Fat Mat onto the inside of the door skin to stop it drumming quite so badly. Then I install the new door handle and re-install the lock and opening mechanism.
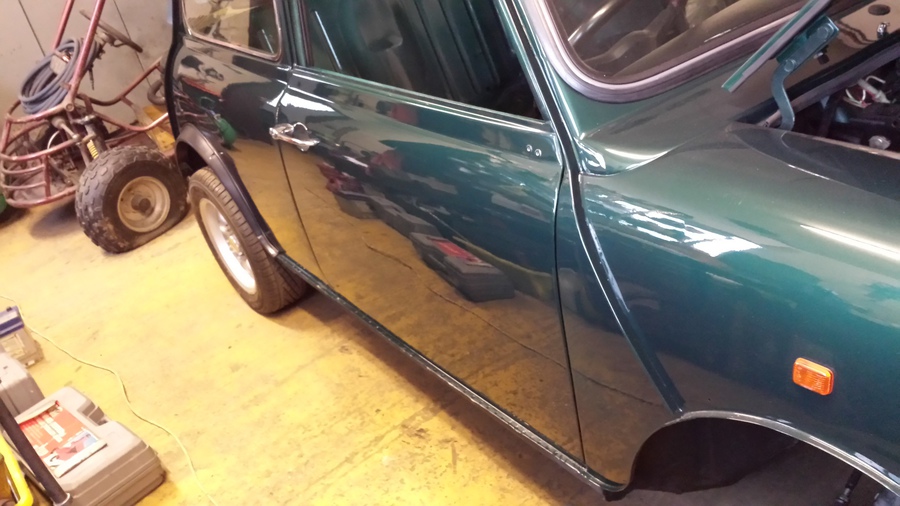
I then re-install the door, this is just four bolts to hold the hinges in place, I don’t tighten them up all the way so I can adjust the door. When I am happy with the alignment I tighten all the nuts up and tighten up the striker plate after adjusting it to suit the door.
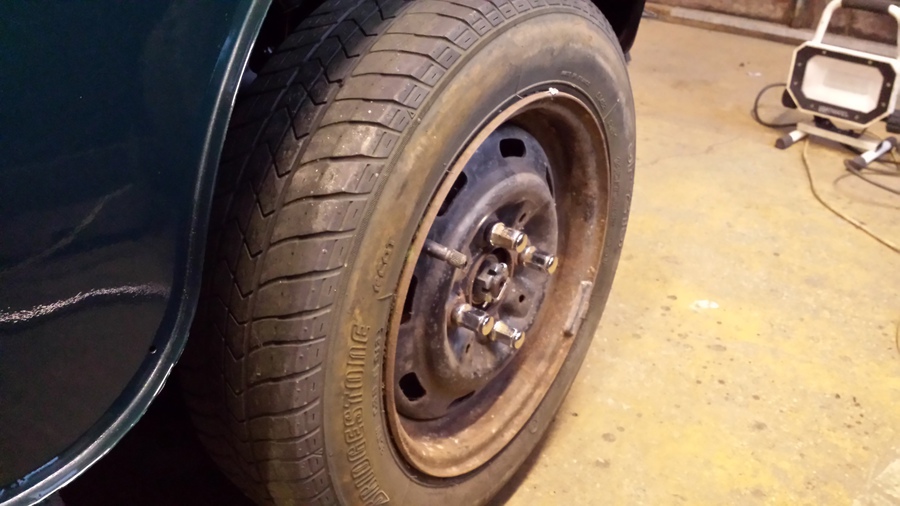
While I have the wheel off to install the door, I tighten up the drivers’ side wheel bearing, I put on a steel wheel that I have borrowed from Darren, this make it easier to get the split pin in which you can’t do with an alloy wheel. I torque it up to the right setting when for Sasha is 100Lbs per sqft, then tighten it up some more until I can get the spit pin through, I then bend it over and trim off the excess. I then put the alloy wheel back on.
Then it is on with the passenger door, there is already the original sound dampening material in the door so I only need to add a little more. I fit the new door handle and everything else the same as the drivers’ door.
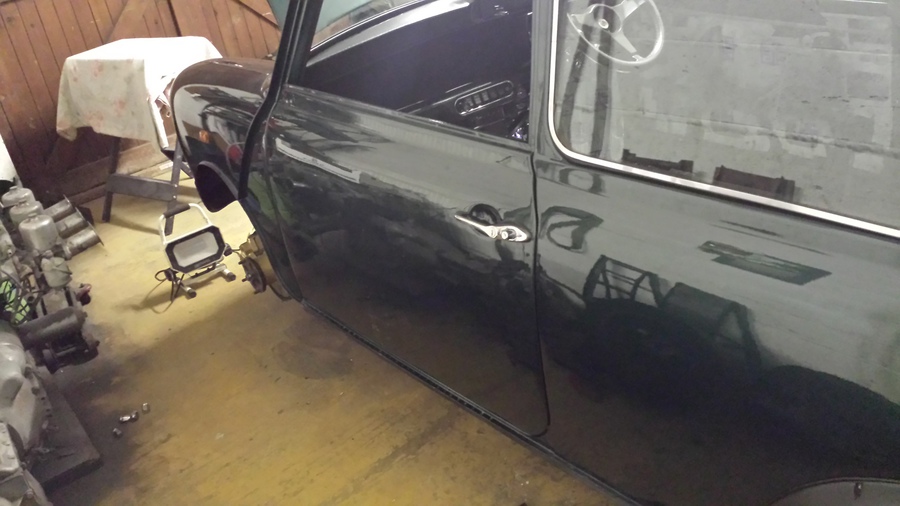
Next I re-install the passenger door using the same method as the drivers’ side.
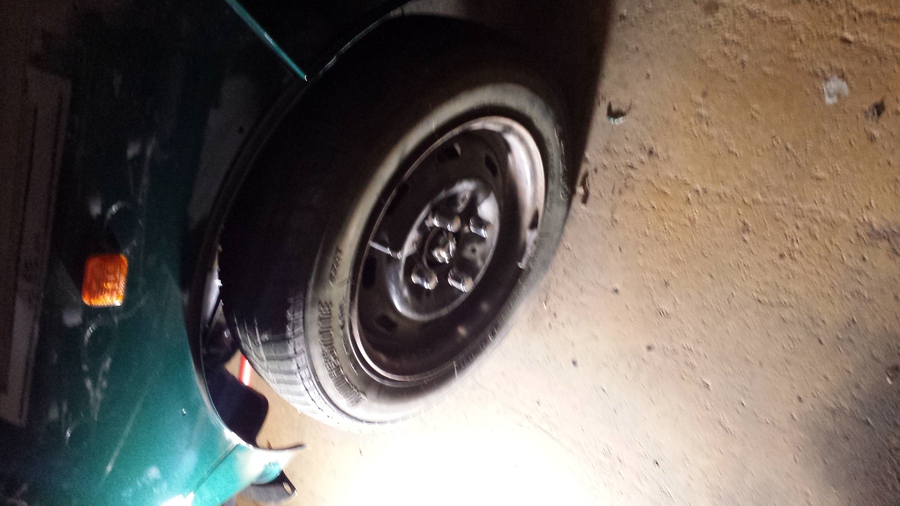
I tighten the passenger side wheel bearing using the same method as the drivers’ side.
It’s now getting quite late so I put everything away, have a bit of a clean up and make my way home.

Sunday, March 13 2016
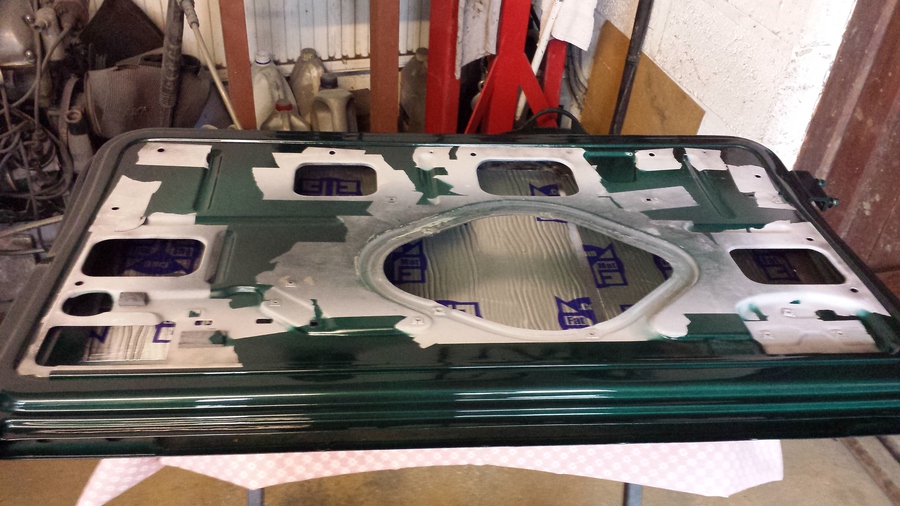
I start off today by getting the Waxoyl ready to spray the inside of the doors and inside the frame of the boot lid, while that is warming up I start to get the door glass ready to refit. I clean the glass then put some masking tape across the glass and mark out where the window channel is currently so I can get the new rubbers and channel in the same place. I then remove the old channels and rubbers, most of them come off very easily and one required a little bit of persuasion with a screwdriver. With them off I clean the glass ready to fit the new ones. I put the rubbers on the glass then spray the rubbers with a bit of soapy water I then hold the channel over the rubber then tap them into place with a hammer, Making sure I get the channels on far enough.
With the channels in place on both windows I grease the channels and cover the entire metal part with grease to try and prevent them from rusting again.
Now the Waxoyl is ready I fill a bucket with boiling water to keep the Waxoyl sprayable and put the Waxoyl put in the boiling water. I spray inside the boot lid frame with the Waxoyl trying to get it everywhere. There are a few runs but I will clean those up later.
Next I spray Waxoyl inside the doors, I spray all round the frames and give them a good coating in the bottom to try and keep rust at bay.
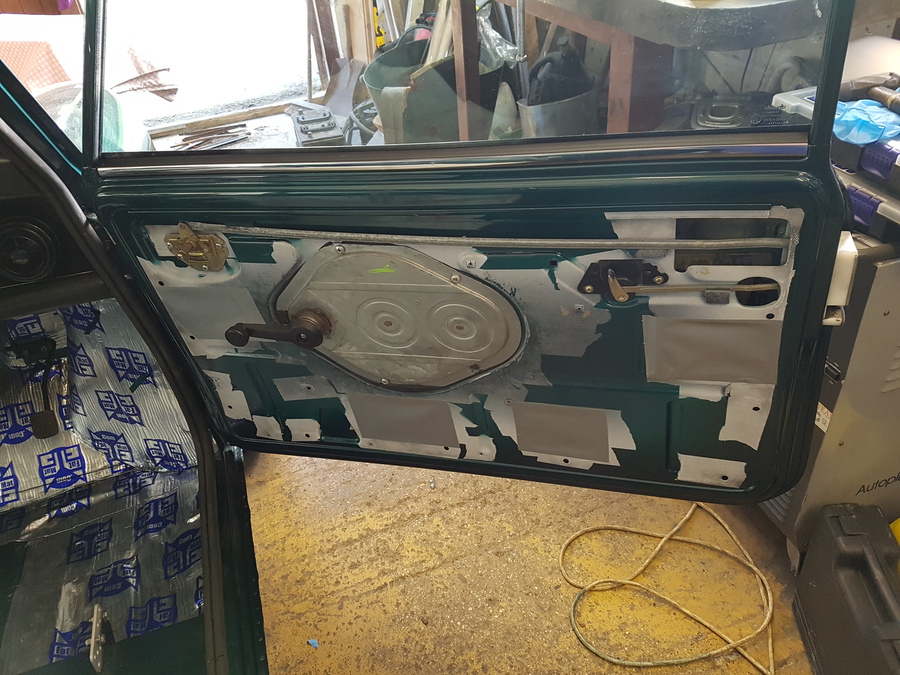
Next job is to refit the windows regulators and glass, I try to do this on my own but I can’t hold the glass and get the regulator arms into the channel and end up dropping the glass into the bottom of the door. I give Frances a call to come over and give me a hand, when she get to the workshop I get her to hold the glass for me so I can get the regulator attached into the channels then fit the regulator into the door. I secure the regulators into place with the four screws then test that the windows go up and down properly.
With the glass in place in both doors Frances makes her escape, next I fit the inner and out strips into the top of the doors. On outer weather strips I fit the clips into the strip then install the strip onto the door. I inner strip I fit the clips onto the door then install the strip onto them.
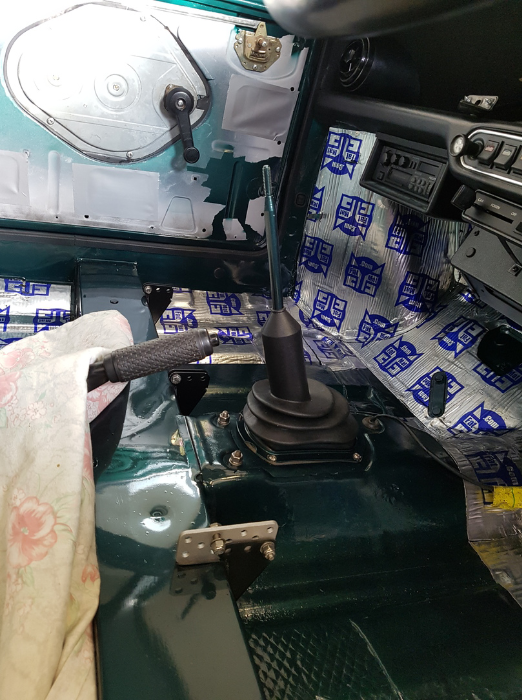
While I waited for Frances to arrive I installed the rubber gaiter onto the gearstick. I fit the metal piece onto the bottom of the gaiter then slide it over the gearstick I them secure it in place with four stainless steel self tapping screws.
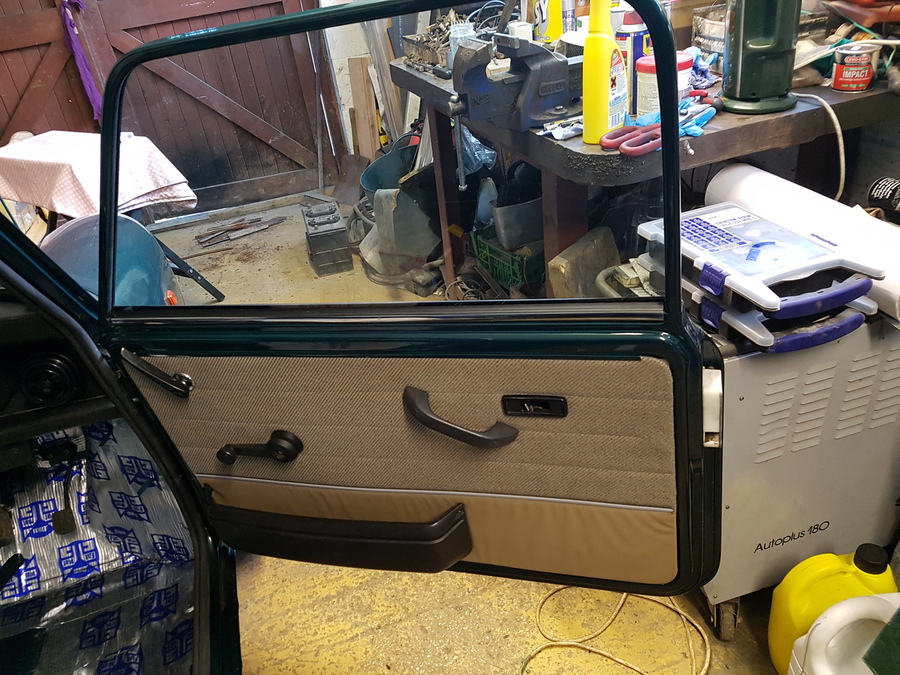
Now the glass is in I install the door cards, windows winder handles, door openers, handles, lock surrounds and door pockets. Apart from the lock surrounds everything just screws into place and the lock surrounds just press into position.
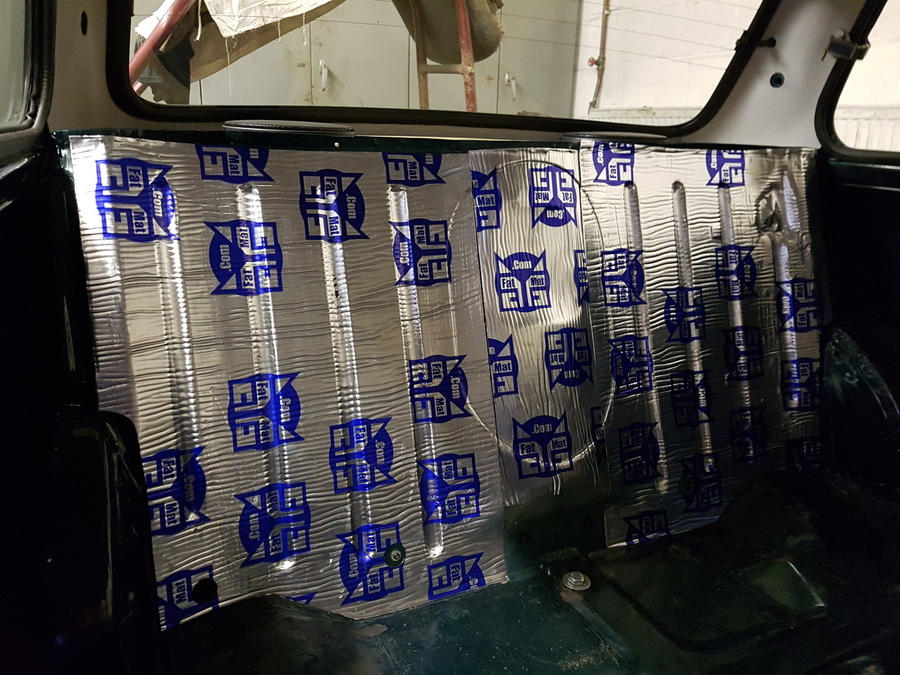
I have decided to install some Fat Mat to the back of the back seat, hopefully this should stop some noise coming through from the boot. I measure the Fat Mat then cut it to length, I then trim the bottom to suit the base of the seat and cut a piece out of the side to let the wheel arch in, I also cut out a circle for the screw that holds the back seat in and where the seatbelts bolt in. I fit that piece of Fat Mat and heat it with the heat gun and using the roller roll it into place. Using the backing that has been peeled off as a template I cut a piece for the other side, then install it the same as the other side. Next I cut a piece for the centre and install it.
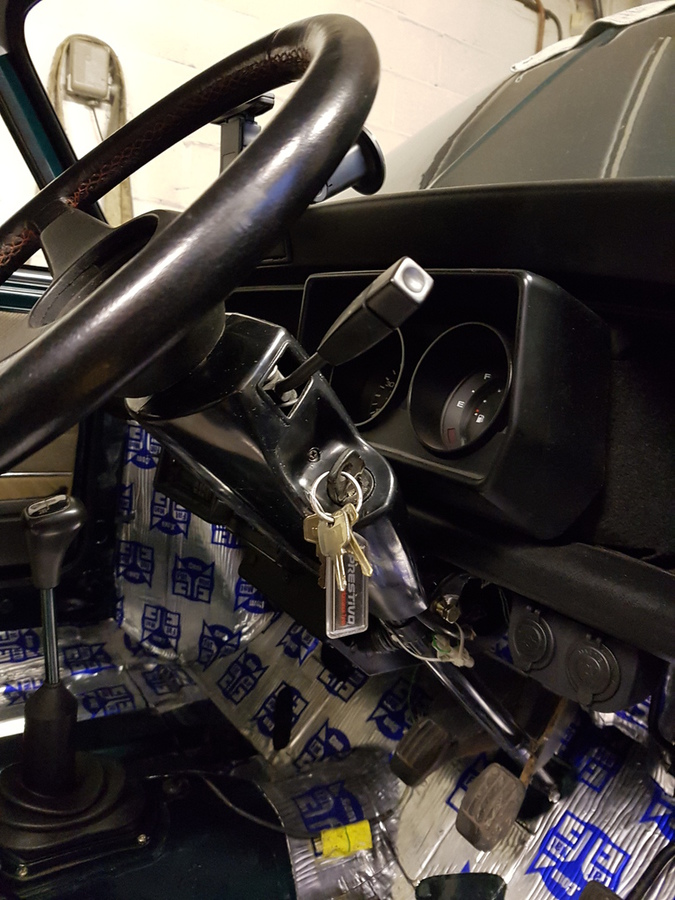
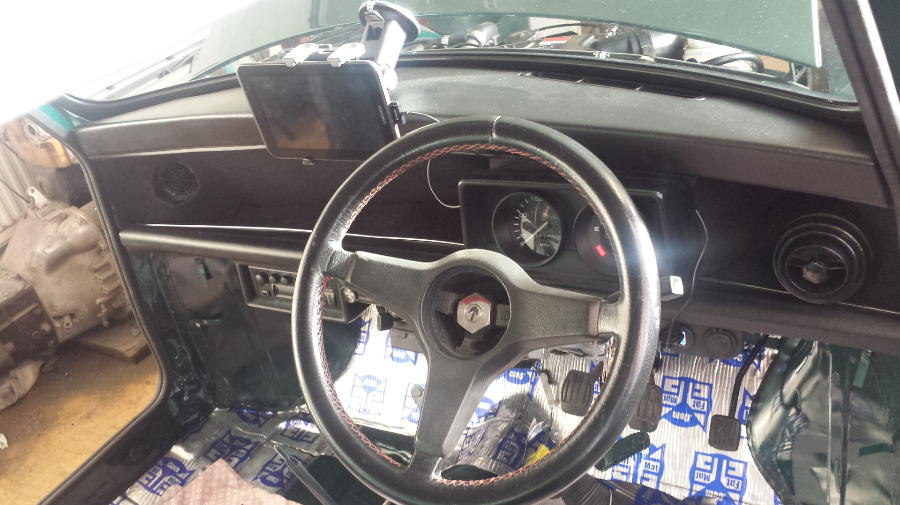
Last job today is to install the surround round the steering column, this is just held into place by three screws.
That’s it for today it’s getting quite late, I put all my tools away, clean up the workshop then make my way home.
Sunday, 20 March 2016
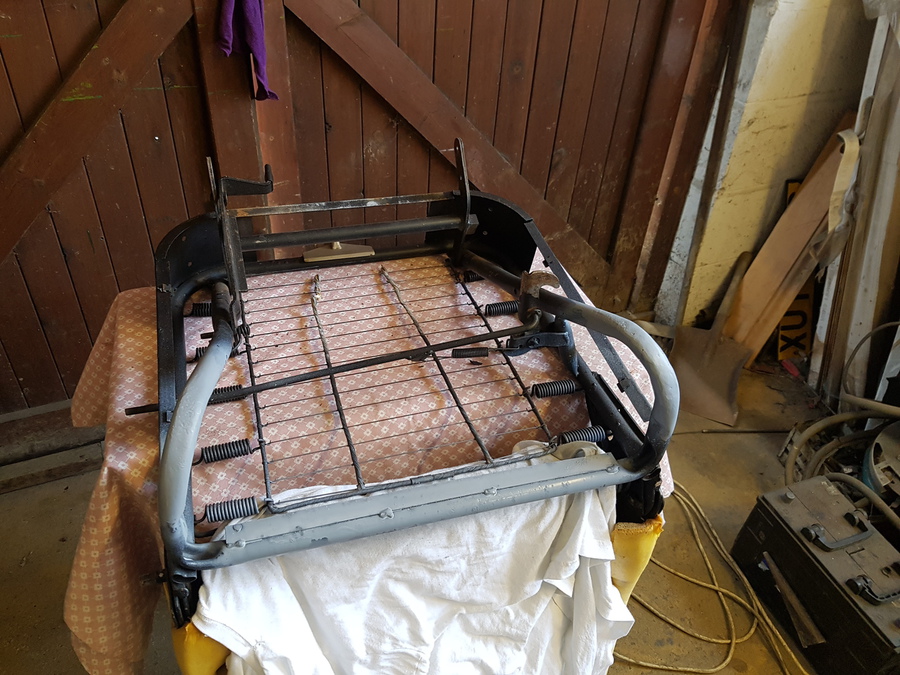
First job today is to repair the frame of the drivers’ seat, the frame is not broken but I need to fix some rust. The left hand rear leg of the seat has rust holes in it, so I clean off all the loose rust with the angle grinder then weld the holes up, I clean up the excess weld and clean up the other rear leg as well. I rub down both rear legs with some wet and dry then clean up with some panel wipe, when the panel wipe is dry I then prepare the bare metal area with some primer.
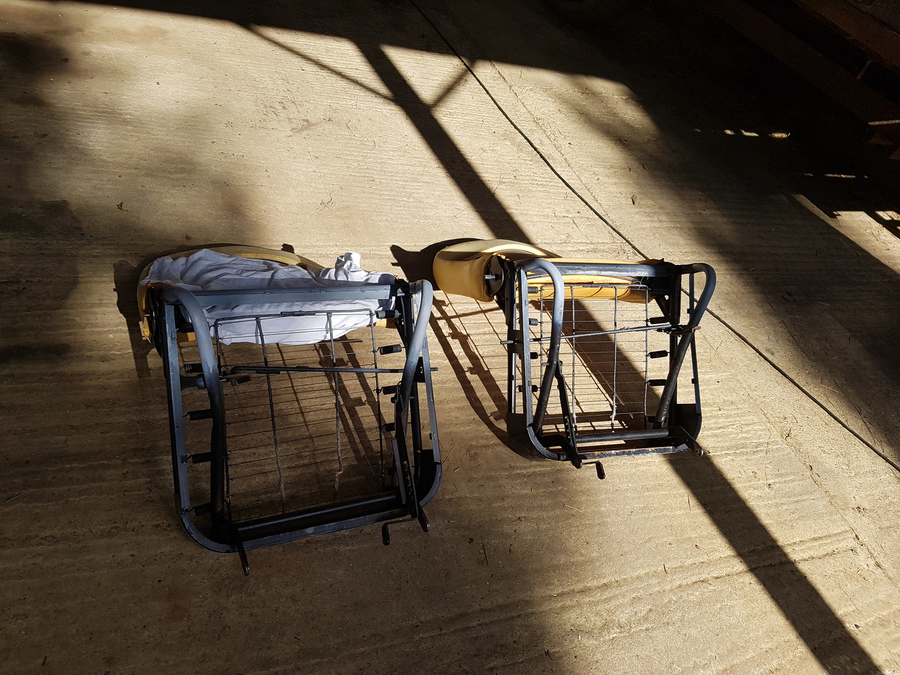
The passenger seat wasn’t as bad so I was able to clean up the rear legs with the grinder and we and dry paper. I clean up the areas with panel wipe then treat them with primer, I put the passenger seat frame outside in the barn to let the paint dry. When the primer is dry I give the primered areas a good coat of satin black.
We are located at:
Market Harborough
Leicestershire
Contact us
If you would like to contact us:
rod@howitt.org.uk
abi@howitt.org.uk
sasha@howitt.org.uk
Or use the contact form.